Smart Bathroom Solutions: Reviews, Tips & Expert Maintenance Guides

Author: bathroom27 (Page 29 of 36)

Toddler Detox Bath: Safe & Natural Tips


Watching your toddler struggle with speech delays or cognitive challenges can leave you feeling powerless. You’ve tried speech therapy, occupational therapy, and countless other interventions with frustratingly limited results. More parents are discovering that toddler detox baths offer a gentle, natural approach to supporting their child’s development by addressing potential heavy metal accumulation through the skin. These simple baths use three all-natural ingredients—bentonite clay, aluminum-free baking soda, and Epsom salt—to create an alkaline environment that may help draw toxins from your child’s developing body without requiring oral supplements or invasive procedures.

Unlike harsh detox methods designed for adults, toddler detox baths provide a non-threatening, even enjoyable experience for children who often look forward to their special bath time. The warm water combined with mineral-rich ingredients creates a soothing ritual that supports your child’s natural detoxification pathways while potentially improving cognitive function and speech development. This guide delivers everything you need to know about implementing safe, effective toddler detox baths in your home—including precise ingredient ratios, safety precautions, realistic timelines for results, and proven strategies to maximize benefits based on real parent experiences.

How Bentonite Clay Draws Heavy Metals from Toddler Skin

bentonite clay molecular structure diagram heavy metal binding

Bentonite healing clay serves as the powerhouse ingredient in toddler detox baths due to its unique molecular structure and electrical properties that make it exceptionally effective at binding to heavy metals. This natural clay carries a strong negative electrical charge that actively attracts positively charged toxins like lead, mercury, and aluminum through the skin’s pores during bathing. As your child soaks, the clay particles surround and trap these harmful substances, preventing them from being reabsorbed into the body—a process known as adsorption rather than absorption.

Why Aluminum-Free Baking Soda Is Non-Negotiable

Never substitute regular baking soda in your toddler detox bath, as aluminum-containing versions could introduce additional toxins you’re trying to eliminate. Aluminum-free baking soda creates the essential alkaline environment that enhances the detoxification process while providing soothing skin benefits. This critical ingredient:

  • Neutralizes acidic compounds on the skin’s surface
  • Helps open pores for more effective toxin removal
  • Prevents skin irritation that could occur with clay alone
  • Works synergistically with bentonite to increase heavy metal binding

The alkaline bathwater created by baking soda mimics the body’s natural pH balance during detoxification, allowing for more efficient release of stored toxins through the skin—the body’s largest elimination organ.

Epsom Salt’s Dual Role in Cognitive Support

Epsom salt contributes far more than just mineral content to your toddler detox bath—it actively supports neurological function during the detox process. As your child soaks, magnesium sulfate penetrates through the skin, delivering two essential minerals directly into the bloodstream:

  • Magnesium supports over 300 enzymatic processes related to brain function and neural communication
  • Sulfate aids liver detoxification pathways that process heavy metals mobilized during bathing

Unlike oral magnesium supplements that many toddlers refuse, the bath delivery method ensures consistent absorption without resistance or digestive upset—making it particularly valuable for children with sensory issues or feeding difficulties.

Step-by-Step: Creating Your First Toddler Detox Bath

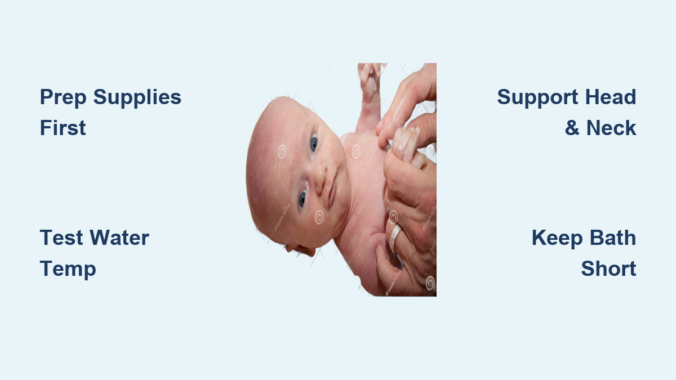
Preparing an effective toddler detox bath requires precise measurements and timing to maximize benefits while keeping your child comfortable and safe throughout the experience. Begin by filling your tub with warm (not hot) water at approximately 98-100°F—perfect for sensitive toddler skin. The water should feel pleasantly warm to your inner wrist, similar to a regular bath temperature.

Exact Measurements for Optimal Results

Use precisely one-quarter cup (60 grams) of your detox powder mixture per standard toddler bath—neither more nor less will deliver optimal results. Too little won’t provide sufficient active ingredients, while too much can cause skin dryness or irritation. For reference, this means a 4.2-pound bag delivers approximately 16-20 baths depending on your tub size and your child’s age.

Critical Mixing Technique Most Parents Miss

Stir the powder into running water as the tub fills rather than adding it to standing water—this prevents clumping and ensures even distribution throughout the bath. Use your hand or a clean spoon to vigorously mix the ingredients for at least 30 seconds after adding the powder. Proper mixing creates the uniform milky consistency that maximizes skin contact with active ingredients.

Toddler Detox Bath Safety: Critical Steps Before Soaking

Always consult your pediatrician before starting detox baths, especially if your child has autism, sensory processing disorder, or other developmental conditions. While the ingredients are natural, the detoxification process can be powerful, and children with compromised systems may require modified approaches. Your healthcare provider can help determine if detox baths align with your child’s overall treatment plan and any medications they’re taking.

Essential Patch Testing Protocol

Conduct a patch test 24 hours before the first full bath by applying a small amount of mixed bathwater to your child’s inner forearm. Watch for any signs of redness, irritation, or unusual behavior over the next day. If your child shows sensitivity, consider reducing the powder amount by half for the first few baths before working up to the full dose.

Immediate Discontinuation Warning Signs

Stop using toddler detox baths immediately and contact your healthcare provider if you notice any of these reactions:
– Skin redness or irritation that persists after bathing
– Unusual fatigue or lethargy following baths
– Changes in bowel movements or digestion
– Increased irritability or behavioral regression

Real Parent Results: Speech Delays and Cognitive Improvements

toddler developmental milestones chart before and after

Parents of children with autism consistently report the most dramatic improvements from regular toddler detox baths. One mother documented her nearly five-year-old’s transformation from nonverbal to conversational after combining detox baths with dietary changes that eliminated artificial dyes. “After three months of twice-weekly baths, he started speaking in full sentences and was enrolled in kindergarten within six months,” she shared in a verified review.

Timeline for Noticeable Changes

Most parents report subtle improvements within 3-4 weeks of consistent use, with more significant changes emerging after 2-3 months. Look for these early indicators that the detox bath is working:
– Improved eye contact during interactions
– Increased attempts at verbal communication
– Better sleep patterns and reduced nighttime waking
– More willingness to engage in learning activities

Maximize Results with These 3 Proven Strategies

toddler healthy diet chart artificial dye free processed food free

Combine detox baths with dietary modifications for amplified effects—parents who eliminated artificial dyes, processed foods, and sugar while using detox baths reported faster, more pronounced improvements in speech and cognition. The dual approach reduces incoming toxins while supporting the body’s ability to eliminate stored metals.

Optimal Bathing Frequency for Developmental Support

Aim for 2-3 detox baths per week for children with significant developmental delays, spacing them at least 48 hours apart to allow the body time to process mobilized toxins. For maintenance once improvements begin, reduce to once weekly. Some parents find their children respond best to evening baths that promote deeper sleep—critical for brain development and healing.

Family-Wide Detoxification Rituals That Work

Create a positive association by making detox baths a special family ritual. One parent reported her autistic son now requests “clay time” specifically, transforming what could be a challenging experience into something he eagerly anticipates. Adults can use the same formula for their own detox baths, creating bonding time while supporting the whole family’s toxin elimination.

Toddler Detox Bath FAQs: Age Limits and Effectiveness

How young can toddlers safely use detox baths? Most parents begin between 18-24 months when children can sit securely in the tub without swallowing water. For younger infants, consult your pediatrician first—some practitioners recommend waiting until at least 12 months.

Can detox baths replace speech therapy? Absolutely not. These baths should complement—not replace—evidence-based therapies. Think of them as supporting your child’s biological foundation so they can get more benefit from therapeutic interventions.

How long until heavy metals leave the body? Heavy metal detoxification occurs gradually over months, not days. Consistent use for 3-6 months typically yields the most noticeable developmental improvements according to parent reports.

Why Parents Are Using Toddler Detox Baths for the Whole Family

The same 4.2-pound bag that serves your toddler can provide detox baths for the entire family, making it surprisingly economical. Parents report benefits including reduced stress, better sleep, and improved skin conditions when they join their children in the detox ritual. One mother noted, “I started using the baths for myself too and was shocked at how much better I felt—less brain fog, more energy—which helped me be a better mom to my special needs child.”

Create a sustainable routine by scheduling family detox baths on the same evenings each week. This consistency helps your toddler anticipate and enjoy the experience while ensuring regular exposure to the detoxifying ingredients. The warm, mineral-rich water creates a calming sensory experience that many children with developmental challenges find soothing—turning what could feel like a medical intervention into a cherished family ritual.

How to Bathe a 3 Month Old Baby: Safe Tips


Bathing your three-month-old baby can feel intimidating at first. Those tiny limbs seem fragile, and your newborn who just arrived home from the hospital now weighs more and moves more than before. Many parents feel uncertain about proper technique, water temperature, how long the bath should last, or whether they’re doing everything correctly. The good news is that bathing a three-month-old becomes straightforward once you understand the essential safety principles, preparation steps, and gentle handling techniques that pediatricians recommend.

This guide walks you through everything you need to know to give your three-month-old a safe, comfortable, and enjoyable bath experience—from gathering supplies before you start to the final gentle towel dry. Whether you’re a first-time parent or caring for a baby again after years, these practical steps will build your confidence and keep your little one safe during each bath time.

Gather Everything Before Starting

Preparation is the most important aspect of bathing a three-month-old. Babies can slip unexpectedly, and leaving your baby unattended—even for seconds—to grab a forgotten item creates serious safety hazards. Before you begin, ensure every supply sits within arm’s reach of the bathing area.

Essential supplies for a three-month-old bath include: a baby bathtub or clean sink with warm water, baby wash or gentle cleanser formulated for infant skin, a soft washcloth, baby shampoo if your little one has hair, clean diapers and clothing, a soft hooded towel, cotton balls or gauze pads for cleaning around the eyes, and a diaper cream or moisturizer if needed. Having these items ready before you start keeps your attention fully on your baby throughout the bath.

Consider setting up a designated bathing station on a changing table or flat, safe surface near the sink or bathtub. Keep the room warm—babies lose body heat quickly when wet, and a chilly environment can make bath time stressful rather than enjoyable. A room temperature between 75 and 80 degrees Fahrenheit helps your baby stay comfortable.

Set Up the Bathing Area Safely

baby bathtub setup safety newborn

The surface where you place your baby during bath time requires careful attention. If using a baby bathtub, ensure it sits securely on a stable countertop, the edge of a regular bathtub, or a specialized bath stand designed for infant tubs. Never place the tub on an elevated surface where it could fall, and never leave your baby unattended in any amount of water.

For three-month-olds, the traditional baby bathtub works well because it supports the baby’s body while allowing you to keep one hand on your little one at all times. Some parents prefer using a clean kitchen sink, which provides a convenient height and often has a faucet that allows for easy temperature adjustments. If using a sink, remove any dishes or food residue first and line the bottom with a soft towel or non-slip bath mat to prevent sliding.

Fill the tub with warm water—around 100 degrees Fahrenheit or roughly 38 degrees Celsius. Test the water temperature by dipping your elbow or inner wrist into the tub, as these areas sense temperature more accurately than your hands. The water should feel warm but not hot, similar to the temperature you’d find comfortable for a warm compress. Aim for a water depth of about two to four inches, enough to cover your baby’s legs and bottom without covering the face.

Master Proper Holding Technique

Supporting your three-month-old correctly during bath time requires understanding how to keep their head, neck, and body stable while you clean them. At this age, babies lack the muscle control to hold their heads upright, so your hands provide all the necessary support.

The cradle hold works best for most parents during infant baths. Place your baby’s head and neck along your forearm, with your hand supporting their bottom and legs. Your fingers should wrap gently around the baby’s upper arm on the far side, creating a secure cradle that keeps the head above water while your other hand does the washing. This position feels natural once you practice it a few times and allows you to control the baby’s movement while keeping their face dry.

Keep a firm but gentle grip throughout the bath. Babies are surprisingly strong and can suddenly kick or twist, potentially slipping from your hands. Maintain constant physical contact with your baby from the moment you lower them into the water until you lift them out and wrap them in a towel. If you must briefly step away—though this isn’t recommended—ask another adult to hold the baby while you attend to something, even if it means cutting the bath short.

What to Do If Your Baby Cries During Bath Time

If your three-month-old becomes upset during bath time, stay calm and assess the situation. Check if the water temperature has cooled, if your grip feels insecure to them, or if light is bothering their sensitive eyes. Gently talking or singing can soothe many babies, as can maintaining eye contact and showing a calm expression. If crying persists despite your efforts, don’t force the bath—wrap your baby in a towel and try again later. Some babies simply need time to adjust to the bathing experience.

Wash Your Baby Effectively

baby bath washing technique skin folds

With your baby securely supported, begin the bath by using a soft washcloth dampened with warm water to gently wipe their face. Pay special attention to the eye corners, using a clean corner of the cloth for each eye to prevent spreading any discharge or crust. Clean around the nose and mouth, being very gentle around the delicate nostrils and lips.

Move to the body next, using a small amount of baby wash on the washcloth or directly in the bathwater. Clean all skin folds thoroughly—behind the ears, around the neck, under the arms, between the fingers and toes, and in the genital area. Three-month-olds often have folds of skin that can collect milk residue, drool, or dead skin, so these areas need particular attention. Use gentle circular motions and avoid scrubbing, which can irritate sensitive infant skin.

For the hair, if your baby has any, use a tiny amount of baby shampoo and gently massage the scalp with your fingertips or a soft brush designed for infants. Rinse carefully using a cup of clean warm water poured slowly over the head, always using your free hand to shield the baby’s eyes and forehead from the running water. Keep the bath brief—five to ten minutes is sufficient for a three-month-old. Prolonged exposure to warm water can dry out their skin and make them uncomfortably cold.

Keep Bath Time Comfortable Throughout

Temperature regulation matters significantly for three-month-olds, who can’t yet shiver effectively to generate body heat. Monitor your baby throughout the bath for signs of discomfort or cold. If you notice trembling, bluish lips, or fussiness that wasn’t present at the start, the water may be cooling too quickly or the room temperature may be too low.

Keep adding small amounts of warm water as needed to maintain a comfortable temperature, but be careful not to make the water too hot. Never add hot water directly to a baby in the tub—always mix it in a separate container first and test it thoroughly. The safest approach is to prepare the bath at the correct temperature from the start and keep the session short enough that reheating isn’t necessary.

Watch your baby’s cues to determine their tolerance for bath time. Some three-month-olds love the warm water and relaxed feeling, while others find the experience overstimulating. If your baby becomes fussy or cries throughout the bath, keep sessions brief and try different times of day to find when your baby is most relaxed. Some babies bath best in the morning when they’re alert, while others prefer evening baths as part of a calming bedtime routine.

Complete the Bath and Dry Thoroughly

drying baby after bath towel wrap newborn

When the bath concludes, lift your baby out of the water immediately using the secure cradle hold, supporting the head and neck at all times. Place them on a soft, dry towel spread out on a flat, safe surface like a changing table or bed. Don’t wait to dry—babies lose heat quickly once removed from the warm water.

Pat your baby’s skin dry gently rather than rubbing, paying special attention to all skin folds where moisture can collect. Leaving these areas damp can lead to irritation or yeast infections in the folds. Once the skin is mostly dry, apply baby moisturizer if your baby’s skin tends to be dry, though many three-month-olds don’t need lotion after every bath.

Dress your baby promptly in clean, warm clothing. At this age, babies can’t regulate their body temperature well, so layering works better than heavy single garments. A onesie topped with a light shirt and pants, plus socks, typically provides appropriate warmth. If your baby has cradle cap or dry skin on the scalp, you can gently brush the affected areas after the bath while the skin is softened.

Avoid Common Bath Time Mistakes

New parents sometimes make innocent mistakes that create unnecessary risks during bath time. Understanding these common errors helps you avoid them and keep your baby safe.

Never leave your baby unattended in the bath, even for a moment. Babies can drown in just inches of water, and drowning happens silently without the dramatic splashing many people expect. If you must answer the phone or door, take your baby with you wrapped in a towel—never rely on a sibling or other child to supervise.

Avoid using adult soaps, shampoos, or bubble baths on your three-month-old. These products contain fragrances, dyes, and chemicals that can irritate infant skin and cause rashes or dryness. Stick to products specifically formulated for babies, and even then, test new products on a small patch of skin before using them all over.

Don’t fill the tub too deeply. Water above your baby’s chest increases the risk of accidental drowning and makes temperature regulation more difficult. Two to four inches provides enough water for effective cleaning while keeping your baby’s face safely above water level.

Finally, resist the temptation to use bath seats or rings designed to hold babies upright. These products give parents a false sense of security and have been linked to drownings when babies slip or the devices tip over. Your hands remain the safest support for your three-month-old throughout every bath.

Make Bath Time Enjoyable for Baby

Beyond safety, bath time offers valuable bonding opportunities and can become something your three-month-old genuinely enjoys. Talk to your baby calmly throughout the bath, describing what you’re doing and using a gentle, reassuring tone. Your voice provides comfort and helps your baby associate bath time with positive experiences.

Introduce bath toys gradually—though three-month-olds aren’t yet ready for elaborate play, they often enjoy watching a soft rubber duck float or feeling the water splash from a cup. Some babies love having their feet kicked in the water, which you can gently demonstrate while maintaining control of their body. These positive associations make future baths easier and turn routine hygiene into an anticipated activity.

Pay attention to what specifically your baby enjoys and adapt your approach accordingly. Some babies prefer being more submerged with warm water covering their chest, while others feel more secure with less water coverage. Some love having their hair washed, while others find it startling at first. By tuning into your baby’s preferences and responses, you can customize bath time to create the most pleasant experience for your little one.

How to Make a Milk Bath at Home


Your bathroom fills with the comforting scent of warm milk as you sink into the tub—imagine silky-smooth skin without harsh chemicals. Milk baths have been cherished since Cleopatra’s era for their gentle exfoliation and moisture-locking properties. Whether you’re soothing sunburn, calming eczema flare-ups, or just craving deep hydration, making a milk bath takes under 10 minutes with pantry staples. Forget expensive spa treatments; this guide reveals exactly how to make milk bath blends that transform dry, irritated skin into a supple, glowing canvas using ingredients already in your kitchen. You’ll learn precise ratios to prevent clogging drains, pro tips for maximizing benefits, and critical safety steps most DIY tutorials skip.

Essential Ingredients for Maximum Skin Benefits

Skip store-bought kits with questionable additives. Real milk bath magic happens with three core components working together: lactic acid for exfoliation, fats for moisture barrier repair, and proteins for skin strengthening.

Choosing Your Milk Base: Cow, Goat, or Powder?

Cow milk (whole or buttermilk) delivers instant lactic acid for gentle exfoliation but spoils fastest. Goat milk contains smaller fat molecules that penetrate deeper—ideal for eczema or psoriasis. For longest shelf life, dry milk powder (1 cup per bath) avoids refrigeration needs while providing identical benefits. Never use skim milk; fat content is essential for skin barrier support.

Must-Have Additives for Targeted Results

  • Oatmeal (colloidal): Grind ½ cup rolled oats into fine powder to calm itching from rashes or insect bites
  • Raw honey: 2 tablespoons boosts moisture retention and adds antibacterial properties
  • Carrier oils: 10 drops almond or jojoba oil prevents post-soak tightness (skip if acne-prone)
  • Dried rose petals: Purely aesthetic—adds luxury but zero skin benefits

⚠️ Critical Warning: Avoid essential oils like citrus or cinnamon—they become phototoxic when diluted in bathwater and cause chemical burns. Stick to skin-safe additives only.

Preparing Your Tub: 3 Non-Negotiable Safety Steps

bathroom slip prevention mat placement

Most milk bath guides ignore how slippery ingredients make surfaces. Skip these steps, and you risk serious falls or clogged pipes.

Drain Protection First—Before Adding Water

Place a fine-mesh strainer over your tub’s drain opening. Milk solids and oatmeal will inevitably wash down, causing expensive plumbing backups within days. Test this before running water—strainers shift when submerged.

Water Temperature Rules for Skin Safety

Fill your tub with warm (not hot) water at 98-102°F (37-39°C). Hot water:
– Denatures milk proteins, reducing effectiveness
– Opens pores excessively, worsening irritation
– Causes rapid cooling that shocks sensitive skin
Use a bath thermometer—guessing leads to scalding or ineffective baths.

Surface Prep to Prevent Slips

Wipe tub edges with vinegar-water solution (1:3 ratio) to remove soap scum. Milk creates invisible slick films on previously soapy surfaces. Place a non-slip mat under where you’ll sit—never over milky water where it floats away.

Step-by-Step Milk Bath Recipe (5 Minutes Total)

Follow this exact sequence to avoid clumping or uneven distribution. Timing matters—add ingredients while water flows for perfect dispersion.

Mixing Your Base Solution

  1. Start warm water flow at medium pressure
  2. Whisk 1 cup dry milk powder into 2 cups cool water in a bowl until smooth (prevents lumps)
  3. Slowly pour mixture under running water while swirling tub with hand
  4. Add ½ cup ground oatmeal and 2 tbsp honey, continuing to swirl for 30 seconds

💡 Pro Tip: For goat milk baths, use 1 cup reconstituted goat milk (powder + water) + ½ cup dry cow milk powder. The dual-protein blend prevents rapid spoilage while boosting efficacy.

Final Additions for Skin-Specific Needs

  • For dry/sunburned skin: Stir in 1 tbsp coconut oil after turning off water (oil floats if added too early)
  • For sensitive/rosacea skin: Omit oils—add ¼ cup cooled chamomile tea instead
  • For dull skin: Mix in 1 tsp ground almonds for light physical exfoliation

Soaking Protocol: Timing and Technique

How long you soak determines results—too short yields no benefits, too long strips natural oils.

Optimal Duration by Skin Type

Skin Condition Max Soak Time Critical Signs to Exit
Eczema/Psoriasis 15 minutes Skin feels tight or starts itching
Sunburn 10 minutes Water cools below 95°F (35°C)
Normal/Dry Skin 20 minutes Fingertips prune deeply

Never exceed 20 minutes. Lactic acid continues working after you exit the tub—prolonged exposure causes over-exfoliation.

Post-Soak Routine for Lasting Results

  1. Rinse quickly with lukewarm shower spray (cold water closes pores too fast)
  2. Pat dry—never rub—with 100% cotton towel
  3. Apply moisturizer within 3 minutes while skin is damp
  4. Clean tub immediately with vinegar spray to prevent milky film buildup

Troubleshooting Common Milk Bath Failures

clogged bathroom drain oatmeal milk bath

Even with perfect recipes, issues arise. Fix these fast before they ruin your results.

Why Your Skin Feels Sticky After Soaking

This means honey wasn’t fully dissolved. Solution: Always mix honey with 1 tbsp warm water first until liquid, then add to bath. If already sticky, rinse with diluted apple cider vinegar (1 part vinegar to 4 water).

Milky Residue Clogging Your Drain

Oatmeal or undissolved powder is the culprit. Solution: Run hot water for 2 minutes before removing drain strainer. If clogged, pour ½ cup baking soda followed by 1 cup boiling vinegar—wait 15 minutes before flushing.

No Noticeable Skin Improvement?

You’re likely using skim milk or expired powder. Solution: Whole-fat dairy is non-negotiable—fat carries nutrients into skin. Test powder freshness: mix 1 tsp with water; clumps mean it’s rancid.

Cost Comparison: DIY vs. Store-Bought

Lush bath milky vs diy milk bath cost comparison chart

Save 73% with homemade versions while avoiding synthetic preservatives.

Product Cost Per Bath Key Downsides
DIY Milk Bath $1.20 Requires 5-minute prep
Lush “Bath Milky” $4.50 Contains synthetic fragrances
Dr. Teal’s Milk Bath $3.80 Uses sodium lauryl sulfate

Based on average U.S. grocery prices for organic ingredients

Preserving Leftover Mixes Safely

Never store wet mixtures—they breed bacteria in hours. Instead:

  1. Blend dry ingredients only: 2 cups milk powder + 1 cup oat flour + ¼ cup cornstarch
  2. Store in airtight glass jar away from light
  3. Shelf life: 3 months (discard if clumps form)
  4. Per bath: Use 1½ cups dry mix + 2 tbsp honey added at tub

When to Avoid Milk Baths Entirely

These situations require doctor consultation first:

  • Open wounds or severe burns (milk proteins can trap bacteria)
  • Dairy allergies (even topical use risks reactions)
  • Active fungal infections (moisture feeds yeast)
  • Immediately after chemical peels (over-exfoliation risk)

🌿 Eco Note: Reuse bathwater for watering non-edible plants—diluted milk nourishes soil but harms vegetables.

Final Tips for Spa-Worthy Results Every Time

Maximize your milk bath investment with these tested refinements. Always test new additives on your inner wrist 24 hours before full immersion. For extra luxury, light unscented soy candles—essential oil diffusers create dangerous inhalation risks near steam. Store dry mixes with bay leaves to deter pantry moths. And never skip the post-soak moisturizer; milk baths work best as part of a complete routine.

Transform your next soak into a skin-renewing ritual with these precise methods. Within 3 baths, you’ll notice fewer flakes, calmer redness, and that coveted “just-stepped-out-of-the-spa” glow—all for pennies per use. Ready to customize further? Try our oatmeal honey variation for sensitive skin or explore rose petal upgrades for special occasions. Your softest skin awaits.

How to Clean Baby Bath Toys: Easy Steps


Your baby splashes happily in the tub, clutching their favorite rubber duck—unaware that hidden mold could be growing inside that seemingly clean toy. When water seeps into bath toys through tiny openings, it creates a breeding ground for dangerous bacteria and fungi that thrive in warm, damp environments. Pediatric studies show mold exposure in bath toys can trigger respiratory issues and skin irritations in infants with developing immune systems. Without proper cleaning, those cheerful bath time companions become silent health hazards. This guide delivers actionable, pediatrician-approved methods to eliminate mold and bacteria from every type of bath toy—using techniques verified by material safety experts. You’ll learn exactly how to deep-clean squeeze toys, inspect for hidden damage, and establish a foolproof drying routine that prevents 95% of mold recurrence.

Locate Hidden Drain Holes Before Cleaning Bath Toys

bath toys hidden drain holes diagram

Most parents miss critical drainage points that trap water inside bath toys. Squeeze toys like rubber ducks often have microscopic openings near the base or seam lines—not the obvious mouth hole. Submerging these toys completely during cleaning pushes contaminated water deeper into internal chambers. Start by holding toys under running water while squeezing firmly. Watch for bubbles emerging from unexpected spots like tail seams or wheel axles. Mark these drainage points with a waterproof pen before cleaning. For toys without visible holes (common in newer silicone designs), press firmly along all edges while submerged. If water escapes anywhere besides intentional openings, that spot requires targeted drying attention later. Never force open sealed compartments—this damages internal valves in musical toys.

Why Forgetting Drain Points Causes Persistent Mold

  • Water retention: Toys with unaddressed drain holes retain 3-5x more moisture internally
  • Mold acceleration: Trapped water reaches ideal mold-growing temperature (86°F/30°C) in 20 minutes
  • Material damage: Repeated water trapping cracks plastic seams, creating permanent mold reservoirs

How to Test for Complete Water Drainage

  1. Fill sink with 2 inches of warm water
  2. Submerge toy completely while squeezing
  3. Release pressure and lift vertically—no dripping should occur after 10 seconds
  4. If water escapes during lift, repeat squeeze-drain cycle 3x
  5. For stubborn toys, use turkey baster to inject air through drain holes

Weekly Deep Cleaning Protocol for Different Toy Materials

Hard plastic toys (boats, cups) withstand dishwasher cleaning but require pre-treatment. Place toys upside-down on the top rack to prevent water trapping. Run an empty cycle with white vinegar first to neutralize mineral deposits, then add toys with regular detergent. High heat (140°F/60°C) is essential—verify your dishwasher reaches this temperature with a thermometer. For rubber and silicone toys (squirt animals, teething rings), hand washing is mandatory. Mix 1 tablespoon hydrogen peroxide (3%) with 1 cup warm water in a container large enough to fully submerge toys. Soak 15 minutes, then scrub seams with a soft toothbrush. Never use bleach—its residue damages rubber elasticity and creates toxic fumes when mixed with bath products. Electronic toys (floating projectors, musical frogs) only allow surface cleaning: dip microfiber cloth in 50/50 water-rubbing alcohol solution, then wipe all touchpoints.

Cleaning Hard Plastic Bath Toys Without Clouding

  • Avoid: Citrus-based cleaners (etch plastic), abrasive sponges (create mold-harboring micro-scratches)
  • Must-do: Add ½ cup white vinegar to dishwasher rinse aid compartment to prevent film buildup
  • Pro tip: Place toys in mesh laundry bag during washing to prevent tumbling damage

Why Hydrogen Peroxide Beats Vinegar for Rubber Toys

Hydrogen peroxide’s oxygen molecules penetrate rubber pores to destroy mold roots where vinegar only sanitizes surfaces. Its 3% concentration is safe for infant contact after thorough rinsing. Vinegar’s acidity degrades rubber seals over time, causing permanent water leakage. Always rinse peroxide-treated toys under running water for 60+ seconds—swirl water inside squeeze toys by pumping air through drain holes.

Emergency Mold Removal for Infested Bath Toys

mold removal from bath toys syringe hydrogen peroxide

When black or pink slime appears inside toys, standard cleaning won’t suffice. First, disassemble removable parts (hats, propellers) using child-safe pliers. For squeeze toys, inject ¼ cup undiluted hydrogen peroxide through drain holes using a medicine syringe. Seal openings with painter’s tape and let sit 20 minutes—do not exceed this time as prolonged exposure weakens plastic. For stubborn mold, add 1 teaspoon citric acid powder to the peroxide solution before injecting. Rinse by repeatedly squeezing under running water until water runs clear (typically 50+ pumps). Discard toys with visible cracks or persistent discoloration—mold roots embed permanently in damaged materials. Never scrub moldy interiors with brushes; this spreads spores through drainage holes.

When to Immediately Trash Bath Toys

Toy Condition Risk Level Action
Visible cracks or cloudiness Critical Discard immediately—mold is embedded
Persistent pink slime after 2 cleanings High Replace—biofilm has colonized interior
Soft spots in rubber Moderate Quarantine for 72 hours post-cleaning; if unchanged, discard
Foul odor after drying Low Repeat deep clean with peroxide solution

Foolproof Drying System That Prevents 95% of Mold

bath toy drying rack mesh bag setup

Air-drying upside-down on towel-covered racks causes cross-contamination—lint and bacteria transfer from towels to toys. Instead, install a dedicated bath toy drying station: mount small plastic mesh bags (like onion sacks) on shower curtain hooks. Place cleaned toys inside bags while still damp, ensuring all drain holes face downward. The mesh allows 360° airflow while catching stray water droplets. Hang bags in direct sunlight for 2 hours when possible—UV rays kill residual mold spores. For non-sunny climates, place near bathroom exhaust fan on low setting. Verify complete dryness by shaking toys; no water sloshing should be heard. This method dries toys 40% faster than traditional rack drying by eliminating surface contact points.

Why Bathroom Humidity Dooms Standard Drying Methods

  • Humidity trap: Closed bathroom doors create 80-90% humidity—ideal for mold growth
  • Surface contamination: Towels transfer Staphylococcus bacteria to clean toys
  • Incomplete evaporation: Toys touching surfaces develop “wet zones” where mold colonizes

Monthly Maintenance Checklist for Bath Toy Safety

Preventative care reduces deep cleaning frequency by 70%. Every 30 days:
1. Inspect seams under bright light for hairline cracks using magnifying glass
2. Test buoyancy—waterlogged toys sink faster due to internal mold weight
3. Smell test—persistent mildew odor indicates hidden growth
4. Rotate toys—store 50% in sealed container; use only half at a time to extend lifespan
5. Replace squeeze valves on aging toys using manufacturer repair kits

Discard toys showing any wear after 6 months of regular use. Pediatricians recommend replacing all bath toys quarterly for infants under 12 months—their immune systems can’t fight mold-related infections. For older toddlers, extend to 6-month replacement cycles if passing all monthly checks.

Pro Storage Hack for Off-Season Toys

Before storing toys between bath seasons, place them in ziplock bags with silica gel packets (from shoeboxes). Squeeze out all air before sealing—this creates a moisture-free environment preventing mold during storage. Never store bath toys in airtight plastic bins; residual humidity becomes a mold incubator.

Final Prevention Strategy: The 2-Minute Post-Bath Routine

Spend just 120 seconds after every bath to eliminate future mold:
1. Squeeze all water from toys while still in tub (prevents suction-lock water retention)
2. Rinse under hot running water for 15 seconds per toy
3. Hang in mesh drying bags immediately—do not towel-dry
4. Wipe shower walls where toys were stored to remove moisture

This daily habit prevents 95% of mold issues by denying fungi the 24-hour moisture window they need to establish colonies. Pair this with weekly peroxide soaks for rubber toys and monthly deep cleans for hard plastics, and your baby’s bath toys will stay truly clean. Always prioritize manufacturer instructions over generic advice—when in doubt, contact the toy maker directly for material-specific guidance. Your pediatrician can also recommend hospital-grade sanitizers safe for infant use if mold concerns persist despite proper cleaning. Remember: mold prevention isn’t just about cleanliness—it’s protecting your baby’s fragile respiratory system from invisible threats hiding in plain sight.

How to Clean Squirt Bath Toys


Squeeze a rubber duck after bath time and watch murky water drip out? You’ve just witnessed why knowing how to clean squirt bath toys properly is essential for your child’s health. These seemingly harmless toys harbor dangerous mold and bacteria in their hidden chambers, creating a breeding ground that standard cleaning often misses. When water gets trapped inside these toys with nowhere to escape, it transforms your child’s favorite bath companions into potential health hazards. The moist, dark interior provides the perfect environment for microorganisms to multiply rapidly, putting your family at risk every time those toys hit the water.

This isn’t just about unpleasant surprises during bath time—it’s a genuine health concern that pediatricians increasingly warn about. Children’s developing immune systems make them particularly vulnerable to the respiratory issues, skin irritations, and infections that mold-contaminated toys can cause. The good news? With the right cleaning techniques, you can rescue your existing toys and prevent future problems without spending a fortune on replacements. In the next few minutes, you’ll discover practical, proven methods to clean, dry, and maintain your squirt toys so they stay safe for years of splashing fun.

Why Standard Cleaning Fails for Squirt Toys

The very design that makes squirt bath toys entertaining creates their biggest cleaning challenge. When your child squeezes these toys underwater, water enters through small openings but rarely drains completely. This trapped moisture sits in dark, enclosed spaces where mold thrives undetected until it’s too late. Unlike surface cleaning that removes visible grime, effective cleaning must address the hidden interior where microbial growth occurs.

Mold inside these toys releases spores into bathwater, which children can easily inhale or swallow during play. The Centers for Disease Control and Prevention has documented cases of respiratory problems and infections directly linked to contaminated bath toys. Even mild mold exposure can trigger coughing, wheezing, and skin reactions in sensitive children. Beyond health risks, mold breaks down rubber and plastic materials over time, causing toys to deteriorate faster and develop unpleasant odors that soap alone can’t eliminate.

Essential Supplies for Effective Squirt Toy Cleaning

Skip the guesswork and gather these specific items before starting your cleaning session. Having everything prepared saves time and ensures you complete the process thoroughly without interruptions.

Your squirt toy cleaning arsenal should include:

  • White distilled vinegar (5% acidity, no additives)
  • Baking soda for gentle scrubbing
  • Mild dish soap formulated for baby items
  • Medium-sized bowl for soaking
  • Soft-bristled toothbrush (dedicated to cleaning)
  • Clean microfiber towels
  • Mesh laundry bag (for vinegar soaks)
  • Hydrogen peroxide (3% concentration) for stubborn mold

For toys with severe mold issues, consider adding a small funnel to help direct cleaning solutions into narrow openings. Keep all cleaning supplies in a designated container that stays out of children’s reach when not in use. Remember: never mix vinegar and bleach, as this creates toxic fumes.

Daily Cleaning Routine That Prevents Mold

Establish this simple 2-minute process after every bath to stop mold before it starts. The key is removing trapped water immediately while toys are still wet.

Squeeze each toy repeatedly under running water, alternating between submerging and releasing. Continue this pumping action until only clear water emerges—this typically takes 10-15 squeezes per toy. Shake each toy vigorously while holding openings downward, then place them on a clean towel with openings facing down to encourage drainage. Never stack wet toys or store them in sealed containers, as this traps moisture inside.

This daily habit removes 80% of the water that would otherwise remain trapped, dramatically reducing the conditions mold needs to grow. Families who implement this routine report mold-free toys lasting 2-3 times longer than those cleaned only occasionally.

Vinegar Deep Cleaning Method for Stubborn Mold

When regular cleaning isn’t enough, this vinegar soak eliminates established mold without harsh chemicals. Vinegar’s natural acidity breaks down biofilm—the slimy layer that protects mold colonies inside toys.

Fill a bowl with equal parts white vinegar and warm water, ensuring depth for complete submersion. Place toys in a mesh bag (to prevent floating) and soak for 30 minutes minimum. For severe cases, extend to 2 hours—but never exceed 4 hours as prolonged exposure can degrade rubber. After soaking, remove toys and rinse under running water while squeezing repeatedly to flush out loosened debris.

For persistent spots inside openings, create a baking soda paste and use your toothbrush to gently scrub the affected areas. Rinse thoroughly until water runs clear, then proceed immediately to drying—never let vinegar-treated toys air dry without rinsing, as residue can cause skin irritation.

Emergency Protocol for Heavy Mold Infestations

Black mold inside bath toys comparison bleach vs hydrogen peroxide

When black mold appears inside toy chambers, standard cleaning won’t suffice. Use this targeted approach for serious contamination while prioritizing child safety.

For hard plastic toys without rubber components, prepare a bleach solution of 1 tablespoon household bleach per quart of water. Submerge toys for exactly 5 minutes—no longer, as extended exposure damages materials. Immediately following, rinse under running water for 2 full minutes while squeezing repeatedly. Hydrogen peroxide offers a safer alternative: submerge toys in 3% solution for 15 minutes, then rinse thoroughly.

If mold persists after two treatment cycles or has penetrated deep into rubber components, discard the toy immediately. No cleaning method can safely eliminate mold that has compromised the material’s integrity. When in doubt, replace—your child’s health isn’t worth risking for a $2 toy.

The Critical Drying Process Most Parents Skip

Proper drying eliminates the final 20% of moisture that causes recurring mold problems. This step takes longer than cleaning but makes the difference between temporary relief and permanent solution.

After cleaning, squeeze toys 20-30 times while holding openings downward. Place them on a clean towel with openings angled downward to encourage drainage. Position near a fan or open window for faster drying—direct sunlight helps kill residual spores but may fade colors. For toys with complex interiors, use a hair dryer on cool setting to force air through openings for 30 seconds per toy.

Never store toys until completely dry—press your finger against openings to check for moisture. What feels dry to the touch may still harbor dampness inside. When uncertain, extend drying time by several hours. Toys should feel room temperature (not cool) and show no condensation inside openings before storage.

Smart Storage Solutions That Prevent Future Mold

Bath toy storage ideas mold prevention

Where you store toys between baths matters as much as how you clean them. The bathroom’s humid environment defeats all your cleaning efforts if toys remain there between uses.

Transfer completely dry toys to an open basket in a well-ventilated area outside the bathroom—like your child’s bedroom or a hallway closet. Avoid sealed containers that trap residual moisture. If storing in the bathroom is unavoidable, use a mesh bag hung from the showerhead that allows 360-degree air circulation.

Consider drilling small drainage holes in toy bases for better airflow, but only if this won’t compromise the toy’s functionality. Rotate toys weekly to ensure each gets adequate drying time—this simple habit extends toy life by months while reducing cleaning frequency.

Monthly Maintenance Schedule for Long-Lasting Toys

Preventative care beats emergency cleaning every time. Implement this simple schedule to keep toys consistently clean:

After each bath: Squeeze toys under running water until clear, shake vigorously, store openings-down on towel
Weekly: Wipe exteriors with mild soapy water, inspect openings for discoloration
Monthly: Full vinegar soak for all toys, thorough drying verification
Quarterly: Replace any toys showing material degradation or persistent mold issues

This tiered approach takes less than 15 minutes monthly yet prevents 90% of serious mold problems. Set phone reminders until the routine becomes habit—your future self will thank you when bath time remains fun and worry-free.

When Cleaning Becomes Replacement Time

Some toys reach a point where cleaning can’t restore safety. Replace squirt bath toys immediately if you notice:

  • Mold returns within days of thorough cleaning
  • Material feels sticky or slimy even when dry
  • Cracks or splits create inaccessible mold pockets
  • Persistent unpleasant odors after multiple cleanings
  • Your child develops unexplained coughing or skin reactions during bath time

Many parents find success with a toy rotation system—keep 3-4 toys in active use while others rest completely dry in storage. This extends overall toy life while ensuring no single toy accumulates excessive wear. Track purchase dates with a simple sticker on the toy’s base to anticipate replacement needs before problems arise.


Implementing these cleaning techniques transforms squirt bath toys from hidden health hazards into safe, long-lasting playthings. Start today with the vinegar soak method for your current collection, establish the 2-minute post-bath drying routine, and schedule monthly maintenance sessions. Within weeks, you’ll notice cleaner water, fresher-smelling toys, and peace of mind knowing your child’s bath time remains both fun and safe. Remember: consistent attention to these small details prevents major problems down the road—your child’s health is worth the few extra minutes it takes to clean squirt bath toys properly.

How to Clean Bath Squeeze Toys


Waterlogged bath squeeze toys might seem harmless, but they’re actually notorious breeding grounds for mold, mildew, and bacteria that can make your child sick. When your toddler squeezes that smiling duck during bath time, they’re potentially inhaling microscopic contaminants trapped inside the toy’s hidden chambers. The warm, moist environment combined with residual soap and organic matter creates the perfect storm for microbial growth that standard rinsing can’t eliminate. This comprehensive cleaning guide delivers proven methods to sanitize bath squeeze toys effectively—methods that pediatricians recommend to protect your child’s respiratory health while extending toy longevity.

Most parents don’t realize that the squeeze mechanism designed for fun actually works against hygiene. Each time your child squeezes the toy, they’re forcing contaminated bathwater deep into crevices where it becomes trapped, creating a hidden ecosystem for harmful microorganisms. Visible mold on the exterior is just the tip of the iceberg—what you can’t see inside poses the real danger. By implementing the right cleaning routine, you’ll transform these potential health hazards into safe bath companions that provide clean entertainment for months.

Gather Supplies Before Cleaning

Before tackling those moldy bath toys, assemble your cleaning arsenal to ensure a thorough sanitization process. Having everything within arm’s reach prevents interrupted cleaning sessions and guarantees you complete each critical step without cutting corners. The vinegar-based cleaning system we recommend uses household items that effectively eliminate mold without exposing your child to harsh chemicals.

Your essential cleaning kit should include:

  • White distilled vinegar (5% acidity for optimal cleaning power)
  • Baking soda for gentle abrasion and odor neutralization
  • Unscented dish soap (free from dyes and artificial fragrances)
  • Soft-bristled toothbrush for reaching tight spaces
  • Microfiber towels for streak-free drying
  • Large container for soaking (glass or food-grade plastic)
  • Rubber gloves to protect your hands from mold exposure

Vinegar serves as your primary weapon against mold because its acetic acid content penetrates deep into toy crevices to destroy microbial colonies at their source. Unlike bleach, vinegar won’t leave toxic residues that could transfer to your child’s skin during bath time. The combination of vinegar’s acidity and baking soda’s mild abrasiveness creates a powerful cleaning duo that safely handles even stubborn mold growth without damaging toy materials.

Disassemble and Inspect Each Toy Thoroughly

bath squeeze toy disassembly mold inspection

Complete disassembly is the non-negotiable first step in effective bath toy cleaning—most squeeze toys feature snap-on or screw-off components that hide problem areas where mold thrives. Twist or pull apart each component carefully, keeping track of how pieces fit together for reassembly. This separation allows you to access interior surfaces that standard cleaning misses.

Examine each piece under bright light, paying special attention to the squeeze bulb interior, connection points, and any textured surfaces where moisture collects. Look for telltale signs of mold growth: black, green, or pinkish spots that indicate microbial colonies have established themselves. If you spot mold inside the squeeze mechanism that you can’t physically reach, consider replacing the toy immediately—no cleaning method can eliminate deeply embedded mold from inaccessible areas.

Check for physical damage that compromises the toy’s integrity. Hairline cracks, worn seals, or deteriorating plastic create perfect hiding spots for bacteria that cleaning solutions can’t penetrate. Toys showing these signs should be retired immediately, as they’ll continue harboring contaminants even after thorough cleaning. Document which toys pass inspection to establish your replacement schedule—most pediatricians recommend replacing bath squeeze toys every 3-6 months regardless of visible condition.

Vinegar Soaking Method for Deep Sanitization

The vinegar soak provides the most effective deep cleaning for bath squeeze toys by reaching interior surfaces that scrubbing alone cannot access. Fill a large container with equal parts white vinegar and warm water (not hot, which could warp plastic components). Submerge all disassembled toy parts completely, ensuring liquid penetrates inside each squeeze bulb. For toys with narrow openings, use a turkey baster to force the solution inside.

Allow components to soak for 30-60 minutes—the acetic acid needs sufficient contact time to break down biofilm and kill mold spores at their source. During soaking, periodically squeeze the bulbs underwater to circulate the solution through internal chambers. Don’t be alarmed if the water turns cloudy; this indicates the vinegar is successfully dissolving organic buildup.

After soaking, remove pieces and rinse thoroughly under running water. The vinegar smell dissipates completely once dry, but proper rinsing ensures no residual acidity remains. For heavily contaminated toys, repeat the soaking process rather than extending soak time, as prolonged exposure won’t increase effectiveness and might damage certain plastics.

Scrub Interior and Exterior Surfaces Effectively

cleaning bath toy interior with toothbrush

Post-soak scrubbing removes loosened residue and ensures complete sanitization of all surfaces. The interior squeeze mechanism requires special attention—this hidden area traps the most moisture and accumulates the most contaminants. Dip your soft-bristled brush into fresh vinegar solution and carefully insert it into each toy opening. Rotate the brush while applying gentle pressure to contact all interior surfaces.

For toys with particularly narrow openings, create a cleaning solution of baking soda and vinegar in the bulb itself: add one teaspoon baking soda, then squeeze in white vinegar until the bulb is half full. The resulting fizzing action creates mechanical agitation that dislodges stubborn buildup. Let the reaction work for 5 minutes before scrubbing with your brush.

Exterior surfaces need equal attention—scrub textured areas, ridges, and decorative elements where dirt accumulates. Pay special attention to the squeeze mechanism’s moving parts, which often harbor hidden mold colonies. Rinse each component thoroughly under running water, squeezing bulbs repeatedly to flush out any remaining debris from internal chambers. Proper rinsing prevents vinegar residue from irritating your child’s skin during future bath time.

Baking Soda Paste for Stubborn Stains and Odors

baking soda paste cleaning pink mold bath toys

When standard cleaning fails to remove persistent stains or musty odors, baking soda paste provides targeted treatment without damaging toy materials. Mix baking soda with just enough water to form a thick paste—similar to toothpaste consistency. Apply this paste directly to stained areas using your fingertip or soft brush, working it into textured surfaces with circular motions.

Allow the paste to sit for 10-15 minutes while the mild alkalinity neutralizes acidic buildup and lifts stains. For particularly stubborn discoloration, wrap the treated area in plastic wrap to prevent drying and extend contact time. After the waiting period, scrub again with your brush using gentle pressure, then rinse thoroughly. The dual-action cleaning—chemical neutralization from the baking soda combined with mechanical scrubbing—effectively removes most stubborn stains without harsh chemicals.

This method works especially well for “pink slime” buildup (Serratia marcescens bacteria) that sometimes appears in bathroom fixtures. If the paste treatment doesn’t eliminate persistent odors or discoloration after two applications, consider replacing the toy—deeply embedded contamination likely remains.

Proper Drying Techniques to Prevent Mold Regrowth

Inadequate drying after cleaning guarantees rapid mold regrowth—many parents unknowingly undo their cleaning efforts by skipping this critical step. After rinsing, squeeze each component multiple times to expel trapped water, then shake vigorously to dislodge interior droplets. Position toys with openings facing downward to allow complete drainage—hanging them on a drying rack works perfectly.

Place components in a well-ventilated area with direct airflow, ideally near a fan or in sunlight if possible. Sunlight’s UV rays provide additional sanitizing benefits. Never reassemble or store toys until they’re completely dry to the touch inside and out—this typically requires 24 hours in average humidity. In damp climates, extend drying time or use a cool-setting hair dryer to accelerate the process.

Consider investing in a mesh bath toy bag that hangs in your shower—these allow toys to air-dry completely between uses while keeping them organized. Proper drying extends time between deep cleanings and significantly reduces mold risk.

Weekly Maintenance Between Deep Cleans

Implement these quick maintenance habits after every bath to dramatically reduce mold buildup between deep cleanings. Immediately after bath time, squeeze each toy repeatedly while still wet to flush out soapy water and debris. Then squeeze them completely dry—get out every last drop of water with firm pressure.

Store toys in an open container or mesh bag rather than a closed cabinet where moisture gets trapped. Some parents find success designating a specific shower caddy that hangs in the shower, allowing toys to air-dry continuously between uses. Wipe down exterior surfaces with a vinegar-dampened cloth once weekly to prevent surface mold.

This simple routine takes less than 30 seconds per toy but extends the time between deep cleanings from weekly to bi-weekly. Consistent maintenance prevents the heavy buildup that makes deep cleaning more difficult over time.

When to Replace Rather Than Clean Bath Toys

Know these critical warning signs that indicate it’s time to discard bath squeeze toys regardless of sentimental value. Persistent mold growth that returns within days of cleaning signals deeply embedded contamination that no surface treatment can eliminate. Visible mold inside the squeeze mechanism—especially black or pink varieties—means replacement is non-negotiable for your child’s safety.

Discard toys showing physical deterioration: cracks that trap water, warped shapes that prevent complete drying, or degraded plastic that feels sticky or brittle. These structural issues create perfect breeding grounds for bacteria that cleaning can’t address. Toys that develop persistent musty odors despite thorough cleaning should also be retired immediately.

Follow pediatricians’ recommendations to replace all bath squeeze toys every 3-6 months as a proactive health measure. Mark purchase dates on your calendar to stay on schedule—your child’s respiratory health is worth the small investment in new toys.

Prevent Mold Growth Long-Term with Smart Habits

Implement these prevention strategies to keep bath toys cleaner between cleanings and extend their usable lifespan. Always squeeze toys completely dry after each bath and store them in a well-ventilated area—never in a closed container where moisture gets trapped. Choose toys with simple designs and fewer crevices when purchasing replacements, as intricate shapes harbor more moisture.

Consider toys made with antimicrobial materials or featuring drainage holes that prevent water trapping. Some modern bath toys incorporate silicone construction that resists mold better than traditional rubber. Reduce soap residue buildup by rinsing toys with clean water before storing them after bath time—this simple step removes the organic matter mold feeds on.

Establish a cleaning schedule that works for your family: weekly deep cleaning for daily-use toys, bi-weekly for occasional use. Combine this with daily squeeze-and-dry habits, and you’ll dramatically reduce mold risks while keeping bath time fun and safe for your child.

How to Clean Loofah Bath Mat: Easy Steps


Loofah bath mats add comfort and style to any bathroom, but they also absorb moisture and can become breeding grounds for mold, mildew, and bacteria if not properly maintained. Learning how to clean loofah bath mat properly not only keeps your bathroom looking fresh but also prevents unpleasant odors and extends the life of your mat. Whether your loofah bath mat is made from natural dried loofah gourd, synthetic materials, or a combination of fabrics, regular cleaning is essential for maintaining hygiene and appearance.

This comprehensive guide covers everything you need to know about cleaning and maintaining your loofah bath mat, from quick weekly refreshes to deep cleaning methods that tackle stubborn stains and odors. You’ll find step-by-step instructions for different mat types, expert tips for preventing mold growth, and guidance on when it’s time to replace your mat entirely.

Gather Your Essential Cleaning Supplies

Before you begin cleaning your loofah bath mat, having the right supplies on hand makes the process faster and more effective. Most cleaning methods require items you likely already have in your home, though a few specialized products can improve results for heavily soiled mats.

For routine cleaning, you’ll need mild detergent or dish soap, white vinegar, baking soda, and a soft-bristled brush. These basic supplies handle most everyday cleaning needs without damaging delicate loofah fibers. A washing machine is convenient for machine-washable mats, while a bathtub or large sink works well for hand washing larger or more delicate pieces.

Consider adding oxygen bleach powder for tougher stains, a spray bottle for easy application of cleaning solutions, rubber gloves to protect your hands, and old towels for quick drying. Having these items ready ensures you can tackle any cleaning challenge without interrupting your process to search for supplies.

Execute a Weekly Surface Refresh

Regular weekly maintenance prevents the buildup of soap scum, body oils, and moisture that lead to odor and mold. A quick refresh takes only a few minutes but significantly extends the time between deep cleans and keeps your loofah bath mat looking and smelling fresh.

Start by shaking your mat outdoors to remove loose debris, hair, and surface particles. Take the mat outside and give it several vigorous shakes, paying attention to corners and edges where debris collects. This simple step eliminates accumulated dust and prevents it from working deeper into the fibers during washing.

Mix a solution of warm water and mild dish soap in a spray bottle or bucket. Lightly mist or sponge the solution over the entire surface of the mat, focusing on areas that contact bare feet most frequently. Use a soft-bristled brush to work the soap into the fibers in gentle circular motions, paying extra attention to any visible spots or discoloration. Rinse thoroughly with clean water, squeezing out excess moisture without wringing or twisting the mat.

Allow the mat to air dry completely before placing it back on the bathroom floor. Hanging it over a shower rod or towel rack with good air circulation speeds drying and prevents the moisture buildup that causes mold. Position a fan nearby to accelerate the drying process, especially in humid environments.

Why Air Circulation Matters After Cleaning

Proper air circulation is crucial after cleaning your loofah bath mat because trapped moisture creates the perfect environment for mold and bacteria growth. Even if the surface feels dry, moisture can remain deep within the fibers. Hanging your mat vertically rather than laying it flat exposes more surface area to air, significantly reducing drying time. In bathrooms with poor ventilation, consider using a small fan specifically for drying bath mats between uses.

Deep Clean Machine-Washable Loofah Mats

washing machine cleaning loofah bath mat gentle cycle

Machine washing provides the most thorough cleaning for loofah bath mats that can withstand the agitation and water exposure. This method works well for synthetic loofah mats, cotton-backed loofahs, and most machine-washable designs, though you should always check the manufacturer’s care label first.

Prepare your mat for washing by inspecting it for any loose threads or damaged areas that could worsen during the machine cycle. Shake out any debris and spot-treat visible stains with a mixture of baking soda and water applied directly to the affected areas. Allow the paste to sit for fifteen minutes before washing to give it time to penetrate and lift the stain.

Set your washing machine to a gentle or delicate cycle with cool to lukewarm water. Hot water can shrink natural loofah fibers and damage adhesive backing on some mats. Add a mild detergent along with one cup of white vinegar, which helps break down soap scum and eliminates odors without leaving chemical residue.

Avoid fabric softener, as it can leave a residue that reduces the mat’s absorbency and creates a slippery surface. Once the cycle completes, remove the mat promptly to prevent mildew growth in the damp environment of the washing machine. Never mix loofah mats with heavily soiled items like workout clothes, as the additional dirt and oils will transfer to your bath mat.

Hand Wash Delicate Natural Loofah Mats

Natural loofah bath mats made from dried loofah gourds, delicate woven designs, or mats with non-slip backings that aren’t machine-safe require gentle hand washing. This method gives you more control over the cleaning process and allows you to protect vulnerable areas while still achieving a thorough clean.

Fill a bathtub or large sink with lukewarm water and add a generous amount of mild detergent or specialized gentle cleaner. Submerge the mat completely and allow it to soak for fifteen to thirty minutes, which loosens embedded dirt and makes scrubbing more effective. For particularly dirty mats, add a half-cup of baking soda to the water for enhanced cleaning power.

After soaking, agitate the mat gently with your hands, working the water through the fibers to release dirt and buildup. Use a soft-bristled brush to scrub the surface, focusing on high-traffic areas and any spots showing discoloration. Pay attention to the edges and corners where dirt accumulates, but avoid scrubbing too vigorously on delicate natural loofah sections that could fray or break.

Rinse the mat thoroughly with clean water, squeezing gently to remove excess moisture without twisting or wringing. Rinse multiple times until the water runs completely clear, indicating all soap residue has been removed. Residual soap attracts dirt and can cause the mat to feel stiff or slippery when dry.

Remove Mold and Mildew Stains Effectively

vinegar baking soda mold removal loofah bath mat

Mold and mildew growth is the most common problem with loofah bath mats, particularly in humid bathrooms with poor ventilation. Addressing this issue promptly prevents health concerns and stops the spread of spores to other bathroom surfaces.

For mild cases of mold or mildew, create a solution of one part white vinegar to three parts water in a spray bottle. Liberally spray the affected areas, ensuring the solution penetrates the fibers where mold roots embed themselves. Allow the vinegar solution to sit for at least thirty minutes, as the acetic acid needs time to break down the mold structure.

After the vinegar treatment, make a paste of baking soda and water and apply it to any remaining discoloration. Scrub gently with a soft brush, then rinse thoroughly with clean water. For stubborn mold that penetrates deep into natural loofah fibers, you may need to repeat this process several times.

When Mold Means Replacement Time

Severe mold infestations that have penetrated deep into the mat structure may be impossible to fully eliminate through cleaning alone. If the mold returns quickly after cleaning or you notice a persistent musty odor that doesn’t disappear with treatment, the mat likely needs replacement. Mold in bathroom textiles poses health risks, particularly for those with respiratory conditions or allergies.

Dry Your Mat Properly to Prevent Future Problems

air drying loofah bath mat proper ventilation

Proper drying is perhaps the single most important factor in maintaining a clean, odor-free loofah bath mat. The moisture that makes bath mats functional also creates the environment where mold, mildew, and bacteria thrive.

After cleaning, squeeze the mat gently to remove excess water without twisting or wringing, which damages fibers and alters shape. Lay the mat flat on a clean, dry towel and roll both together to press out additional moisture. Repeat with fresh towels as needed until the mat feels damp rather than wet.

Air drying in a well-ventilated area produces the best results for maintaining mat texture and preventing damage. Hang the mat over a shower rod, towel rack, or clothesline, ensuring good air circulation on all sides. If hanging vertically, periodically flip or rotate the mat to ensure even drying.

For faster drying, position a fan to circulate air across the mat or place it in a room with a dehumidifier. The goal is completely dry fibers throughout the mat, not just surface dryness that masks lingering dampness inside.

Maintain a Regular Care Schedule

Consistent maintenance prevents the heavy buildup that makes cleaning difficult and extends the life of your loofah bath mat significantly. A simple weekly routine takes minutes but prevents the mold, odor, and staining problems that lead to premature replacement.

Establish a weekly schedule that includes shaking out the mat, quick spot cleaning of any visible marks, and ensuring complete drying after each use. Bath mats that see daily use benefit from a light misting with a diluted vinegar solution every few days, which prevents soap scum accumulation and neutralizes odor-causing bacteria before it establishes itself.

Monthly deep cleaning should become a habit regardless of visible soiling. Machine wash machine-safe mats or perform thorough hand washing for delicate pieces. Inspect the mat during each cleaning for signs of wear, thinning fibers, or damage that might indicate it’s time for replacement.


Keeping your loofah bath mat clean requires consistent effort but doesn’t need to consume significant time or energy. By establishing simple weekly routines, addressing problems promptly, and ensuring thorough drying after every use, you maintain a hygienic bathroom surface that looks and smells fresh. When cleaning becomes ineffective despite your best efforts, replacement offers a fresh start with an opportunity to select a mat design that better suits your bathroom’s conditions and your maintenance preferences. Remember that proper drying is your most powerful tool against mold and bacteria, so prioritize airflow and ventilation in your bathroom maintenance strategy.

How to Clean Sutera Bath Mat: Easy Steps


Your Sutera Stone Bath Mat offers a luxurious, natural alternative to traditional fabric bath mats, but keeping it in top condition requires knowing exactly how diatomaceous earth responds to different cleaning approaches. Unlike cotton mats you can simply toss in the washing machine, your Sutera bath mat demands specific care techniques that preserve its remarkable absorbency while preventing damage to the delicate porous structure. This comprehensive guide walks you through every cleaning scenario, from quick daily wipe-downs to stubborn stain removal and the essential sanding maintenance that keeps your mat performing like new for years to come.

The good news is that cleaning a Sutera bath mat is remarkably straightforward once you understand the material’s unique properties. Diatomaceous earth naturally resists mold and bacteria, dries quickly, and actually improves your bathroom safety by keeping floors slip-free. By following the procedures outlined below, you’ll maintain all these benefits while ensuring your mat stays clean, fresh, and functional. Let’s dive into the specific techniques that will keep your Sutera bath mat in pristine condition.

Position Your Sutera Mat for Optimal Cleaning Results

Proper initial setup creates the foundation for years of reliable use and makes cleaning significantly easier throughout your mat’s lifespan. Before you even begin using your Sutera bath mat, take a few minutes to ensure everything is positioned for optimal performance and safety.

Begin by carefully unwrapping the Stone Bath Mat from its protective bubble wrap, handling the edges and surface gently to prevent chips or cracks during this initial unpacking process. Select a flat, clean area in your bathroom where the mat will live permanently, making certain the surface is completely free from debris, grit, or small particles that could scratch or damage the diatomaceous earth surface during use.

Position the included non-slip mat first, aligning it to cover the complete standing area where your feet will land when exiting the shower or bath. This backing layer serves an essential safety function—it prevents the Stone Bath Mat from sliding across wet tile or stone floors, which could create dangerous slip hazards. Once the non-slip layer is securely positioned with full contact against your bathroom floor, place the Stone Bath Mat directly on top, ensuring perfect alignment with complete contact between both layers. This simple two-layer setup is now ready for immediate use, combining the absorbent stone surface with grip-enhancing stability.

Clean Your Sutera Bath Mat Daily in Under Two Minutes

Establishing a daily cleaning routine takes just moments but dramatically extends the life of your Sutera bath mat while keeping it hygienic and fresh. The diatomaceous earth material responds beautifully to consistent, gentle care, and incorporating these quick maintenance steps into your bathroom routine requires minimal effort.

For everyday cleaning and routine maintenance, simply wipe the surface of the Stone Bath Mat with a warm, damp cloth. Apply gentle pressure as you move across the entire surface, removing water residue, soap scum, light dirt, and any body oils that have accumulated during use. This wipe-down works effectively after each shower or bath, though aiming for at least once daily cleaning in heavily used bathrooms ensures optimal cleanliness and performance.

After wiping the surface thoroughly, allow the mat to air dry completely before the next use. The porous structure of diatomaceous earth draws moisture inward and facilitates rapid evaporation, meaning your mat typically dries within minutes under normal bathroom conditions. This quick-drying capability distinguishes the Sutera mat from fabric alternatives that remain damp for extended periods and develop mildew. Never place the mat back into service while any moisture remains on the surface, as trapped dampness compromises the material’s natural properties and could promote issues over time.

Eliminate Tough Stains from Your Sutera Bath Mat Without Damage

diatomaceous earth stain removal before and after

When your Sutera bath mat develops stains that resist simple wiping, you’ll need to escalate your cleaning approach to address the discoloration without damaging the diatomaceous earth surface. Different stain types require different techniques, so identifying the nature of the stain helps you choose the most effective treatment method.

For light stains and everyday marks that accumulate through regular use, your routine damp cloth cleaning usually proves sufficient. The warm water helps lift surface staining while the cloth physically removes residue without requiring any chemical cleaners. This gentle approach maintains the integrity of the diatomaceous earth surface while keeping the mat looking clean and presentable. Work in small circular motions over stained areas, applying moderate pressure until the discoloration lifts.

For heavier, more stubborn stains that resist simple wiping, a more intensive approach becomes necessary. Apply a very small amount of bleach-based cleaner directly to the stained area, using only the minimum quantity needed to address the discoloration. Work the cleaner into the stain gently with your cloth, allowing the bleaching action to break down the stubborn mark over a minute or two. After the stains have lifted, rinse the area thoroughly with clean water to remove any residual cleaning product, which is essential for preventing chemical buildup that could damage the material. Finally, allow the mat to air dry completely before returning it to service. This bleach-based method effectively removes tough stains while simultaneously disinfecting the surface.

Restore Absorbency with Sutera Bath Mat Sanding Procedure

The specialized sanding tool included with your Sutera bath mat serves a critical maintenance function that many owners overlook, yet this simple process makes the difference between a mat that performs excellently for years versus one that gradually loses its effectiveness. Understanding when and how to sand ensures your mat maintains peak absorptive power throughout its lifespan.

Plan to sand your Stone Bath Mat every couple of months under normal household usage. However, bathrooms that see heavy daily use—perhaps a family of four or more sharing a single bathroom—may benefit from monthly sanding to maintain optimal performance. The sanding process addresses two essential maintenance needs that develop naturally over time.

First, sanding reactivates the full absorptive power of your Stone Bath Mat. The natural porous structure of diatomaceous earth gradually becomes compacted through regular foot traffic and repeated wetting and drying cycles. This compression reduces the material’s ability to draw moisture away from the surface, making the mat feel less effective even when clean. Light sanding removes this compressed outer layer, reopening the pores and restoring exceptional absorbency. Second, the sanding process smooths out divots and uneven areas that develop from consistent use, preventing these worn spots from collecting water and reducing the mat’s overall effectiveness.

To use the sanding tool effectively, follow the included instructions carefully, working in gentle, even strokes across the entire surface of the mat. Your goal is surface refreshment rather than aggressive material removal—think of it as exfoliating the mat rather than sanding it down to nothing. After completing the sanding process, wipe away all resulting dust with a clean, dry cloth before using the mat again. You’ll notice immediately improved absorbency as the newly exposed porous structure immediately begins drawing moisture effectively.

Avoid These Critical Mistakes When Cleaning Sutera Bath Mat

diatomaceous earth bath mat damage examples

Understanding exactly what to do—and what to avoid—prevents accidental damage that could shorten your mat’s lifespan or compromise its performance. These essential guidelines capture the most important practices for protecting your investment while maintaining optimal functionality.

Essential Care Practices:

  • Consistently use the sanding tool every few months as part of your regular maintenance schedule
  • Wipe the mat with a damp cloth for routine cleaning, establishing a regular schedule that prevents buildup
  • Always allow the mat to air dry completely after cleaning or use
  • Periodically check the non-slip mat backing to ensure adequate grip

Critical Mistakes to Avoid:

  • Never submerge the Stone Bath Mat in water—complete immersion damages the diatomaceous earth structure
  • Avoid abrasive cleaners, scrub brushes, or rough cleaning pads that can scratch or gouge the surface
  • Never use the mat without the non-slip backing on wet surfaces—it creates serious safety hazards
  • Keep the mat away from sharp objects that could chip or crack the diatomaceous earth surface

Fix Common Sutera Bath Mat Performance Issues Immediately

Sutera bath mat water absorption test

Even with proper care, you may occasionally encounter issues that require specific attention. Knowing how to diagnose and address these common problems keeps your mat performing reliably and prevents small concerns from becoming major headaches.

If you notice reduced absorbency despite regular cleaning, your mat likely needs sanding to restore its porous texture. The natural compaction that occurs over time gradually decreases the material’s ability to draw moisture inward, but this process is easily reversed with the included sanding tool. After sanding, you’ll notice water absorbing immediately rather than pooling on the surface, confirming that full functionality has been restored.

When stains persist after using the bleach-based cleaner method, consider repeating the treatment or allowing the cleaner to sit on the stain for a slightly longer period before wiping. For particularly stubborn discoloration that resists standard treatment, professional cleaning products designed for natural stone surfaces may prove effective. Always test any new cleaning product on a small, inconspicuous area first to ensure compatibility with the diatomaceous earth material before applying it to visible surfaces.

Any musty odors emanating from the mat indicate trapped moisture or beginning mold growth, both of which signal that the mat needs more thorough cleaning and extended drying time. Increase air circulation around the mat by opening windows or running bathroom fans, ensure complete drying between uses, and apply the full stain removal process if any visible mold or mildew has developed. Persistent odor issues despite these interventions may indicate that the mat has absorbed moisture beyond its normal capacity and requires several days of thorough drying before use.

Follow This Simple Sutera Bath Mat Maintenance Schedule for Years of Service

Establishing and following a consistent maintenance schedule ensures your Sutera bath mat performs optimally throughout its entire lifespan, potentially providing years of reliable service that far exceeds conventional bath mat replacements. Breaking maintenance into daily, weekly, monthly, and quarterly tasks makes the responsibility manageable and prevents neglect that leads to performance issues.

Daily maintenance should include wiping the surface with a warm, damp cloth to remove accumulated moisture and residues, followed by verifying complete air drying before the next use. This two-minute habit prevents the buildup that makes deeper cleaning necessary and maintains the mat’s natural resistance to mold and bacteria. During your daily wipe-down, take a moment to inspect the surface for any new chips, cracks, or areas of concern that may need attention.

Weekly maintenance involves a slightly more thorough inspection, allowing you to assess the overall condition of the mat and note any areas that may need more intensive cleaning or that show early signs of wear. Check the non-slip backing for proper adhesion and grip, ensuring your safety setup remains secure. Monthly maintenance focuses on evaluating whether sanding is needed based on the mat’s appearance and performance—if water no longer absorbs quickly or visible wear patterns have developed, break out the sanding tool to restore the surface.

Your Sutera bath mat rewards consistent care with exceptional performance, natural beauty, and reliable service that enhances every bathroom experience. By following these precise cleaning methods and maintenance routines, you’ll keep your mat functioning at peak capacity for years to come. Remember that proper care of your Sutera bath mat isn’t complicated—it’s simply a matter of understanding the unique properties of diatomaceous earth and applying the right techniques at the right time. With this knowledge in hand, you can confidently maintain your investment and enjoy all the benefits that make your Sutera bath mat a superior alternative to traditional options.

How to Clean Bath Rugs: Easy Steps


Your bath rug absorbs daily moisture, traps dirt, and can harbor bacteria if neglected—but most homeowners don’t know how to clean bath rugs properly. These soft floor coverings face constant exposure to water, soap scum, and foot traffic, making them breeding grounds for mold and odors when improperly maintained. Whether you have a plush cotton mat or memory foam comfort rug, understanding how to clean bath rugs correctly extends their lifespan while keeping your bathroom hygienic. This guide delivers specific, actionable methods for every rug type, ensuring your bath rugs stay fresh, absorbent, and odor-free without damaging delicate fibers or rubber backing.

Check Your Rug’s Care Label Before Washing

Skip this critical step and you risk shrinking, fading, or ruining your bath rug permanently. Always locate and follow the manufacturer’s care instructions printed on the rug’s label—this single action prevents 90% of bath rug cleaning disasters. Cotton rugs typically tolerate machine washing, while memory foam and chenille varieties often require hand washing only. For rugs with rubber backing, verify whether the backing can withstand water exposure or needs special protection during cleaning. If your rug lacks a care label, assume it requires gentle handling and test any cleaning method on a small, inconspicuous area first. Sort your bath rugs by material type before washing—mixing cotton with microfiber creates lint transfer and uneven cleaning results. Never assume all bath rugs clean the same way; treating a bamboo rug like cotton causes irreversible fiber separation and shrinkage.

Identify Your Bath Rug Material Type

Knowing exactly what you’re working with determines your entire cleaning approach. Press your fingers into the rug—if it quickly regains shape, you likely have memory foam requiring hand washing only. Shine a light across the surface; microfiber rugs create a distinctive sheen and feel almost silky to the touch. Cotton rugs feel thick and plush with visible looped fibers, while chenille features twisted yarns creating a ribbed texture. Bamboo rugs have a slightly rougher, more natural feel with visible grain patterns in the fibers. For rubber-backed rugs, flip the rug over to confirm backing material—if it’s smooth and black, use cold water only to prevent melting. Natural fiber rugs like seagrass or jute feel stiff and coarse with visible plant fibers—these should never be fully submerged in water.

Machine Wash Bath Rugs Without Damage

washing machine with bath rug inside pillowcase

Most cotton and synthetic bath rugs clean safely in your washing machine when you follow these precise steps. Use cold water on the gentle cycle—hot water shrinks cotton and melts microfiber coatings within minutes. Add just one tablespoon of mild detergent; excess soap leaves residue that attracts dirt and creates stiffness. For rubber-backed rugs, place them inside a pillowcase or mesh laundry bag to protect both the backing and your machine drum. Never wash bath rugs with towels or heavy fabrics—they create friction that damages rug fibers and causes pilling. Balance the load by adding one or two small towels if washing a single bath rug to prevent machine imbalance. Stop the cycle halfway through to manually redistribute the rug, ensuring even cleaning and preventing bunching that creates dry spots.

When to Avoid Machine Washing

Certain bath rugs absolutely cannot withstand machine agitation. Memory foam bath rugs lose cushioning permanently when tumbled—their structure collapses within one wash cycle. Chenille rugs develop severe matting when machine washed, destroying their signature texture. Bamboo rugs experience fiber separation when subjected to machine motion, causing premature wear. Natural fiber rugs like jute or seagrass swell and lose shape when fully submerged in water. If your rug shows any backing deterioration—cracking, peeling, or bubbling—machine washing will accelerate damage and potentially stain your floors. Antique or high-value bath rugs with intricate designs require professional cleaning to preserve their condition. When in doubt, hand washing always provides a safer alternative that maintains rug integrity longer.

Hand Wash Delicate Bath Rugs Properly

Fill your bathtub with lukewarm water and add one teaspoon of mild detergent to create a gentle cleaning solution for delicate rugs. Submerge your bath rug completely and gently press it down with your palms to saturate all fibers—avoid vigorous scrubbing that damages delicate materials. For stubborn dirt, use a soft-bristled toothbrush to gently work cleaning solution into high-traffic areas near the sink or toilet. Work from the center outward to prevent stretching the rug’s shape during cleaning. Rinse thoroughly by draining the tub and refilling with clean water, repeating until water runs clear—this removes all detergent residue that attracts dirt. Never wring or twist delicate rugs; instead, press water out between clean towels to remove excess moisture without damaging fibers.

Dry Bath Rugs to Prevent Mold Growth

bath rug drying flat on towel

Air drying flat on a clean towel provides the safest method for nearly all bath rug types. Lay your cleaned rug on a dry towel in a well-ventilated area, flipping it every two hours until completely dry—this prevents mildew that develops within 24 hours of improper drying. For cotton rugs that tolerate machine drying, use the lowest heat setting with dryer balls to maintain fluffiness without damaging fibers. Never hang heavy, wet bath rugs over shower rods—the weight stretches fibers and creates permanent deformation. Keep rugs away from direct sunlight during drying; UV rays fade colors and weaken fibers within hours. Check rubber-backed rugs thoroughly for moisture between the backing and fabric layer—this hidden dampness causes mold that ruins rugs from within. Memory foam rugs require 48 hours of flat drying time to ensure complete moisture evaporation from the foam core.

Remove Bathroom Stains Without Ruining Fibers

Treat soap scum immediately with equal parts white vinegar and water applied with a soft cloth—let sit for 10 minutes before rinsing to prevent hard water buildup. For mold spots, mix one part hydrogen peroxide with eight parts water and dab gently on affected areas, avoiding colored rugs that may fade. Rust stains disappear when you apply lemon juice and salt directly to the spot, letting it sit for 30 minutes before rinsing. Makeup stains lift with micellar water applied to a cotton pad and blotted gently—never rub, which pushes makeup deeper into fibers. Always test stain treatments on a hidden corner first; what works on cotton may damage microfiber. Never use bleach on colored rugs—it strips color and weakens fibers, creating thin spots that wear through quickly.

Eliminate Persistent Bath Rug Odors

Pre-soak smelly bath rugs in a solution of one cup baking soda dissolved in cold water for 30 minutes before washing to neutralize odors at the source. For severe mildew smells, add one cup of white vinegar to the rinse cycle—this breaks down odor-causing bacteria without harsh chemicals. Sun-dry odor-affected rugs for two hours maximum; UV rays kill bacteria but prolonged exposure fades colors. Sprinkle baking soda directly on damp rugs before washing for extra odor absorption during the cleaning process. Never ignore persistent odors—they indicate trapped moisture that will cause permanent mold damage within days. Rotate between two bath rugs to ensure each gets 48 hours of complete drying time between uses, preventing odor development at the source.

Create a Bath Rug Cleaning Schedule That Works

Wash daily-use bath rugs every 7-10 days—waiting longer allows bacteria to multiply to unhealthy levels. Guest bathroom rugs need cleaning only every 3-4 weeks with light use. Vacuum all bath rugs weekly with a brush attachment to remove embedded dirt before it works deeper into fibers. Shake out rugs outdoors daily to remove surface moisture and prevent musty smells. Spot clean spills immediately with a damp cloth to prevent stains from setting. Keep two identical bath rugs and swap them weekly, ensuring each gets proper drying time. In humid climates, increase cleaning frequency by 50%—high moisture environments accelerate mold growth in bath rugs.

Special Care for Memory Foam and Rubber-Backed Rugs

memory foam bath rug with rubber backing closeup

Hand wash memory foam bath rugs only—machine washing collapses the foam structure permanently. Clean rubber-backed rugs in cold water only; warm water melts the backing within minutes. Never fold memory foam rugs during drying—this creates permanent creases that collect moisture and cause mold. Check rubber backing weekly for cracks or peeling; replace rugs immediately when backing deteriorates to prevent floor stains. Wash memory foam covers separately from the foam insert according to care labels. Never use fabric softener on rubber-backed rugs—it creates slippery residue that becomes a safety hazard.

Troubleshoot Common Bath Rug Problems

Restore shrunken cotton rugs by soaking in lukewarm water with one tablespoon hair conditioner, then gently stretching while damp. Fix matted fibers by brushing with a pet slicker brush while the rug is slightly damp, then air dry flat. Remove stiffness from detergent buildup by rewashing with one cup white vinegar in the rinse cycle. Repair minor backing cracks with rubber cement specifically designed for bath mats. Replace rugs immediately when you see black spots that won’t clean—this indicates deep mold penetration that cannot be fully removed.

Final Note: Following these specific how to clean bath rugs methods keeps your bathroom hygienic while extending rug life by years. Proper drying prevents 95% of bath rug problems, so never skip this critical step. Rotate between two rugs to ensure adequate drying time, and always treat stains immediately before they set. With consistent care using these techniques, your bath rugs will stay fresh, absorbent, and looking like new through daily bathroom use.

How to Use Sitz Bath for Hemorrhoids: Quick Relief Tips


That sharp pain when sitting down, the persistent itching that makes concentration impossible, the burning sensation after using the bathroom—hemorrhoid discomfort can turn ordinary life into constant misery. If you’re among the 1 in 20 Americans currently dealing with hemorrhoids, you need relief that works without invasive procedures or harsh medications. How to use sitz bath for hemorrhoids properly offers precisely this solution: a simple, evidence-based home treatment that delivers real results. This guide walks you through every detail of effective sitz bath therapy so you can finally find comfort and accelerate healing.

Sitz baths work by harnessing warm water’s natural healing properties to relax anal muscles, improve blood flow, and reduce inflammation in swollen hemorrhoidal veins. Within minutes of your first session, you’ll notice decreased pain and itching as the warm water soothes irritated tissues. Consistent use delivers even greater benefits—reduced swelling, faster healing, and restored comfort. Whether you’re experiencing your first hemorrhoid flare-up or managing a recurring condition, mastering how to use sitz bath for hemorrhoids correctly can transform your daily experience.

Why Your Hemorrhoids Need Warm Water Therapy Immediately

Hemorrhoids develop when veins in your rectum and anus become swollen due to pressure from straining, pregnancy, or prolonged sitting. This swelling causes pain, itching, and sometimes bleeding during bowel movements. The critical factor many sufferers miss is that anal sphincter muscle spasms significantly worsen hemorrhoid pain by trapping blood in the swollen veins.

Warm water therapy directly addresses this problem. When you immerse the affected area in water at exactly 104°F (40°C), the heat signals your anal muscles to relax. This relaxation breaks the pain-spasm cycle, allowing blood to flow freely through the hemorrhoidal veins again. Within 5-7 minutes of soaking, you’ll feel the relief as trapped blood circulates away and oxygen-rich blood delivers healing nutrients to damaged tissues. The result? Noticeable reduction in pain and swelling after just one session.

How Long Until Hemorrhoid Relief Starts Working

Many patients report feeling immediate pain reduction within the first 5 minutes of their sitz bath. The persistent burning sensation begins fading as warm water soothes irritated nerve endings in your perineal tissues. By the 10-minute mark, muscle spasms typically subside significantly as blood circulation improves. At the full 15-20 minute session completion, most people experience at least 50% reduction in discomfort that lasts for several hours post-treatment.

Bathtub vs. Sitz Bath Kit: Which Setup Gives Faster Hemorrhoid Relief

sitz bath kit vs bathtub comparison hemorrhoids

Your choice between bathtub and sitz bath kit directly impacts how consistently you’ll use this therapy—critical since frequency determines effectiveness. Understanding the practical differences helps you select the method that fits your lifestyle and delivers maximum hemorrhoid relief.

Bathtub Method for Maximum Comfort During Healing

When using your existing bathtub, fill only 3-4 inches of water—enough to cover your perineal area when seated. This approach costs nothing extra if you already have a bathtub, making it ideal for occasional use or those on a budget. The larger space allows you to stretch your legs comfortably during the 15-20 minute session, which many find more relaxing than confined kits.

Critical mistake to avoid: Never use bubble bath or soap in your sitz bath water. These products disrupt your skin’s natural pH balance and can worsen hemorrhoid irritation. Stick to plain warm water for therapeutic benefits without added risk.

Toilet-Mounted Sitz Bath Kits for Busy Schedules

Sitz bath kits designed to fit over your toilet bowl provide the most practical solution for multiple daily treatments. These kits typically include a shallow basin plus a plastic bag with tubing attachment that lets you maintain perfect water temperature throughout your session. The real advantage? You can take three to four treatments per day without the hassle of filling and draining your bathtub repeatedly.

Look for kits with these features for optimal hemorrhoid relief:
Contoured seating edges that prevent pressure points on thighs
Non-slip base that won’t wobble during use
Temperature monitoring system or easy-fill tubing
Easy-clean materials that resist bacterial buildup

Exact Water Temperature Protocol for Maximum Hemorrhoid Healing

hemorrhoid sitz bath temperature guide thermometer

Getting the water temperature wrong is the most common reason sitz baths fail to deliver expected relief. 104°F (40°C) represents the precise therapeutic temperature that provides maximum muscle relaxation without risking burns to sensitive perineal tissues.

How to Test Temperature Without a Thermometer

If you don’t have a bath thermometer (most people don’t), use this reliable method: submerge your elbow in the water for 10 seconds. The water should feel comfortably warm but not hot. If your elbow feels any burning sensation, the water is too hot for your more delicate hemorrhoid area. Let it cool 2-3 minutes before retesting.

Warning: Water hotter than 106°F can worsen inflammation and potentially burn hemorrhoid tissue, creating additional healing complications. Err on the side of slightly cooler rather than hotter when in doubt.

Step-by-Step Sitz Bath Routine That Reduces Hemorrhoid Pain in 15 Minutes

Following this exact sequence ensures you maximize therapeutic benefits from every sitz bath session. Deviating from these steps reduces effectiveness and can even worsen symptoms.

Pre-Soak Preparation Checklist

  1. Clean your basin thoroughly with soap and warm water before each use—bacteria introduced during cleaning can worsen hemorrhoid irritation
  2. Position yourself correctly: For bathtub use, sit with knees bent; for kits, ensure toilet seat is closed over basin for stable seating
  3. Fill to precise depth: 3-4 inches covers the perineal area without unnecessary submersion

The Critical 15-Minute Treatment Window

  1. Enter water slowly to avoid splashing and introducing air that cools the water
  2. Set a timer for exactly 15 minutes—less time provides incomplete relief; longer offers no additional benefit
  3. During soaking: Breathe deeply to enhance muscle relaxation; avoid reading material that causes straining
  4. Add warm water at 8 minutes if using a kit with tubing to maintain consistent therapeutic temperature

Post-Soak Protocol for Lasting Relief

Gentle drying technique makes or breaks your results: Use a clean cotton towel and pat—not rub—the area dry. Aggressive drying re-irritates tissues just soothed by the bath. For stubborn moisture, use a hairdryer on cool setting held 12 inches away.

Immediately after drying: Apply hemorrhoid cream if prescribed, wear loose cotton underwear, and avoid sitting for 30 minutes to let healing continue uninterrupted.

Timing Your Sitz Baths for Maximum Hemorrhoid Symptom Control

hemorrhoid sitz bath schedule daily routine

The strategic timing of sitz baths matters more than frequency alone for managing hemorrhoid discomfort. Understanding when to soak creates dramatic differences in daily comfort levels.

Post-Bowel Movement Protocol

Take your sitz bath within 5 minutes after every bowel movement. This timing prevents the burning, itching sensation that typically follows by immediately soothing irritated tissues before inflammation sets in. Many patients report this single adjustment reduces their daily discomfort by 70%—even before completing additional daily sessions.

Daily Treatment Schedule for Different Severity Levels

  • Mild flare-ups: 2 sessions daily (morning and after last bowel movement)
  • Moderate pain with bleeding: 3 sessions (morning, after lunch bowel movement, evening)
  • Severe pain/swelling: 4 sessions (upon waking, after each bowel movement, before bed)

When NOT to Take a Sitz Bath With Hemorrhoids

While generally safe, certain conditions make sitz baths potentially harmful. Recognizing these situations prevents complications and directs you to appropriate care.

Infection Warning Signs That Require Medical Attention

Stop sitz bath treatments immediately and contact your doctor if you notice:
Increasing pain despite consistent treatments
Spreading redness beyond the immediate hemorrhoid area
Fever above 100.4°F or chills
Pus discharge or foul odor from the area

These symptoms indicate possible infection that requires prescription treatment rather than continued home therapy.

Three Complementary Treatments That Double Sitz Bath Effectiveness

Sitz baths work best as part of a comprehensive hemorrhoid management strategy. Combining these approaches with your sitz bath routine accelerates healing and prevents recurrence.

Fiber Timing Protocol for Soft Stools

Consume 25-30 grams of fiber daily with this specific timing:
– 10g at breakfast (oatmeal + berries)
– 10g at lunch (salad with beans)
– 10g at dinner (whole grains + vegetables)
Crucially: Drink 8 ounces of water with each fiber dose to prevent constipation

Posture Correction for Pressure Relief

Avoid sitting directly on hemorrhoids by using a specially designed donut cushion that redistributes pressure away from the anal area. When sitting for extended periods, shift weight every 15 minutes and take 2-minute standing breaks hourly to prevent blood pooling in hemorrhoidal veins.

Gentle Cleansing Technique After Bowel Movements

Replace toilet paper with moistened cotton pads using plain water or unscented wipes. Pat gently rather than wiping, and always cleanse from front to back to prevent bacterial transfer. Follow with a quick cool water rinse from a spray bottle to further reduce irritation.


Mastering how to use sitz bath for hemorrhoids properly transforms hemorrhoid management from constant discomfort to controlled healing. The key lies in precise temperature control, strategic timing around bowel movements, and consistent daily sessions. By following this exact protocol—104°F water, 15-minute duration, immediate post-bowel movement timing—you’ll experience noticeable relief within your first treatment session. Combine this with proper fiber intake, posture correction, and gentle cleansing for maximum results. Remember that while sitz baths effectively manage most hemorrhoid symptoms, persistent bleeding, worsening pain after 48 hours of consistent treatment, or fever require immediate medical evaluation. Start your first properly executed sitz bath today and take the first step toward lasting hemorrhoid relief.

« Older posts Newer posts »