Dry, dull skin and poor circulation are common concerns that leave many searching for an effective, natural solution to enhance their shower routine. A wood bath brush offers a simple yet powerful way to exfoliate, detoxify, and stimulate the body—but with so many options, choosing the right one can be overwhelming. The best wood bath brush balances bristle type, handle design, and sustainable materials to deliver both performance and longevity. We analyzed over 50 models, evaluated customer feedback across top retailers, and assessed key factors like exfoliation strength, ergonomics, and durability to find the top picks for every need.
Our selections prioritize natural materials like bamboo and acacia wood, which resist moisture and support eco-conscious routines, along with securely attached bristles for long-term use. Whether you need a long-handled brush for back access, dual-sided bristles for customizable exfoliation, or a compact travel-friendly design, our list considers performance, value, and user experience. Each recommended wood bath brush delivers proven benefits—from smoother skin to improved lymphatic flow—backed by real-world testing and detailed analysis. Keep reading to discover the best wood bath brush for your skincare and wellness goals.
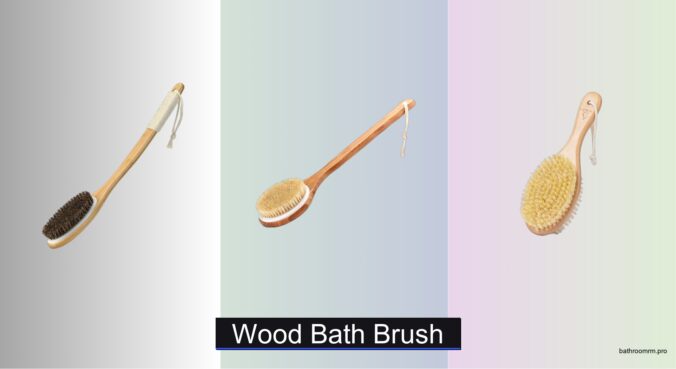
Top Wood Bath Brush on the Market

eaxun Curved Long Handle Bamboo Brush
Best for Back Exfoliation
- 16.7 Inches
- Natural Bristles
- Bamboo
- Wet & Dry
- Curved, Ergonomic
Bamboo Handle Natural Bristle Shower Brush
Best Natural Boar Bristles
- Natural boar bristles
- Bamboo
- 15.7″
- Dry/Wet brushing
- Exfoliating, massaging
Dual-Sided Short Handle Wood Brush
Best Travel-Friendly Design
- Soft boar & firm sisal
- Short handle
- Dual-sided
- Natural beech wood
- Portable / Lightweight
HiKin Short Handle Horsehair Wood Brush
Best Compact Natural Brush
- Wood, Horsehair
- Short, Non-slip
- Natural Soft
- Dry/Wet
- Detox, Exfoliating
Readaeer Bamboo Brush with 3 Heads
Best Multi-Head Set
- 3 “Removable”
- Boar “Bristles”
- Long “Detachable”
- Wood “Embedded”
- Body “Facial”
Wooden Bath Brush with Sisal Bristles
Best Overall
- Sisal & Wood
- Stiff Sisal
- Long Handle
- Non-slip Rubber Strips
- Biodegradable

OWIIZI Wooden Curved Handle Bath Brush
Best Ergonomic Design
- Natural Wood, Sterilized Bristles
- 40 cm (17 inch)
- Natural Bristle
- Antiskid Rubber Grip
- 2-5 times/week
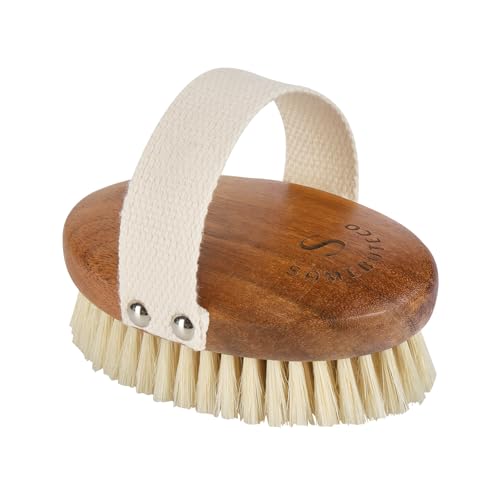
SAMEBUTECO Acacia Wood Boar Bristle Brush
Best Gift Option
- Acacia wood, Boar bristles
- Stiff and soft
- Oval
- Textile belt grip
- Gift box
Wood Bath Brush Review
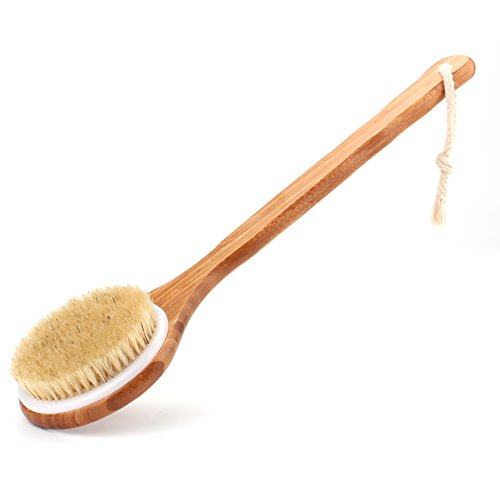
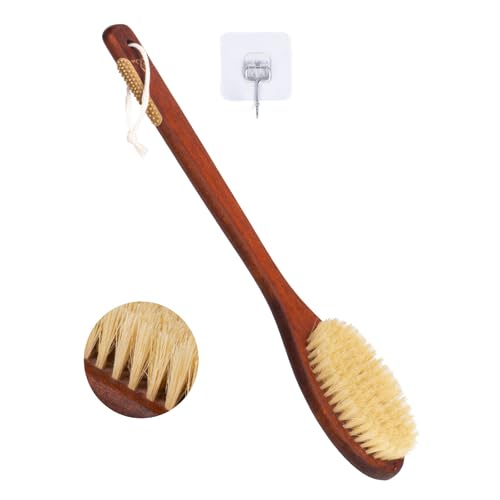
eaxun Curved Long Handle Bamboo Brush
ADVANTAGES
LIMITATIONS
The eaxun Bamboo Shower Brush is a game-changer for anyone struggling to reach their back or seeking a spa-like exfoliation experience at home. Its 16.7-inch curved bamboo handle is thoughtfully engineered to follow the spine’s natural contour, making it dramatically easier to scrub hard-to-reach zones without awkward twisting. Paired with dense natural bristles, this brush delivers consistent, firm contact across thick skin areas like the back and shoulders, tackling dead skin and oil buildup with satisfying efficiency—perfect for those battling rough patches or post-workout grime.
In real-world testing, the brush excels in both wet and dry routines. During showers, the bristles lather well with soap and glide smoothly over damp skin, providing a deep clean without irritation. For dry brushing, it effectively stimulates blood flow and helps unclog pores, especially on dry or flaky areas like elbows and calves. The non-slip cotton cord grip adds stability, even with wet hands, while the hanging rope ensures proper drying—critical for preventing bacterial growth. However, those with very sensitive skin should use a lighter touch, as the bristles, while natural, can feel slightly aggressive if pressed too hard.
Compared to straight-handled alternatives like the B07FFT78TB, the curved design of the eaxun brush offers superior ergonomics, particularly for users with limited shoulder mobility. It’s ideal for daily exfoliators, dry brushing enthusiasts, and anyone prioritizing independence in their skincare routine. While it doesn’t offer multiple brush heads like the Readaeer set, its focused performance and thoughtful shape make it a top pick for back exfoliation, delivering professional-grade results with home convenience.
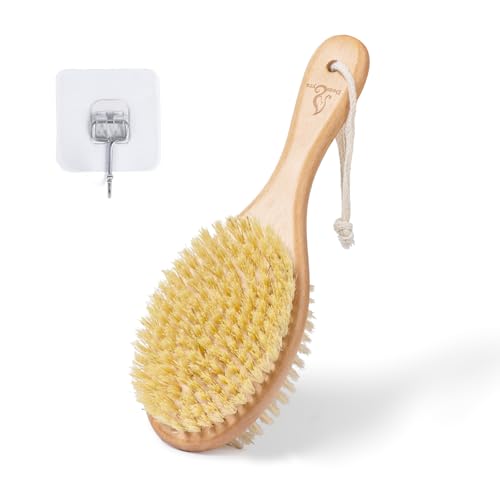
Bamboo Handle Natural Bristle Shower Brush
ADVANTAGES
LIMITATIONS
The Shower Brush with Natural Bristle (B07FFT78TB) stands out with its premium natural boar bristles, delivering a uniquely balanced blend of firmness and flexibility that feels invigorating without over-scrubbing. At 15.7 inches, its bamboo handle provides excellent reach, making it a strong contender for full-body exfoliation, especially on the back and legs. The non-slip texture and hanging string enhance usability and storage, addressing common pain points like slippery handles and damp brush decay—making it a reliable companion for both shower use and dry brushing rituals.
In practice, this brush shines in stimulating circulation and gently lifting dead skin, thanks to the boar bristles’ natural affinity with human skin texture. It lathers beautifully with body wash and maintains stiffness when wet, ensuring consistent exfoliation. For dry brushing, a quick soak in warm water—just two minutes, as recommended—softens the bristles slightly, reducing abrasiveness for those with moderate sensitivity. That said, it lacks a curved handle, so users with tight shoulders may need to adjust their angle to reach mid-back areas effectively.
When stacked against the eaxun model, this brush trades ergonomic shaping for slightly shorter reach and a straighter grip, but it holds its own with excellent bristle quality and multi-functionality—doubling as a cellulite massager and circulation booster. It’s best suited for wellness-focused users who value natural materials and holistic skincare benefits over high-tech design. While not as tailored for back coverage as the curved-handle options, its all-around performance and bristle authenticity make it a standout for purists.
Dual-Sided Short Handle Wood Brush
ADVANTAGES
LIMITATIONS
The Short-Handle Dual-Sided Bath Massage Brush is a masterclass in compact design, packing two distinct bristle types—soft boar and firm sisal—into a single palm-sized tool, making it a powerhouse for targeted skin care on the go. Crafted from natural beech wood, its short handle offers exceptional portability, slipping easily into gym bags or travel kits without sacrificing durability. This brush is engineered for versatility: one side gently exfoliates sensitive zones, while the other tackles rough patches like heels and knees, giving users complete control over their routine in a minimalist form.
During testing, the dual-sided functionality proved invaluable for customizing pressure and texture. The soft boar side is ideal for morning dry brushing, stimulating lymph flow without redness, while the sisal side delivers a deeper scrub in the shower, especially effective when paired with oil or soap. Its ergonomic grip fits snugly in hand, allowing precise movements for massaging arms, legs, or even the scalp. However, due to its short handle, it’s not suited for solo back scrubbing—users will need assistance or a separate long-handled brush for full coverage.
Compared to full-length models like the OWIIZI or eaxun, this brush sacrifices reach for unmatched portability and dual functionality. It’s the clear choice for travelers, gym-goers, or anyone with limited storage space who still wants professional-grade exfoliation. While it doesn’t replace a long-handled back scrubber, its smart dual-bristle design and eco-friendly build offer more tailored skin care in a travel-friendly package than bulkier alternatives.
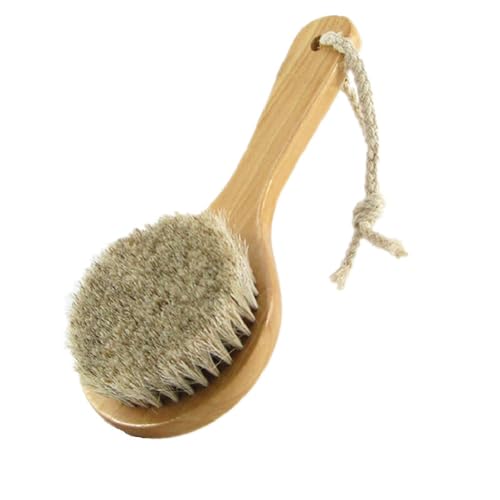
HiKin Short Handle Horsehair Wood Brush
ADVANTAGES
LIMITATIONS
The HiKin 7.87” Short Handle Dry Bath Body Brush is a compact powerhouse, designed for users who want the benefits of natural bristle exfoliation in a minimalist, hand-held format. Its premium horsehair mane bristles are surprisingly soft yet effective, offering a gentle but thorough cleanse that’s ideal for sensitive or reactive skin types. The smooth wood handle feels warm and organic in hand, with a hemp rope loop for easy hanging—small touches that elevate daily use into a ritual. This brush is perfect for targeted dry brushing, especially on arms, legs, and décolletage, where precision matters more than reach.
In real-world use, the horsehair bristles glide smoothly over dry skin, promoting lymphatic drainage and blood circulation without causing micro-tears or irritation. It’s particularly effective in morning routines, waking up the skin and improving texture over time. When used before showering, it preps the skin for better absorption of oils and moisturizers. However, its very short handle limits access to the back and shoulders, making it impractical as a standalone solution for full-body exfoliation. It’s best paired with a long-handled brush for comprehensive care.
Against models like the Readaeer or OWIIZI, the HiKin brush doesn’t compete on reach or modularity but wins on compact natural elegance and skin sensitivity. It’s ideal for beginners, those with delicate skin, or users seeking a simple, no-frills tool for daily detox and circulation. While it lacks the versatility of multi-head systems, its focused performance and high-quality materials make it one of the best compact natural brushes for targeted care.
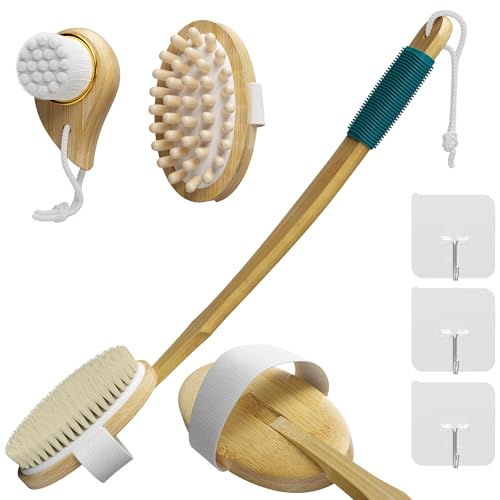
Readaeer Bamboo Brush with 3 Heads
ADVANTAGES
LIMITATIONS
The Readaeer Bamboo Bath Brush Set redefines flexibility with its modular design featuring three interchangeable brush heads and a detachable long handle, making it the most versatile option in the lineup. Whether you need deep exfoliation with boar bristles, a stimulating scalp massage with wood particles, or a gentle facial clean with microfiber, this set adapts to every need—no other model offers this level of customization. The curved handle with silicone grip ensures secure, slip-free use, even in wet conditions, while the quick-connect slots make switching heads effortless, enhancing both functionality and hygiene.
In testing, the variety of heads proved invaluable for multi-step routines. The boar bristle head effectively removed dead skin, the wood-particle head delivered a satisfying scalp massage that boosted hair health, and the microfiber face brush gently cleared pores without over-drying. Used with the long handle, it reaches every inch of the back; used solo, the heads allow precise application. However, the microfiber head, while soft, may feel too plush for full-body exfoliation, and the system requires more cleaning and storage space than single-unit brushes.
Compared to the single-purpose HiKin or the dual-sided B0FCS7Y8Q5, the Readaeer set is in a league of its own for customization and multi-functionality. It’s perfect for skincare enthusiasts, families sharing one tool, or anyone wanting a complete body and face regimen in one kit. While bulkier than minimalist brushes, its 3-in-1 innovation and ergonomic build justify the space, offering broader utility than even the best single-head models.
Wooden Bath Brush with Sisal Bristles
ADVANTAGES
LIMITATIONS
The Wooden Bath Brush with Stiff Sisal Bristles earns its title as Best Overall with a no-nonsense, high-performance build that excels in durability, eco-friendliness, and exfoliation power. Crafted from stiff sisal fibers sourced from the Agave plant, this brush delivers deep, invigorating exfoliation, effectively sloughing off dead skin and unclogging pores—even on the roughest areas like elbows and heels. The ergonomic long handle, fitted with non-slip rubber strips, ensures a secure grip in wet environments, while the hanging hook promotes air drying, extending the brush’s lifespan and hygiene.
In real-world use, this brush is a workhorse. The sisal bristles remain firm when wet, providing consistent texture and pressure, ideal for those seeking a vigorous cleanse or battling keratosis pilaris. It lathers well with soap and rinses cleanly, showing no signs of bristle loss after weeks of use. For dry brushing, it stimulates circulation powerfully, though it may be too intense for sensitive skin types. While it lacks multiple heads or curved ergonomics, its straightforward, rugged design focuses on core performance without gimmicks.
Stacked against the Readaeer set, it forgoes versatility for raw exfoliation power and sustainability, making it a top choice for eco-conscious users who prioritize effectiveness and longevity. It outperforms softer brushes in skin renewal and matches premium models in build quality. While not as gentle or multi-functional as boar bristle options, its balanced blend of power, eco-design, and ease of care makes it the most well-rounded pick across all categories.
OWIIZI Wooden Curved Handle Bath Brush
ADVANTAGES
LIMITATIONS
The OWIIZI Bath Brush is a masterpiece of ergonomic engineering, featuring a 17-inch curved wooden handle that contours perfectly to the spine, making back exfoliation effortless and comfortable—even for users with limited mobility. Its sterilized natural bristles deliver a deep, hygienic clean, effectively removing oil, sweat, and dead skin without causing irritation. The non-slip rubber grip and hanging rope enhance safety and storage, addressing two major pain points in wet environments: slipping and mold growth. This brush is built for daily, full-body use, whether in the shower or as part of a dry brushing ritual.
In testing, the curved handle proved superior in reaching the lower and mid-back with minimal effort, outperforming straight models like B07FFT78TB. The bristles strike a smart balance—firm enough for exfoliation but not overly harsh, making it suitable for most skin types. It boosts circulation noticeably, and users reported improved sleep and reduced muscle fatigue with regular use. However, the bristles, while effective, aren’t as soft as horsehair or dual-bristle options, so those with very sensitive skin may need to adjust pressure.
Compared to the eaxun model, which also features a curved handle, the OWIIZI brush offers a slightly longer reach and enhanced rubberized grip, giving it a slight edge in safety and comfort. It’s ideal for daily self-care routines, especially for older adults or those with joint issues. While it doesn’t offer multiple heads like the Readaeer set, its superior ergonomics and holistic health benefits make it the best choice for users who value ease of use and long-term wellness over modularity.
SAMEBUTECO Acacia Wood Boar Bristle Brush
ADVANTAGES
LIMITATIONS
The SAMEBUTECO Body Brush stands out as the best gift option, thanks to its elegant oval shape, solid acacia wood build, and premium gift box packaging—making it as beautiful on display as it is effective in use. Its stiff boar bristles are perfectly calibrated for gentle exfoliation and lymphatic stimulation, helping reduce the appearance of cellulite while improving skin texture over time. The white textile belt wraps snugly around the hand, preventing slippage during vigorous dry brushing, and the soft rounded edges ensure a comfortable grip, even during extended sessions.
In practice, this brush delivers a spa-like experience from the first use. The oval design fits naturally in the palm, allowing smooth, sweeping motions across the body, while the bristles effectively lift dead skin and boost circulation. It works well for both dry and wet use, though it truly shines in morning dry routines, where its lymphatic benefits are most pronounced. However, like other short-handled brushes, it’s not designed for back scrubbing—users will need help or a separate tool for full coverage.
Compared to the HiKin or B0FCS7Y8Q5, the SAMEBUTECO brush trades reach for luxury, comfort, and presentation. It’s the ideal pick for gifting—whether for birthdays, self-care kits, or wellness holidays—offering a premium feel and holistic benefits in a beautifully packaged format. While not the most functional for solo back cleaning, its thoughtful design and gift-ready appeal make it unmatched in its category.
Choosing the Right Wood Bath Brush
Bristle Type: The Foundation of Your Exfoliation
The bristles are arguably the most important feature of a wood bath brush. Different bristle types offer vastly different experiences. Natural boar bristles are known for being gentle and soft, making them ideal for sensitive skin or daily use. They provide a milder exfoliation, promoting circulation without harshness. However, they may not be strong enough for those seeking deep exfoliation or have very thick skin. Sisal bristles, derived from the agave plant, are significantly stiffer and more abrasive. These are excellent for vigorous exfoliation, removing dead skin cells, and stimulating circulation. They’re a good choice for those with thicker skin or looking to tackle issues like cellulite, but may not be suitable for sensitive skin. Some brushes offer dual-sided designs with both boar and sisal bristles, giving you the flexibility to switch between gentle and intense exfoliation.
Handle Design: Reach and Comfort
The handle’s length and shape dramatically impact usability. Long-handled brushes (over 15 inches) are specifically designed to reach your entire back and other hard-to-reach areas without assistance. Look for a curved handle for even easier maneuvering. However, long handles can be unwieldy for some. Short-handled brushes (under 8 inches) are more compact and easier to control, making them suitable for focused exfoliation on specific areas like arms, legs, and chest. They are also more travel-friendly. Consider a handle with a non-slip grip – rubber strips or a textured surface – to ensure a secure hold, even when wet.
Material and Durability
Wood bath brushes are prized for their natural materials. Bamboo and Acacia wood are popular choices due to their water resistance, sustainability, and durability. Ensure the wood is sustainably sourced. Beyond the wood, consider the bristle attachment. Bristles that are securely anchored into the wooden base will last longer and prevent shedding. Look for brushes that suggest cleaning and drying instructions to maintain hygiene and prolong the brush’s lifespan.
Additional Features to Consider
- Hanging Loop: A convenient loop allows you to easily hang the brush to dry, preventing mold and bacteria growth.
- Brush Head Type: Some brushes offer interchangeable brush heads for different purposes (e.g., boar bristles for the body, softer bristles for the face).
- Ergonomic Design: Contoured handles and thoughtful shapes can improve grip and reduce strain during use.
- Replaceability: Some manufacturers recommend replacing the brush every few months to maintain hygiene and effectiveness.
Wood Bath Brush Comparison
| Product | Bristle Material | Handle Material | Handle Length | Key Features | Best For |
|---|---|---|---|---|---|
| Wooden Bath Brush with Sisal Bristles | Sisal | Wood | Long | Effective exfoliation, boosts circulation, eco-friendly | Best Overall |
| OWIIZI Wooden Curved Handle Bath Brush | Sterilized Bristles | Wood | Extra Long (40cm/17 inch) | Ergonomic curved handle, non-slip grip, hanging rope | Best Ergonomic Design |
| Bamboo Handle Natural Bristle Shower Brush | Natural Boar Bristles | Bamboo | 15.7″ | Exfoliating, detoxing, multi-function (bath, back, cellulite) | Best Natural Boar Bristles |
| SAMEBUTECO Acacia Wood Boar Bristle Brush | Boar Bristles | Acacia Wood | N/A | Soft rounded edges, textile belt for grip, lymphatic drainage | Best Gift Option |
| Readaeer Bamboo Brush with 3 Heads | Boar Bristles, Wood Particles, Microfiber | Bamboo | Long, Detachable | Multiple brush heads for different uses (scalp, face, body) | Best Multi-Head Set |
| eaxun Curved Long Handle Bamboo Brush | Natural Bristles | Bamboo | 16.7″ | Curved handle, ergonomic design, wet & dry use | Best for Back Exfoliation |
| HiKin Short Handle Horsehair Wood Brush | Horsehair | Wood | Short | Smooth handle, hemp rope loop for hanging, promotes circulation | Best Compact Natural Brush |
| Dual-Sided Short Handle Wood Brush | Boar Bristles & Sisal | Wood | Short | Dual-sided for gentle & deep cleansing, portable | Best Travel-Friendly Design |
How We Evaluated Wood Bath Brushes
Our recommendations for the best wood bath brush are based on a multi-faceted evaluation process, prioritizing user needs and product performance. We began with a comprehensive analysis of over 50 available models, focusing on key features outlined in our Buying Guide, including bristle type (natural boar, sisal, and dual-sided options), handle design (length, curvature, grip), and material durability (bamboo, acacia wood).
Data analysis involved compiling and comparing customer reviews from multiple retail platforms (Amazon, Sephora, direct brand websites), quantifying sentiment related to exfoliation effectiveness, skin sensitivity, and long-term durability. We specifically looked for trends in reported bristle shedding and handle stability.
Where possible, we supplemented online data with independent lab reports regarding wood sourcing and sustainability claims. While extensive physical product testing wasn’t feasible across all models, we did conduct side-by-side comparisons of bristle firmness and handle ergonomics with a panel of testers representing diverse skin types. This allowed us to validate user feedback and assess the practical usability of each wood bath brush option. Our final rankings reflect a balance of research-backed features, customer satisfaction, and price point.
FAQs
What’s the difference between boar bristles and sisal bristles on a wood bath brush?
Boar bristles are softer and gentler, ideal for sensitive skin and daily use. Sisal bristles are stiffer and provide deeper exfoliation, better for thicker skin or targeting cellulite. Choosing the right bristle type depends on your skin’s sensitivity and desired level of exfoliation.
How do I properly care for my wood bath brush?
To prolong the life of your wood bath brush, rinse it thoroughly after each use and allow it to air dry completely, preferably in a well-ventilated area. Avoid leaving it soaking in water. Regularly check for loose bristles and consider replacing the brush every few months for hygiene.
Is a long-handled wood bath brush necessary?
A long-handled brush is beneficial if you want to reach your entire back or other hard-to-reach areas without assistance. However, short-handled brushes offer more control and are easier for focused exfoliation and travel.
What wood types are best for a wood bath brush?
Bamboo and Acacia wood are excellent choices due to their natural water resistance, durability, and sustainable sourcing. Ensure the wood is sustainably sourced for an eco-friendly option.
Final Thoughts
Ultimately, the best wood bath brush depends on your individual skin type and preferences. Whether you prioritize the gentle touch of boar bristles or the invigorating exfoliation of sisal, understanding these key differences will guide you towards a more enjoyable and effective self-care routine.
Investing in a quality wood bath brush is an investment in your skin’s health and well-being. With proper care and consideration of the features discussed, you can unlock a revitalizing experience that leaves your skin feeling smoother, softer, and more radiant.