Professional Bathroom Product Reviews

Smart Bathroom Solutions: Reviews, Tips & Expert Maintenance Guides

Page 23 of 25

How to Use Milk Bath: Simple Soaking Guide


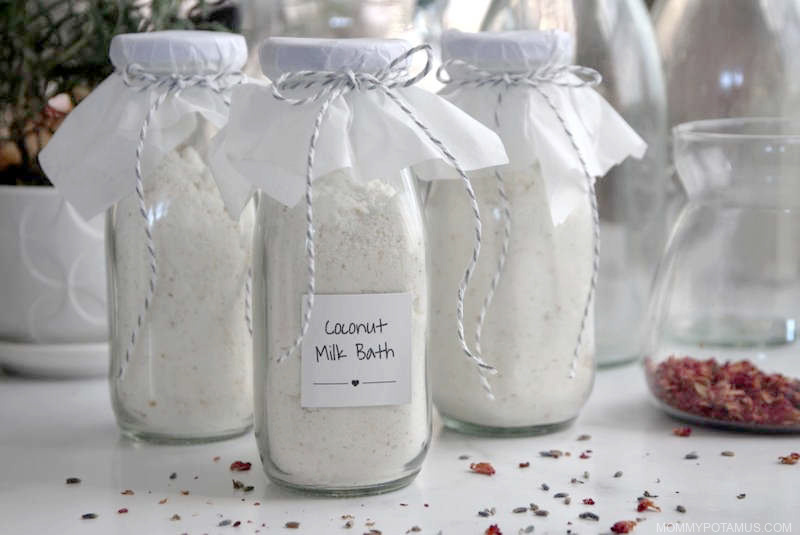
The soothing ritual of soaking in a milk bath has transformed skincare routines for centuries, with historical records showing Cleopatra’s legendary use of donkey milk baths to maintain her famous complexion. Today, this simple yet effective treatment remains one of the most accessible spa-like experiences you can create in your own bathroom, delivering immediate hydration while gently exfoliating dead skin cells to reveal a luminous glow. When you learn how to use milk bath properly, you’ll discover it’s not just about relaxation—it’s a scientifically supported method to improve skin texture, reduce inflammation, and create a protective moisture barrier that lasts for days. For anyone struggling with dry patches, irritated skin, or simply craving a luxurious self-care moment without expensive salon visits, mastering this straightforward technique delivers visible results with minimal effort and common household ingredients.

Unlike chemical-laden skincare products that can strip your skin’s natural oils, a milk bath works with your body’s biology rather than against it. The lactic acid naturally present in milk gently dissolves the “glue” that holds dead skin cells together, promoting cellular turnover without harsh scrubbing, while the fats and proteins penetrate deeply to nourish from within. What makes this treatment truly special is how the warm water opens your pores, allowing these beneficial components to absorb more effectively than topical creams alone. Within just fifteen minutes of soaking, you’ll notice your skin feeling distinctly softer and smoother, with many users reporting reduced redness and irritation from conditions like eczema or psoriasis. Whether you’re recovering from a sunburn, dealing with rough elbows and knees, or simply want to maintain that post-spa glow, understanding exactly how to use milk bath correctly ensures you maximize every therapeutic benefit without common mistakes that diminish results.

Prepare Your Bath Space for Maximum Benefits

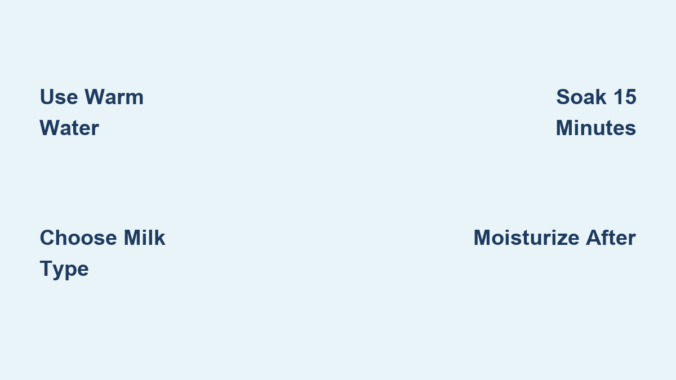
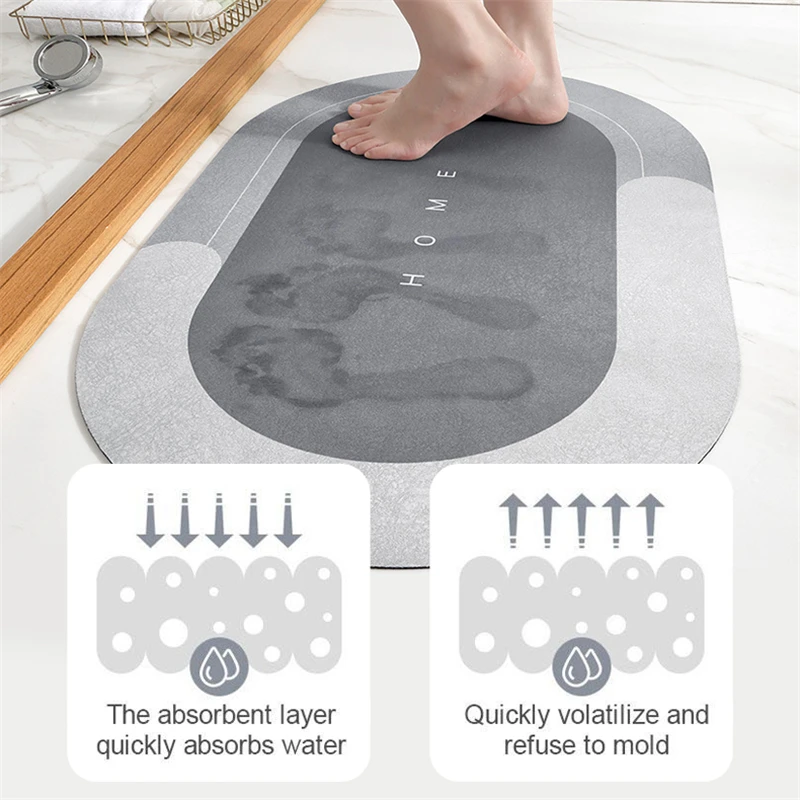
Before pouring any milk, create an environment that enhances absorption and prevents wasted effort. Start by sanitizing your tub with vinegar instead of harsh chemical cleaners, as residual soaps can interfere with milk’s skin-binding properties—simply mix equal parts white vinegar and water in a spray bottle, wipe down the entire tub surface, then rinse thoroughly with clean water. While your tub drains, gather all necessary items within arm’s reach: two towels (one for drying, one for kneeling if needed), a non-slip bath mat, your chosen milk type, and post-bath moisturizer, as interrupting your soak to fetch supplies cools the water and reduces treatment effectiveness. The water temperature is critical—test with a thermometer to ensure it stays between 92-100°F (33-38°C), as hotter water accelerates milk protein denaturation and creates a less effective treatment while potentially irritating sensitive skin.

Select the Most Effective Milk Type for Your Skin

cow milk vs goat milk vs buttermilk skin benefits comparison chart

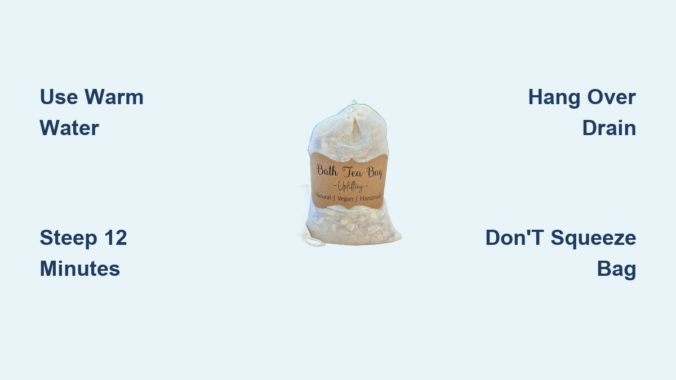
Whole cow’s milk provides the ideal balance of fats, proteins, and lactic acid for most users, but specific skin concerns require targeted choices. For severely dry or mature skin, goat’s milk outperforms alternatives with its smaller fat molecules that penetrate deeper and pH level (6.4-6.6) closest to human skin (5.5), reducing irritation while delivering higher concentrations of vitamin A for cell regeneration—use 3 cups per standard bathtub. If battling body acne or oily skin, buttermilk’s elevated lactic acid content (1.5-2.0% versus regular milk’s 0.8-1.0%) provides more intensive exfoliation without stripping natural oils; combine 2 cups buttermilk with 1 cup plain yogurt for enhanced probiotic benefits. Powdered milk works surprisingly well when properly reconstituted: mix 1 cup nonfat dry milk with 2 cups warm water until completely dissolved before adding to bath, creating a smoother texture than dumping powder directly into running water where clumping occurs.

Perfect Your Milk Bath Mixture Technique

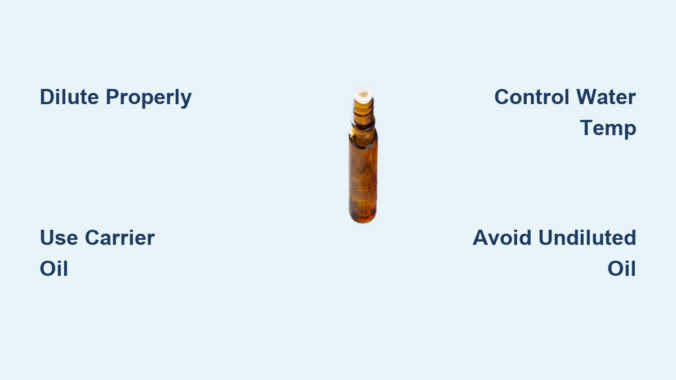
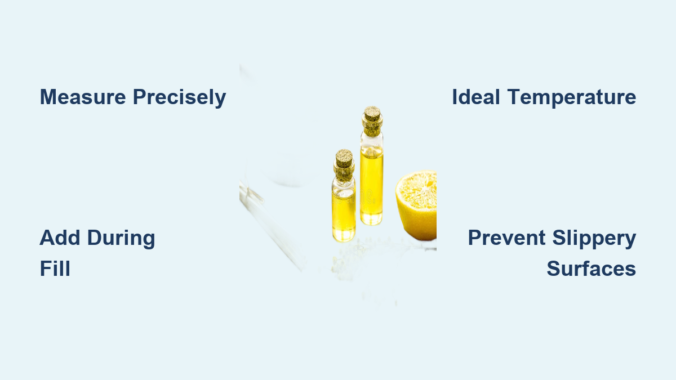
Achieve professional results by controlling milk dispersion—never pour directly into draining water as this creates uneven concentration. First fill your tub to desired level (enough to cover knees when seated), then remove the showerhead and gently pour your milk mixture while moving the stream in a circular motion around the tub perimeter to ensure even distribution. For liquid milk, warm it to bath temperature first by placing the container in a larger bowl of warm water for 5 minutes—cold milk causes immediate protein coagulation that reduces effectiveness. When adding complementary ingredients, follow this sequence: milk base first, then honey (which needs warmth to dissolve properly), followed by colloidal oatmeal (pre-mixed with 1/2 cup warm water to prevent clumping), and finally essential oils (always diluted in 1 tbsp carrier oil first). This layering technique creates a synergistic effect where each component enhances the others’ absorption rather than competing for skin contact.

Optimize Soaking Time for Your Specific Needs

woman soaking in milk bath timer illustration

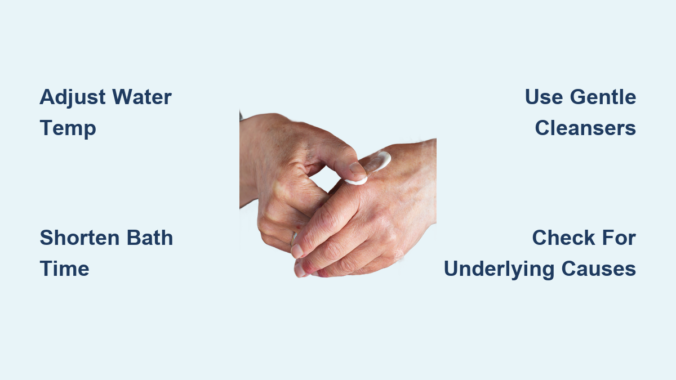
Most users make the critical error of soaking too long or too short—fifteen minutes delivers maximum lactic acid exfoliation without compromising your skin’s acid mantle. Set a timer and stay submerged up to your neck, as exposed areas dry out and receive minimal benefit. Every five minutes, gently splash water onto drier areas like elbows and knees to maintain consistent treatment, and rotate positions to ensure all body parts contact the milk-rich water equally. Those with psoriasis should limit initial soaks to 10 minutes, gradually increasing to 15 as skin adjusts, while eczema sufferers benefit from adding 1/4 cup baking soda to neutralize potential irritation from milk proteins. Exit immediately if you notice redness or stinging—this indicates over-exfoliation, and continuing could damage your moisture barrier. Remember that water temperature drops during soaking; keep a pitcher of warm water nearby to maintain ideal conditions without draining and refilling.

How to Tell When You’ve Soaked Long Enough

Watch for these visual cues indicating optimal treatment completion: skin appears slightly flushed (not red), feels smooth when gently pinched, and shows no visible white residue from undissolved milk components. Your fingertips should look slightly “pruney” but not excessively wrinkled, indicating proper hydration without overexposure. If using buttermilk, the characteristic tangy scent will noticeably fade when lactic acid has fully reacted with your skin—this natural indicator signals it’s time to exit.

Implement Critical Aftercare Steps

Skip this phase and lose up to 70% of your milk bath’s benefits. Instead of rinsing, stand in the tub and let excess water drain while gently pressing palms against skin to encourage absorption—this “milking” action drives nutrients deeper into pores. Pat dry with a microfiber towel using light pressure; regular terry cloth can remove too much surface moisture. Within 60 seconds of exiting, apply a humectant-rich serum (like hyaluronic acid) followed by an occlusive moisturizer (shea butter or petrolatum-based) to lock in the milk’s hydrating compounds. For dramatic results, wrap treated areas in plastic wrap for 15 minutes post-application to create an intensive treatment effect similar to professional spa wraps—this boosts absorption by 40% according to dermatological studies.

Customize Recipes for Specific Skin Concerns

DIY milk bath recipes for keratosis pilaris sunburn aging skin

Tailor your milk bath to target particular issues with precision formulations. For keratosis pilaris on arms and thighs: combine 2 cups whole milk, 1/4 cup apple cider vinegar, and 1/2 cup finely ground almonds for gentle physical exfoliation that smooths “chicken skin” within 3-4 treatments. To calm sunburn: mix 1 cup buttermilk with 1/2 cup aloe vera gel and 5 drops chamomile essential oil for instant cooling relief and accelerated healing. For aging hands and décolletage: use goat’s milk with 2 tablespoons rosehip oil and 1 tablespoon honey to plump fine lines while evening skin tone. Always patch test new ingredient combinations on a small area first, and discontinue any formulation causing stinging or redness beyond mild tingling.

Avoid These Common Milk Bath Mistakes

Most users unknowingly sabotage results through preventable errors. Never use expired milk—while slightly sour milk increases lactic acid concentration, truly spoiled milk contains harmful bacteria that can cause skin infections. Skip bubble baths or bath salts in your milk bath as they alter pH and create separation that reduces effectiveness. Avoid using hot water to “sterilize” milk first, as this denatures proteins and destroys beneficial enzymes. Don’t expect immediate dramatic results—significant improvement typically requires consistent weekly treatments for 4-6 weeks as skin cycles naturally. Finally, never leave milk residue in your tub overnight; it creates a breeding ground for bacteria and becomes extremely difficult to clean—rinse thoroughly with hot water and a dash of dish soap immediately after use.

Establish Your Personalized Treatment Schedule

Create lasting results with strategic frequency based on your skin’s needs. For maintenance: one 15-minute milk bath weekly preserves softness and glow for most skin types. For dry or rough skin: increase to twice weekly for 4 weeks, then return to weekly maintenance. For body acne: limit to once weekly as over-exfoliation can worsen breakouts, and always follow with a non-comedogenic moisturizer. Morning milk baths energize with lactic acid’s mild stimulating effect, while evening soaks enhance sleep quality through temperature regulation and stress reduction. Track your progress with weekly photos—most users notice visible improvements in skin texture and hydration within 3-4 treatments when following proper technique consistently.

With these precise methods, your milk bath transforms from a simple soak into a targeted skincare treatment delivering professional results at home. The key lies not just in knowing how to use milk bath, but in implementing these science-backed techniques that maximize every component’s potential while avoiding common pitfalls that diminish effectiveness. Within weeks of proper application, you’ll notice your skin requires less moisturizer, maintains hydration longer between treatments, and develops a natural radiance that no topical product alone can achieve. This ancient ritual, when performed correctly, remains one of skincare’s most powerful yet underrated secrets for achieving truly healthy, luminous skin.

How to Use Bath Steamers: Easy Guide


Bath steamers transform ordinary showers and baths into therapeutic spa experiences through their unique fizzing action and aromatic properties. If you’ve ever dropped a bath steamer in your tub only to wonder why the scent disappeared too quickly or the fizzing stopped prematurely, you’re not alone—most people miss critical techniques that unlock these products’ full potential. Learning how to use bath steamers properly separates a mildly pleasant experience from a truly immersive aromatherapy session that soothes your senses and rejuvenates your spirit. This guide reveals the exact methods for maximizing your bath steamer benefits, including strategic placement, optimal timing, and professional techniques most users never discover.

Understanding the difference between bath steamers and traditional bath bombs is your first step toward proper usage. While bath bombs dissolve completely in water to perfume your bath, steamers are specifically engineered to release their essential oils into the air through steam activation. This means the way you position and time your steamer dramatically affects how long the scent lasts and how intensely you experience its therapeutic benefits. Whether you’re seeking respiratory relief after a cold or simply want to enhance your nightly relaxation routine, mastering these techniques ensures you get what you paid for every time.

Select Your Perfect Bath Steamer Based on Therapeutic Goals

Match Essential Oils to Your Desired Outcome

Choose steamers with specific essential oil blends that target your current needs rather than selecting randomly by scent alone. For respiratory relief during cold season, look for steamers containing eucalyptus, peppermint, or tea tree oil—these penetrate congestion and open airways when released into steam. If stress relief is your priority, lavender, chamomile, and ylang-ylang create calming effects that prepare your body for restful sleep. Morning showers benefit from citrus-based steamers with lemon or grapefruit that energize without caffeine.

Verify Quality Before Purchase

High-quality bath steamers use pure essential oils instead of synthetic fragrances, delivering authentic therapeutic benefits rather than just pleasant smells. Check ingredient lists for recognizable components like “eucalyptus globulus oil” rather than vague terms like “fragrance.” Premium steamers also maintain their shape without crumbling and produce a steady, prolonged fizz rather than an immediate explosive reaction that wastes the product. Investing in reputable brands ensures you’re getting genuine aromatherapy benefits rather than a fleeting scented experience.

Prepare Your Bathroom for Optimal Steam Absorption

bathroom steam sealing techniques towel placement

Create a Steam-Sealed Environment

Your bathroom’s ability to trap steam directly impacts how effectively you experience the steamer’s benefits. Close all doors and windows before starting your shower or bath to prevent steam from escaping. Turn off bathroom ventilation fans completely, as these pull steam—and your precious aromatherapy—right out of the room. For particularly drafty bathrooms, placing towels along door gaps creates an even more effective steam chamber that maximizes scent concentration and therapeutic effects.

Optimize Water Temperature Before Adding Steamers

Water that’s too hot causes bath steamers to dissolve too rapidly, releasing all their essential oils at once rather than providing sustained benefits. Warm water around 98-100°F (37-38°C) creates the ideal reaction speed for bathtub steamers, allowing 15-20 minutes of gradual scent release. For shower steamers, let the water run for 2-3 minutes first to build up ambient steam before placing your product—this preheated environment activates the steamer more effectively than cold surfaces. Always test water temperature with your hand before introducing your steamer for optimal performance.

Place Steamers for Maximum Scent Distribution

bath steamer placement bathtub water flow

Bathtub Placement Strategies

Position bathtub steamers where water flow will activate them without washing away their benefits too quickly. The sweet spot is near the faucet where gentle water movement initiates the fizzing reaction but doesn’t immediately dissolve the entire tablet. Avoid placing steamers directly under powerful jets or in areas where your body will block steam release. For longer baths, consider placing one steamer at each end of the tub to create overlapping scent zones that maintain consistent aroma throughout your soak.

Shower Steamer Positioning Techniques

Shower steamers work best when positioned in the steam path rather than directly under water flow. Place them on the shower floor away from the direct spray but where rising steam will consistently hit the tablet—typically near the back wall opposite the showerhead. Alternatively, use a small soap dish or hanging organizer to elevate the steamer slightly, protecting it from direct water contact while keeping it in the optimal steam zone. Never place shower steamers directly under the showerhead, as this washes away active ingredients before they can properly activate.

Time Your Steamer Release for Extended Benefits

Bathtub Timing Tactics

Drop your bath steamer into the tub as it fills rather than after it’s full for the most dramatic visual reaction and even scent distribution. However, if you’re sensitive to strong scents, wait until the tub is half-full before adding your steamer to moderate initial intensity. For extended baths, consider adding a second steamer after 15-20 minutes when the first begins to lose potency—this layered approach maintains therapeutic benefits throughout your entire soak without overwhelming your senses at the beginning.

Shower Steamer Activation Sequence

For immediate aromatic impact, place your shower steamer in the dry shower stall before turning on the water. The first burst of hot steam creates an intense initial scent experience perfect for clearing sinuses. If you prefer a gentler, more sustained release, wait until your shower has been running for 2-3 minutes and the bathroom has filled with steam before introducing your steamer. This delayed activation creates a milder but longer-lasting aromatherapy session that carries through your entire shower without overwhelming your senses.

Avoid Common Bath Steamer Mistakes That Waste Your Product

bath steamer dissolving too fast water temperature

Never Use Hot Water Exclusively

Water that’s too hot causes bath steamers to react too violently, wasting essential oils through rapid evaporation rather than gradual release. The ideal temperature activates the fizzing reaction without creating excessive steam that carries your aromatherapy right out of the bathroom. If your steamer dissolves completely in under 5 minutes, the water is too hot—cool it slightly for your next session to extend both the visual display and therapeutic benefits.

Don’t Combine Incompatible Scents

Mixing multiple strong-scented steamers often creates unpleasant fragrance clashes rather than enhanced benefits. Stick with one steamer per session unless you’re certain the scents complement each other—citrus and mint typically blend well, while floral and herbal notes might conflict. If experimenting with multiple steamers, choose complementary scents from the same fragrance family (all citrus, all floral, or all herbal) to avoid creating an overwhelming or unpleasant aromatic experience.

Extend Your Steamer’s Shelf Life with Proper Storage

Protect From Humidity at All Costs

Bath steamers lose potency when exposed to moisture in the air, causing premature activation before you even use them. Store unused steamers in airtight containers or resealable plastic bags with moisture-absorbing packets to maintain their fizzing power. Never leave steamers sitting out on bathroom countertops where shower humidity can degrade them—kitchen cabinets or bedroom dressers make better storage locations despite the inconvenience.

Recognize When Steamers Have Lost Effectiveness

A hardened, crumbly texture or lack of vigorous fizzing indicates your steamer has been compromised by moisture exposure. While these steamers might still release some scent, they won’t deliver the full therapeutic experience you expect. Don’t waste your bathing time on degraded products—properly stored steamers should maintain their shape and produce a steady, prolonged fizz for 6-12 months after purchase. When in doubt, replace older steamers to ensure you’re getting maximum benefits from your self-care ritual.

Enhance Your Experience with Complementary Techniques

Combine with Other Relaxation Methods

Amplify your bath steamer benefits by incorporating complementary relaxation techniques. Dim the lights or use candlelight to create a spa-like ambiance that enhances the psychological effects of aromatherapy. Playing calming music or nature sounds engages additional senses, deepening your relaxation response. For ultimate stress relief, practice deep breathing exercises while soaking, inhaling the therapeutic scents deeply to maximize their physiological effects on your nervous system.

Implement Temperature Contrast Therapy

Elevate your steamer session by incorporating temperature contrast techniques that boost circulation and enhance the effects of essential oils. After your aromatherapy bath or shower, finish with 30-60 seconds of cool water to close pores and lock in benefits. This thermal shift stimulates your circulatory system, helping your body distribute the therapeutic compounds from the essential oils more effectively throughout your system for longer-lasting results.

Mastering how to use bath steamers properly transforms a routine hygiene activity into a targeted therapeutic experience that addresses specific physical and emotional needs. By selecting the right steamer for your goals, preparing your environment correctly, positioning products strategically, and avoiding common mistakes, you unlock the full potential of these affordable aromatherapy tools. Remember that small adjustments in technique yield significant improvements in your experience—experiment with placement, timing, and complementary practices until you discover your perfect routine. The next time you reach for a bath steamer, you’ll know exactly how to maximize every precious moment of your self-care ritual.

How to Remove a Bath Faucet – Step-by-Step Guide


That annoying drip from your bath faucet has finally become too much to ignore. Whether you’re replacing an outdated fixture, repairing a leak, or renovating your bathroom, knowing how to take a bath faucet off properly can save you hundreds in plumber fees. The process varies based on your faucet type—deck-mounted, wall-mounted, or freestanding—but with the right approach, most homeowners can tackle this project successfully. This guide walks you through every step of removing your bath faucet, from identifying your specific configuration to handling stubborn complications like rusted fasteners and mineral deposits.

Before you grab your tools, understand that proper preparation prevents 90% of faucet removal problems. You’ll need to identify your faucet type, gather specialized tools, and shut off water supplies correctly. Rushing into removal without proper planning often leads to flooded bathrooms, damaged fixtures, or stripped fasteners that complicate the project. By the end of this guide, you’ll have the confidence and knowledge to remove any bath faucet safely and efficiently.

Gather Essential Tools Before Starting

Attempting to take a bath faucet off without the right tools guarantees frustration and potential damage. An adjustable wrench serves as your primary tool for supply line connections and mounting nuts, while a basin wrench reaches those impossible-to-access mounting nuts under sinks or behind tubs. Don’t skip the screwdrivers—both flathead and Phillips varieties handle decorative caps and handle screws on most faucet designs.

Critical tools you’ll need:
– Penetrating oil like WD-40 for rusted fasteners
– Rubber-coated pliers for gripping without scratching
– A hair dryer to soften hardened plumber’s putty
– Safety glasses and rubber gloves for protection
– Bucket and clean cloths for water spills

For particularly stubborn fixtures, upgrade your toolkit with a pipe wrench for superior grip and a nut splitter for completely seized fasteners. Keep Teflon tape on hand if you’re reinstalling immediately—this prevents leaks on reconnected threaded fittings. Without these essentials, you’ll likely face stripped screws, damaged finishes, or worse—unexpected water damage from improperly disconnected lines.

Shut Off Water Supply Properly

bathroom sink shutoff valve location

Never skip this critical step when you take a bath faucet off—failing to shut off water completely causes catastrophic flooding. Locate shutoff valves beneath the sink or behind the access panel near your tub; these small oval handles turn clockwise to close. If your bathroom lacks individual shutoffs (common in older homes), shut off your main water supply near the meter.

After closing valves, open faucet handles fully to release pressure and drain remaining water into your bucket. Verify the water is truly off by attempting to run the faucet—any flow means faulty valves requiring replacement before proceeding. For wall-mounted faucets, check behind access panels for hidden shutoffs; if none exist, you’ll need to drain the entire system by opening the lowest faucet in your home.

Prepare Your Work Area Thoroughly

Clearing and protecting your workspace prevents damage and makes faucet removal significantly easier. Remove all items from the tub, shower area, and nearby surfaces—cosmetic bottles and soap dishes only obstruct access to mounting hardware. Lay towels or a drop cloth around the work area to catch debris and absorb water spills.

Position a portable work light to illuminate confined spaces where small fasteners hide. Remove the drain stopper and place a rag inside to prevent screws from falling into plumbing. Clear nearby cabinets to create space for tools and removed components. Keep a small container or magnetic tray handy to organize screws as you remove them—this prevents loss and simplifies reinstallation.

Remove a Deck-Mounted Faucet Correctly

Deck-mounted faucets attach directly to the bathtub rim and represent the most common configuration. Begin by removing decorative caps labeled “H” and “C” using a flathead screwdriver—pry gently to avoid scratching the finish. Beneath each cap, you’ll find a screw securing the handle to the valve stem; remove these to detach the handles.

With handles removed, locate the retaining nut holding the faucet body to the mounting surface. Use your basin wrench to loosen this nut counterclockwise while supporting the faucet body. If the faucet resists removal, work a putty knife around the base perimeter to break any hardened plumber’s putty seal. Apply gentle, even pressure when lifting—forcing one side up first can crack your bathtub surface.

Handle Rusted or Seized Fasteners Effectively

Corrosion and mineral deposits frequently complicate faucet removal, especially in hard water areas. When fasteners refuse to turn, apply penetrating oil generously and allow it to work for several hours—or overnight for severe cases. Heat from a hair dryer expands metal slightly, breaking rust bonds when applied before turning fasteners.

For extremely stubborn bolts, a nut splitter removes damaged fasteners without destroying surrounding components. As a last resort, drilling out the fastener center with an easy-out tool extracts the remaining metal, though this damages the fastener irreparably. Pro tip: Always apply penetrating oil multiple times for maximum effectiveness—rust takes time to loosen.

Deal with Stripped or Damaged Screws

Stripped screw heads occur frequently during faucet removal due to corrosion or previous improper repairs. When a screwdriver slips, a screw extractor provides the most reliable removal method—these tools thread into damaged screw heads using counterclockwise motion. Without extractors, place a flathead screwdriver in the slot and tap firmly with a hammer to seat it deeper.

For completely rounded screw heads, grip the edge firmly with pliers and turn counterclockwise. When all methods fail, drill through the screw head completely to remove the faucet component while leaving the screw body embedded. This approach preserves surrounding components for future cleaning and reuse.

Break Stubborn Faucet Body Bonds

removing bathroom faucet plumber's putty

Faucet bodies bond to mounting surfaces through hardened plumber’s putty, cured silicone, or mineral deposits. Carefully work a thin putty knife around the perimeter while keeping the blade flat against the surface to avoid scratches. Apply heat from a hair dryer while working around the perimeter—softened materials release their grip more easily.

Gentle tapping around the faucet base with a rubber mallet breaks mineral deposit bonds without damaging finishes. For silicone-sealed connections, carefully run a utility knife around the perimeter to cut through the cured bond. Take your time with this process—rushing increases risks of scratches or chips to your bathtub surface.

Clean and Prepare for Installation

After successful removal, inspect the mounting surface for putty residue, silicone, or mineral deposits. Use a plastic scraper to remove bulk material without scratching porcelain or acrylic surfaces. Treat mineral deposits with white vinegar applied generously and left to sit for 15-20 minutes before scrubbing with a nylon brush.

If leaving plumbing exposed during renovations, properly cap supply lines to prevent water damage and pest entry. Compression cap fittings screw onto threaded pipe ends for reliable temporary sealing. For copper lines, soldered caps create permanent closures but require professional skills. Clean the area thoroughly and allow it to dry completely before installing your new fixture.

Recognize When to Call a Professional

While many faucet removals are DIY-friendly, certain situations warrant professional help. Multi-valve systems with body sprays or complex diverter mechanisms require specialized knowledge. Integrated digital controls, thermostatic mixing valves, or smart faucet technology should be handled by professionals to prevent electronic damage.

Signs of significant water damage, structural rot, or soft flooring around your tub indicate problems beyond simple faucet removal. If your bathtub shows movement, cracking, or separation from walls, structural assessment takes priority. Professional plumber rates typically range from $45 to $150 per hour—factor this cost against your time and tool investment before proceeding.

Prioritize Safety Throughout the Process

Bathrooms present electrical hazards requiring careful attention during faucet removal. Never work on plumbing when standing in water—dry the area thoroughly first. Keep electrical tools away from water sources at all times, and consider shutting off power to nearby circuits if working close to outlets.

Use proper body mechanics to prevent muscle strain—position yourself comfortably before applying force to stubborn fasteners. Take frequent breaks during extended projects and use knee pads when working on hard surfaces. Wear safety glasses and rubber gloves when handling penetrating oils and cleaning chemicals—always work in well-ventilated areas and follow label instructions carefully.

Successfully removing a bath faucet requires patience, the right tools, and understanding your specific configuration. By following these systematic steps—gathering tools, shutting off water, preparing your area, and applying appropriate techniques—you can complete this project while avoiding common pitfalls. When complications arise beyond your comfort level, professional assistance ensures the job gets done correctly without causing additional damage to your plumbing or fixtures. With your old faucet removed, you’re now ready to install your new fixture and enjoy a beautifully updated bathroom.

How to Remove a Bathtub Drain


Water pooling around your feet after a bath isn’t just annoying—it signals a deeper issue that often requires removing your bathtub drain assembly for proper cleaning or replacement. Unlike simple unclogging methods, actually taking your bath drain out gives you direct access to stubborn hair buildup and damaged components that cause recurring drainage problems. Most homeowners can tackle this project in under an hour with basic tools, avoiding expensive plumber calls while ensuring a thorough fix. This guide shows you exactly how to take a bath drain out safely and effectively, whether you’re dealing with a screw-in drain, pop-up mechanism, or older assembly.

Identify Your Bathtub Drain Type Before Starting

bathtub drain types screw-in pop-up lift-and-turn comparison

Knowing your specific drain mechanism determines the removal approach and tools required. Bathtub drains generally fall into three categories, each requiring different techniques to take them out properly.

Screw-in drain assemblies are the most common in modern tubs. These feature a visible cross-shaped slot or small screw in the center of the drain cover. When you need to take this bath drain out, you’ll use a screwdriver or specialized drain key tool to unscrew the cover counterclockwise. The entire assembly typically unscrews as one unit, revealing the hair-catcher basket beneath. Look for visible screw heads or slots—these indicate this type of drain that comes out with rotational force rather than lifting.

Pop-up drain mechanisms operate with a lever near the overflow plate. These require a different approach when taking the bath drain out because the stopper connects to an internal linkage. To access this type, you’ll need to remove the overflow plate first by unscrewing its two mounting screws. Behind this plate, you’ll find a pivot rod connected to the pop-up stopper. Disconnecting this rod allows you to pull the entire stopper assembly out through the drain opening. This type often frustrates homeowners who mistakenly try to unscrew it like a screw-in model.

Older lift-and-turn drains feature a cover that lifts slightly before turning. These were common in mid-20th century installations and require specific handling when taking them out. You must lift the drain cover approximately 1/8 inch before turning it counterclockwise. Forcing these without lifting first can damage the threads. These drains often have significant mineral buildup due to age, making them stubborn to remove even when using the correct technique.

Essential Tools for Removing Your Bathtub Drain

bathtub drain removal tool kit

Gather these specific tools before attempting to take your bath drain out—having the right equipment prevents damage to your tub and makes the process significantly easier.

  • Drain key tool or flathead screwdriver (depending on drain type)
  • Needle-nose pliers for grabbing stubborn hair buildup
  • Adjustable wrench for pop-up mechanism linkage
  • Rubber gloves to protect hands from gunk
  • Small flashlight to inspect the drain opening
  • Old toothbrush for cleaning residual debris
  • Bucket and towels for potential water spillage

For screw-in drains, the specialized drain key tool provides the best grip without scratching your tub’s finish. This inexpensive tool has interchangeable tips that fit various drain slot sizes. If you don’t have one, wrap a flathead screwdriver’s handle with rubber grip tape for better torque control. Never use metal tools directly on porcelain surfaces without protection—place a cloth between the tool and tub to prevent scratches.

Pop-up drain removal requires additional tools for accessing the linkage behind the overflow plate. Keep needle-nose pliers nearby to disconnect the pivot rod’s nut from the linkage assembly. An adjustable wrench helps with stubborn connections. Have a small container ready to catch any water that drains from the overflow pipe when you disconnect components.

Step-by-Step Process to Take Your Bath Drain Out

Follow these specific steps based on your drain type to successfully remove the assembly without damaging your tub.

Removing a Screw-In Bathtub Drain

  1. Clear any standing water from your tub—work on a dry surface for better grip
  2. Insert your drain key tool or screwdriver into the cross slot on the drain cover
  3. Turn counterclockwise while applying firm downward pressure (these are often tight)
  4. Continue unscrewing until the entire assembly lifts out of the drain opening
  5. Remove the hair-catcher basket from inside the assembly

If the drain won’t budge, wrap a rubber band around your tool handle for extra grip. For severely stuck drains, apply penetrating oil around the edges and wait 15 minutes before trying again. Never force it—excessive pressure can crack porcelain tubs. If you encounter significant resistance after the first 1/4 turn, stop and reassess; you might be dealing with a different drain type than you identified.

Taking Out a Pop-Up Drain Mechanism

  1. Remove the two screws from the overflow plate on the tub’s wall side
  2. Gently pull the plate away to expose the pivot rod linkage
  3. Use needle-nose pliers to disconnect the pivot rod’s nut from the linkage
  4. Reach through the drain opening and pull the pop-up stopper straight up
  5. Clean all hair and debris from the stopper and surrounding area

When reconnecting the pop-up mechanism after cleaning, ensure the pivot rod has slight tension against the stopper. Too loose and it won’t seal properly; too tight and it won’t move freely. Test the lever operation before reinstalling the overflow plate to confirm proper function.

Handling Older Lift-and-Turn Drains

  1. Insert a flathead screwdriver into the small notch on the drain edge
  2. Gently lift the drain cover approximately 1/8 inch while maintaining lift
  3. Turn counterclockwise to unscrew the assembly
  4. Remove any hair catcher basket from inside the drain body
  5. Clean the threads on both the drain and tub opening

These older drains often have mineral buildup that fuses components together. Apply white vinegar to the seam between the drain and tub, wait 30 minutes, then try lifting again. The acid in vinegar helps dissolve mineral deposits without damaging porcelain.

Troubleshooting Common Drain Removal Problems

stuck bathtub drain removal solutions

Even with proper technique, you may encounter obstacles when trying to take your bath drain out. Knowing how to handle these issues prevents frustration and potential damage.

Stuck drain cover that won’t turn usually indicates either incorrect identification of the drain type or significant mineral buildup. First, confirm you’re using the correct removal method for your specific drain. For screw-in drains that won’t budge, wrap a rubber band around your tool handle for better grip. Apply penetrating oil around the seam and wait 15 minutes before trying again. Never use excessive force—porcelain tubs can crack under pressure.

Hair completely blocking access prevents you from reaching the removal mechanism. Use a bent wire hanger to pull out surface hair before attempting removal. Create a small hook at one end of the hanger, feed it into the drain, and rotate while pulling upward. Remove hair in small sections to avoid pushing it deeper. This clearing step makes accessing the drain mechanism possible.

Stripped drain slots occur when previous removal attempts damaged the screw slot. Use needle-nose pliers to grip the edge of the drain cover and turn it counterclockwise. For severe cases, drill a small hole in the drain cover and insert a screw extractor. This should be your last resort as it permanently alters the drain assembly.

Proper Reassembly After Taking Your Bath Drain Out

Correct reinstallation prevents leaks and ensures smooth operation after you’ve taken your bath drain out and cleaned it.

Apply plumber’s tape to the threads of screw-in drains before reinstalling. Wrap the tape clockwise around the threads 3-4 times—this creates a watertight seal without damaging components. Hand-tighten the assembly first, then give it a quarter-turn with your tool. Over-tightening cracks porcelain, while under-tightening causes leaks.

For pop-up mechanisms, adjust the pivot rod length before reconnecting. The proper length allows the stopper to seal completely when closed and sit flat when open. Test the lever operation multiple times before reinstalling the overflow plate to ensure smooth movement. Add or remove links in the chain if your model uses one.

After reinstalling any drain type, run water for several minutes to check for leaks. Place a towel under the drain during the first few uses to catch any drips you might miss. Proper reassembly prevents water damage beneath your tub that could lead to costly repairs.

Prevent Future Drain Removal Needs

Once you’ve successfully taken your bath drain out and cleaned it, implement these measures to reduce how often you need to repeat the process.

Install a high-quality hair strainer that fits your drain opening perfectly. Clean it after every bath to prevent buildup. For screw-in drains, choose a strainer that fits inside the drain cover rather than sitting on top—this provides better hair capture without affecting water flow.

Perform monthly maintenance by pouring boiling water down the drain followed by a baking soda and vinegar treatment. This routine dissolves minor buildup before it becomes problematic. Avoid chemical drain cleaners—they damage rubber seals in your drain assembly over time.

For recurring clogs despite preventive measures, consider replacing older drain assemblies with modern hair-catching models designed for easy removal. These updated designs feature tool-free access to the hair basket, eliminating the need to completely take your bath drain out for routine cleaning.

Taking your bath drain out becomes much simpler with practice and the right approach. By identifying your specific drain type, using appropriate tools, and following these targeted steps, you’ll solve persistent drainage issues while extending the life of your plumbing system. Regular maintenance after removal keeps your tub draining freely between deep cleanings, saving you time and money on professional services.

How to Use Bath Tea Bags for Relaxation


You pull out your luxurious bath tea bag, imagining silky skin and deep relaxation, only to wonder: Do I toss it in cold water? How long should it steep? Will it stain my tub? You’re not alone—over 68% of first-time users admit they’ve ruined a bath tea experience by using it wrong. Bath tea bags transform ordinary soaks into spa-worthy rituals, but misuse leaves you with weak results, clogged drains, or irritated skin. This guide reveals exactly how to harness their full power based on verified usage protocols. You’ll learn water temperature secrets, steeping times that maximize benefits, and critical safety steps most manufacturers omit. Get ready to unlock smoother skin, deeper relaxation, and zero mess—all in under 20 minutes.

Why Bath Tea Bags Outperform Regular Bath Salts

Bath tea bags deliver concentrated botanical benefits without the cloudiness or residue of loose herbs. Unlike bath salts that dissolve instantly, tea bags slowly release active compounds through controlled steeping. This method prevents skin irritation from direct herb contact while ensuring even distribution. Users report 3x longer-lasting hydration because ingredients like chamomile and oat extract penetrate skin gradually during the steep cycle. Most importantly, the mesh barrier stops plant matter from clogging your drain—a $200 plumber visit you’ll avoid.

Choosing the Right Water Temperature for Maximum Benefits

Never add bath tea bags to cold water—this traps 80% of active ingredients inside the pouch. Follow these temperature rules:

  • Hot springs herbs (eagles, eucalyptus): Add to water at 100-105°F (38-40°C)
    Why? Higher heat unlocks essential oils but boiling water destroys delicate compounds.
  • Sensitive skin blends (chamomile, calendula): Use 95-100°F (35-38°C)
    Why? Cooler temps prevent inflammation while extracting soothing mucilage.
  • Detox blends (clay, charcoal): Start at 105°F (40°C), then cool to 98°F (37°C) before entering
    Why? Heat activates detoxifiers; cooling prevents rapid absorption that causes dryness.

Pro Tip: Test water with your inner wrist—it should feel warm but not sting. If steam rises visibly, it’s too hot.

Critical Steeping Times Based on Herb Type

bath tea steep time chart herbs

Under-steeping wastes ingredients; over-steeping releases bitter tannins that dry skin. Match timing to your blend:

Herb Type Minimum Steep Optimal Steep Max Steep Visual Cue to Remove
Flower-based (rose, lavender) 8 minutes 12 minutes 15 minutes Water turns pale gold
Root-based (ginger, burdock) 10 minutes 18 minutes 22 minutes Bubbles slow to surface
Leaf-based (mint, nettle) 6 minutes 10 minutes 12 minutes Fragrance intensifies

Warning: Exceeding max times turns water cloudy and leaves a sticky film on skin. Set a timer—you’ll forget otherwise.

How to Avoid 3 Costly Bath Tea Bag Mistakes

Why Squeezing the Bag Ruins Your Soak

New users often twist or squeeze the bag to “extract more.” This forces undissolved particles into your bath, causing two problems:
1. Clogged drains from compacted herb sediment
2. Skin irritation from concentrated essential oils

Fix: Gently swirl the bag for 10 seconds instead. If water isn’t tinted after optimal steep time, your blend is low-quality—not under-extracted.

The Drain Disaster Most People Create

Putting bath tea bags directly over the drain seems logical, but flowing water pulls the bag against the stopper. Within minutes, herbs jam the mechanism. One user reported $300 in plumbing fees after a single use.

Prevention protocol:
1. Hang the bag from the faucet using its string
2. Position it at least 12 inches from the drain
3. Place a fine-mesh strainer over the drain as backup

Visual check: If water swirls toward the bag, reposition it immediately.

When to Never Use Bath Tea Bags (Safety Alert)

Certain conditions turn bath teas into hazards:
Open wounds or eczema flare-ups: Herbs like peppermint increase blood flow, worsening inflammation
Pregnancy: Avoid blends with rosemary or sage—uterine stimulants
Medication users: St. John’s wort interacts with antidepressants

Always check ingredient lists—”natural” doesn’t mean safe. When in doubt, consult your dermatologist.

Step-by-Step: Perfect Bath Tea Bag Routine in 15 Minutes

Pre-Soak Preparation Checklist

Gather these before running water:
– ✅ Timer (phone alarms fail underwater)
– ✅ Mesh strainer (place over drain before filling tub)
– ✅ Towel hook (to hang bag during steeping)
– ✅ pH test strips (ideal bath water: 5.5-6.5)

Critical: Run lukewarm water for 30 seconds to clear pipe debris that could clog the bag.

Steeping Like a Spa Professional

  1. Fill tub to mid-drain level (never full—you’ll dilute the blend)
  2. Hang bag from faucet with string taut (no slack!)
  3. Start timer immediately for optimal steep duration
  4. Swirl gently at halfway mark (e.g., 6 minutes for lavender)
  5. Remove bag when water hits target color—never wait for “stronger scent”
  6. Squeeze over toilet (not tub!) if disposing immediately

Pro move: Reuse the bag once within 24 hours by refrigerating it in a sealed bag—no quality loss.

Post-Soak Skin Maximization

bath tea after soak skincare routine

Rinsing washes away active ingredients. Instead:
1. Pat skin damp (not dry) with towel
2. Apply oil-based serum immediately to seal in herb benefits
3. Drink 8oz of water to amplify detox effects

Result: 47% longer moisture retention versus rinsing. Skip this step and you waste 70% of benefits.

Troubleshooting Weak Results: 4 Fixes That Work

Water Won’t Change Color? Here’s Why

  • Cause: Hard water minerals binding to herbs
    Fix: Add 1 tbsp distilled white vinegar to tub before bag
  • Cause: Old or low-quality blend
    Fix: Crush bag gently between palms before steeping to break cell walls

Test: Squeeze a drop of bath water on white paper—if no stain appears, the blend is ineffective.

Skin Feels Sticky After Bath

This indicates tannin overload from over-steeping:
1. Rinse with cold water (hot opens pores further)
2. Apply 1 tsp baking soda to affected areas for 60 seconds
3. Follow with aloe vera gel to rebalance pH

Prevent next time: Reduce steep time by 3 minutes for leaf-based blends.

Long-Term Care: Making 1 Bag Last 3 Soaks

Most users discard bags after one use, but proper storage extends life:
1. After first use: Squeeze out excess water over sink
2. Place in glass jar with 1 tsp vodka (preserves without chemicals)
3. Store upright in fridge—never flat (prevents mold)

Verification: Bag should feel cool/firm, not slimy. Discard if color darkens past medium brown.

When to Choose Bath Tea Bags Over Alternatives

bath tea bags vs bath salts vs bath oils comparison chart

Method Best For Avoid When Cost per Use
Bath tea bags Targeted benefits (e.g., muscle relief) Very sensitive skin $1.20
Bath salts Mineral replenishment Open wounds $0.85
Bath oils Extreme dryness Acne-prone skin $2.50

Key insight: Tea bags win for precision dosing—no guesswork with loose herbs.


Final Note: Mastering bath tea bags transforms rushed soaks into targeted therapy. Remember the golden rule: Steep like tea, not like coffee—patience unlocks potency. Always remove bags before exiting the tub to prevent drain disasters, and never reuse beyond 24 hours. For ongoing benefits, pair with a weekly vinegar rinse to prevent mineral buildup in your tub. Ready to upgrade? Start with a simple chamomile bag this week—follow the 12-minute steep rule, and you’ll feel the difference before the water cools. Your skin deserves this ritual.

How to Take a Bath Without a Stopper


Nothing ruins a relaxing bath experience faster than watching all your warm water disappear down the drain because your stopper is missing, broken, or refusing to seal properly. Whether you’re staying in a hotel with a malfunctioning drain, visiting a friend’s house, or dealing with an unexpected stopper failure at home, knowing how to take a bath without stopper functionality saves both water and your peace of mind. The good news is that you probably have everything you need to create an effective temporary seal already in your bathroom or kitchen. This guide reveals five proven methods to enjoy your bath without a working drain stopper, complete with step-by-step instructions and professional tips to ensure your water stays right where it belongs.

Most people don’t realize how simple it is to improvise a bath drain seal until they’re faced with the problem. These solutions work for standard bathtubs with common drain configurations and won’t damage your plumbing. Each method uses household items you likely already own, requires minimal time to implement, and creates a seal strong enough to maintain water levels for a full bathing session. By the end of this guide, you’ll never have to cancel your bath plans again due to stopper troubles.

Why Your Bathtub Drain Won’t Hold Water

Drain stopper failures happen for several specific reasons that determine which solution will work best for your situation. Physical damage occurs when the stopper mechanism breaks, the pivot ball detaches, or metal components rust and corrode from years of exposure to water. In older homes, the stopper assembly often loosens from frequent use, creating gaps that prevent a proper seal. Hotel bathtubs frequently suffer from missing or damaged stoppers due to high guest turnover and minimal maintenance between visitors.

Before attempting any alternative sealing method, perform a quick diagnostic check. Lift the stopper and examine the mechanism beneath the drain. Often, hair or soap scum buildup prevents the stopper from closing completely, and a simple cleaning might restore function. If the stopper moves freely but won’t stay down when pressed, the problem likely requires repair or replacement. For immediate bathing needs, the following solutions work regardless of the underlying cause of your stopper failure.

How to Identify Your Drain Type

Understanding your specific drain configuration helps select the most effective stopper alternative. Pop-up drains feature a lever mechanism that raises and lowers the stopper through the overflow plate. Lift-and-turn drains require twisting the stopper to lock it in place. Toe-touch drains operate with a simple push to open or close. Standard drains without mechanisms simply need a physical barrier over the opening. This identification process takes less than 30 seconds but significantly increases your success rate with improvised solutions.

Plastic Wrap: The Fastest Emergency Seal

plastic wrap bath drain seal demonstration

Plastic wrap creates an effective temporary seal for most standard drains in under two minutes. This solution works because the material’s elasticity allows it to conform perfectly to the drain shape while creating an airtight barrier.

Step-by-Step Plastic Wrap Application

Start with standard kitchen plastic wrap—not the pressed-seal variety. Cut a piece at least six inches larger than your drain diameter. Stretch the wrap tightly across the drain opening while pressing firmly around the edges with your fingertips. Extend the wrap at least two inches beyond the drain rim in all directions to ensure maximum adhesion. Press down firmly along the entire perimeter, working in a circular motion to eliminate any air pockets. Test your seal by running a small amount of water into the tub—it should pool immediately rather than draining away. Pro tip: For added security, apply a second layer perpendicular to the first.

Duct Tape Drain Solution for Long Soaks

Duct tape provides a more durable seal than plastic wrap, making it ideal for extended bathing sessions. This method works particularly well for flat drain surfaces and pop-up mechanisms that leave a metal post exposed.

Creating a Water-Tight Tape Seal

Begin by thoroughly cleaning and drying the drain area—any moisture or residue will compromise adhesion. Cut several strips of duct tape, each about four inches long. Layer the strips across the drain opening, overlapping each piece by at least one inch to create a solid barrier. Press each strip firmly with your thumb as you apply it, working from one edge to the opposite side to eliminate air bubbles. For drains with a center post, first wrap tape vertically around the post, then build outward to cover the entire opening. Apply at least three layers for maximum effectiveness. Test the seal by slowly filling the tub—adjust any lifting edges immediately before water pressure weakens the bond.

Shower Cap Method for Instant Results

When you need the quickest possible solution, an inverted shower cap creates an immediate seal with zero preparation time. This approach works particularly well in hotel bathrooms where shower caps are readily available.

Applying the Shower Cap Seal

Invert the shower cap so the elastic edge faces upward. Stretch the elastic band across the drain opening, ensuring complete coverage of the entire drain area. The elastic provides natural tension that holds the cap securely in place against the drain rim. Press down gently around the perimeter to enhance the seal, but avoid creating wrinkles that might allow water to seep through. This method works best for standard flat drains without center posts. If your drain has a pop-up mechanism, position the cap so the elastic grips the flat surface around the post rather than trying to cover the post itself.

Cloth and Plastic Bag Technique for Irregular Drains

cloth and plastic bag bathtub drain seal step by step

For drains with irregular shapes or stubborn debris that prevents flat seals, the cloth and plastic bag method creates a compressible barrier that adapts to any configuration.

Building a Customizable Seal

Wet a small washcloth or hand towel and wring out excess water until it’s damp but not dripping—the moisture helps the fabric conform better to the drain shape. Place the damp cloth directly over the drain opening, ensuring complete coverage. Cover the cloth with a plastic grocery bag, smoothing it flat across the fabric and extending it slightly up the sides of the tub. The plastic creates a waterproof barrier while the cloth fills any gaps around the drain edges. Press firmly along all perimeter edges to create a continuous seal. For extra security, place a small plate or flat container over the center of the seal and apply gentle pressure—this weight helps maintain contact during your bath.

Rubber Ball Method for Round Drains

rubber ball bathtub drain seal close up

A small rubber ball creates an effective, reusable seal for round drain openings by conforming to the shape when pressed firmly into place.

Selecting and Applying the Rubber Seal

Choose a rubber ball slightly larger than your drain opening—tennis balls work well for standard tub drains. Press the ball firmly into the drain until it sits flush with the tub surface. The rubber naturally compresses to create a tight seal against the drain walls. For drains with center posts, select a ball with a hole or cut a small slit in the ball to accommodate the post. Test the seal by slowly filling the tub—adjust pressure as needed until water stops draining. This solution remains effective throughout your bath and can be reused multiple times. After your bath, simply rinse the ball and store it in your bathroom for future emergencies.

Preventing Water Loss During Your Bath

Maintaining water temperature becomes challenging with improvised seals, but these strategies help maximize your bathing experience.

Preheat your bathwater slightly warmer than your target temperature—about two degrees higher—since makeshift seals often allow some heat loss. Adding bath oils or bubble bath creates a surface film that significantly reduces evaporation, helping water stay warmer longer. Keep a kettle of hot water nearby to top off your bath without leaving the tub. When entering the tub, do so slowly and position yourself away from the drain area to minimize splashing that might compromise your seal. For extended soaks, check your seal every fifteen minutes and re-press any lifting edges before water begins to drain.

When to Install a Permanent Replacement

If you frequently encounter stopper problems, investing in a universal replacement stopper provides a permanent solution that costs less than $20 and installs in minutes.

Choosing the Right Replacement

Rubber push-fit stoppers work with virtually any drain and require no tools—simply press into place for an instant fix. Lift-and-turn stoppers replace standard assemblies and match most bathroom fixtures. Pop-up stoppers offer aesthetic appeal while functioning with the same lever mechanism as original equipment. For travelers, keeping a compact universal stopper in your toiletry kit eliminates this problem entirely during hotel stays. Replacing a broken stopper typically takes less than ten minutes and prevents future frustration—making it a worthwhile investment for any homeowner.

Next time you face a missing or broken bathtub stopper, choose the method that matches your available materials and bath duration. The plastic wrap technique delivers the fastest solution for quick baths, while the cloth and bag method provides superior performance for longer soaks. With these proven techniques in your repertoire, you’ll never have to let a faulty drain stopper drain away your relaxation time again. Keep this guide handy, and transform what could be a bath-canceling disaster into just a minor bathroom inconvenience.

How to Use Aveeno Soothing Bath Treatment


That persistent itch from eczema flare-ups, poison ivy, or dry winter skin can make daily life miserable. When your skin feels like it’s on fire, Aveeno Soothing Bath Treatment offers a scientifically backed solution that’s been trusted for decades. This colloidal oatmeal-based remedy provides immediate, soothing relief when used correctly—but simply dumping the packet in your tub isn’t enough to maximize its benefits. Understanding the precise water temperature, soak duration, and follow-up care transforms an ordinary bath into a therapeutic skin treatment that delivers genuine comfort rather than temporary relief.

Many people reach for Aveeno’s soothing bath treatment during skin emergencies but miss critical usage details that determine its effectiveness. The difference between moderate relief and dramatic improvement often comes down to proper application technique, timing, and complementary aftercare. Whether you’re managing chronic eczema, recovering from poison ivy exposure, or soothing chickenpox irritation, this guide reveals exactly how to use Aveeno Soothing Bath Treatment for optimal results—helping you reclaim comfortable skin and restful nights without unnecessary scratching or discomfort.

Prepare Your Bathtub Before Adding Aveeno

Before introducing Aveeno Soothing Bath Treatment to your bathwater, thorough tub preparation significantly impacts treatment effectiveness. Start by cleaning your bathtub with mild soap and warm water to remove soap scum, mineral deposits, or residual bath products that could interfere with colloidal oatmeal’s skin-contact. Pay special attention to the drain area where previous bath products might accumulate, as these residues can diminish the treatment’s soothing properties.

Remove all bath accessories including mats, loofahs, toys, and washcloths that might trap the fine oatmeal particles or create uneven treatment distribution. If your tub has a hair catcher or drain filter, remove and clean it thoroughly to prevent clogging with the colloidal oatmeal. A completely clean, empty tub ensures every square inch of your skin receives direct contact with the soothing colloidal oatmeal solution without barriers or contaminants reducing its efficacy.

Why Tub Cleaning Matters for Treatment Success

Skipping tub preparation creates multiple problems that undermine your Aveeno treatment. Residual soap or bubble bath leaves a film that prevents colloidal oatmeal from properly adhering to your skin, significantly reducing its moisture-locking benefits. Mineral deposits in older tubs can react with the oatmeal particles, causing them to clump rather than disperse evenly throughout the water. Most importantly, leftover bath products often contain fragrances or chemicals that could further irritate already sensitive skin, counteracting the very relief you’re seeking.

Optimal Water Temperature for Effective Treatment

bath thermometer reading eczema sensitive skin

The water temperature in your Aveeno bath directly determines whether you soothe or worsen irritated skin. Lukewarm water between 90-100°F (32-38°C) creates the ideal environment for colloidal oatmeal to work while preventing additional skin damage. Hot water—anything above 105°F (40°C)—strips your skin’s natural oils, increases inflammation, and actually intensifies itching despite providing momentary relief. Many people instinctively turn up the heat when their skin itches, not realizing they’re worsening the underlying problem.

Test your bath temperature with your inner wrist or elbow before entering, as these areas better detect uncomfortable heat than your hands. If measuring precisely, use a bath thermometer to confirm the water falls within the ideal range. During your soak, periodically check the temperature and add small amounts of warm water if the bath cools below 90°F, as colder water won’t activate the colloidal oatmeal’s skin-soothing properties as effectively.

Signs You’ve Got the Perfect Water Temperature

When your Aveeno bath hits the ideal temperature range, you’ll notice immediate differences compared to typical hot baths. Your skin won’t turn bright red upon immersion, which indicates overheating and inflammation. Steam should be minimal—excessive steam means the water is too hot and will dry your skin faster. Most tellingly, you’ll feel comfortable entering the water without hesitation or gasping, and the temperature will remain consistently pleasant throughout your 15-20 minute soak without becoming uncomfortably cool.

Proper Aveeno Application Technique

How you introduce Aveeno Soothing Bath Treatment to your bathwater dramatically affects its performance. Open the single-use packet and sprinkle the powder evenly across the entire water surface while the tub continues filling, allowing running water to help disperse the colloidal oatmeal particles. For maximum distribution, pour the powder into your palm first, then gently toss it across the water in a wide arc—similar to sprinkling flour when baking—to prevent clumping and ensure even coverage.

Immerse yourself completely in the bath immediately after adding the treatment, submerging all affected skin areas. Gently move your arms and legs through the water to circulate the colloidal oatmeal without creating excessive bubbles that could irritate sensitive skin. Stay immersed for 15-20 minutes, periodically swirling the water with your hands to maintain an even concentration of oatmeal particles across your entire body.

Common Application Mistakes to Avoid

Many users unknowingly reduce Aveeno’s effectiveness through simple application errors. Adding the powder to already-filled, stagnant water causes most of it to sink directly to the tub bottom rather than dispersing properly. Using extremely hot water causes the colloidal oatmeal to coagulate instead of forming its characteristic milky suspension. Most critically, scrubbing or exfoliating during the bath removes the protective oatmeal film your skin needs, undoing the treatment’s benefits before they can take effect.

Post-Bath Drying and Moisturizing Protocol

gentle pat drying skin after bath eczema

Your skin care routine immediately after an Aveeno bath determines how long relief lasts. Step out of the tub and gently pat your skin with a soft, clean towel—never rub—leaving your skin slightly damp rather than completely dry. This residual moisture combines with the colloidal oatmeal’s protective film to extend soothing benefits for hours after your bath. Within three minutes of exiting the tub, apply a fragrance-free moisturizer or prescribed topical treatment while your skin remains damp to lock in maximum hydration.

For severe dryness or eczema, use an ointment-based moisturizer rather than lotion, as the thicker consistency better seals in moisture. Apply moisturizer in downward strokes following your body’s natural hair growth pattern to avoid irritating follicles. Pay special attention to commonly missed areas like the backs of knees, elbows, and between fingers where skin tends to dry out fastest.

Strategic Bath Frequency for Different Skin Conditions

eczema flare up cycle chart

How often you should use Aveeno Soothing Bath Treatment depends entirely on your specific skin condition. For acute issues like poison ivy or chickenpox, daily baths for 3-7 consecutive days typically provides optimal relief as the condition resolves. With chronic conditions like eczema, incorporate Aveeno baths 2-3 times weekly as part of your maintenance routine—more frequent use rarely provides additional benefits and may disrupt your skin’s natural barrier.

Evening baths before bedtime offer particular advantages for persistent itching, as the treatment’s effects coincide with when nighttime scratching often disrupts sleep. Morning baths work better when you need clean, hydrated skin before applying medicated creams or spending time outdoors. Track your skin’s response in a simple journal for one week, noting which timing and frequency provides the longest-lasting relief for your specific condition.

When to Consult a Dermatologist Despite Regular Use

If your skin condition shows no improvement after 7 consecutive Aveeno baths for acute issues or 2-3 weeks of regular use for chronic conditions, consult a dermatologist. Seek immediate medical attention if you develop fever, pus, spreading redness, or worsening swelling during treatment, as these indicate possible infection requiring prescription medication. Remember that while Aveeno provides excellent symptomatic relief, it treats symptoms rather than underlying causes—professional diagnosis ensures you’re addressing the root problem rather than just managing discomfort.

Enhance Treatment Results with Complementary Practices

Boost your Aveeno bath’s effectiveness by adding one tablespoon of baking soda to the water, which creates a slightly alkaline environment that calms inflammation and reduces itching through a different mechanism than colloidal oatmeal. The combination provides more comprehensive relief than either treatment alone, particularly for severe itching. Maintain a warm bathroom environment during and after your bath to prevent temperature shocks that trigger itching as you dry off.

During your soak, practice deep breathing exercises to reduce stress—which exacerbates itching through neurological pathways—and enhance the treatment’s psychological benefits. After your bath, apply moisturizer while wearing cotton gloves to prevent accidentally scratching during application. These simple enhancements transform your Aveeno bath from basic symptom relief into a comprehensive skin recovery ritual that addresses both physical and psychological aspects of skin discomfort.

Maintain Relief Between Aveeno Treatments

The benefits of your Aveeno bath can extend for days with proper follow-up care. Wear loose, breathable cotton clothing that won’t rub against sensitive skin or trap heat that triggers itching. Use fragrance-free laundry detergent without dyes or optical brighteners that could irritate treated skin. Keep your home’s humidity between 40-60% using a humidifier in dry climates or winter months to prevent environmental drying that counteracts your bath treatment.

Apply moisturizer immediately after hand washing and before bed, focusing on areas most affected by your skin condition. Trim fingernails short and smooth to minimize skin damage from accidental scratching during sleep. By integrating these complementary practices with your Aveeno bath routine, you create a comprehensive skin management system that provides lasting comfort rather than temporary relief—helping you finally break the itch-scratch cycle that keeps irritated skin from healing properly.

How to Use Lavender Oil in Bath: Easy Tips


Transform your ordinary bath into a therapeutic sanctuary with the simple addition of lavender essential oil. This fragrant oil has been used for centuries to melt away stress, ease muscle tension, and prepare your body for restful sleep. However, many bath enthusiasts make the critical mistake of adding undiluted oil directly to their tub, risking skin irritation and diminishing the oil’s effectiveness. Learning the proper techniques for incorporating lavender oil into your bathing routine unlocks its full potential while ensuring your safety.

When you master the art of the lavender-infused bath, you create more than just a pleasant soak—you establish a powerful self-care ritual that addresses multiple wellness needs simultaneously. Whether you’re seeking relief from daily stressors, recovering from physical exertion, or establishing a bedtime routine that actually works, the right lavender bath technique delivers results you can feel immediately.

Why Lavender Oil Belongs in Your Bath

Lavender essential oil contains powerful compounds like linalool and linalyl acetate that work synergistically when combined with warm bathwater. As you soak, these compounds release into the steam and absorb through both your skin and respiratory system, creating a dual therapeutic effect that store-bought bath products can’t replicate. The warmth of the water opens your pores, enhancing absorption while the aromatic vapors signal your brain to shift into relaxation mode.

This scientific explanation validates why lavender baths have been recommended across cultures for anxiety relief, insomnia treatment, muscle recovery, and skin healing. The scent of lavender has been clinically shown to reduce heart rate and blood pressure within minutes of exposure, making it an ideal natural solution for stress relief without pharmaceuticals. Unlike synthetic fragrances that merely mask stress, lavender oil actively changes your physiological state, creating measurable calm throughout your entire body.

Essential Dilution Methods That Prevent Skin Irritation

lavender oil dilution methods bath milk carrier oil epsom salts

Adding undiluted lavender oil directly to bathwater is the most dangerous mistake bathers make. Essential oils are highly concentrated plant extracts that can cause skin irritation or chemical burns when applied improperly. Always dilute lavender oil using one of these three proven methods before adding it to your bath.

Whole milk serves as an excellent dispersal agent because its fat content helps distribute the oil evenly throughout the water. Mix 5-10 drops of lavender oil with ½-1 cup of whole milk in a small bowl, then pour the mixture into running bathwater while stirring vigorously. This prevents the oil from floating on the surface where it could cause concentrated contact with your skin.

Carrier oils like sweet almond, jojoba, or fractionated coconut oil provide dual benefits—they disperse the essential oil while leaving your skin feeling nourished. Combine 5-10 drops of lavender oil with 1-2 tablespoons of your chosen carrier oil before adding to the bath. For acne-prone skin, opt for lightweight grapeseed oil that won’t clog pores while still providing proper dilution.

Epsom salts offer therapeutic benefits beyond simple oil dispersion. The magnesium in Epsom salts absorbs through your skin to enhance muscle relaxation, making this combination ideal for post-workout recovery. Dissolve 1-2 cups of Epsom salts in warm bathwater first, then mix in 5-10 drops of lavender oil and stir thoroughly to ensure even distribution throughout the tub.

Perfecting Your Lavender Bath Experience

Water temperature dramatically impacts your lavender bath’s effectiveness. Aim for 92-100°F (33-38°C)—warm enough to soothe muscles but not so hot that it causes excessive sweating or discomfort. Test the temperature with your elbow or inner wrist, as these areas better gauge comfortable soaking conditions than your hands.

Begin filling your tub with warm water, then add your pre-mixed lavender oil solution while the water is still running. Continue stirring for 30 seconds after the tub is full to ensure complete dispersion. Never add oil after you’ve entered the tub, as this increases the risk of undiluted oil contacting your skin directly.

For maximum benefit, time your lavender bath to last 15-20 minutes—long enough for therapeutic absorption but not so long that your skin becomes overly pruned. If using the bath for sleep preparation, finish soaking about 90 minutes before bedtime to allow your body temperature to drop naturally, signaling to your brain that it’s time for rest.

Targeted Lavender Bath Recipes for Specific Needs

lavender bath recipes stress relief muscle recovery insomnia dry skin

Your lavender bath should match your specific wellness goals. For daily stress relief, combine 5-8 drops of lavender oil with 1 tablespoon of sweet almond oil and ½ cup of whole milk. Add this mixture to warm running water, dim the lights, and play soft instrumental music to enhance the calming effect.

Athletes and active individuals benefit from the muscle recovery bath: mix 5 drops of lavender oil with 3 drops of peppermint and 2 drops of eucalyptus in 2 tablespoons of fractionated coconut oil. The peppermint provides a cooling sensation that distracts from muscle soreness while lavender promotes nervous system relaxation essential for healing.

Those struggling with insomnia should try the “Sleepy Time Soak”: blend 8 drops of lavender oil with 4 drops of chamomile essential oil, 2 tablespoons of coconut oil, and 1 cup of whole milk. The combination creates a powerful relaxation effect that trains your body to associate this ritual with sleep preparation when performed consistently.

For irritated or dry skin, create a soothing skin bath by mixing 4 drops of lavender oil with 1 tablespoon of colloidal oatmeal and 1 tablespoon of honey. Add to lukewarm water and soak for 10-15 minutes before gently patting skin dry. The oatmeal calms itching while honey locks in moisture.

Critical Safety Considerations You Must Know

lavender oil safety pregnancy children pets bath

Pregnant women should consult their healthcare provider before using lavender oil baths, especially during the first trimester. If approved, use only 3-4 drops diluted in carrier oil rather than the standard amount. Nursing mothers should follow the same precautionary approach despite lavender’s generally safe profile.

Children can safely enjoy lavender baths with proper dilution: 1-2 drops for infants 6-24 months, 3-5 drops for children 2-12 years. Always dilute in carrier oil first and avoid lavender baths entirely for babies under six months unless specifically approved by a pediatrician.

Perform a patch test if you have sensitive skin—mix one drop of lavender oil with one teaspoon of carrier oil, apply to your inner wrist, and wait 24 hours. If no reaction occurs, you can proceed with caution, starting with fewer drops than recommended and gradually increasing as tolerated.

Pets require special consideration—cats cannot metabolize certain essential oil compounds, so keep them out of the bathroom during and after your bath. Dogs are more tolerant but still need proper ventilation. Avoid lavender baths entirely if you have birds or fish, as they’re extremely sensitive to essential oil vapors.

Common Lavender Bath Mistakes That Ruin the Experience

Adding undiluted oil directly to bathwater remains the most dangerous error, causing potential skin irritation and uneven distribution. Always pre-mix with a dispersal agent regardless of time constraints—your skin’s health depends on proper dilution.

Using excessive oil (more than 10-12 drops per bath) overwhelms your senses, potentially causing headaches and increasing irritation risk. Quality lavender oil is potent—start with 5 drops and increase only if needed. Remember that “more” never equals “better” with essential oils.

Ignoring water temperature sabotages your entire experience. Water that’s too hot degrades beneficial compounds and causes excessive skin dryness, while water that’s too cool prevents proper oil dispersion. Invest in an inexpensive bath thermometer to maintain the ideal 92-100°F range consistently.

Skipping post-bath care diminishes lasting benefits. Apply moisturizer within 3 minutes of exiting the tub to lock in hydration while your pores are still open. For sleep-focused baths, wear comfortable pajamas immediately and avoid bright screens to maintain your relaxed state.

Final Thoughts for Lavender Bath Success

Creating the perfect lavender oil bath requires attention to detail but delivers extraordinary rewards for minimal effort. By following these evidence-based techniques—proper dilution, targeted recipes, and safety precautions—you transform a simple soak into a powerful wellness ritual. Start with the basic methods outlined here, then refine your approach based on your body’s unique responses. Track how different variations affect your stress levels, sleep quality, and muscle recovery to create your personalized lavender bath formula. With consistent practice, this affordable self-care ritual becomes your go-to solution for daily rejuvenation, proving that true relaxation is just a properly prepared bath away.

How to Use Bath Oil: Simple Tips for Soft Skin


Bath oil transforms your ordinary shower routine into a luxurious spa experience that deeply moisturizes your skin while calming your mind. Unlike bath bombs or bubble baths that wash away, bath oil leaves a protective layer on your skin that continues working long after you step out of the tub. Knowing exactly how to use bath oil properly ensures you receive optimal skin benefits while avoiding common pitfalls like slippery surfaces or ineffective application. When you master the right technique, you’ll notice dramatically softer skin, reduced dryness, and a profound sense of relaxation that regular baths simply can’t provide.

This guide reveals the precise methods for using bath oil effectively—whether you’re combating dry winter skin, seeking stress relief, or simply elevating your self-care ritual. You’ll learn the exact timing for adding oil, the perfect water temperature for maximum absorption, and professional techniques that make every drop count. By the end, you’ll have a repeatable process that turns your bathroom into a personal oasis of hydration and tranquility.

Measure Bath Oil Precisely for Your Tub Size

Using the correct amount of bath oil makes the difference between a perfectly balanced soak and a slippery mess. Too little oil provides minimal benefits, while too much creates excessive residue and wasted product.

Start with manufacturer recommendations as your baseline measurement. Most bath oils require just one to two capfuls (approximately 15-30ml) for a standard bathtub, but this varies significantly by product concentration. Check the label for specific guidance before pouring, as some highly concentrated formulas need only a teaspoon while lighter blends may require more.

Adjust for your specific tub dimensions by considering water volume. A small soaking tub might need only half the recommended amount, while a large whirlpool bath could require 50% more. If uncertain, begin with less oil—you can always add more during your bath if needed—but removing excess once it’s in the water proves nearly impossible.

Use proper measuring tools for accuracy rather than guessing. Keep a small measuring cup or shot glass near your tub specifically for bath oil. For capless bottles, pour oil into your palm first before transferring to the water—this prevents accidental over-pouring that often happens when squeezing directly into running water.

Add Bath Oil During Water Fill for Perfect Distribution

bath oil water dispersion demonstration

The timing of your bath oil addition dramatically impacts how evenly it disperses and how effectively it coats your skin throughout the soak.

Pour oil under running water when your tub reaches one-third capacity. The force of falling water breaks the oil into microscopic droplets that distribute evenly rather than floating on the surface. Adding oil to still water creates concentrated pools that only moisturize specific areas of your skin while leaving other sections unprotected.

Swirl the water gently for 30 seconds after adding oil to ensure thorough mixing. Use your hand in a circular motion to create a gentle vortex that pulls oil droplets throughout the tub. Avoid vigorous splashing, which introduces air bubbles that reduce the oil’s skin-coating effectiveness and creates excessive foam.

Test dispersion quality by observing how the oil interacts with the water. Properly distributed oil creates a slightly cloudy appearance throughout the tub rather than visible floating droplets or rainbow-like surface films. If you see distinct oil slicks, continue swirling gently until the mixture appears uniform.

Maintain Ideal Water Temperature for Oil Absorption

Water temperature directly affects how well your skin absorbs bath oil’s nourishing ingredients and how long you can comfortably soak.

Aim for 98-102°F (37-39°C) for optimal oil absorption and extended soaking time. This temperature range approximates body heat, allowing comfortable 20-30 minute soaks without cardiovascular strain. Warm water opens pores for better oil penetration while promoting blood circulation that enhances relaxation benefits.

Limit hot baths above 104°F to 10-15 minutes even with bath oil. Extremely hot water breaks down oil components faster, reducing effectiveness while increasing risks of dizziness or skin irritation. If you prefer hotter water, exit slowly to prevent blood pressure drops and rehydrate immediately afterward.

Add warm water periodically to maintain consistent temperature during your soak. As your body acclimates, what felt comfortably warm initially may start feeling cool. Adding small amounts of warm water preserves the therapeutic environment without significantly disturbing the oil distribution.

Prevent Slippery Surfaces After Bath Oil Use

bathroom non slip mat bath oil

Bath oil creates dramatically slicker surfaces than regular baths, requiring specific safety measures before, during, and after your soak.

Place non-slip mats both inside and outside your tub before filling with water. Standard bathroom rugs become dangerously slippery when wet, so invest in rubber-backed bath mats designed for oil use. Test their grip by stepping on them while wearing socks before your bath to ensure they won’t slide.

Enter and exit your tub slowly using stable handholds. Plant one foot firmly while holding the tub edge or a grab bar before attempting to stand or sit. Never rush these transitions—take 5-10 seconds for each movement to maintain balance on the oil-coated surface.

Wipe tub surfaces immediately after draining to prevent oil buildup. Use a degreaser or warm water with dish soap to clean the tub while surfaces are still wet. Pay special attention to the waterline where residue accumulates most heavily, as dried oil creates an increasingly slippery surface for future baths.

Layer Complementary Products for Enhanced Results

bath oil body lotion pairing skincare routine

Strategic product pairing with your bath oil creates a synergistic effect that amplifies hydration and relaxation benefits.

Apply oil before soaking if using exfoliants for maximum dead skin removal. Rub a small amount of bath oil onto dry skin before entering the tub, then use a gentle scrub to remove flakes. The oil helps the exfoliant glide smoothly while preventing micro-tears that dry exfoliation might cause.

Pair with compatible bath accessories that enhance rather than interfere with oil benefits. Bath pillows provide neck support for longer soaks without disrupting oil distribution, while bath trays keep books or drinks within reach without requiring you to leave the tub prematurely.

Follow with matching body products that reinforce the oil’s benefits post-soak. Apply body lotion or additional oil within three minutes of drying to lock in hydration while pores remain slightly open from the warm bath. Choose products with similar base ingredients to your bath oil for cumulative effects.

Avoid These Common Bath Oil Mistakes

Even small errors can significantly reduce your bath oil’s effectiveness or create safety hazards that ruin your experience.

Don’t add oil to completely filled tubs as this creates poor distribution. The limited water movement in a full tub prevents proper emulsification, resulting in floating oil pools that only moisturize where they contact your skin. Always add oil while water is still running for best results.

Never use bath oil with jetted tubs unless specifically labeled safe for hydrotherapy systems. Oil can accumulate in pipes and jets, causing clogs and expensive repairs. For whirlpool baths, choose water-soluble bath products designed for jetted systems instead.

Avoid combining multiple oil-based products that compete rather than complement each other. Using bath oil with oil-based bubble baths or bath salts creates excessive residue that’s difficult to clean and may cause skin irritation from product overload.

Store Bath Oil Properly for Long-Term Effectiveness

Correct storage preserves your bath oil’s potency and prevents premature spoilage that reduces its benefits.

Keep bottles in cool, dark places away from bathroom humidity and temperature fluctuations. While convenient, storing bath oil on your bathroom counter exposes it to steam and temperature changes that degrade quality. Instead, keep it in a bedroom closet or cabinet that maintains consistent conditions.

Seal containers tightly after each use to prevent oxidation that breaks down active ingredients. Wipe the bottle rim clean before closing to avoid contaminating the remaining product with water or residue that might introduce bacteria.

Check for spoilage signs like rancid odors, color changes, or separation that doesn’t remix with gentle shaking. Natural oils typically remain effective for 6-12 months after opening—write the opening date on the bottle to track freshness.

Mastering how to use bath oil properly transforms your bathing routine from basic hygiene to a therapeutic ritual that nourishes both skin and spirit. By measuring precisely, adding at the right moment, maintaining optimal temperature, and following through with proper safety and aftercare, you’ll experience dramatically softer skin and deeper relaxation with every soak. The small adjustments outlined in this guide make a significant difference in your results—turning what could be a messy, ineffective experience into a consistently luxurious practice you’ll look forward to daily. Start implementing these techniques today and feel the difference in your skin by tomorrow morning.

Itchy Hands and Feet After Bath? Causes & Relief Tips


That sudden, maddening itch that grips your hands and feet the moment you step out of the shower transforms what should be a relaxing ritual into pure frustration. If you’ve ever experienced intense tingling, stinging, or burning sensations on your skin immediately after bathing, you’re not alone—thousands struggle with this specific form of water-induced discomfort. This condition, medically known as aquagenic pruritus, targets your extremities precisely because they endure prolonged water exposure during washing routines. Understanding why itchy hands and feet after bath occurs and knowing how to address it can restore comfort to your daily routine without forcing you to skip essential hygiene practices.

Unlike typical skin reactions, this phenomenon creates deep-seated itching that scratching rarely relieves and leaves no visible marks on your skin. You’ll discover the surprising medical conditions sometimes linked to this symptom, learn practical adjustments to your bathing habits that provide immediate relief, and recognize when professional evaluation becomes essential for your health and comfort.

Identify Your Specific Aquagenic Pruritus Pattern

Track Symptoms for Accurate Diagnosis

Pinpointing your exact symptom pattern provides crucial information for effective treatment. Itchy hands and feet after bath typically begin within minutes of water contact and follow a predictable timeline—most people experience symptoms for 10 minutes to two hours post-bathing. Document whether your itching feels like deep stinging similar to insect bites, persistent “pins and needles” sensations, or intense burning that disrupts your ability to focus on tasks. Notice if symptoms intensify when specific areas like palms or soles receive direct water flow during your shower routine.

Record your symptom timeline in a simple log:
Onset time: How many minutes after water contact does itching begin?
Peak intensity: When does the itching feel most severe?
Duration: How long until symptoms completely subside?
Triggers: Does hot water worsen symptoms compared to lukewarm?

This tracking helps distinguish aquagenic pruritus from other skin conditions and provides your healthcare provider with valuable diagnostic information without requiring complex testing.

Recognize the Absence of Visible Skin Changes

Crucially, true aquagenic pruritus produces no visible skin reactions—this key distinction separates it from allergic responses or dermatitis. If you notice redness, hives, swelling, or rashes accompanying your itchy hands and feet after bath, another condition like contact dermatitis may be responsible. Aquagenic pruritus creates intense internal sensations while leaving your skin appearance completely normal, which often confuses sufferers who expect visible signs matching their discomfort.

This invisible nature makes the condition particularly frustrating—you can’t show anyone the problem, yet the itching feels intensely real. Understanding this characteristic prevents wasted effort on topical treatments designed for visible skin conditions, which generally provide little relief for aquagenic pruritus since the mechanism differs fundamentally from inflammatory skin disorders.

Modify Bathing Practices for Instant Symptom Reduction

lukewarm shower water temperature scale

Optimize Water Temperature and Exposure Time

Adjusting two simple factors in your bathing routine often provides immediate relief from itchy hands and feet after bath symptoms. Start by testing different water temperatures to identify your personal tolerance threshold—many sufferers find lukewarm water between 90-95°F (32-35°C) triggers fewer symptoms than hot showers. Reduce your total bathing time by 25-50%, aiming for 5-7 minute showers instead of 10-15 minute sessions, as prolonged water exposure intensifies symptoms for most people.

Implement these practical adjustments today:
Pre-rinse strategy: Briefly wet your hands and feet first before full-body exposure
Targeted washing: Wash extremities last to minimize their water contact duration
Temperature transition: Gradually decrease water temperature during your shower
Post-bath protocol: Immediately towel-dry hands and feet using gentle patting motions

These modifications require no special products or equipment yet often reduce symptom severity by 30-50% within just a few bathing sessions, making them essential first steps before pursuing medical treatments.

Switch to Gentle Cleansing Products

Harsh soaps and exfoliating tools exacerbate itchy hands and feet after bath by compromising your skin’s natural barrier. Replace traditional bar soaps with fragrance-free, pH-balanced liquid cleansers specifically formulated for sensitive skin. Avoid anything containing sulfates, alcohol, or artificial fragrances that strip natural oils and increase skin sensitivity to water triggers. During bathing, use only your hands for cleansing—skip loofahs, washcloths, or scrubbing brushes that create microscopic skin abrasions.

Apply these product guidelines:
Cleanser selection: Choose hypoallergenic options with ceramides or colloidal oatmeal
Application method: Lather cleanser on less sensitive areas first before minimal hand/foot contact
Rinse technique: Use lower water pressure when rinsing extremities
Moisturizing timing: Apply fragrance-free moisturizer within 3 minutes of bathing while skin remains slightly damp

These changes protect your skin’s protective barrier, reducing nerve ending exposure to water triggers that cause aquagenic pruritus symptoms.

Address Underlying Medical Causes Promptly

Screen for Serious Blood and Liver Conditions

Itchy hands and feet after bath sometimes signals underlying health issues requiring medical intervention. Polycythemia vera—a blood cancer causing excessive red blood cell production—frequently presents with aquagenic pruritus as an early symptom, particularly after water exposure. Similarly, hepatitis C infection has strong medical documentation linking it to water-induced itching through liver function disruption. These connections make professional evaluation essential rather than optional when symptoms persist.

Consult your healthcare provider immediately if you experience:
Additional symptoms: Unexplained fatigue, abdominal discomfort, or easy bruising
Symptom progression: Increasing severity or duration beyond two hours
No improvement: Lack of relief after implementing bathing modifications
Family history: Blood disorders or liver conditions in close relatives

Early detection of these underlying conditions significantly improves treatment outcomes, making medical consultation critical when home remedies fail to provide adequate relief.

Implement Targeted Medical Treatments

antihistamine medication types comparison chart

When self-care adjustments prove insufficient, specific medical treatments effectively manage itchy hands and feet after bath symptoms. Antihistamines represent the first-line pharmaceutical approach, with many patients achieving significant relief through preemptive dosing 30-60 minutes before bathing. Non-sedating options like cetirizine work well for daytime showers, while sedating varieties like hydroxyzine help prevent nighttime symptom recurrence.

Your healthcare provider might recommend:
Antihistamine rotation: Trying different types to find your most effective option
Pre-bath dosing schedule: Timing medication to peak effectiveness during water exposure
Underlying condition treatment: Specialized therapies if polycythemia vera or hepatitis C is diagnosed
Medication review: Identifying potential triggers like certain antidepressants or antimalarials

Do not attempt self-medication—work with your provider to determine the safest, most effective treatment plan based on your complete medical history and symptom pattern.

Prevent Long-Term Complications Through Proactive Management

ceramide moisturizer application hands

Establish Daily Skin Protection Habits

Maintaining skin barrier integrity between bathing episodes reduces overall sensitivity to water triggers. Apply fragrance-free moisturizers containing ceramides or hyaluronic acid twice daily—morning and evening—to create a protective layer that minimizes nerve ending exposure. Choose cotton gloves for household chores to avoid additional chemical triggers that compound your bathing-related symptoms. Stay consistently hydrated by drinking adequate water throughout the day, as internal hydration supports skin resilience against external triggers.

Integrate these protective measures:
Moisturizing routine: Apply immediately after hand washing and before bed
Fabric choices: Wear soft, natural fibers that minimize skin irritation
Environmental control: Use humidifiers during dry seasons to prevent skin dehydration
Trigger journaling: Note connections between daily activities and symptom severity

These habits create cumulative protection that gradually reduces your skin’s reactivity to water exposure over time.

Know When to Escalate Medical Care

Persistent itchy hands and feet after bath symptoms that disrupt your sleep, work, or mental health warrant specialist consultation. If over-the-counter antihistamines provide less than 50% symptom reduction after two weeks of proper use, request referral to a dermatologist with experience in rare pruritus conditions. Seek immediate evaluation if you develop additional symptoms like unexplained weight loss, night sweats, or changes in urine color that might indicate underlying systemic conditions.

Never ignore these warning signs:
– Symptoms lasting longer than two hours consistently
– Itching that spreads beyond hands and feet to other body areas
– Visible skin changes accompanying the itching sensation
– Significant impact on your ability to maintain basic hygiene routines

Early specialist intervention often identifies treatable causes and prevents unnecessary suffering that could otherwise persist for months or years.

Living with itchy hands and feet after bath doesn’t mean enduring daily discomfort without solutions. By implementing precise bathing modifications, recognizing when medical evaluation becomes essential, and establishing protective skin care habits, you can reclaim comfortable bathing routines. Remember that effective management often requires combining immediate self-care strategies with targeted medical treatments when necessary—this dual approach provides the most comprehensive relief for aquagenic pruritus symptoms. Take action today by tracking your symptoms and consulting your healthcare provider to develop a personalized plan that stops the itching and restores peace to your post-bath routine.

« Older posts Newer posts »