Have you ever struggled to find a bathing suit that fits your body perfectly? You’re not alone—nearly 70% of women report difficulty finding ready-made swimwear that accommodates their unique shape. Learning how to sew a bathing suit solves this common frustration by giving you complete control over fit, style, and comfort. Unlike store-bought options, handmade swimwear can be tailored to your exact measurements, feature your favorite colors and patterns, and include specialized support where you need it most. The process may seem intimidating at first glance, but with the right techniques and materials, even intermediate sewists can create professional-quality swimwear that withstands countless dips in the pool.
Sewing your own bathing suit offers benefits beyond perfect fit—it’s also more sustainable and cost-effective in the long run. High-quality ready-to-wear swimwear often costs $80-$150 per piece, while sewing your own uses comparable materials for about half that price. Plus, you’ll avoid contributing to the fashion industry’s staggering waste problem, as handmade garments typically last longer and can be repaired when needed. This guide cuts through the confusion surrounding swimwear construction by breaking down the process into manageable steps, highlighting the specialized techniques that transform basic sewing skills into professional results. Whether you’re dreaming of a classic one-piece, a trendy swim skirt, or a custom bikini, this guide gives you everything needed to create swimwear that looks store-bought but fits uniquely you.
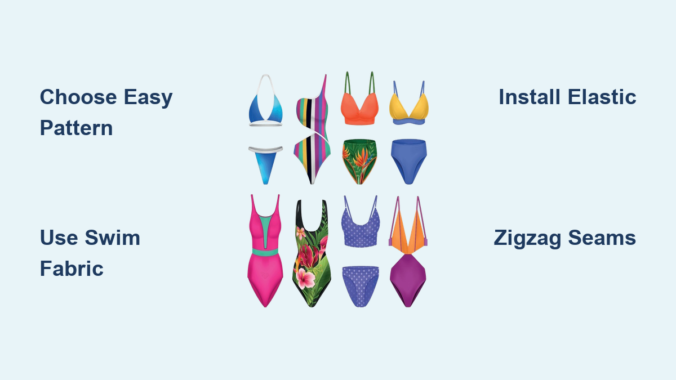
Choose the Right Bathing Suit Pattern for Your Skill Level
Selecting an appropriate pattern makes or breaks your first swimwear project. Beginners should avoid complicated designs with multiple small pieces and instead focus on simple one-piece patterns labeled “easy” or “beginner-friendly.” Look for patterns with minimal cutting lines, standard strap configurations, and no intricate cutouts or tie closures, as these features significantly increase construction difficulty. A manageable beginner pattern typically contains eight or fewer pattern pieces, allowing you to master fundamental techniques before tackling more complex designs.
When evaluating patterns, check whether they include multiple cup size options within the same envelope. This feature is crucial for achieving proper bust support without needing to trace multiple size variations. Patterns with built-in shelf bras offer more structure but add complexity—start with unlined designs until you gain confidence with elastic installation and seam construction specific to stretch fabrics. For your very first project, consider a swim skirt paired with a simple tank top style, as this two-piece approach allows you to focus on one challenging component at a time rather than tackling an entire one-piece simultaneously.
Gather Essential Swimwear-Specific Sewing Supplies
Your standard apparel sewing tools won’t cut it for bathing suit construction—swimwear requires specialized supplies that accommodate stretch fabrics and withstand water exposure. Start with a sewing machine capable of zigzag or overlock stitching, as these stitches maintain integrity when stretched. Pair this with stretch needles (size 75/11 or 90/14) specifically designed for knit fabrics, as universal needles often skip stitches or damage the tight knit construction of swimwear fabrics.
The most critical supplies you’ll need include:
- Swimwear-specific elastic that resists chlorine and saltwater deterioration (1/4 inch for leg openings, 3/8-1/2 inch for waistbands)
- Polyester thread formulated for chlorine resistance
- Fabric clips instead of pins to prevent permanent holes in slippery swimwear fabric
- Sharp fabric shears dedicated solely to cutting swimwear fabric
- Water-soluble fabric marker for transferring pattern markings
- Rotary cutter and mat for precision cutting without stretching fabric
Investing in these specialized tools pays dividends in the durability and professional appearance of your finished suit. Attempting to substitute regular elastic or all-purpose thread typically results in rapid deterioration after minimal water exposure.
Select Chlorine-Resistant Swimwear Fabric That Won’t Turn See-Through

Choosing the right fabric determines both the appearance and longevity of your handmade bathing suit. Quality swimwear fabric consists of 80% polyester or nylon with 20% Lycra or elastane, engineered specifically to maintain shape, resist sun and chemical degradation, and dry quickly. When shopping, always request swatches to test three critical properties:
- Recovery: Stretch a corner of the fabric and release it—quality fabric snaps back immediately without sagging
- Opacity: Stretch the fabric over a dark surface to check for transparency when pulled tight
- Weight: Opt for 8-10 oz fabric for better structure and coverage, especially in lighter colors
Polyester-Lycra blends offer superior chlorine resistance compared to nylon, making them ideal for frequent pool use, while nylon blends provide silkier texture and brighter colors but may degrade faster with repeated chemical exposure. Never skip the opacity test—many inexpensive swimwear fabrics become embarrassingly transparent when wet or stretched, regardless of their appearance when dry.
Cut Your Swim Fabric Without Distorting the Pieces

Precision cutting prevents the fit issues that plague many homemade bathing suits. Unlike woven fabrics, swimwear material stretches easily during cutting, so follow these critical techniques:
- Cut one layer at a time rather than folding fabric (prevents shifting and stretching)
- Use sharp shears or a fresh rotary blade—dull tools drag and distort stretch fabric
- Keep scissors flat against the cutting surface rather than lifting the fabric
- Cut notches carefully, extending beyond the pattern line for clear identification
After cutting, immediately transfer all pattern markings using a water-soluble marker. Mark elastic placement lines, cup points, strap connections, and any other construction guides—these temporary marks disappear after washing but provide essential guidance during assembly. Pro tip: Place cut pieces on a flat surface to verify they match the pattern shape before proceeding to sewing.
Install Elastic Like a Professional Swimwear Maker
Proper elastic installation separates homemade-looking suits from professional results. Swim-specific elastic differs from apparel elastic in its resistance to chlorine and saltwater, so never substitute regular elastic. Follow these steps for perfectly applied elastic:
- Measure elastic against pattern piece or body measurement, adding seam allowances
- Cut elastic at a slight angle across the width (not straight across) to prevent rolling
- Pin elastic to fabric edge with right sides together, stretching both evenly as you sew
- Use a zigzag stitch while maintaining consistent tension—practice on scraps first
Critical warning: Too much stretching creates puckered, uncomfortable edges, while insufficient stretching results in loose, baggy areas that gap when wet. For leg openings, consider clear elastic sewn into a channel for superior support without visible stitching—this technique works especially well for larger cup sizes requiring more structure.
Construct Seams That Stretch Without Breaking

Standard straight stitches fail on swimwear—they’ll pop when stretched. Instead, master these specialized seam techniques:
- Zigzag stitch: Set to medium width (2.5-4mm) and length (1.5-2.5mm) for balanced, stretch-friendly seams
- Overlock stitch: Use if your machine has this capability, or finish edges with a narrow zigzag before seaming
- Twin needle hem: Creates professional double-stitched hems that maintain stretch
When sewing curved seams (common around cups and side panels), go slowly and use plenty of clips to hold pieces together. Clip seam allowances occasionally (not through stitching lines) to allow fabric to lay flat without bunching. Expert note: Basting curved seams first prevents shifting during final construction, saving time and frustration.
Fix Common Fitting Problems Before Finalizing Your Suit
Even careful construction requires fitting adjustments due to swim fabric’s unique properties. Try on your nearly-finished suit and move through typical activities—sitting, bending, reaching—to identify issues:
- Leg openings that gap: Remove small amounts of fabric from crotch area or add clear elastic along seam
- Straps that slip off: Check if torso band is too loose (causing suit to shift downward) or strap placement too wide
- Cup separation or spillage: Add power mesh lining for light support or adjust foam cup positioning
Time-saving shortcut: Make fitting adjustments before adding final elastic and finishing seams—this avoids having to rip out complex stitch work later. Remember that swim fabric stretches more when wet, so your dry-fit should feel snug but not uncomfortably tight.
Care for Your Handmade Bathing Suit to Extend Its Life
Protect your sewing investment with proper maintenance that preserves elasticity and color:
- Rinse thoroughly with cool water after each wear to remove chlorine, salt, and sunscreen
- Lay flat to dry away from direct sunlight (never hang, as this stretches shoulder straps)
- Machine wash only when necessary using gentle cycle, cool water, and mild detergent
- Never use fabric softeners—they degrade elastic and reduce water-wicking properties
- Rotate between multiple suits to allow 24 hours of drying time between wearings
Following these care instructions doubles or triples the lifespan of handmade swimwear compared to improper maintenance. Store suits flat or gently rolled rather than hung to maintain their shape season after season.
Creating your own bathing suit delivers the perfect combination of custom fit, personal style, and cost savings that ready-made options simply can’t match. Start with a simple design to master the specialized techniques of swimwear construction, then gradually tackle more complex patterns as your confidence grows. With practice, you’ll develop a wardrobe of handmade swimsuits that fit flawlessly, reflect your unique personality, and withstand countless seasons of wear—proving that learning how to sew a bathing suit is one of the most rewarding sewing skills you can master.
Leave a Reply