Nothing disrupts your daily routine like a leaky bathtub faucet that drips relentlessly or one that won’t turn off completely. When your bathtub faucet starts malfunctioning, replacing it becomes necessary to prevent water damage, reduce wasted water, and restore proper function to your bathing space. Many homeowners hesitate to tackle this project, assuming it requires professional plumbing skills, but with the right approach, you can successfully replace your bathtub faucet yourself. This guide walks you through the entire process from identifying your faucet type to completing the installation, helping you save money while gaining confidence in basic home maintenance.
Determine Your Bathtub Faucet Type Before Starting
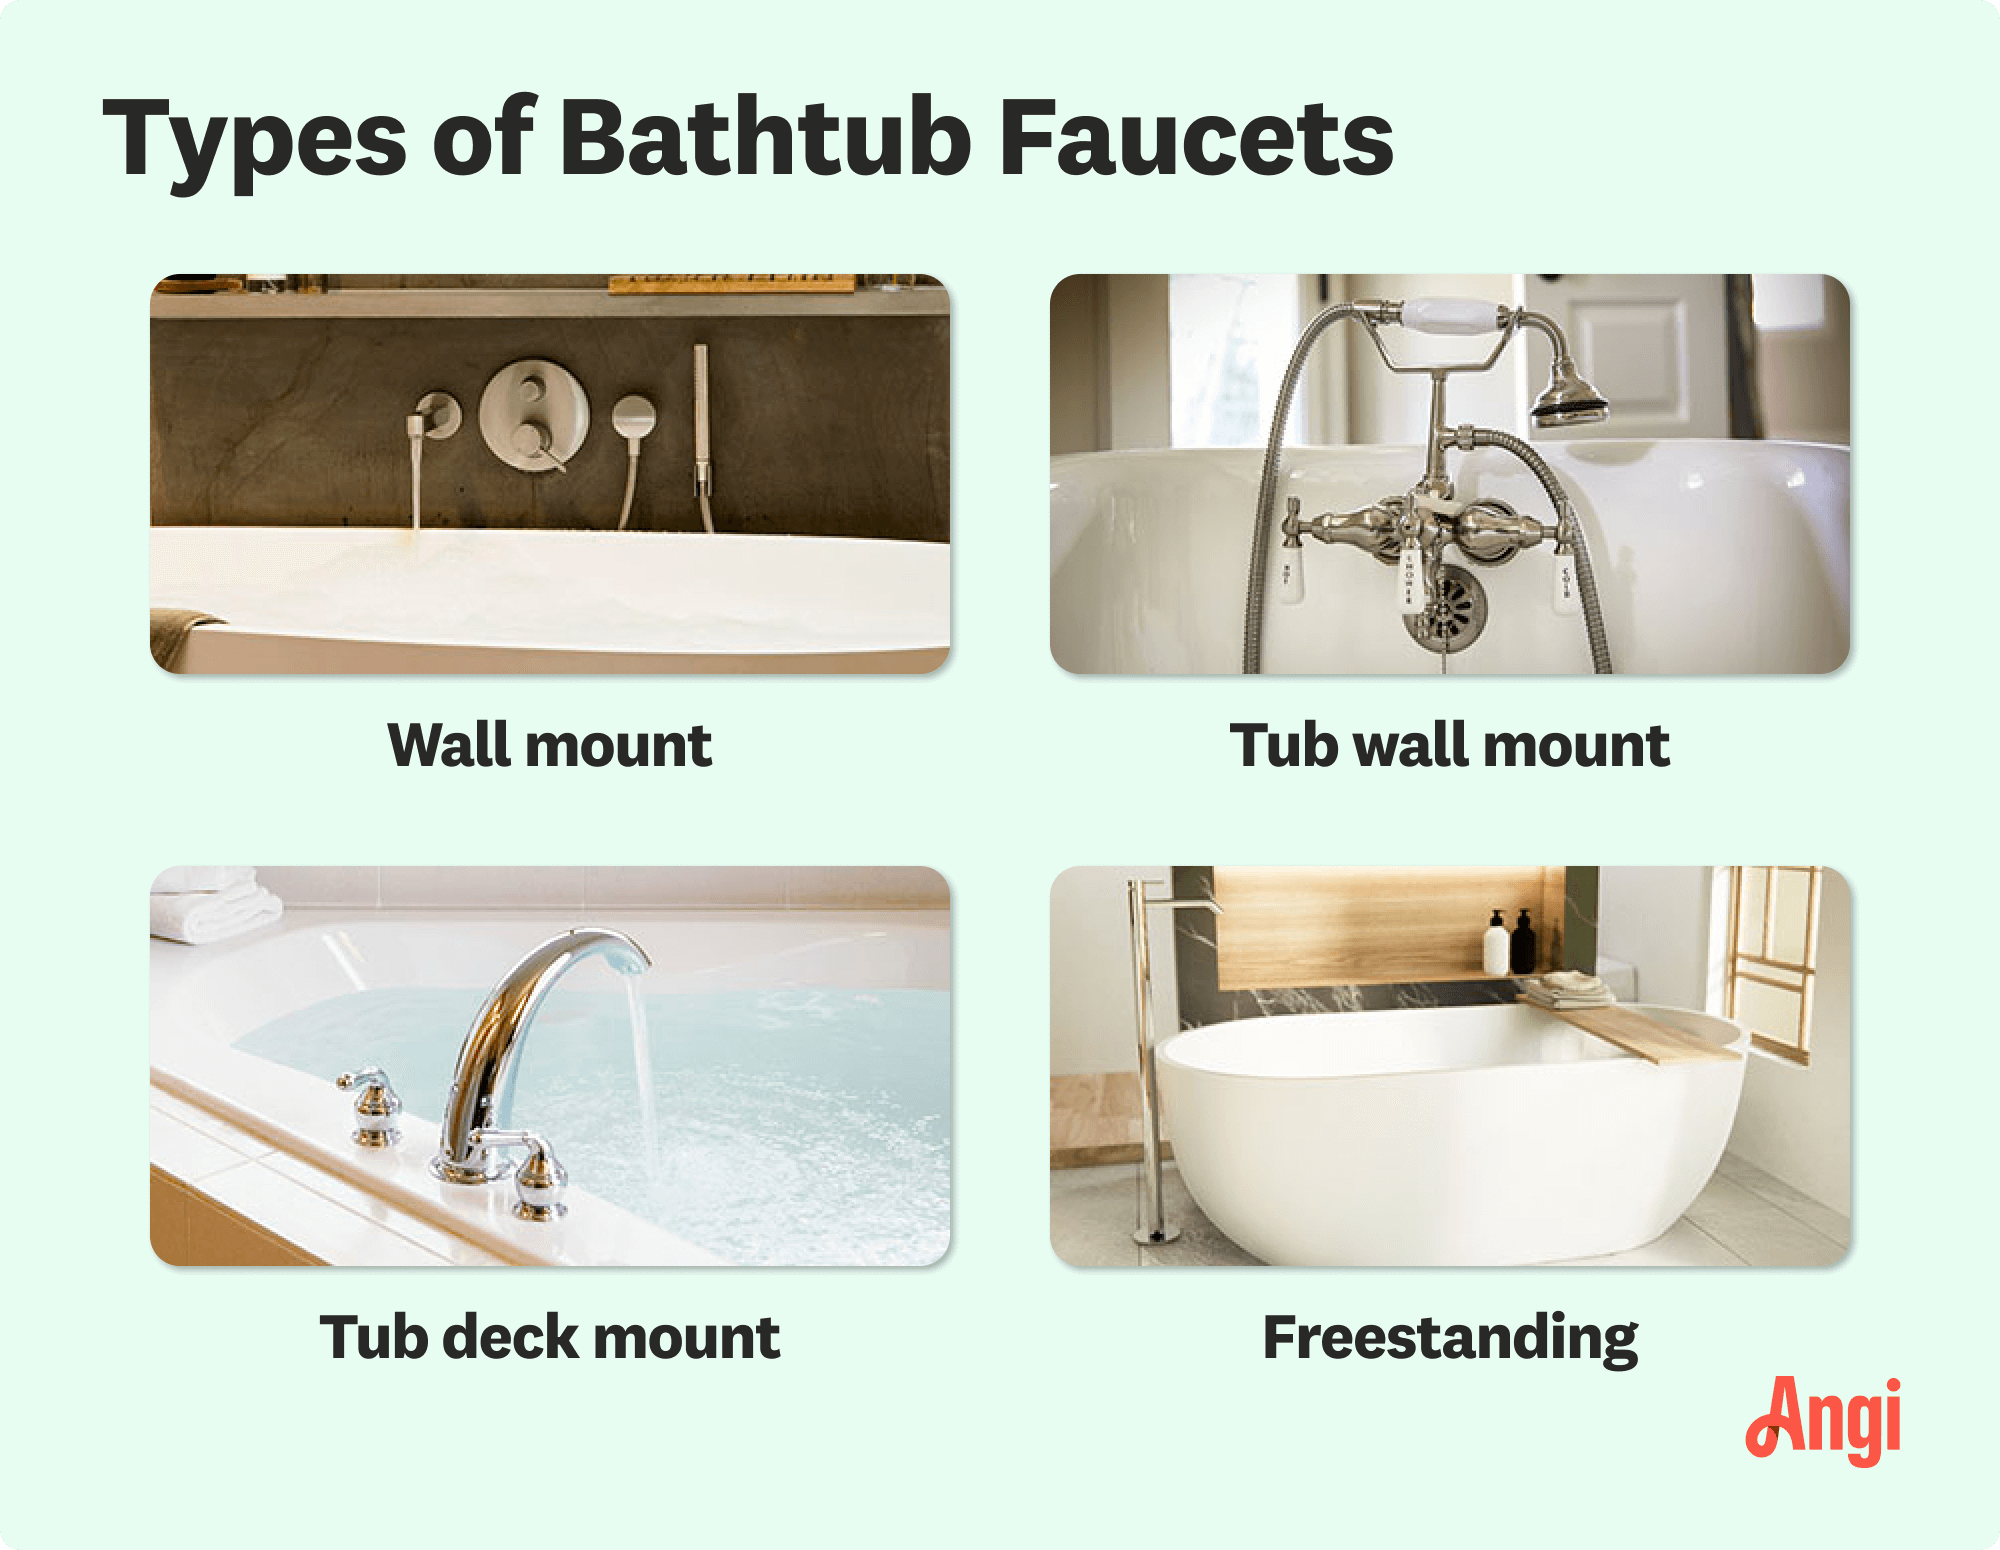
Before purchasing replacement parts or beginning disassembly, you must identify your specific faucet configuration. Bathtub faucets come in several common types that require different replacement approaches.
Identify Your Specific Faucet Configuration
Most bathtub faucets fall into one of three categories, each requiring different replacement techniques:
- Three-handle faucets: Separate hot and cold handles with a diverter in the center
- Two-handle faucets: Hot and cold handles with the spout in between
- Single-handle faucets: One control for temperature and flow
Examine your existing setup carefully. Notice how the handles operate and where the spout is positioned. The valve assembly behind the wall differs significantly between these types, so proper identification prevents purchasing incorrect replacement parts.
Why Matching Faucet Types Matters for Successful Replacement
Using incompatible replacement parts creates installation problems and potential leaks. The valve body, mounting hardware, and plumbing connections vary between faucet types. For example, converting from a three-handle to a single-handle system requires different rough-in plumbing that may necessitate wall access.
Essential Tools and Materials for Faucet Replacement

Gather These Critical Tools Before Disassembly
Having all necessary tools ready prevents mid-project delays when you discover you’re missing a specific wrench or screwdriver. For most bathtub faucet replacements, you’ll need:
- Adjustable wrench or basin wrench
- Screwdrivers (flathead and Phillips)
- Plumber’s tape (Teflon tape)
- Plumber’s putty or silicone sealant
- Bucket and towels for water catchment
- Safety glasses and work gloves
- Flashlight for better visibility
Selecting the Correct Replacement Faucet Components
When purchasing your new faucet, ensure compatibility with your existing plumbing:
- Match the valve type to your current configuration
- Verify the rough-in dimensions match your wall plumbing
- Check spout reach to ensure proper water delivery into the tub
- Confirm handle style and finish match your bathroom aesthetic
Shut Off Water Supply and Prepare Work Area
Locate and Close Main Water Valves Properly
Before touching any plumbing components, shut off the water supply:
- Find your home’s main water shut-off valve, typically in the basement or near your water meter
- Turn the valve clockwise until fully closed
- Open the lowest faucet in your home to drain remaining water pressure
- Open your bathtub faucet to relieve pressure in those lines
Never skip this step—working on plumbing without shutting off water can cause significant flooding and water damage.
Protect Your Bathtub Surface During Replacement
Place towels or a rubber mat in the bottom of your tub to prevent scratches from tools or hardware. Cover nearby surfaces with drop cloths to catch any debris or water that might escape during disassembly.
Remove Existing Bathtub Faucet Components
Disassemble Old Faucet Handles Correctly
Most faucet handles conceal mounting screws beneath decorative caps:
- Gently pry off the decorative cap using a flathead screwdriver wrapped in tape
- Remove the mounting screw underneath
- Carefully wiggle and pull the handle straight up to remove it
- If stuck, use penetrating oil and let it sit for 15 minutes before trying again
Warning: Forcing a handle can break internal components, making removal more difficult.
Extract Valve Stems and Trim Components
After removing handles, you’ll access the valve stems:
- Unscrew the packing nut with an adjustable wrench
- Pull out the valve stem assembly
- Remove any remaining trim rings or escutcheons
- Clean old putty or sealant from mounting surfaces
Take photos during disassembly to help with reassembly later. Organize removed parts in the order they came off.
Install New Bathtub Faucet Components
Position and Secure New Valve Body Properly
With old components removed:
- Apply plumber’s putty or silicone sealant around the mounting flange
- Insert the new valve body into position
- Secure from behind with mounting nuts, tightening evenly
- Ensure the valve is straight and properly aligned before final tightening
Connect New Spout and Diverter Mechanisms
For spout installation:
- Apply Teflon tape to threaded connections
- Hand-tighten the spout before using a wrench for final tightening
- For diverter tub spouts, ensure the diverter mechanism aligns correctly
- Test for proper operation before proceeding
Complete Faucet Installation and Test System
Attach Handles and Trim Components Correctly
When installing new handles:
- Position handles according to manufacturer instructions
- Insert mounting screws and tighten securely but not excessively
- Align handles properly before securing decorative caps
- Ensure smooth operation through full range of motion
Test for Leaks and Proper Functionality
After completing installation:
- Slowly turn water supply back on
- Check all connections for leaks under pressure
- Test hot and cold water operation
- Verify proper water flow through spout and showerhead
- Adjust as needed before finalizing installation
Pro Tip: Place a paper towel near each connection point to detect slow leaks that might not be immediately visible.
Troubleshooting Common Faucet Replacement Issues
Fixing Leaks at Connection Points
If you discover leaks after installation:
- For minor drips, try tightening connections an additional 1/8 turn
- If leaking continues, disassemble and check for proper Teflon tape application
- Ensure O-rings are properly seated and undamaged
- Replace any damaged washers or seals before reassembling
Solving Handle Operation Problems
If handles don’t operate smoothly:
- Check for proper alignment of valve stem components
- Ensure mounting hardware isn’t over-tightened
- Verify internal cartridge or stem assembly is correctly installed
- Lubricate moving parts with plumber’s grease if recommended
Maintain Your New Bathtub Faucet for Longevity
Regular Cleaning Practices to Prevent Buildup
Extend your faucet’s life by:
- Wiping down after each use to prevent mineral deposits
- Using vinegar solution monthly to dissolve hard water buildup
- Avoiding abrasive cleaners that damage finish
- Checking for leaks weekly during the first month
Schedule Preventative Maintenance Checks
Establish a maintenance routine:
- Inspect connections quarterly for signs of moisture
- Tighten loose handles before they cause damage
- Replace worn washers at first sign of dripping
- Consider professional inspection every 2-3 years
When to Call a Professional Plumber Instead
Recognize Complex Situations Beyond DIY
While many faucet replacements are manageable DIY projects, certain scenarios warrant professional help:
- If you discover significant corrosion in plumbing lines
- When wall access is required and you’re uncomfortable with drywall repair
- If your home has older galvanized pipes that may break during disassembly
- When dealing with specialized or antique faucet configurations
Cost-Benefit Analysis of DIY vs Professional Installation
Consider both time and potential risks:
- Simple replacements may take 2-4 hours for DIYers
- Professional installation typically costs $150-$400
- Factor in potential water damage from mistakes
- Weigh your skill level against project complexity
Replacing your bathtub faucet yourself can save significant money while giving you valuable home maintenance experience. By following these steps carefully and preparing thoroughly, you’ll successfully complete this project with confidence. Remember to take your time during disassembly and reassembly—rushing leads to mistakes that create more work later. With your new faucet installed, you’ll enjoy reliable performance and the satisfaction of having completed a meaningful home improvement project.
Leave a Reply