Your fibreglass bath develops an ugly hairline crack near the drain after years of reliable service. You dread the cost of replacement—but what if you could fix it yourself for under $50? Fibreglass bath repairs are surprisingly achievable with the right approach, saving you hundreds compared to professional reglazing or replacement. Most common damage like cracks, chips, and surface wear stems from daily use, temperature shifts, or accidental impacts. This guide cuts through the confusion to deliver a practical, step-by-step repair process using accessible materials. You’ll learn exactly how to assess damage severity, select appropriate repair methods, and execute professional-looking fixes that restore both function and appearance—without requiring advanced skills.
Fibreglass baths are vulnerable to specific failure points that demand targeted solutions. Unlike porcelain enamel, fibreglass surfaces can develop stress fractures from flexing, hairline cracks from thermal shock, or deep gouges from dropped objects. The good news? Minor-to-moderate damage rarely compromises structural integrity and responds well to DIY repair when addressed promptly. Ignoring these issues allows moisture penetration that accelerates deterioration beneath the surface. By mastering the techniques in this guide, you’ll extend your bath’s lifespan significantly while avoiding unnecessary replacement costs. Let’s transform that damaged fixture back into a smooth, seamless centerpiece for your bathroom.
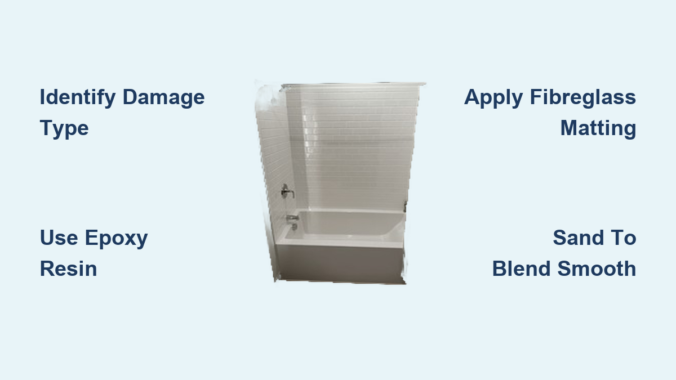
Identifying Your Fibreglass Bath Damage Type

Before grabbing tools, accurately diagnosing your bath’s damage is critical—repair methods vary drastically based on the problem. Misidentifying a stress fracture as a simple surface scratch leads to failed repairs that worsen over time. Run your fingers over the affected area: does it feel like a shallow scratch or a deep groove? Does light catch a hairline crack, or is there visible bubbling beneath the surface? These tactile clues separate cosmetic flaws from structural threats.
Hairline Cracks vs. Stress Fractures: What’s Really Wrong
Hairline cracks appear as thin, spiderweb-like lines barely visible to the naked eye, often radiating from drain fittings or corners where stress concentrates. They stay superficial without moisture seepage underneath. Stress fractures run deeper, feeling like ridges under your fingernail and potentially leaking water when filled. Pro Tip: Dab the area with acetone on a cotton swab—discoloration indicates moisture ingress, confirming a stress fracture needing structural repair. Never treat these as surface scratches; they require fibreglass matting reinforcement.
When Delamination Means Professional Help Is Needed
Delamination shows as raised, spongy blisters where the gelcoat separates from the fibreglass substrate. Press firmly: if it flexes like a drum skin or emits a hollow sound, moisture has compromised the core structure. Critical Warning: Attempting DIY repair on delaminated areas often spreads damage. Small blisters under 2 inches might respond to epoxy injection, but larger areas require professional stripping and re-laminating. If water pools beneath the surface when pressed, skip DIY and consult a specialist—this isn’t a weekend fix.
Essential Tools and Materials for Fibreglass Bath Repair

Gathering the right supplies prevents mid-repair frustration and ensures adhesion. Generic household tools won’t cut it—fibreglass demands specific abrasives and resins. Skip the dollar-store sandpaper; improper grit causes pitting that ruins your finish. Most critical: never substitute polyester resin for epoxy in bath repairs. Water exposure causes polyester to degrade, leading to yellowing and re-cracking within months.
Must-Have Repair Kit Components
- 80-400 grit sandpaper assortment: Start coarse (80 grit) for damage excavation, finish fine (400 grit) for seamless blending
- Marine-grade epoxy resin kit: Specifically formulated for wet environments (not polyester resin!)
- Fibreglass matting: 1.5 oz woven cloth for structural cracks, chopped strand mat for chips
- Acetone in spray bottle: For final degreasing (avoid paper towels—lint ruins adhesion)
- Silicone caulk: To seal perimeter edges after repair cures
Safety Gear You Can’t Skip
Working with epoxy requires serious protection:
– Vapor-rated respirator mask (N95 filters won’t block fumes)
– Nitrile gloves (latex dissolves in resin)
– Eye protection with side shields (resin splashes cause corneal damage)
– Ventilation fan blowing outward through an open window
Common Mistake: Skipping acetone cleaning after sanding. Oils from your hands prevent epoxy bonding, guaranteeing repair failure. Always wipe with acetone immediately before applying resin.
Step-by-Step Fibreglass Bath Repair Process
This sequence works for 90% of common damage—cracks, chips, and small holes. For stress fractures over 3 inches or delamination, stop after Step 2 and consult a professional. Total repair time: 4-6 hours active work plus 24-hour cure time. Difficulty: Moderate (requires careful sanding but no specialized skills).
Prepare the Damaged Area for Repair
Remove all contaminants with acetone on a lint-free cloth. Sand outward from the damage zone using 80-grit paper until you feel no edges—create a 2-inch feathered slope around cracks. For holes or deep chips, undercut the edges slightly with a utility knife to lock in new material. Vacuum dust thoroughly, then wipe again with acetone. Visual Cue: The area should feel uniformly smooth like fine sandpaper, not jagged. If light catches ridges, keep sanding.
Apply Fibreglass Matting for Structural Repairs
Mix epoxy resin per kit instructions (typically 2:1 resin-to-hardener). For cracks deeper than 1/16 inch:
1. Brush a thin epoxy layer into the sanded area
2. Press fibreglass matting into wet resin, avoiding wrinkles
3. Saturate matting completely until transparent
4. Add second matting layer if repairing holes
Pro Tip: Use a plastic spreader to force resin into matting—bubbles weaken the repair. Let cure 2 hours before proceeding.
Fill and Smooth the Surface
Once matting sets, mix epoxy putty (included in most kits) to peanut butter consistency. Apply with a flexible spreader, overfilling slightly. For non-structural scratches, skip matting and apply putty directly. Wait 15 minutes until “tacky,” then smooth with a spreader dipped in soapy water. Key Technique: Hold the spreader at 30 degrees and pull—not push—to avoid gouging. Cure 4 hours.
Final Sanding and Blending

Progress through grits: 120 → 220 → 400. Sand in circular motions, checking frequently against surrounding surface. Stop when you feel no lip—over-sanding exposes matting. Wipe with acetone. Troubleshooting: If the repair feels rough after 400-grit, you didn’t fill deeply enough; reapply putty. Never sand below 400 grit before priming.
Critical Success Factors for Long-Lasting Repairs
Skipping these steps causes 80% of DIY repair failures. Epoxy won’t bond to contaminants, and improper curing invites moisture intrusion. Your repair’s lifespan depends entirely on execution here—not the product quality.
Why Ventilation Matters More Than You Think
Epoxy fumes inhibit curing in humid environments. Work with windows open and a fan blowing air outward for 24 hours post-repair. Below 60°F or above 85% humidity, curing slows dramatically—resin stays tacky for days, attracting dust. Urgent Consequence: Rushing this step traps moisture that reactivates old damage within weeks.
Matching Your Bath’s Finish Like a Pro
Most kits include white gelcoat, but baths yellow with age. Test-cure samples on scrap cardboard first. For off-white baths:
– Add a drop of brown pigment to epoxy
– Or mix 90% gelcoat + 10% white acrylic paint
Time-Saving Shortcut: Use a toothpick to apply tiny color samples inside the drain plug hole—cures in 2 hours for perfect matching.
When to Call a Professional Instead
Some damage exceeds DIY capabilities. Attempting complex repairs wastes money and worsens problems. Stop immediately if you see:
– Delamination covering >10% of the bath surface
– Cracks intersecting at drain or overflow fittings
– Previous repairs that feel spongy or discolored
Professional reglazing costs $300-$600 but includes structural assessment and warranty. For extensive damage, replacement ($500-$1,200) may be more economical long-term. Prevention Tip: Place non-slip mats in the tub—dropped bottles cause 60% of repairable chips.
Final Note: A properly executed fibreglass bath repair lasts 5-10 years with basic care. Avoid abrasive cleaners and reapply a thin epoxy topcoat annually to high-traffic zones. For hairline cracks under 2 inches, this method succeeds 9 times out of 10—saving you $400+ versus replacement. Bookmark this guide for future touch-ups: minor maintenance prevents major damage. If your repair holds after the 24-hour water test, you’ve just mastered a valuable home skill that pays for itself instantly.
Leave a Reply