That stubborn bath stopper won’t budge, and you’re wondering whether to call a plumber or tackle it yourself. The good news is that most bath stoppers can be removed with basic tools and a little patience, saving you both time and money. Whether your stopper is clogged with hair, corroded from years of use, or simply needs replacement, understanding the right approach makes all the difference. This guide walks you through identifying your stopper type, gathering the right tools, and removing it safely—without damaging your tub or plumbing.
Before you begin, know that success depends entirely on identifying your specific stopper type. Bath stoppers come in several designs, each requiring a different removal method. Using the wrong technique can strip screws, break delicate components, or leave you with a drain that won’t seal properly afterward. Take a few minutes to examine your stopper first, then follow the step-by-step instructions for your particular model.
Identify Your Bath Stopper Type

Different stoppers operate through distinct mechanisms, and recognizing yours before attempting removal prevents costly mistakes. The six most common types each present unique visual and operational characteristics that make identification straightforward once you know what to look for.
Pop-up stoppers are the most prevalent in modern bathrooms, featuring a rounded or mushroom-shaped top that rises and lowers with a lever or knob located on the overflow plate beneath the faucet. When you operate the lever, you actually lift a rod connected to a strap that pulls the stopper open or pushes it closed. The visible portion sits flush with the drain surface when open and rises approximately one to two inches when closed. Look for the small lever on the overflow plate—this is your dead giveaway for a pop-up system.
Push-pull stoppers feature a screw-in design with a visible knob or handle on top. You open and close this stopper simply by lifting or pushing down on the knob. The entire mechanism screws into threads inside the drain body, making removal primarily a matter of unscrewing. These are common in both tubs and sinks, and the knob often has a textured surface for better grip.
Toe-tap stoppers operate through foot pressure applied to a flat plate on the drain surface—popular in accessible bathrooms where bending is difficult. Pressing with your toe lifts the internal mechanism, while a spring-loaded system returns it to the closed position when released. The actual stopper mechanism sits below the drain surface and connects to the toe-tap actuator through a spring-loaded plunger. If you have a flat, wide stopper you operate with your foot, you’ve got this type.
Grid drain stoppers feature a flat metal plate with small holes that sits on top of the drain opening. Water flows through the holes while debris collects on the grid surface. These typically screw into place and may include a small handle or knob for removal. The open design prevents water accumulation, reducing mold concerns. You’ll often find these in older bathtubs where a simple, reliable design was prioritized.
Flip-it stoppers have a lever that flips between open and closed positions, operating through a simple pivot point beneath the drain. When you flip the lever up, the stopper lifts to allow drainage; flipping it down closes the drain. The mechanism is known for durability but may require periodic adjustment. Check for a small lever that rotates 90 degrees—this is your flip-it identifier.
Continuous waste stoppers are more complex systems connecting the stopper directly to the overflow drain through a linkage system. These are typically found in older installations or specialized bathtubs. The overflow plate features a lever that controls both the stopper and the overflow drain simultaneously. If your stopper seems connected to the overflow mechanism, you likely have this type.
Gather Essential Tools
Having the right tools within reach before you start prevents interruptions and reduces frustration during the removal process. Most bath stopper removals require only basic household tools, though some situations call for specialized items.
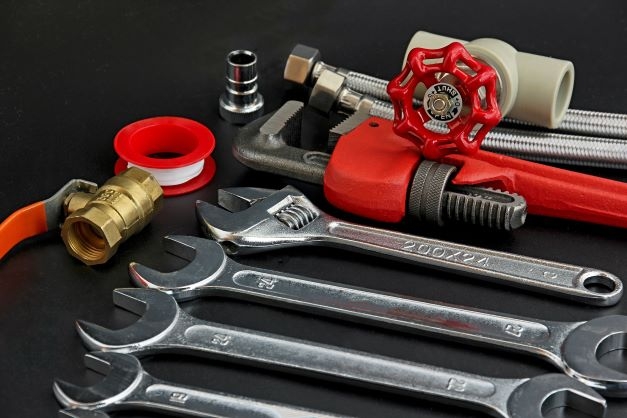
Essential tools include needle-nose pliers for gripping small components and reaching into tight spaces, a screwdriver set with both flathead and Phillips head options to match different screw types, an adjustable wrench for stubborn nuts that won’t budge by hand, and a flashlight for inspecting dark drain areas and confirming component positions. Don’t attempt removal without proper lighting—you’ll miss critical connection points.
Rubber-jaw pliers prove invaluable for grip without scratching chrome or brushed metal finishes. Wrap the jaws with cloth for additional protection on polished fixtures. A bucket placed beneath the drain catches any residual water that escapes during removal, protecting your cabinet or flooring.
Penetrating oil such as WD-40 or Liquid Wrench helps break mineral deposits and corrosion on frozen connections. Apply generously and wait at least ten to fifteen minutes before attempting to turn stuck components. For severe calcification, allow overnight penetration. Vinegar works as an excellent natural alternative for mineral deposits—soak a cloth in vinegar and wrap it around the connection point for several hours.
Remove a Push-Pull Stopper Without Stripping the Finish
Push-pull stoppers offer the simplest removal process since the entire mechanism screws directly into the drain body without linkage systems or hidden components.
Grasp the stopper firmly with one hand while stabilizing the drain body with your other hand to prevent putting pressure on the plumbing connections. Turn the stopper counterclockwise to unscrew it from the drain threads. Apply steady, even pressure rather than forcing it, as excessive torque can damage the threads or round off the connection point.
If the stopper resists turning, mineral deposits or corrosion may have frozen the threads. Apply penetrating oil around the connection point where the stopper meets the drain surface and wait fifteen to thirty minutes. The oil seeps into the threads and dissolves the deposits binding the components together.
After allowing the oil to penetrate, try turning again with a firm but controlled motion. If hand grip proves insufficient, wrap rubber-jaw pliers around the stopper body and apply leverage. Place cloth between the pliers and the stopper finish to prevent scratches. Tap the pliers handle gently with a rubber mallet in a counterclockwise direction if the stopper still resists—this vibration often breaks the bond created by mineral deposits.
Remove a Grid Drain Stopper Without Damaging the Tub
Grid drain stoppers sit on top of the drain opening and typically screw into place, making removal relatively simple despite their sometimes stubborn nature.
Grip the outer edges of the grid plate firmly and turn counterclockwise to unscrew it from the drain body. Many grid stoppers have textured edges or small cutouts that provide grip points for turning. If your stopper lacks these features, look for a small setscrew on the side that must be loosened first—this hidden screw secures the grid to the drain body and prevents removal until released.
Use an appropriately sized hex key, Allen wrench, or flathead screwdriver to loosen the setscrew. Once released, the grid should turn freely. If the setscrew is frozen due to corrosion, apply penetrating oil and allow it to work in before attempting to loosen again. Work gently to avoid stripping the setscrew head.
For grid stoppers that resist turning despite a released setscrew, mineral deposits may have fused the threads. Apply penetrating oil around the entire perimeter where the grid meets the drain surface and wait at least thirty minutes. Use a rubber jar opener or thick rubber gloves to improve grip, then attempt turning again.
Troubleshoot Stuck Stoppers Without Causing Further Damage

Even with proper technique, bath stoppers sometimes refuse to release due to corrosion, mineral deposits, or stripped components. These troubleshooting approaches address the most common obstacles without requiring professional assistance.
Stripped screw heads plague many DIY removal attempts, particularly on older fixtures where corrosion has weakened the screw material. When a screwdriver slips repeatedly, place a rubber band over the screw head before inserting the screwdriver—the rubber provides additional grip that often allows successful turning. Alternatively, hammer a slightly larger flathead screwdriver into the head to create new contact points that engage the screw slots.
For severely damaged screws, drill through the center of the screw head to destroy it and use a screw extractor bit to remove the remaining portion. This approach destroys the screw but allows component removal without further damage. Apply penetrating oil generously before extraction to reduce resistance.
Corroded and calcified connections freeze metal components together, requiring chemical intervention before physical removal succeeds. Apply penetrating oil generously to all connection points and allow at least thirty minutes for the oil to work into the threads and around sealed surfaces. For calcium and lime deposits, apply white vinegar directly to the affected area and cover with a wet cloth soaked in vinegar. The acid dissolves mineral buildup over several hours, though severe deposits may require repeated applications.
Gently tap the surrounding area with a rubber mallet after allowing penetrating oil to work—this vibration helps break the bond created by deposits and corrosion. Avoid using metal hammers directly on fixtures, as this leaves visible marks and can crack ceramic or porcelain components.
Clean and Maintain After Removal to Prevent Future Problems
Once you’ve successfully removed the bath stopper, take time to clean all components and inspect for wear before deciding whether to reinstall or replace. This maintenance step extends the life of your stopper and prevents future problems.
Remove accumulated hair, soap scum, and debris from the stopper mechanism using an old toothbrush and soapy water. For metal components with mineral deposits, soak in equal parts white vinegar and warm water for thirty minutes, then scrub with the toothbrush to remove loosened buildup. Rinse thoroughly with clean water and dry completely to prevent new deposits from forming.
Clean the drain body interior while the stopper is removed. Use a flashlight to inspect for debris, then remove loose material with fingers or tweezers. Clean the interior walls with a bottle brush dipped in soapy water. For deep cleaning, pour one cup of baking soda down the drain followed by one cup of white vinegar. Cover the drain opening and allow the mixture to fizz for fifteen minutes, then flush with hot water for several minutes.
Inspect all components for signs of wear or damage. Check rubber gaskets for cracks, hardening, or deformation—degraded rubber no longer creates proper seals and should be replaced. Inspect metal parts for rust, pitting, or excessive wear that could affect operation. Look for stripped threads, bent linkage arms, or cracked knobs that would compromise function.
Apply a thin layer of plumber’s grease to rubber gaskets and moving parts before reinstalling. This lubrication ensures smooth operation and prevents future sticking from mineral deposits. Work the grease into all moving connections and around seals to create a protective barrier.
When Replacement Makes More Sense Than Repair
Some situations favor replacement over repair, particularly when removal reveals extensive damage or when original parts have become obsolete. Recognizing these scenarios prevents wasted time and ensures reliable results.
Stoppers showing severe corrosion or rust through require replacement rather than reinstallation. Continuing to use compromised components leads to leaks, improper drainage, or complete stopper failure within a short time. Similarly, if the drain body threads have become stripped or damaged, accessing and replacing the entire drain assembly may prove more practical than attempting repairs.
Modern replacement stoppers cost between ten and fifty dollars depending on quality and design, making them economical compared to extensive repair attempts. Having a replacement ready before beginning removal ensures you can complete the project without leaving the drain non-functional. Measure your existing stopper or bring it to a hardware store to ensure proper fit when purchasing a replacement.
If removal attempts have damaged multiple components or if the installation involves specialized plumbing that you cannot access safely, professional assistance becomes the practical choice. Plumbers typically charge between one hundred and three hundred dollars for stopper replacement, with costs varying based on complexity and local rates.
Final Thoughts
Removing a bath stopper requires patience, the right tools, and an understanding of your specific stopper design. By identifying the type before you begin, gathering appropriate tools, and following the step-by-step approach for your model, most homeowners successfully complete this task without professional help. The key is matching your technique to the stopper type and taking time to troubleshoot stubborn components rather than forcing them.
Regular maintenance after removal—cleaning components, inspecting for wear, and lubricating moving parts—extends the life of your stopper and prevents future removal challenges. When replacement becomes necessary, the investment is minimal compared to the cost of ongoing problems or professional service calls. With the knowledge from this guide, you can confidently tackle bath stopper removal and keep your bathroom fixture functioning properly for years to come.
Leave a Reply