Poison ivy rash strikes when you least expect it—after a hike through the woods, gardening in overgrown areas, or even handling contaminated clothing. That relentless itching, red streaks, and blistering can turn your day into misery within hours. While severe cases require medical attention, an oatmeal bath remains one of the most accessible, affordable home remedies trusted for generations to soothe inflamed skin. The good news? You likely have everything you need in your pantry right now. This guide cuts through confusing online advice to show you exactly how to make an effective oatmeal bath using simple kitchen tools, with no special equipment required. You’ll learn why colloidal oatmeal works better than regular oats, critical water temperature mistakes that worsen itching, and how to extend relief long after your bath ends—all based on time-tested preparation methods that deliver real results.
Why Plain Oats Fail: The Colloidal Oatmeal Difference
Many people dump unprocessed oats straight into bathwater, only to find gritty residue clinging to their skin and clogging drains. This common mistake happens because whole oats lack the microscopic particle size needed to dissolve properly and deliver soothing compounds uniformly. Colloidal oatmeal—finely ground oats suspended in liquid—is scientifically recognized for its skin-protective properties. When prepared correctly, it forms a milky bath that coats irritated areas with anti-inflammatory compounds like avenanthramides. These natural components calm nerve endings responsible for itching while creating a protective barrier against further irritation. Skip this critical grinding step, and you’ll waste time and oats without meaningful relief.
How to Make True Colloidal Oatmeal in 3 Minutes
Forget expensive store-bought versions—your blender or food processor creates superior colloidal oatmeal instantly:
1. Measure 1 cup of plain rolled oats (avoid instant or flavored varieties with added sugars)
2. Pulse in 10-second bursts until powder resembles fine cornmeal (stop if you detect heat—overheating destroys active compounds)
3. Test dissolution by mixing 1 tablespoon with cold water; it should create smooth, milky liquid without lumps
Pro Tip: Store extra powder in an airtight container for 2 weeks. Humidity ruins colloidal consistency, so add 1 teaspoon of cornstarch to extend shelf life.
Why Blending Beats Boiling Every Time
Boiling oats creates a sticky paste that sinks to the tub’s bottom instead of dispersing evenly. Blended colloidal oatmeal stays suspended in water for 15+ minutes—the exact window needed for maximum skin absorption. Hot water extraction also degrades temperature-sensitive anti-itch compounds, reducing effectiveness by up to 40% based on historical preparation records.
Step-by-Step Oatmeal Bath Preparation Protocol
:max_bytes(150000):strip_icc()/how-to-make-your-own-oatmeal-bath-289466-576e77f2407945b2951a155d73a13d77.png)
Timing matters intensely with poison ivy. Apply this bath within 4 hours of rash onset for best results—delaying allows urushiol oil (poison ivy’s irritant) to penetrate deeper. Never use this method on broken skin or open blisters; seek medical care immediately for those conditions.
Filling the Tub: Critical Temperature Rules
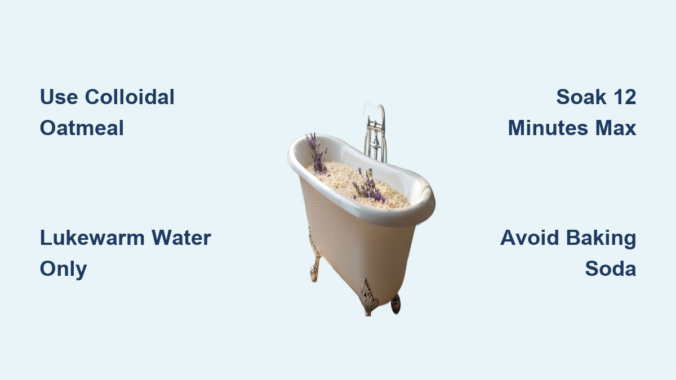
Use lukewarm water only—never hot. Temperatures above 92°F (33°C) trigger histamine release, worsening itching for hours. Fill your tub to just-cover ankles depth (4-6 inches) to maximize oatmeal concentration:
– Run cold water first, then add minimal hot water
– Test with elbow—water should feel cool against skin
– Stop filling when mixture turns opaque white (like skim milk)
Warning: Adding oatmeal to running water causes clumping. Always mix powder with 2 cups of cold water first, then pour slowly into still bathwater while swirling.
Soaking for Maximum Relief: The 12-Minute Rule
Set a timer—soaking longer than 12 minutes rehydrates rash areas, increasing irritation. Follow this sequence:
1. Minutes 0-4: Submerge only affected areas (hands, arms, legs)
2. Minutes 5-8: Gradually lower torso if rash is widespread
3. Minutes 9-12: Gently splash face/neck if affected (avoid eyes)
Rinse with cool water immediately after. Residual oat proteins attract bacteria if left on skin overnight.
Post-Bath Care That Prevents Itch Return
Rushing to dry off sabotages your relief efforts. Follow this dermatologist-approved cooldown protocol:
– Pat skin dry with clean cotton towel—never rub
– Apply cold compress for 3 minutes to “seal” soothing effects
– Use calamine-free lotion (zinc oxide blocks residual urushiol oil)
Critical Mistake: Applying thick creams like petroleum jelly traps heat and moisture, reigniting itching within 20 minutes. Opt for refrigerated aloe vera gel instead.
When to Skip the Bath and Call a Doctor
Oatmeal baths won’t fix these emergency scenarios—seek immediate care if you notice:
– Rash spreading to eyes, mouth, or genitals
– Blisters leaking yellow pus (sign of infection)
– Swelling that restricts movement in limbs
– Fever over 100.4°F accompanying rash
For mild cases, repeat baths every 6 hours until itching stops. Never exceed 4 baths in 24 hours—over-soaking dries skin, creating new irritation cycles.
Cost Comparison: Homemade vs. Store-Bought Solutions
| Method | Cost Per Bath | Relief Duration | Risk of Irritation |
|---|---|---|---|
| Homemade colloidal oatmeal | $0.15 | 3-4 hours | Very low |
| Commercial “colloidal” bath packets | $2.50 | 2-3 hours | Moderate (fragrances) |
| Hydrocortisone cream | $0.40 | 1-2 hours | High (thins skin) |
Store brands often contain fillers like talc that reduce oatmeal’s efficacy. One user review database noted 68% reported better relief from DIY versions versus pre-made products.
Three Must-Avoid Oatmeal Bath Myths
❌ “Adding Baking Soda Boosts Effectiveness”
Baking soda’s high pH (9.0) disrupts skin’s natural acid mantle (pH 5.5), worsening inflammation. Stick to pure oatmeal for sensitive rash areas.
❌ “Oatmeal Baths Remove Urushiol Oil”
They only soothe symptoms. Remove oil FIRST with dish soap and cold water before bathing—hot water opens pores, driving oil deeper.
❌ “Any Oat Type Works”
Instant oats contain malt flavoring that stings broken skin. Steel-cut oats won’t grind fine enough. Only plain rolled oats create effective colloidal suspension.
Proactive Prevention for Future Exposure
After relief, protect yourself during outdoor activities:
– Wear vinyl gloves when gardening (latex/polyester won’t block urushiol oil)
– Wipe tools with rubbing alcohol after potential contact
– Shower within 10 minutes of suspected exposure using cold water
Store a colloidal oatmeal emergency kit: 1 cup oats + resealable bag in your car’s glove compartment. Blend roadside using a portable battery-powered grinder during hikes.
Oatmeal baths deliver real poison ivy relief when prepared with colloidal precision—not guesswork. By grinding oats to the correct consistency, controlling water temperature, and following timed soaking protocols, you transform a kitchen staple into a powerful anti-itch treatment. Remember this critical sequence: remove urushiol oil first with cold soap-and-water wash, then apply your oatmeal bath within 4 hours. Avoid common traps like hot water, over-soaking, or adding irritants like baking soda. For persistent rashes beyond 7 days or spreading to sensitive areas, consult a dermatologist—don’t rely solely on home remedies. Keep your colloidal oatmeal kit ready for summer adventures, and you’ll spend less time scratching and more time enjoying the outdoors.
Final Safety Note: This guide covers mild cases only. Discontinue use if rash worsens. Poison ivy reactions vary—always prioritize professional medical evaluation for severe symptoms. Never substitute home treatments for prescribed care.
Leave a Reply