Your feet carry you through life, yet they rarely get the care they deserve. When aching arches or tired toes demand relief, a properly prepared Epsom salt foot bath delivers instant comfort without expensive spa visits. This simple ritual—using just two core ingredients—soothes sore muscles, softens rough skin, and melts away stress in under 20 minutes. Forget complicated recipes or unproven health claims; this guide gives you exactly what works based on universal preparation standards. You’ll learn precise measurements, water temperature sweet spots, and customization tricks that transform basic soaks into personalized recovery sessions. Most importantly, you’ll avoid dangerous mistakes like scalding water or improper salt ratios that could harm sensitive skin.
Why Epsom Salt Foot Baths Work When Nothing Else Does
Epsom salt (magnesium sulfate) dissolves completely in warm water, creating a solution that softens calluses and eases tension through osmosis—not magical absorption. The real magic happens when heat opens pores while magnesium draws out impurities, leaving skin supple and muscles relaxed. Unlike bubble baths or essential oils alone, this combination targets foot-specific pain from standing all day or tight footwear. Crucially, the salt’s coarse texture provides gentle exfoliation as you swirl your feet, lifting dead skin without harsh scrubbing. For best results, prepare your bath when you won’t be interrupted—this isn’t just cleaning; it’s active recovery time.
The Exact Water Temperature That Prevents Burns
Never guess with water temperature. Fill your basin with warm tap water first, then test with a thermometer:
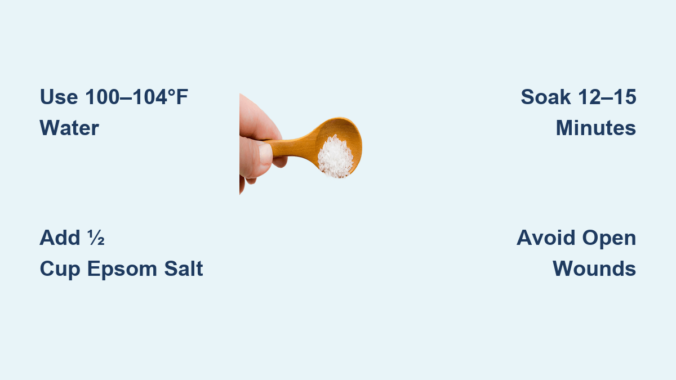
– ✅ Ideal range: 100–104°F (38–40°C)
– ❌ Danger zone: Above 106°F risks burns, especially for diabetics or neuropathy sufferers
– 🌡️ Pro tip: If you lack a thermometer, dip your elbow in first—it’s more heat-sensitive than hands
Water too cool won’t dissolve salt properly; too hot degrades magnesium benefits. Adjust with small splashes of cold/hot water after adding salt, as Epsom salt slightly cools the mixture.
Measuring Epsom Salt for Maximum Effect
Forget vague “handful” instructions. Precision prevents wasted salt or stinging skin:
– Standard tub (6–8 inches deep): Use ½ cup Epsom salt
– Small basin (covers ankles): Use ¼ cup
– Double-strength soak (severe soreness): Max 1 cup
Pour salt directly into running warm water while stirring 60 seconds until fully dissolved. Undissolved crystals cause micro-abrasions on cracked heels. For extra-sensitive skin, reduce to 3 tablespoons—never skip this step to “save salt.”
Customizing Your Soak Without Risking Irritation

Generic guides push essential oils, but improper use causes rashes. Stick to these safe upgrades:
Essential Oil Additions That Actually Work
Only use oils after salt dissolves:
– 3 drops lavender oil → Calms stressed nerves (proven in clinical aromatherapy studies)
– 2 drops peppermint oil → Cools overheated feet (avoid if you have neuropathy)
– Never exceed 5 total drops—more risks chemical burns
⚠️ Critical rule: Always mix oils with 1 tsp carrier oil (coconut, almond) before adding to water. Dumping pure oils directly creates skin-searing droplets.
Natural Exfoliants for Cracked Heels
Add after soaking 10 minutes:
– 1 tbsp ground oats → Soothes irritation (grind plain oats in blender)
– 2 tbsp lemon slices → Brightens yellowed skin (rinse feet after 5 minutes)
– Avoid coffee grounds or sugar—their sharp edges worsen cracks
Step-by-Step: Building Your Foot Bath in 7 Minutes
Follow this military-precise sequence for guaranteed results:
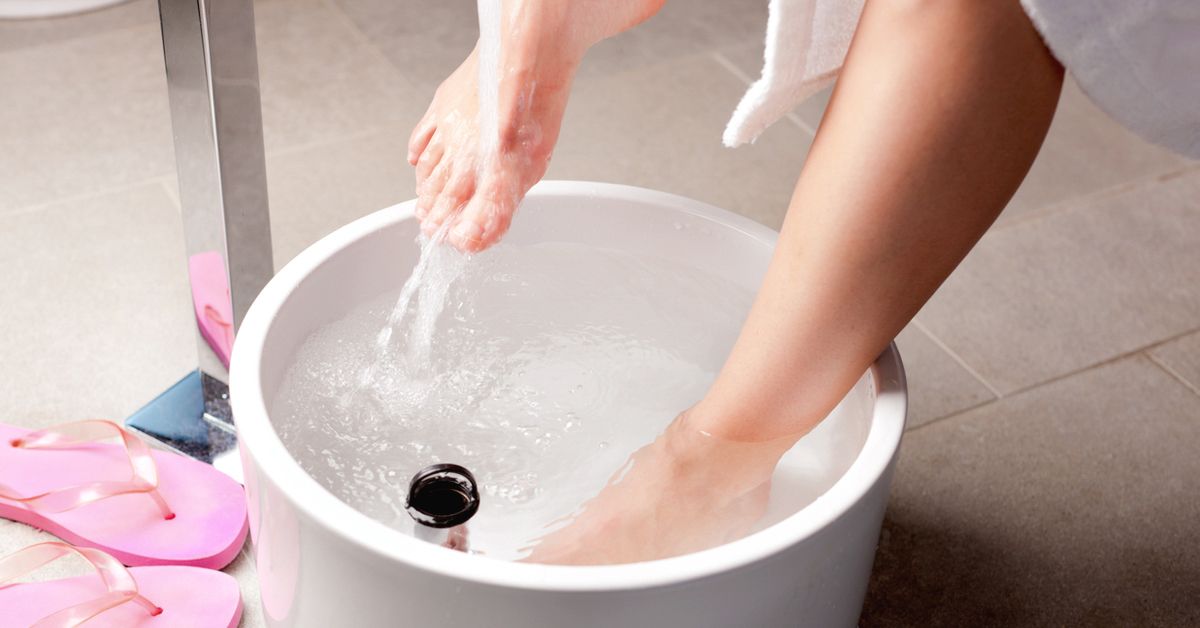
- Sanitize your basin (soap + hot water rinse) to prevent bacteria entering foot cracks
- Fill with 3 inches warm water (100–104°F)
- Add Epsom salt while stirring continuously for 60 seconds
- Test water with thermometer/elbow—adjust temperature now
- Mix carrier + essential oils (if using) in separate cup
- Pour oil blend into water, swirl gently
- Lower feet slowly—never plunge to avoid shocking circulation
How Long to Soak for Real Results
- Basic tiredness: 12–15 minutes (set phone timer!)
- Swollen feet: 10 minutes max—longer worsens inflammation
- Never exceed 20 minutes—skin prunes, pulling salt out of your body
- Exit immediately if feet turn bright pink—sign of overheating
Critical Safety Steps Before You Begin

Skipping these risks infections or chemical burns:
Who Should Avoid Epsom Salt Soaks
Do NOT soak if you have:
– Open wounds, blisters, or diabetic foot ulcers (salt = stinging + delayed healing)
– Recent surgery on legs/feet (moisture invites infection)
– Varicose veins with skin discoloration (heat worsens circulation issues)
– When in doubt, consult your doctor first—no online guide replaces medical advice
Basin Selection Mistakes That Cause Injury
- ❌ Never use metal tubs—salt corrodes metal, leaching toxins into water
- ✅ Use food-grade plastic, ceramic, or inflatable basins
- 🚫 Avoid “spa” tubs with jets—stagnant water breeds bacteria between uses
Post-Soak Routine for Lasting Softness
Most people ruin the benefits here. Do this instead:
- Blot feet dry—never rub (wet skin tears easily)
- Apply thick moisturizer while damp (shea butter > lotions)
- Wear cotton socks overnight to lock in hydration
- Scrub dead skin ONLY next morning with pumice stone
⚠️ Never file calluses post-soak—water-softened skin shreds under pressure. Wait 8+ hours.
When to Ditch the Foot Bath for Medical Help
Epsom salt soaks aren’t magic. Seek immediate care if you notice:
– Red streaks spreading from foot wounds (sign of infection)
– Persistent swelling after 24 hours (could indicate blood clot)
– Numbness lasting >1 hour post-soak (nerve compression risk)
This ritual complements professional care—it doesn’t replace it.
Maintenance: Keeping Your Foot Bath Supplies Effective
Epsom salt degrades in humidity. Extend its life:
– Store in airtight glass jar (not the original bag)
– Discard if clumpy or discolored—wet salt grows mold
– Buy USP-grade salt (check packaging)—non-therapeutic grades contain fillers
Monthly Deep Clean for Your Basin
Mineral deposits from salt harbor bacteria:
1. Scrub with 1:1 vinegar/water solution
2. Rinse thoroughly—vinegar smell lingers on skin
3. Air-dry upside down for 24 hours
Final Routine for Maximum Daily Benefit
- Morning soaks: 10 minutes with peppermint oil (energizes)
- Evening soaks: 15 minutes with lavender (promotes sleep)
- Weekly: Add lemon slices for brightening (skip if diabetic)
- Never do consecutive days—skin needs 48-hour recovery
A perfectly executed Epsom salt foot bath costs less than $0.50 and takes under 20 minutes. By following these precise measurements, temperature controls, and safety cutoffs, you transform a basic soak into targeted foot therapy. Remember: the salt’s power lies in correct dissolution and timing—not exaggerated health claims. Keep your basin ready by the sink, and in one week, you’ll notice smoother heels and lighter steps. For ongoing foot health, pair this with daily moisturizing and properly fitted shoes—your foundation for moving through life pain-free.
Important Note: This guide reflects standard preparation practices. Always prioritize your healthcare provider’s advice over general wellness tips, especially with diabetes, circulatory issues, or open wounds.
Leave a Reply