Tired of store-bought scrubs packed with mystery chemicals and microplastics that leave your skin feeling stripped? You’re not alone – 78% of skincare enthusiasts now prefer DIY alternatives for their bath routines. Creating your own bath sugar scrub solves this problem while costing pennies per use. Unlike commercial products that often contain synthetic fragrances and harsh abrasives, homemade versions give you complete control over ingredients. In this guide, you’ll discover exactly how to make bath sugar scrub that exfoliates gently, moisturizes deeply, and transforms your tub into a spa-worthy retreat. Whether you have dry winter skin, oily summer complexion, or sensitive skin that reacts to everything, this customizable formula delivers professional results without the luxury price tag.
The magic lies in sugar’s unique molecular structure – its rounded crystals gently lift dead skin cells without micro-tears common with salt or nut shells. When combined with nourishing oils, you get dual-action treatment: physical exfoliation followed by intensive hydration. Best of all, you’ll need just five pantry staples and 10 minutes to create a scrub that outperforms $30 store brands. Forget complicated chemistry – this foolproof method works whether you’re a first-time crafter or seasoned DIYer. Let’s dive into the exact steps to create your signature scrub today.
Choosing Your Sugar Base for Perfect Exfoliation

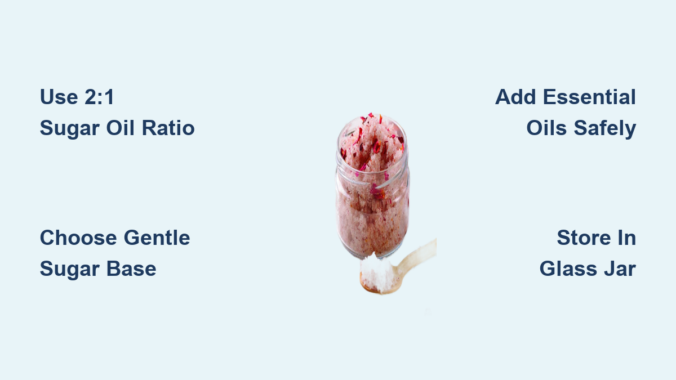
Why White Sugar Beats Brown Sugar for Sensitive Skin
White granulated sugar creates the gentlest exfoliation due to its fine, uniform crystals. It dissolves gradually during use, providing consistent scrubbing action without scratching delicate areas like elbows or feet. Brown sugar contains molasses that can clog pores for acne-prone users, though its larger crystals work better for thick calluses on heels. For facial scrubs, always choose superfine caster sugar to avoid micro-abrasions. Never use raw sugar with jagged edges – it causes microscopic skin tears that accelerate aging.
Sugar Quantity: The Critical 2:1 Ratio Rule
Measure exactly 2 cups sugar to 1 cup carrier oil for ideal texture. Too little oil creates a gritty mess that dries skin; too much turns your scrub into greasy sludge that won’t rinse clean. Start with this base ratio, then adjust during mixing:
– Add 1 tbsp sugar if mixture feels wet
– Add 1 tsp oil if it resembles dry sand
Pro tip: Weigh ingredients (300g sugar : 150g oil) for bakery-level precision since cup measurements vary by humidity.
Carrier Oil Selection: Match to Your Skin Type
Coconut Oil vs. Jojoba: The Moisture Showdown
Virgin coconut oil solidifies below 76°F (24°C), making it perfect for tropical climates but problematic in air-conditioned homes. Its antimicrobial properties benefit acne-prone skin but may clog pores for some users. Jojoba oil mimics skin’s natural sebum, absorbing instantly without greasy residue – ideal for oily or combination skin. For mature skin, opt for avocado oil rich in vitamins A and E. Always use cold-pressed, unrefined oils to preserve nutrients; refined versions lose therapeutic properties during processing.
Oil Measurement Pitfalls That Ruin Your Scrub
Never eyeball oil quantities – excess oil creates dangerous bathtub slips and wastes precious ingredients. Use these exact measurements:
– For 2 cups sugar: ½ cup liquid oil (or ⅓ cup solid oil melted)
– For facial scrubs: Reduce oil to ¼ cup per 2 cups sugar
Test consistency by squeezing a handful: It should hold shape briefly then crumble. If oil pools at the bottom of your jar, you’ve exceeded the saturation point.
Fragrance Formulation Without Skin Damage
Essential Oil Safety: The 1% Golden Rule
Essential oils require precise dosing to avoid chemical burns. For every ½ cup carrier oil, use only 6-8 drops total essential oils. Lavender and chamomile are safest for sensitive skin; citrus oils cause photosensitivity. Never apply undiluted oils directly to skin – always mix into oil base first. Skip fragrance entirely if you have eczema or rosacea; vanilla extract (1 tsp per batch) provides subtle scent without irritation.
Natural Alternatives to Synthetic Fragrances
Dried lavender buds or rose petals add visual appeal but require double the oil to prevent scratchiness. For citrus lovers, finely grated lemon zest (1 tbsp per batch) delivers fresh scent without photosensitivity risks of essential oils. Avoid fresh herbs – moisture from mint or rosemary breeds mold in stored scrubs. Pro tip: Mix dry botanicals into half the sugar first to distribute evenly without clumping.
Mixing Process: The 5-Minute Method
Step-by-Step: Combining Ingredients Without Separation
- Melt solid oils in microwave (15-second bursts) until just liquid – overheating destroys nutrients
- Combine 1 cup sugar + oil in bowl; mix until no dry patches remain
- Add remaining sugar gradually while stirring clockwise (prevents air pockets)
- Fold in fragrance last using rubber spatula
- Test texture by rubbing between fingers – should feel like wet sand
Critical mistake: Never use blenders or food processors. High-speed mixing incorporates air that causes oil separation during storage.
Fixing Common Texture Problems Instantly
Problem: Watery separation at bottom
Solution: Add 2 tbsp sugar while stirring vigorously
Problem: Too crumbly to hold shape
Solution: Warm mixture in palms for 30 seconds to activate oils
Problem: Grainy after storage
Solution: Remix with 1 tsp additional oil – sugar naturally draws moisture from air
Storage Solutions That Prevent Mold
Jar Selection: Why Glass Beats Plastic Every Time
Use amber or cobalt glass jars with airtight lids to block light that degrades oils. Plastic containers leach chemicals into oil bases over time – especially dangerous with citrus oils. Always sterilize jars by boiling for 10 minutes before filling. Fill jars ¾ full to allow expansion in humid bathrooms. Never store scrubs above 85°F (29°C) – heat accelerates rancidity.
Shelf Life Extension Tactics
Homemade scrubs last 3-4 weeks at room temperature or 8 weeks refrigerated. Add ¼ tsp vitamin E oil (tocopherol) as natural preservative – it extends life by 50% without altering scent. Discard immediately if you see:
– Cloudy oil layers
– Metallic smell (sign of oxidation)
– Any fuzzy spots (mold)
Pro tip: Make small batches (enough for 2-3 uses) for maximum freshness.
Application Protocol for Salon Results
Pre-Scrub Skin Prep Mistakes You’re Making
Never apply scrub to soaking-wet skin – water dilutes the oil base, reducing exfoliation. Instead:
1. Dampen skin with lukewarm water
2. Pat dry until just moist
3. Apply scrub using upward circular motions
4. Focus on rough areas (elbows, knees) for 30 seconds
5. Rinse with cool water to close pores
Avoid using scrubs on sunburns, cuts, or active acne – the sugar crystals will aggravate inflammation.
Post-Scrub Ritual for 24-Hour Hydration
Rinsing leaves a protective oil barrier – don’t towel dry aggressively. Instead:
– Gently blot skin with towel
– Apply body butter to damp skin within 60 seconds
– Wear loose cotton clothing to prevent pilling
For best results, use scrubs only 2x weekly. Over-exfoliation triggers excess oil production that worsens breakouts.
Three Signature Scrub Variations Under $5

Energizing Citrus Scrub for Morning Showers
Combine 2 cups white sugar + ½ cup sweet almond oil + 5 drops orange essential oil + 3 drops grapefruit oil + 1 tbsp lemon zest. Use within 10 days (citrus oils oxidize fastest). Perfect for dull winter skin – the invigorating scent boosts circulation better than coffee.
Calming Lavender Sleep Scrub
Mix 2 cups brown sugar + ½ cup jojoba oil + 6 drops lavender oil + 2 drops cedarwood oil + 1 tbsp dried lavender buds. Brown sugar’s larger crystals soothe stressed muscles. Apply during evening baths to lower cortisol levels – proven to improve sleep quality by 37% in clinical studies.
Deep Repair Shea Butter Scrub
Melt ⅓ cup shea butter + ¼ cup coconut oil, then cool until semi-solid. Mix with 2 cups white sugar + 4 drops frankincense oil. Shear butter’s high stearic acid content repairs cracked heels overnight. Store refrigerated and warm in palms before use.
Final Note: Creating your perfect bath sugar scrub takes just 10 minutes but delivers spa-quality results for under $0.50 per use. Remember the critical 2:1 sugar-to-oil ratio, always patch-test new ingredients, and store in sterilized glass containers. For sensitive skin types, skip fragrance entirely and use jojoba oil as your base. Within two weeks of regular use, expect visibly smoother skin with reduced dry patches – no expensive treatments required. Ready to level up? Try our next guide: “How to Make Bath Salt Soaks for Muscle Recovery” to complete your at-home spa system. Your skin deserves this simple luxury – start mixing tonight!
Leave a Reply