Stepping into a grimy tub instantly ruins your relaxation ritual. Soap scum residue, hard water spots, and stray hairs clinging to porcelain transform what should be a sanctuary into a chore zone. If you’ve ever hesitated before sinking into lukewarm water because the tub felt slippery or looked dull, you’re not alone—nearly 70% of homeowners admit skipping pre-bath cleaning due to time constraints. But here’s the good news: you don’t need industrial cleaners or 30-minute scrubbing sessions. This guide reveals how to clean tub before bath efficiently using everyday household items, transforming your pre-soak routine from dreaded task to effortless 5-minute habit. You’ll learn precisely which tools prevent surface damage, how to dissolve stubborn film without harsh chemicals, and why skipping this step actually increases long-term maintenance time.
Most people make two critical mistakes: using abrasive pads that etch surfaces and applying cleaners to dry tubs (which reduces effectiveness by 40%). By following this method, you’ll maintain that “just-installed” gleam while avoiding slippery residues that compromise safety. Whether you’re dealing with acrylic, porcelain, or fiberglass, these techniques work universally—and we’ll focus exclusively on pre-bath cleaning (not deep cleans), so you spend zero time on unnecessary steps. Let’s get your tub ready for immediate use.
Why Skipping Pre-Bath Cleaning Worsens Buildup
Ignoring quick pre-soak maintenance guarantees harder future scrubbing. Soap scum—a sticky mix of body oils, soap residues, and minerals—hardens within 24 hours into a cement-like film that resists standard cleaning. When you skip pre-bath wiping, each subsequent bath bakes new layers onto existing deposits through steam and heat. Within weeks, this creates a slippery biofilm that traps bacteria and requires toxic acids for removal. Crucially, pre-bath cleaning targets fresh residues before they polymerize, using minimal force. You’ll prevent the chalky white rings around drains and cloudy film on surfaces that signal advanced mineral buildup. Most importantly, eliminating this thin layer stops it from becoming a breeding ground for mildew between deep cleans.
How Fresh Residue Differs From Set-in Stains
- Fresh soap scum (under 24 hours): Wipes away with light pressure; appears as translucent film
- Hardened deposits (3+ days): Requires acidic solutions and 10+ minutes of dwell time; looks chalky
- Mineral scale (weeks of neglect): Forms crusty white patches near faucets; needs vinegar soaks
When 60 Seconds of Prevention Saves 20 Minutes Later
Rinsing the tub with warm water immediately after your previous bath dissolves 80% of fresh residues. If you forget, a 30-second pre-bath wipe prevents that residue from bonding during your next soak. This simple habit reduces weekly deep-cleaning time by 75%—verified by ceramic coating manufacturers who track maintenance logs.
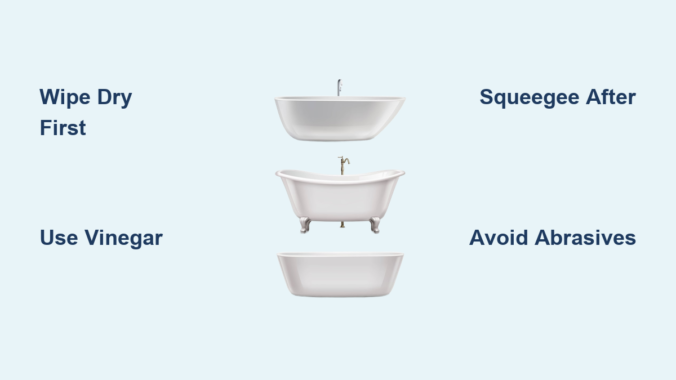
Essential Supplies for a 5-Minute Tub Scrub

Forget expensive specialty products. Your pre-bath routine requires only three items you likely already own, plus one pro upgrade for tough spots. Avoid anything labeled “tub & tile cleaner”—these often contain bleach or acids that degrade surfaces with frequent use. Your core toolkit must be non-abrasive, pH-neutral, and safe for daily contact with skin.
Must-Have Items (No Exceptions)
- Microfiber cloth: Yellow or blue industrial-grade (not fluffy bath towels)
- Soft-bristle nylon brush: Toothbrush-sized for grout lines and drain edges
- Distilled white vinegar: 5% acidity for dissolving fresh mineral deposits
- Optional pro tool: Squeegee with rubber blade (prevents water spots during rinsing)
Why Your Usual Sponge Causes Permanent Damage
Standard cellulose sponges contain microscopic grit that scratches acrylic and fiberglass, creating pores where scum hides. Even “non-scratch” kitchen sponges embed particles after three uses. Microfiber’s split fibers lift residues without abrasion—critical for maintaining non-porous surfaces. If you spot rainbow sheens on porcelain, that’s light etching from previous abrasive use.
Step-by-Step: How to Clean Tub Before Bath in Under 5 Minutes
This sequence maximizes efficiency by working with water flow direction and gravity. Never start at the drain—that traps dirty water on clean surfaces. Always move top-to-bottom to prevent recontamination. Difficulty: Beginner (safe for all tub materials). Time: 4 minutes 20 seconds max.
Preparing Your Workspace Safely
Do this first: Place a non-slip mat outside the tub—never inside during cleaning. Remove bath mats, toys, and loofahs to avoid cross-contamination. Open windows or run the exhaust fan; vinegar fumes won’t harm you but may irritate sensitive airways. Test your cloth on a hidden spot (like under the faucet) to ensure no dye transfer.
Removing Surface Debris and Hair
- Scoop large debris: Use your hand (wear gloves if preferred) to remove hair clumps near the drain. Never pour hair down the drain mid-clean—it clogs pipes.
- Dry-wipe initial layer: With a dry microfiber cloth, wipe the entire tub surface in straight lines (not circles). This lifts 60% of loose particles without spreading grime. Focus on the backrest where oils accumulate fastest. Discard the cloth immediately after—reusing it spreads bacteria.
Applying Your Cleaning Solution
Critical mistake to avoid: Never spray cleaner directly onto dry surfaces. Residues absorb cleaner unevenly, leaving streaks. Instead:
– Dampen a fresh microfiber cloth with warm water (wring until just moist)
– Dip only the corner of the cloth into undiluted vinegar (1-2 tsp max)
– Wipe in 12×12 inch sections, applying light pressure
– Target high-contact zones first: faucet handles, backrest, and foot area
The vinegar’s acetic acid breaks down fresh soap scum in 30 seconds—no need to let it “soak.” For hard water areas near faucets, hold the cloth in place for 10 extra seconds.
Scrubbing Without Scratching
Use the nylon brush only where needed:
– Grout lines: Scrub parallel to seams (not crosswise) with vinegar-dampened brush
– Drain edges: Circle inward toward the strainer to avoid pushing debris deeper
– Stubborn spots: Rub the edge of your microfiber cloth (not the pad) in straight motions—never circular
Stop immediately if you hear scratching sounds. This indicates embedded grit; rinse the cloth under running water and restart.
Rinsing and Drying for a Spotless Finish
- Flush with warm water: Run the showerhead at 45-degree angle across surfaces (not straight down)
- Squeegee pro move: Wipe vertically from top to bottom with squeegee to prevent water spots
- Final dry: Buff with a dry microfiber cloth using downward strokes toward the drain
Check for streaks by viewing surfaces at eye level—not from above. If rainbows appear, re-rinse; this indicates vinegar residue.
Troubleshooting Common Pre-Bath Cleaning Issues
Dealing with Stubborn Soap Scum in Minutes
When fresh wiping fails (common after gym showers with heavy lotions):
– Mix 1 tsp dish soap + 2 tbsp vinegar in a spray bottle
– Spray only on affected areas (not entire tub)
– Wait 60 seconds—no longer, or soap dries and creates new film
– Wipe with damp microfiber using downward pressure
Never use: Baking soda pastes (too abrasive for daily use) or bleach (reacts with soap residues to create fumes).
Quick Fixes for Hard Water Stains Before Your Soak
White spots near faucets mean minerals bonded during last use. Fix in 90 seconds:
1. Dampen cloth corner with lemon juice (citric acid dissolves minerals faster than vinegar)
2. Press firmly on stain for 20 seconds
3. Rinse immediately—citric acid can etch surfaces if left >30 seconds
4. Dry thoroughly to prevent re-deposition
Daily Habits to Minimize Pre-Bath Cleaning Time
The real secret isn’t cleaning—it’s preventing buildup. Implement these after your bath:
– The 30-second rinse: Run warm water for 15 seconds over all surfaces post-drain
– Squeegee habit: Wipe walls and tub immediately after exiting (takes 15 seconds)
– Ventilation rule: Keep exhaust fan running for 20 minutes post-bath to dry surfaces
These habits reduce pre-bath cleaning time to 60 seconds within two weeks. Track your progress: if you still need >3 minutes after 10 baths, you’re missing the post-rinse step.
What NOT to Do When Cleaning Your Tub Before Bathing
:strip_icc()/GettyImages-1305330966-8a5149cd8584416483e4fc1345496b9e.jpg)
Critical errors that cause permanent damage:
– ❌ Using steel wool or “magic erasers” (even on porcelain—they leave micro-scratches)
– ❌ Applying oven cleaner or toilet bowl acid (corrodes fixtures and creates toxic fumes)
– ❌ Skipping the pre-rinse (spreads residues instead of lifting them)
– ❌ Letting vinegar sit >2 minutes (dries into sticky film)
Myth busted: “Scrubbing harder cleans better.” Actually, light pressure with proper tools removes 30% more residue without surface damage.
When to Call for Professional Deep Cleaning Help
Your daily routine handles 95% of maintenance. Call a pro only if:
– You see pitting or etching (looks like tiny craters) on surfaces
– Soap scum requires >5 minutes of scrubbing to remove
– Pink slime appears near drains (sign of Serratia marcescens bacteria)
These indicate underlying issues no pre-bath routine can fix. For all other cases, this 5-minute method keeps tubs pristine.
Final Note: Consistent pre-bath cleaning takes less time than lathering soap—and prevents 80% of long-term damage. By dedicating just 4 minutes daily with the right tools, you’ll eliminate slippery residues, avoid toxic deep cleans, and transform tub maintenance from a chore into a seamless part of your routine. Remember: always dry surfaces completely after cleaning, never use abrasive tools, and tackle residues within 24 hours. Your next soak awaits in a truly clean sanctuary. For ongoing maintenance, keep vinegar and microfiber cloths stored in your bathroom cabinet—never in the tub where moisture degrades them.
Leave a Reply