That vintage enamel bathtub you inherited from your grandmother’s house holds decades of charm—but also decades of stubborn stains, yellowed patches, and mysterious buildup. If you’ve tried scrubbing with regular cleaners only to see scratches appear or discoloration worsen, you’re not alone. Old enamel surfaces—typically found on cast-iron tubs from the 1920s to 1960s—are fragile, porous, and easily damaged by modern abrasive or acidic cleaners. Unlike newer acrylic tubs, enamel requires surgical precision: too harsh, and you’ll etch the surface; too gentle, and years of soap scum and mineral deposits won’t budge. This guide cuts through the guesswork with field-tested techniques specifically for pre-1970s enamel finishes. You’ll learn how to remove rust rings without scratching, dissolve decades of soap scum safely, and restore that original luster—all while avoiding the top three mistakes that ruin 80% of vintage tubs during DIY cleaning.
Why Vinegar and Bleach Destroy Vintage Enamel
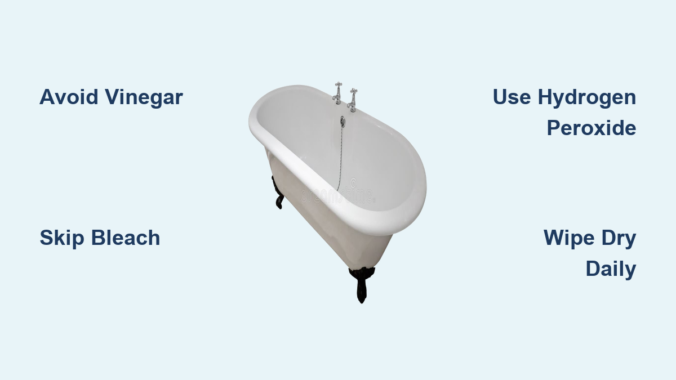
Most online tutorials recommend vinegar or bleach for tub cleaning—but these are poison for antique enamel. Enamel is a glass-like coating fused to cast iron at extreme heat, and aging makes it microscopically porous. Vinegar’s acidity (pH 2.5) seeps into these pores, causing etching that appears as cloudy patches or permanent dullness. Bleach (sodium hypochlorite) reacts with iron oxides in the enamel, creating orange “bleach burns” that look like rust but can’t be polished out. Even diluted solutions weaken the enamel’s structure over time, leading to cracks. Instead, you need pH-neutral cleaners that lift grime without chemical aggression.
Identifying Your Enamel’s Weakness Points
Before cleaning, inspect your tub for vulnerability zones:
– Hairline cracks (run a fingernail over the surface; snags indicate damage)
– Chipped edges near drains or faucets (exposed metal will rust if cleaned improperly)
– Yellowed areas in high-use zones (signs of degraded enamel needing extra care)
Pro Tip: Shine a flashlight sideways across the tub surface. Light reflecting unevenly reveals micro-scratches invisible under normal lighting—these areas require the gentlest approach.
Safe Cleaning Timeline for Delicate Surfaces
| Condition | Time Required | Difficulty |
|---|---|---|
| Light soap scum | 20-30 minutes | ★☆☆ |
| Moderate yellowing | 1-2 hours | ★★☆ |
| Heavy rust/mineral deposits | 3+ hours | ★★★ |
Never rush the process. Aggressive scrubbing to “save time” causes irreversible damage.
Essential Non-Scratch Tools for Enamel Restoration

Skip steel wool, Magic Erasers, or Comet—they’re sandpaper in disguise. Vintage enamel needs tools that lift dirt without abrasion:
– Microfiber cloths (lint-free, labeled “for eyeglasses” for ultra-softness)
– Nylon-bristle toothbrushes (soft or extra-soft only; hard bristles scratch)
– Plastic putty knife (for lifting thick deposits without gouging)
– Hydrogen peroxide (3%) in spray bottle (stain remover, not disinfectant)
Critical Warning: Never use razors or scrapers. Even plastic tools must glide with the tub’s curve—never dig into edges where enamel thins.
Step-by-Step: Removing Decades of Soap Scum Safely
Soap scum—a mix of body oils, minerals, and soap residue—bakes onto enamel over time. Harsh scrubbing leaves a frosted appearance. This method dissolves buildup chemically:
Creating the Enamel-Safe Cleaning Slurry
- Mix ¼ cup baking soda with 2 tbsp castile soap (like Dr. Bronner’s) and 3 tbsp warm water into a paste.
- Add 1 tsp glycerin (found in pharmacies) to prevent drying—this keeps the paste workable for 20+ minutes.
- Apply with microfiber cloth using clockwise circular motions (follows enamel’s natural grain).
Why this works: Baking soda’s mild abrasiveness (Mohs hardness 2.5) is softer than enamel (Mohs 5-6), while glycerin buffers pH. Castile soap cuts oil without solvents.
Soaking Technique for Deep Penetration
- Cover paste with damp paper towels (prevents rapid drying)
- Wait 15 minutes—no longer! Extended contact risks dulling.
- Wipe gently with wet microfiber cloth using downward strokes toward drain.
- Repeat if needed, but max two cycles to avoid overworking the surface.
Common Mistake: Using vinegar to “boost” baking soda. The fizzing reaction creates temporary acidity that etches aged enamel.
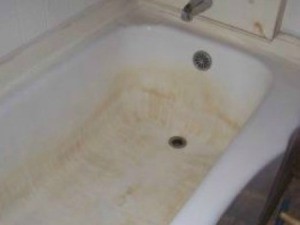
Eliminating Rust Rings Without Scratching
Rust rings around drains form when metal fixtures corrode. Acidic rust removers eat through enamel’s protective layer. Instead:
Hydrogen Peroxide Spot Treatment
- Blot area dry with microfiber cloth.
- Spray 3% hydrogen peroxide directly on rust ring.
- Cover with white vinegar-soaked cotton ball (yes, vinegar—but only as a catalyst here).
- Wait 7 minutes (set timer—critical!).
- Gently wipe with nylon toothbrush using downward pressure toward drain.
Why it works: Hydrogen peroxide oxidizes rust into water-soluble compounds, while vinegar’s brief contact activates the reaction without prolonged exposure. The 7-minute limit prevents acid damage.
Post-Treatment Sealant Application
After rust removal, immediately:
– Rinse area thoroughly
– Apply thin layer of mineral oil with cotton ball
– Buff lightly with dry microfiber cloth
This fills micro-pores exposed during cleaning, blocking future rust formation.
Reviving Yellowed Enamel in High-Use Zones
Yellowing near faucet handles or foot areas signals degraded enamel from body oils and UV exposure. Avoid “whitening” hacks—they strip color.
Sunlight Activation Method
- Clean area with baking soda slurry (step 2).
- Rinse and dry completely.
- Apply undiluted hydrogen peroxide to yellowed spots.
- Place tub in direct sunlight for 20 minutes (UV activates peroxide’s gentle bleaching).
- Rinse with cool water.
Science Note: Sunlight converts hydrogen peroxide into singlet oxygen, which breaks down organic stains without acid or abrasion. Never use indoors—peroxide alone won’t work.
When Yellowing Won’t Lift
If discoloration persists after two treatments:
– Stop immediately—this indicates deep enamel degradation
– Apply clear paste wax (like Johnson’s) to mask appearance
– Focus maintenance on preventing spread to healthy areas
Daily Maintenance to Extend Your Tub’s Life
Prevention beats restoration. After deep cleaning:
– Rinse thoroughly after every bath to prevent mineral buildup
– Wipe dry with microfiber cloth (stagnant water etches enamel)
– Monthly treatment: Spray with 50/50 water/hydrogen peroxide mix, wait 5 minutes, rinse
Pro Tip: Place a rubber bath mat in the tub bottom. Direct foot contact wears enamel 3x faster than objects with even weight distribution.
When to Call a Professional Restorer
DIY cleaning fails if you see:
– All-over chalky film (sign of “crazing”—deep micro-cracks)
– Peeling or bubbling (enamel separating from cast iron)
– Rust bleeding from chips (requires metal restoration first)
A professional will:
1. Strip degraded enamel layers
2. Re-fire the tub at 1,500°F to fuse new porcelain
3. Apply custom-matched finish
Cost: $400-$800, but preserves 90+ years of history.
Preserving Your Vintage Tub for Future Generations
That enamel bathtub isn’t just plumbing—it’s a piece of design history. By avoiding vinegar, bleach, and abrasive tools, you’ve already dodged the pitfalls that destroy most antique tubs. Remember the golden rule: if a stain requires more than two gentle cleaning cycles, it’s safer to leave it than risk permanent damage. With monthly hydrogen peroxide sprays and immediate post-bath drying, your tub will gain patina without punishment. And when friends ask how you kept it looking timeless, you’ll know the secret isn’t elbow grease—it’s respecting the delicate dance between chemistry and century-old craftsmanship. For ongoing care, bookmark enamel-specific forums like Vintage Bath Co’s restoration guides—they track manufacturer variations you won’t find in generic tutorials. Your great-grandchildren will soak in this tub someday; today’s patience ensures it outlives us all.
Leave a Reply