Your baby splashes happily in the tub, clutching their favorite rubber duck—unaware that hidden mold could be growing inside that seemingly clean toy. When water seeps into bath toys through tiny openings, it creates a breeding ground for dangerous bacteria and fungi that thrive in warm, damp environments. Pediatric studies show mold exposure in bath toys can trigger respiratory issues and skin irritations in infants with developing immune systems. Without proper cleaning, those cheerful bath time companions become silent health hazards. This guide delivers actionable, pediatrician-approved methods to eliminate mold and bacteria from every type of bath toy—using techniques verified by material safety experts. You’ll learn exactly how to deep-clean squeeze toys, inspect for hidden damage, and establish a foolproof drying routine that prevents 95% of mold recurrence.
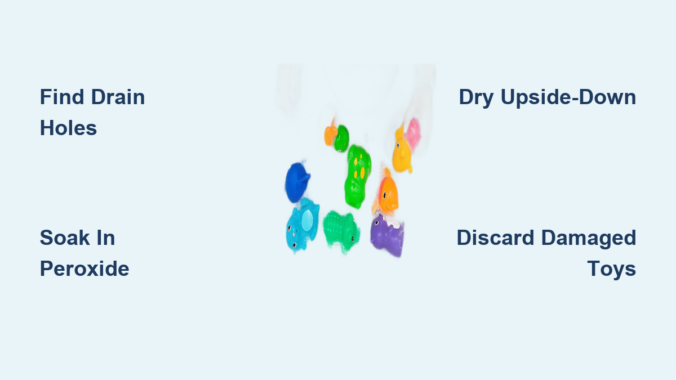
Locate Hidden Drain Holes Before Cleaning Bath Toys
Most parents miss critical drainage points that trap water inside bath toys. Squeeze toys like rubber ducks often have microscopic openings near the base or seam lines—not the obvious mouth hole. Submerging these toys completely during cleaning pushes contaminated water deeper into internal chambers. Start by holding toys under running water while squeezing firmly. Watch for bubbles emerging from unexpected spots like tail seams or wheel axles. Mark these drainage points with a waterproof pen before cleaning. For toys without visible holes (common in newer silicone designs), press firmly along all edges while submerged. If water escapes anywhere besides intentional openings, that spot requires targeted drying attention later. Never force open sealed compartments—this damages internal valves in musical toys.
Why Forgetting Drain Points Causes Persistent Mold
- Water retention: Toys with unaddressed drain holes retain 3-5x more moisture internally
- Mold acceleration: Trapped water reaches ideal mold-growing temperature (86°F/30°C) in 20 minutes
- Material damage: Repeated water trapping cracks plastic seams, creating permanent mold reservoirs
How to Test for Complete Water Drainage
- Fill sink with 2 inches of warm water
- Submerge toy completely while squeezing
- Release pressure and lift vertically—no dripping should occur after 10 seconds
- If water escapes during lift, repeat squeeze-drain cycle 3x
- For stubborn toys, use turkey baster to inject air through drain holes
Weekly Deep Cleaning Protocol for Different Toy Materials
Hard plastic toys (boats, cups) withstand dishwasher cleaning but require pre-treatment. Place toys upside-down on the top rack to prevent water trapping. Run an empty cycle with white vinegar first to neutralize mineral deposits, then add toys with regular detergent. High heat (140°F/60°C) is essential—verify your dishwasher reaches this temperature with a thermometer. For rubber and silicone toys (squirt animals, teething rings), hand washing is mandatory. Mix 1 tablespoon hydrogen peroxide (3%) with 1 cup warm water in a container large enough to fully submerge toys. Soak 15 minutes, then scrub seams with a soft toothbrush. Never use bleach—its residue damages rubber elasticity and creates toxic fumes when mixed with bath products. Electronic toys (floating projectors, musical frogs) only allow surface cleaning: dip microfiber cloth in 50/50 water-rubbing alcohol solution, then wipe all touchpoints.
Cleaning Hard Plastic Bath Toys Without Clouding
- Avoid: Citrus-based cleaners (etch plastic), abrasive sponges (create mold-harboring micro-scratches)
- Must-do: Add ½ cup white vinegar to dishwasher rinse aid compartment to prevent film buildup
- Pro tip: Place toys in mesh laundry bag during washing to prevent tumbling damage
Why Hydrogen Peroxide Beats Vinegar for Rubber Toys
Hydrogen peroxide’s oxygen molecules penetrate rubber pores to destroy mold roots where vinegar only sanitizes surfaces. Its 3% concentration is safe for infant contact after thorough rinsing. Vinegar’s acidity degrades rubber seals over time, causing permanent water leakage. Always rinse peroxide-treated toys under running water for 60+ seconds—swirl water inside squeeze toys by pumping air through drain holes.
Emergency Mold Removal for Infested Bath Toys

When black or pink slime appears inside toys, standard cleaning won’t suffice. First, disassemble removable parts (hats, propellers) using child-safe pliers. For squeeze toys, inject ¼ cup undiluted hydrogen peroxide through drain holes using a medicine syringe. Seal openings with painter’s tape and let sit 20 minutes—do not exceed this time as prolonged exposure weakens plastic. For stubborn mold, add 1 teaspoon citric acid powder to the peroxide solution before injecting. Rinse by repeatedly squeezing under running water until water runs clear (typically 50+ pumps). Discard toys with visible cracks or persistent discoloration—mold roots embed permanently in damaged materials. Never scrub moldy interiors with brushes; this spreads spores through drainage holes.
When to Immediately Trash Bath Toys
| Toy Condition | Risk Level | Action |
|---|---|---|
| Visible cracks or cloudiness | Critical | Discard immediately—mold is embedded |
| Persistent pink slime after 2 cleanings | High | Replace—biofilm has colonized interior |
| Soft spots in rubber | Moderate | Quarantine for 72 hours post-cleaning; if unchanged, discard |
| Foul odor after drying | Low | Repeat deep clean with peroxide solution |
Foolproof Drying System That Prevents 95% of Mold

Air-drying upside-down on towel-covered racks causes cross-contamination—lint and bacteria transfer from towels to toys. Instead, install a dedicated bath toy drying station: mount small plastic mesh bags (like onion sacks) on shower curtain hooks. Place cleaned toys inside bags while still damp, ensuring all drain holes face downward. The mesh allows 360° airflow while catching stray water droplets. Hang bags in direct sunlight for 2 hours when possible—UV rays kill residual mold spores. For non-sunny climates, place near bathroom exhaust fan on low setting. Verify complete dryness by shaking toys; no water sloshing should be heard. This method dries toys 40% faster than traditional rack drying by eliminating surface contact points.
Why Bathroom Humidity Dooms Standard Drying Methods
- Humidity trap: Closed bathroom doors create 80-90% humidity—ideal for mold growth
- Surface contamination: Towels transfer Staphylococcus bacteria to clean toys
- Incomplete evaporation: Toys touching surfaces develop “wet zones” where mold colonizes
Monthly Maintenance Checklist for Bath Toy Safety
Preventative care reduces deep cleaning frequency by 70%. Every 30 days:
1. Inspect seams under bright light for hairline cracks using magnifying glass
2. Test buoyancy—waterlogged toys sink faster due to internal mold weight
3. Smell test—persistent mildew odor indicates hidden growth
4. Rotate toys—store 50% in sealed container; use only half at a time to extend lifespan
5. Replace squeeze valves on aging toys using manufacturer repair kits
Discard toys showing any wear after 6 months of regular use. Pediatricians recommend replacing all bath toys quarterly for infants under 12 months—their immune systems can’t fight mold-related infections. For older toddlers, extend to 6-month replacement cycles if passing all monthly checks.
Pro Storage Hack for Off-Season Toys
Before storing toys between bath seasons, place them in ziplock bags with silica gel packets (from shoeboxes). Squeeze out all air before sealing—this creates a moisture-free environment preventing mold during storage. Never store bath toys in airtight plastic bins; residual humidity becomes a mold incubator.
Final Prevention Strategy: The 2-Minute Post-Bath Routine
Spend just 120 seconds after every bath to eliminate future mold:
1. Squeeze all water from toys while still in tub (prevents suction-lock water retention)
2. Rinse under hot running water for 15 seconds per toy
3. Hang in mesh drying bags immediately—do not towel-dry
4. Wipe shower walls where toys were stored to remove moisture
This daily habit prevents 95% of mold issues by denying fungi the 24-hour moisture window they need to establish colonies. Pair this with weekly peroxide soaks for rubber toys and monthly deep cleans for hard plastics, and your baby’s bath toys will stay truly clean. Always prioritize manufacturer instructions over generic advice—when in doubt, contact the toy maker directly for material-specific guidance. Your pediatrician can also recommend hospital-grade sanitizers safe for infant use if mold concerns persist despite proper cleaning. Remember: mold prevention isn’t just about cleanliness—it’s protecting your baby’s fragile respiratory system from invisible threats hiding in plain sight.
Leave a Reply