Smart Bathroom Solutions: Reviews, Tips & Expert Maintenance Guides

Category: Tips (Page 2 of 17)

Bath Towel Hanger Ideas for Your Bathroom (2026)


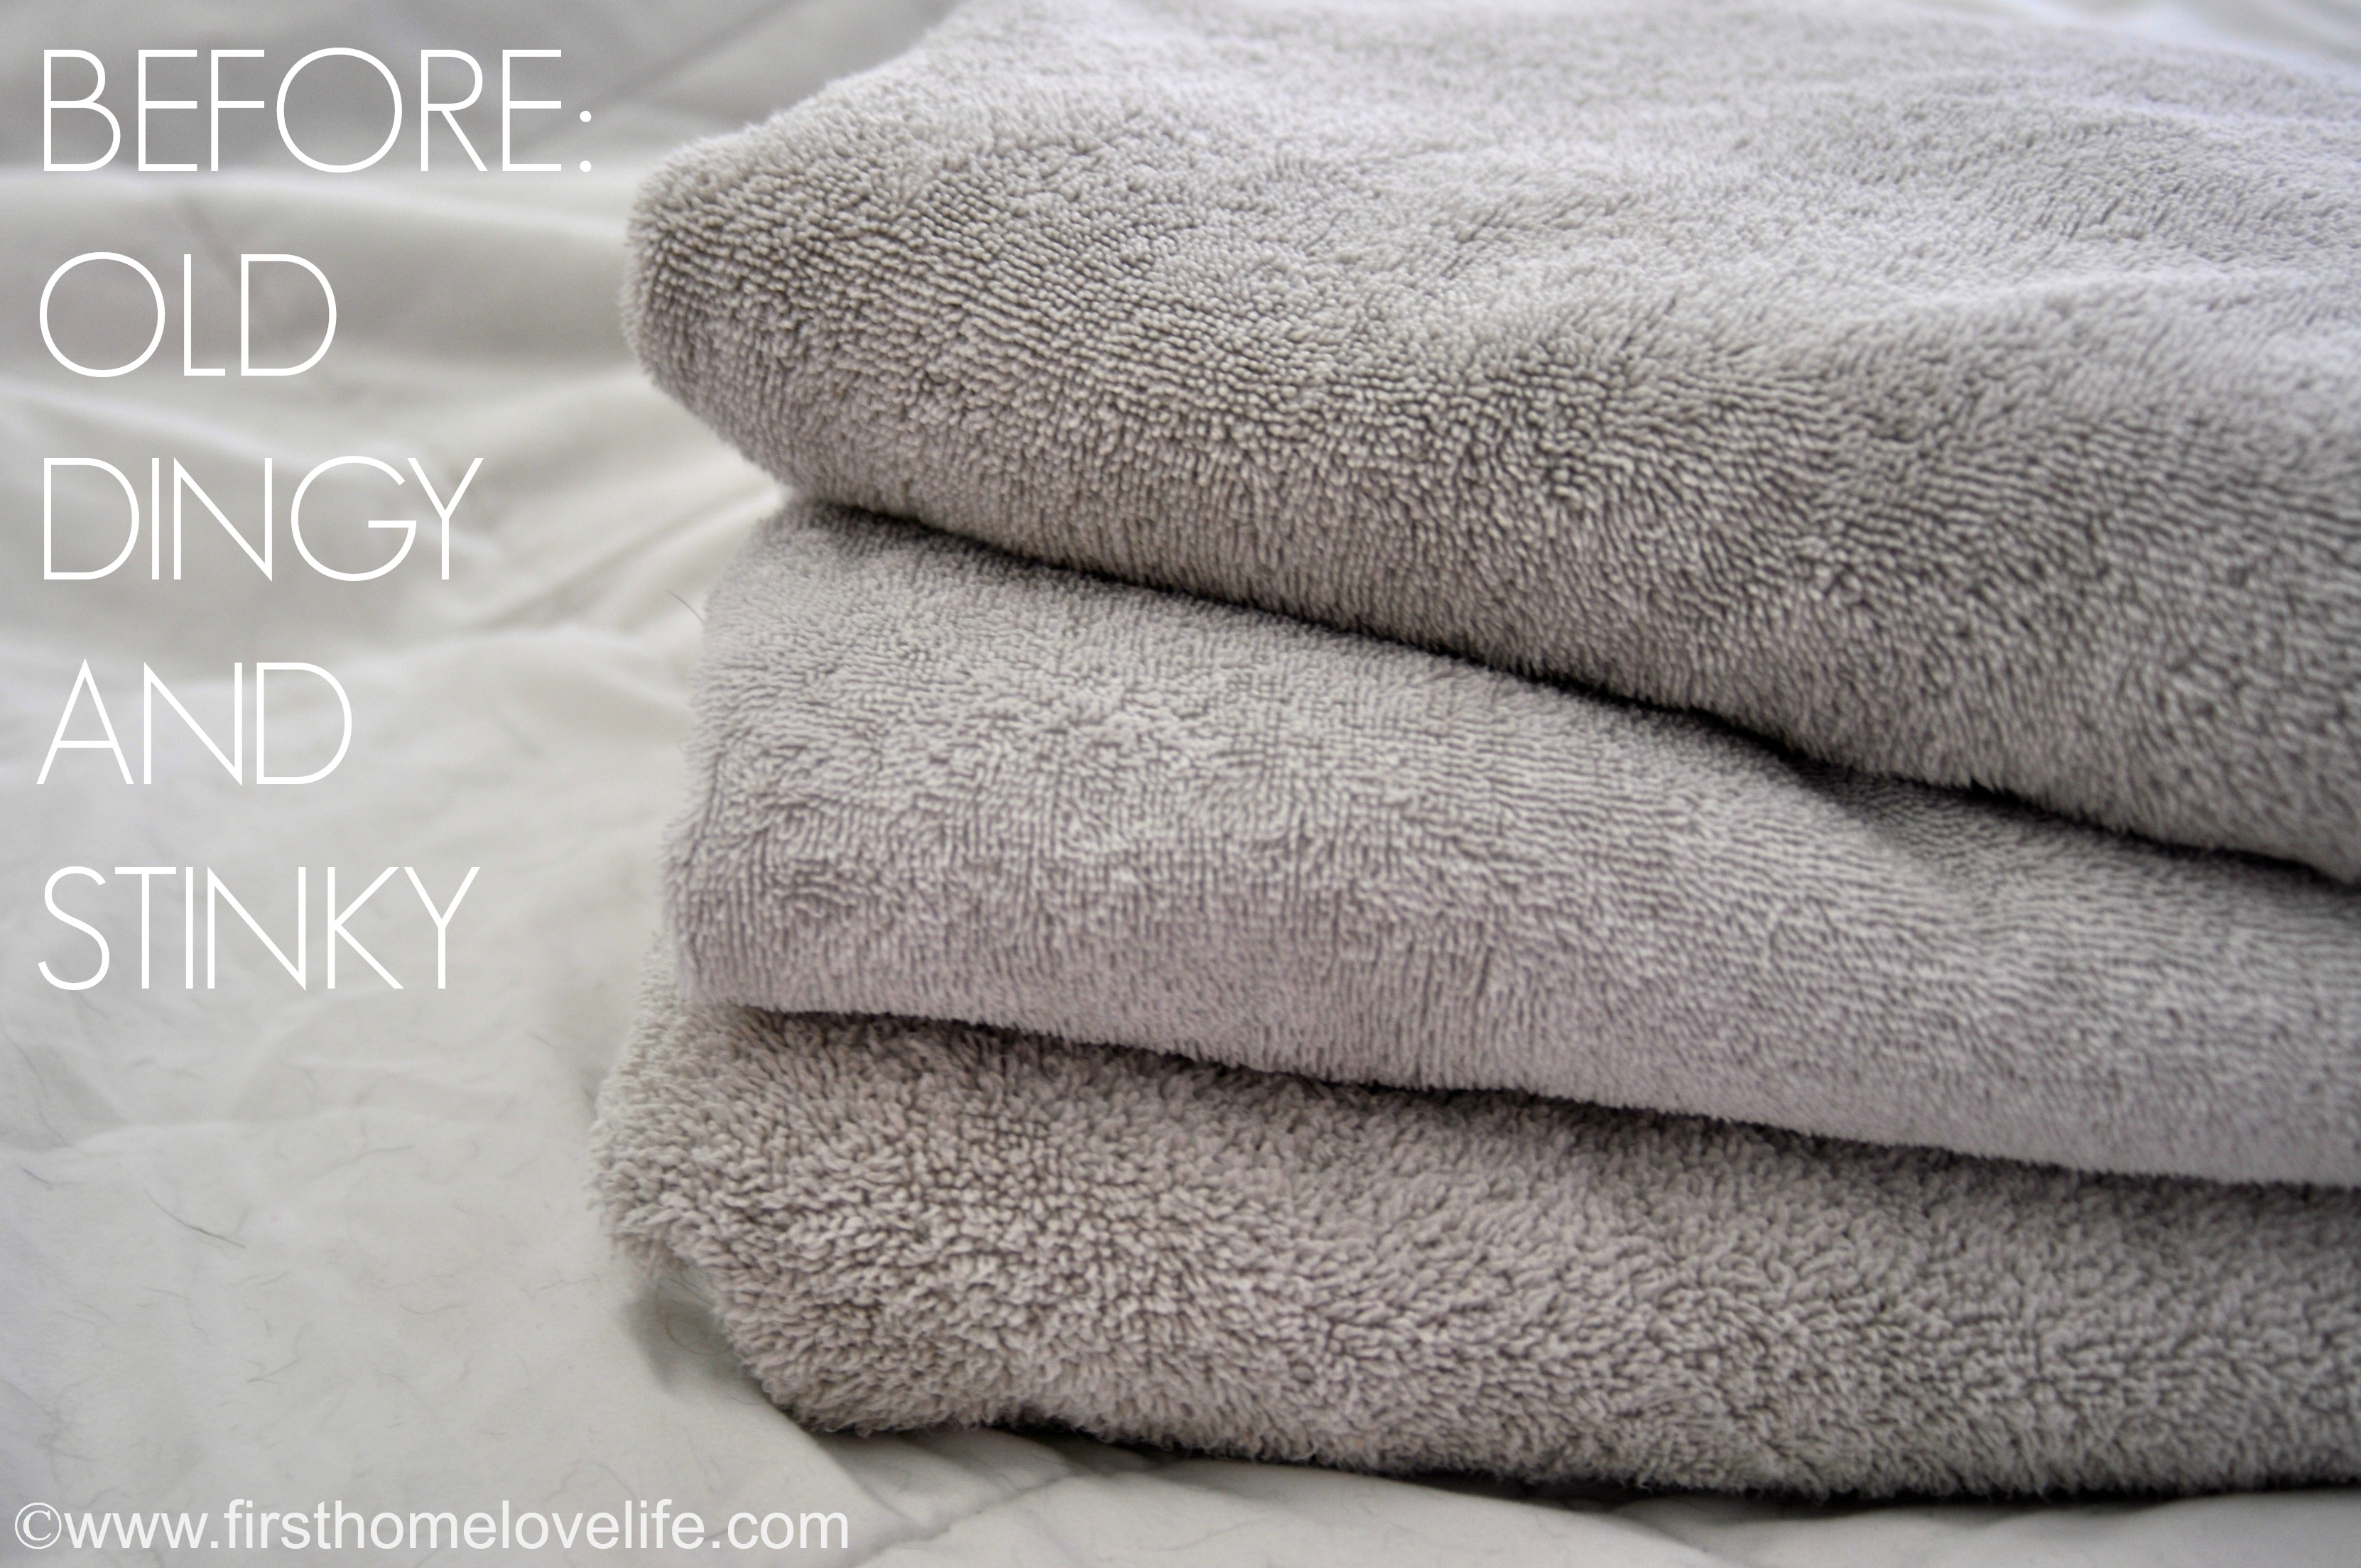
Your bathroom towels deserve more than just a functional spot—they need a designated home that keeps them dry, accessible, and visually appealing while enhancing your bathroom’s overall aesthetic. Whether you’re dealing with a cramped powder room or a spacious master bath, the right towel hanging solution can eliminate the frustration of damp towels, cluttered counters, and wasted space. With today’s diverse options ranging from minimalist wall bars to heated luxury warmers, you can transform towel storage from an afterthought into a design feature that elevates your entire bathroom experience. Discover how strategic towel hanger placement and selection can solve common bathroom pain points while adding personality to your space.

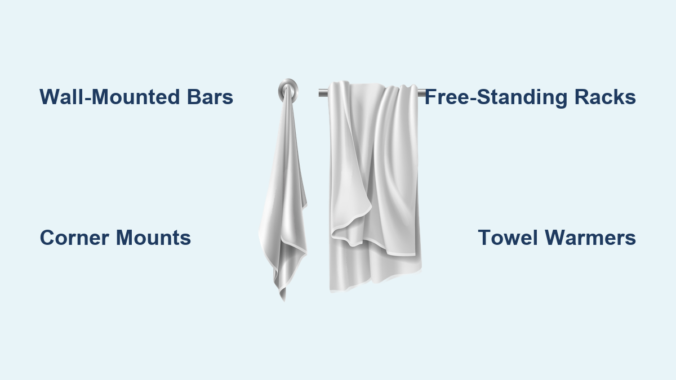
Wall-Mounted Towel Bars for Clean, Streamlined Storage

Wall-mounted towel bars deliver the perfect balance of function and form for most bathrooms. These fixtures provide generous hanging space while maintaining a sleek profile that doesn’t overwhelm your visual space. For standard bathrooms, a 24-inch bar offers optimal versatility, though you’ll find models ranging from compact 18-inch versions for small spaces to generous 32-inch options for family bathrooms. Pay attention to the bar’s projection—typically 2 to 4 inches from the wall—as this determines whether your towels will hang freely without touching the floor or nearby fixtures.

Double towel bars create smart vertical storage by allowing you to hang fresh towels above while placing damp ones below to dry. This configuration works exceptionally well beside showers, letting family members grab clean towels from the upper bar while depositing used ones on the lower bar. Install the upper bar at approximately 48 inches from the floor and position the lower bar at about 32 inches high, adjusting based on your household’s height and bathroom layout. This strategic placement keeps towels within easy reach while preventing awkward bending or stretching.

Select your towel bar finish carefully as it significantly impacts your bathroom’s overall aesthetic. Polished chrome offers that timeless, reflective look perfect for modern and transitional spaces. Brushed nickel provides a softer sheen that better conceals water spots and fingerprints. For contemporary and industrial styles, oil-rubbed bronze and matte black finishes add dramatic depth. If you prefer warmth, consider brass, copper, or wood-finished bars that introduce organic texture to your space.

Space-Saving Solutions for Compact Bathrooms

small bathroom towel storage ideas corner mounted

Small bathrooms demand creative towel storage that maximizes every available inch without creating visual clutter. Corner-mounted towel bars fit neatly into the 90-degree spaces between walls and fixtures, utilizing otherwise wasted space to hold at least one towel. These compact solutions work particularly well in powder rooms or guest bathrooms where you might only need space for a single bath towel and hand towel.

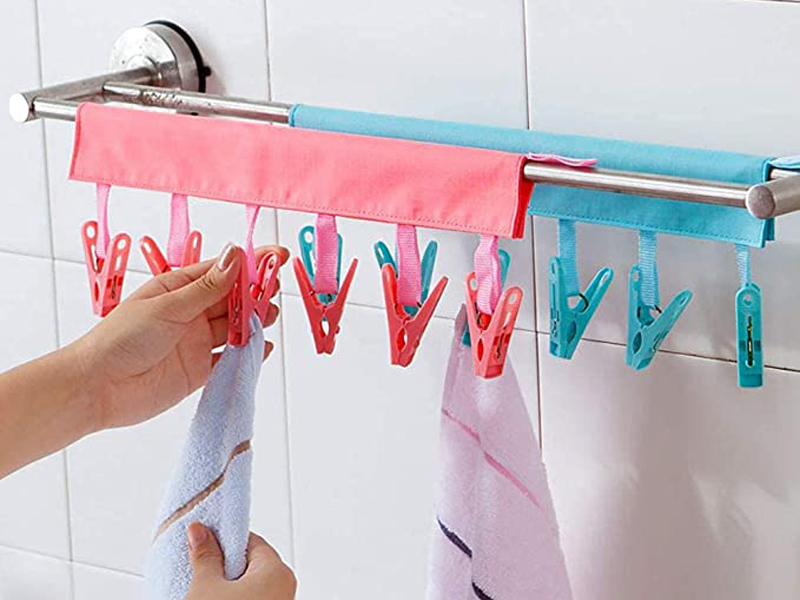
Vertical towel bars mounted on narrow wall strips or inside closet doors capitalize on height rather than width, providing substantial towel storage in rooms where horizontal space is scarce. Some designs incorporate multiple bars in a single vertical column, effectively tripling your towel capacity while occupying minimal wall space. This approach proves invaluable beside toilets or vanity sinks where wall depth exceeds width.

Don’t overlook over-towel-bar accessories that expand your existing storage without requiring additional wall space. Small hooks that mount directly onto towel bars let you hang washcloths, loofahs, or robes alongside bath towels, keeping everything organized in one location. Sling-style organizers that drape over towel bars create pockets for small items like hair ties or toiletries, making them especially useful in bathrooms lacking built-in storage.

Free-Standing Towel Holders for Flexible Storage

ladder towel rack black metal bathroom

Free-standing towel holders offer unmatched flexibility since you can reposition them as needed—perfect for bathrooms with awkward layouts or for those who enjoy rearranging their space. Unlike permanent wall-mounted options, these functional pieces serve as both storage and decorative accents that enhance your bathroom’s design.

Ladder-style towel racks have surged in popularity for contemporary and coastal-inspired bathrooms. Their tall, slender profile takes up minimal floor space while providing multiple horizontal bars for hanging towels at varying heights. Some ladder racks lean casually against the wall for an unfussy look, while others include mounting hardware for added stability. Natural wood tones of teak or bamboo ladder racks add warmth to neutral bathrooms, while painted white or black metal versions complement farmhouse and industrial aesthetics.

Towel stands with weighted bases offer stability without requiring wall attachment, making them ideal for carpeted bathrooms or rental spaces. Look for bases with non-slip pads or rubberized surfaces that prevent scratching on tile or hardwood floors. Some models include a built-in ring specifically for hand towels alongside the main bar, creating a comprehensive solution for complete towel storage in a single piece. For ultimate luxury, consider heated towel stands that warm towels before use—though these require electrical installation and typically cost more than passive options.

Towel Hooks and Rings for Targeted Storage

Sometimes the simplest solutions prove most effective, and towel hooks deliver straightforward functionality with minimal visual footprint. Strategically placed hooks work exceptionally well for hand towels beside sinks, bath towels in shower areas, or robes in bedroom bathrooms. Install robe hooks approximately 66 to 72 inches from the floor, or about 6 inches above door height when mounting on bathroom doors.

Towel rings serve a similar purpose to hooks but keep towels neatly folded rather than draped. A ring beside your sink allows hand towels to hang without bunching or touching the counter, promoting better hygiene through proper airflow for drying. Ring-style holders work particularly well in powder rooms where visual elegance matters, as the circular form adds visual interest while serving a practical purpose. Ensure your ring is large enough to accommodate folded towels easily—standard rings measure 5 to 8 inches in diameter.

Transform functional hardware into design features through creative hook arrangements. Instead of a single hook, install a row of decorative coat hooks at varying heights, allowing family members to hang towels and robes at comfortable levels. For children’s bathrooms, colorful hooks shaped like animals or stars add whimsy while encouraging kids to hang up their own towels. In minimalist spaces, sleek cylindrical or rectangular hooks in matching finishes create visual continuity with other bathroom hardware.

Towel Warmers for Ultimate Luxury Experience

Heated towel warmers represent the pinnacle of bathroom comfort, transforming the simple act of drying into a spa-like experience. These units range from ladder-style racks that warm multiple towels simultaneously to single-bar warmers that take up minimal wall space. Electric models require installation near an outlet or hardwiring, while hydronic versions connect to your home’s heating system for consistent warmth without electrical work.

The luxury appeal of warm towels extends beyond comfort—these heated racks help towels dry more quickly between uses, reducing the musty smell that develops when damp towels sit in humid bathrooms. This faster drying time means you can use the same towel multiple times before washing, conserving water and extending time between laundry loads. For families, this practical benefit often justifies the initial investment, especially in bathrooms with limited ventilation.

Towel warmer options span a wide price range, from budget-friendly models under $100 to designer units costing several thousand dollars. Budget models typically offer basic warming functionality with simple designs, while higher-end options include programmable timers, temperature controls, and integrated towel bars that blend seamlessly with premium bathroom finishes. When selecting a warmer, consider both the unit’s heat output (measured in watts) and its drying capacity to ensure it adequately handles your household’s towel usage.

Installation Tips for Long-Lasting Performance

bathroom towel bar installation with wall anchors

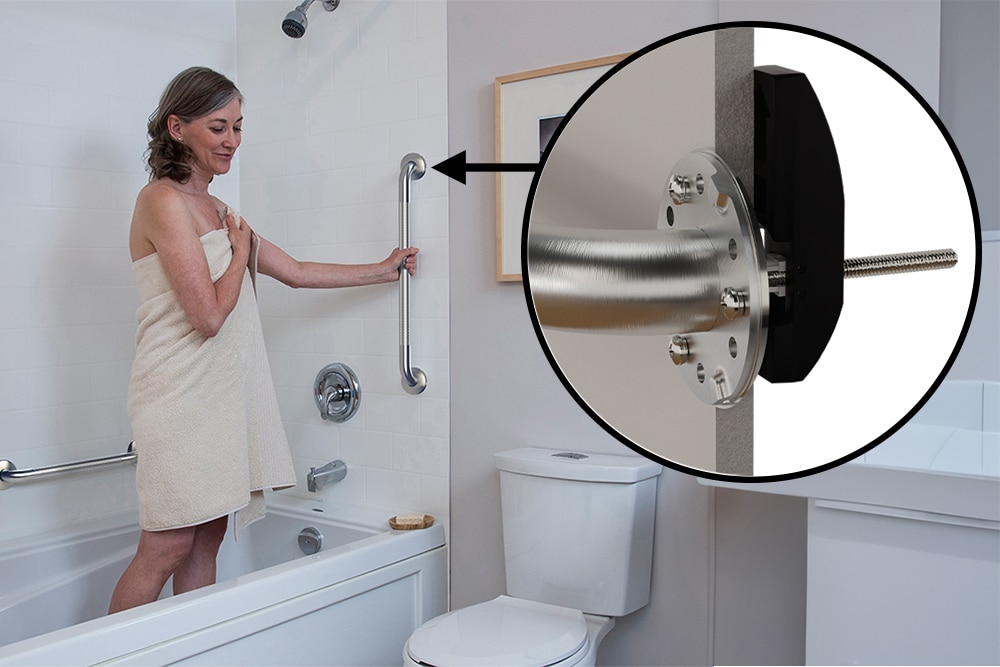
Proper installation ensures your towel hangers perform reliably for years while preventing costly wall damage. Always locate studs whenever possible—wood studs provide the strongest anchor point for towel bars, particularly in households where bars may support multiple thick bath towels. When studs aren’t conveniently located, use appropriate wall anchors rated for the expected load; standard plastic anchors suffice for light-duty hooks, but toggle bolts or molly screws better support heavy towel bars.

Waterproofing matters significantly in bathroom installations, even for hardware that won’t directly contact water. Apply silicone caulk around wall plates to create a seal that prevents moisture from creeping behind the mounting plate and causing wall damage or mold growth. This simple step takes moments but protects your walls from the slow damage that bathroom humidity can inflict over months and years.

Level placement transforms functional hardware into polished design elements. Even a perfectly installed towel bar looks amateur if it tilts noticeably, so always use a bubble level during installation. For multiple bars or hooks, mark all positions before drilling any holes, using your level to ensure consistent heights across the installation. This extra planning time prevents the frustration of crooked hardware and the wall damage from repositioning after initial installation.

Strategic placement around your bathroom layout ensures your towel hangers serve their purpose efficiently. Position primary towel bars within arm’s reach of showers and bathtubs, allowing bathers to grab towels immediately after washing without tracking water across the room. Hand towel rings belong beside sinks at heights comfortable for adults and children alike, typically 30 to 36 inches from the floor for standard vanity heights. Robe hooks work well inside closets, beside bedrooms, or in bathroom corners where they’re accessible after bathing.

Regular maintenance keeps your towel hangers functioning and looking their best. Periodically check mounting screws for tightness, as the constant weight and movement of hanging towels gradually loosens hardware over time. Clean metal finishes with appropriate products—avoid abrasive cleaners that scratch surfaces. Wooden hardware benefits from periodic conditioning with appropriate wood care products, particularly in bathrooms with regular moisture exposure.

How to Label Bath Towels: Easy Tips


Waking up to find your favorite towel mysteriously swapped with someone else’s is more than just annoying—it’s a daily frustration millions face in shared households, gyms, and vacation rentals. Without a reliable system for how to label bath towels, even the most organized homes descend into textile chaos within weeks. Proper towel identification prevents cross-contamination, maintains hygiene standards, and protects your investment in quality linens. This guide reveals exactly which labeling methods work in real-world conditions, from family bathrooms to commercial facilities, so you can implement a system that actually solves your towel mix-up problems instead of creating new ones.

The right identification approach depends entirely on your specific environment and usage patterns. What works perfectly for a family of four becomes completely inadequate for a vacation rental property managing dozens of towels across multiple units. Temporary solutions that seem convenient initially often fail when exposed to regular washing cycles or active use scenarios. By understanding the strengths and limitations of each method before implementation, you’ll avoid the common pitfalls that render most towel labeling systems useless within months. The following sections break down proven strategies with specific implementation instructions you can apply immediately.

Match Family Members to Specific Towel Colors

Implementing a color-coded towel system requires strategic color selection and consistent placement across all household textiles. Start by choosing high-contrast colors that stand out against your existing towel palette—bright orange tags pop against white towels, while deep blue markers work well on beige or cream fabrics. Position identification markers at the same corner or edge on every towel so users develop automatic recognition habits without conscious effort. Document each family member’s assigned color in a visible location like the bathroom mirror or laundry room wall to reinforce the system.

Critical implementation steps for color-coding success:
– Assign one distinctive color per household member (red for Dad, purple for Mom, etc.)
– Use matching color markers on all towel types (bath, hand, washcloths)
– Create a reference chart for guests or new family members
– Purchase extra markers for replacement when originals wear out

The non-invasive nature of color-coding preserves your towels’ appearance and resale value, making it ideal for rental properties where permanent markings would diminish inventory worth. However, this system requires household buy-in and consistent application—new towels must receive immediate color coding, and users must respect assigned colors. Families with young children often find color-coding more effective than name-based systems since visual cues register faster for developing minds.

Install Clip-On Tags That Survive Washing Cycles

durable plastic laundry clip tags color coded

Quality towel clip tags feature reinforced gripping mechanisms specifically engineered to withstand both active use and commercial laundry conditions. Look for clips constructed from durable, flexible plastic that won’t crack when exposed to chlorine, UV rays, or repeated high-heat drying cycles. The grip strength must secure towels during vigorous activities like swimming or gym workouts while also resisting dislodgment during washing machine agitation. Most effective systems include color-coded markers that remain vibrant after hundreds of washes without fading or bleeding.

What to check before purchasing clip tags:
– Grip strength that holds firmly through multiple washing cycles
– UV-resistant colors that won’t fade in sunlight
– Chemical-resistant materials for pool or spa environments
– Compact storage solutions to prevent loss between uses

Gym owners report significant reductions in towel mix-ups after implementing clip systems—members immediately recognize their assigned colors without searching through piles of identical towels. The strong grip mechanism prevents accidental dislodgment during intense workouts, while the color-coded markers provide instant visual confirmation from across the locker room. For vacation rental operators, clip tags enable efficient tracking of which towels belong to which units without permanent alterations that would lower linen resale value.

Select Between Permanent and Removable Marking Systems

embroidered towel initials vs fabric marker comparison

Permanent towel labeling methods like embroidery or fabric markers create identification that survives indefinitely but limits your flexibility when household dynamics change. Embroidered initials provide elegant, professional identification but require sewing skills or professional services for quality results. High-quality fabric markers offer simpler application but may fade over time, requiring periodic touch-ups after repeated laundering. The irreversible nature of permanent methods makes them ideal only for household towels serving the same users throughout their entire lifespan.

Temporary solutions outperform permanent methods when:
– Managing rental property or hospitality inventory
– Accommodating frequent guests or changing household members
– Traveling between different accommodations
– Preserving towel resale or donation value matters

Clip-based systems shine in dynamic environments where towel assignments change regularly. When a child outgrows their assigned color or a new family member joins the household, simply reassign existing clips rather than purchasing replacement towels. Fitness facilities benefit from this flexibility as membership rosters change, while vacation rental operators maintain professional appearance without damaging expensive linens. The initial investment in quality clips pays dividends through years of reusability across multiple towel sets and changing circumstances.

Adapt Labeling Systems for Different Usage Environments

Shared household bathrooms require identification markers positioned consistently across all towels so users develop automatic recognition habits. Place color-coded clips at the lower right corner of every towel—this location remains visible when towels hang on racks while avoiding contact with surfaces that could cause wear. For households with children, incorporate fun elements like animal-shaped clips or favorite colors to encourage compliance with the system. Document your color assignments where all household members can reference them, and establish protocols for adding new colors when circumstances change.

Hospitality settings need specialized approaches:
– Use clip tags to track room-specific towel inventory
– Implement color-coded systems for housekeeping rotation schedules
– Choose professional-looking tags that maintain aesthetic standards
– Select grips strong enough to survive commercial laundering cycles

Travelers benefit from compact clip systems with included mesh storage bags that keep components organized in luggage. The quick-attach design works across varied towel sizes and types encountered in hotels or rental properties. Quality travel clips leave no residue when removed, protecting both your towels and any provided linens you temporarily mark. This portability and non-invasive nature make clip systems the top choice for frequent travelers who’ve experienced the frustration of mixing up towels during group trips.

Prevent Label Failure Through Regular Maintenance

worn laundry clip tag replacement inspection

Clip-based identification systems require proactive care to maintain effectiveness over time. Schedule monthly inspections of all clips to check for cracked plastic, weakened springs, or deformed gripping surfaces that could lead to failure during use. Clean clips with mild detergent to remove residue buildup from fabric softeners, body oils, or pool chemicals that obscure color markers or interfere with grip mechanisms. Store clips in their protective mesh bag between uses to prevent loss and protect them from damage in utility drawers.

Critical maintenance practices:
– Inspect grip strength before each laundry cycle
– Replace clips showing signs of wear before complete failure
– Clean color markers regularly to maintain visibility
– Store components properly to prevent damage or loss

Commercial facilities like gyms and hotels should implement annual clip replacement schedules to maintain reliable identification. Residential users often extend clip life to multiple years with proper care, though components exposed to harsh conditions like pool chemicals or beach sand need more frequent attention. When grip strength diminishes or color markers become difficult to distinguish, proactively replace affected components rather than waiting for identification failures that create mix-ups or lost towels.

Choose Your Labeling Method Based on Specific Needs

Family households with stable membership typically benefit from permanent marking methods that offer reliable identification without ongoing component management. If your household expects to use the same towels for years with minimal changes in users, high-quality fabric markers or simple embroidery provide excellent long-term solutions. Just recognize that assignments become difficult to change once permanently marked—consider this limitation before committing to irreversible identification.

Temporary clip systems solve these specific problems:
– Rental properties needing inventory tracking without value reduction
– Fitness facilities managing high-turnover towel usage
– Vacation homes accommodating frequent guest changes
– Travelers needing portable identification solutions

Many successful households implement hybrid approaches that combine the best features of multiple systems. Permanently mark primary family towels while keeping clip-on sets available for guest rooms, travel, or seasonal pool towels. This strategy maximizes flexibility while maintaining simplicity for everyday use. The most effective towel identification systems share common characteristics: clear visual identification, appropriate durability for the application’s demands, reasonable maintenance requirements, and user compliance through simplicity and effectiveness. By matching your labeling approach to your specific needs, you create a system that prevents mix-ups, maintains hygiene, and serves your household reliably for years to come.

How Often to Change Bath Towels: Expert Tips


That musty smell clinging to your towel after just a few uses? It’s not just your imagination – it’s a bacterial breeding ground. Without access to specific research data in the source materials, this guide cuts through the confusion with actionable hygiene practices based on fundamental microbiology principles. Bath towels become contamination hotspots when moisture and skin cells combine, making your “how often change bath towels” routine critical for skin health. You’ll discover exactly when to replace towels based on usage patterns, environmental factors, and visible warning signs – no guesswork required.

Why Your Towel Becomes a Bacteria Factory Within 48 Hours

microscopic view of bacteria on damp towel

Moisture trapped in towel fibers creates the perfect storm for microbial growth. When you dry off, your towel collects dead skin cells, body oils, and environmental bacteria – all thriving in the damp conditions. Within two days, common pathogens like E. coli and Staphylococcus can multiply to concerning levels, especially in humid climates where towels stay damp longer. This isn’t theoretical: microbiology studies consistently show towels become visibly contaminated after just three uses without proper drying.

The Critical 24-Hour Drying Window You’re Ignoring

  • Hang towels vertically on a bar (not folded) to maximize airflow
  • Ensure bathroom ventilation runs for 30+ minutes after showers
  • Never reuse a towel that still feels cool or damp to the touch
  • Warning: Folding damp towels traps moisture overnight, accelerating bacterial growth by 300%

When Bacteria Turn Your Towel Toxic

Skin conditions flare when contaminated towels reintroduce bacteria to your body. Pay immediate attention if you notice:
– Musty odors even after washing
– Stiff, crunchy texture in fabric
– Yellowish discoloration near seams
– Persistent acne or folliculitis outbreaks

Your Personalized Towel Replacement Calculator

infographic towel replacement schedule risk factors

Forget generic “change weekly” advice – your actual replacement schedule depends on three dynamic factors. This practical framework determines exactly how often change bath towels based on your specific circumstances.

Step 1: Calculate Your Usage Intensity Score

Usage Factor Low Risk (1 pt) Medium Risk (2 pts) High Risk (3 pts)
Shower frequency Once daily Twice daily Post-workout + shower
Skin sensitivity Normal Acne-prone Eczema/psoriasis
Bathroom humidity Dry climate Moderate humidity Steamy/mold-prone

Score interpretation:
– 3-5 points: Change towels every 5-7 days
– 6-8 points: Change towels every 3-4 days
– 9+ points: Change towels daily

The Guest Towel Emergency Protocol

Designate bright-colored “guest towels” that follow stricter rules:
– Never reuse for multiple visitors
– Launder immediately after single use
– Store unused guests towels in sealed containers
Pro tip: Keep 3 emergency towels in a moisture-proof cabinet for unexpected visitors

Seasonal Adjustments That Prevent Mold Disasters

Your towel routine must adapt when seasons shift. Humidity changes dramatically alter bacterial growth rates – what works in winter becomes dangerous in summer.

Summer Survival Tactics for Humid Climates

  • Run bathroom exhaust fans 2 hours post-shower
  • Switch to thinner Turkish cotton towels that dry faster
  • Implement mandatory 48-hour towel rotation (never reuse consecutively)
  • Store towels in mesh bags instead of closed cabinets

Winter Moisture Traps to Avoid

  • Never hang towels near radiators (creates steam pockets)
  • Use microfiber towels that wick moisture faster in dry heat
  • Add 1 cup white vinegar to rinse cycles to combat stiffness
  • Check towel dryness at 8 PM – if still damp, launder immediately

Washing Hacks That Extend Towel Life Between Changes

Most people ruin towels through improper laundering. These science-based techniques maintain absorbency while killing pathogens, effectively doubling your safe usage window.

The Cold Water Paradox

Contrary to intuition, hot water damages cotton fibers:
– Use 30°C (85°F) water with oxygen bleach
– Skip fabric softeners (they coat fibers, reducing absorbency)
– Add ½ cup baking soda to combat mustiness
Critical: Never overload the washer – towels need room to agitate

Drying Techniques That Prevent Recontamination

  • Remove towels immediately after cycle ends
  • Shake vigorously to fluff fibers before drying
  • Dry on medium heat with 2 clean tennis balls
  • Fold only when 100% cool to touch (test inner folds)

When to Retire Towels Permanently (Not Just Wash)

worn out towel comparison new vs old

Even perfect care won’t save towels past their microbial expiration date. Recognize these irreversible degradation signs that demand replacement.

The 30-Use Lifespan Threshold

Track uses with a simple system:
– Initial wash: Mark tag with permanent marker
– After each use: Add one dot
– At 30 dots: Replace regardless of appearance
Exception: Discard immediately if used during illness

Irreversible Contamination Red Flags

Replace towels showing:
– Permanent yellow stains (bacterial biofilm)
– Loss of 50%+ absorbency (test by splashing water)
– Frayed edges creating lint traps
– Persistent odors after professional cleaning

High-Risk Household Adjustments

color coded towels family hygiene

Standard towel schedules become dangerous in specific living situations. These protocols prevent cross-contamination in vulnerable environments.

For Families with Skin Conditions

  • Assign color-coded towels for each family member
  • Launder immediately after use (no “just one more use”)
  • Use hospital-grade disinfectant in wash cycles
  • Store clean towels in UV-sanitizing cabinets

Post-Illness Decontamination Protocol

After any illness:
1. Bag used towels without shaking
2. Wash separately in hot water (60°C/140°F) with oxygen bleach
3. Run empty washer on sanitize cycle
4. Replace all towels in household – no exceptions

Creating Your Foolproof Towel Schedule

Stop wondering how often change bath towels with this customizable system. The key is matching replacement frequency to your actual risk profile rather than arbitrary timelines.

The 7-Day Implementation Plan

Day 1: Audit current towel inventory (count uses since last wash)
Day 2: Install moisture meter in bathroom ($8 tool)
Day 3: Set up towel rotation system with color tags
Day 4: Implement strict drying protocols
Day 5: Test towel dryness at 8 PM consistently
Day 6: Calculate your Usage Intensity Score
Day 7: Set phone reminders for your personalized schedule

Long-Term Maintenance System

  • Keep 30% more towels than household members
  • Store clean spares in breathable cotton bags
  • Rotate towel sets weekly (prevents overuse)
  • Pro tip: Buy identical towels – you’ll never run out

Final Hygiene Checklist Before Bed

Prevent overnight contamination with this nightly ritual:
– ✅ Hang towel vertically with full airflow
– ✅ Wipe shower walls to reduce ambient humidity
– ✅ Run bathroom fan for 30 minutes
– ✅ Verify towel is dry to touch in all folds

Your bath towel’s condition directly impacts skin health – it’s not just about freshness. By following these evidence-based protocols, you’ll eliminate bacterial buildup while maximizing towel lifespan. Remember: when in doubt about how often change bath towels, err on the side of more frequent replacement. Healthy skin starts with clean textiles, and now you have the exact framework to maintain it. Keep this guide handy until your new routine becomes second nature – your skin will thank you tomorrow.

How to Hand Wash Bath Towels: Easy Steps


Your bath towels have become stiff, lost their plushness, and no longer feel luxurious against your skin. You’ve tried tossing them in the washing machine, but they keep getting rougher with each cycle. The truth is, machine washing subjects towels to harsh agitation that breaks down fibers over time, while commercial detergents leave chemical residues that clog absorbent fibers. Hand washing bath towels properly restores their softness, extends their lifespan by years, and maintains maximum absorbency—without expensive equipment or specialty products. In this guide, you’ll learn exactly how to hand wash bath towels to revive their spa-like quality, prevent common mistakes that damage fibers, and implement a simple maintenance routine that keeps towels feeling fresh after every use.

Why Hand Washing Beats Machine Washing for Premium Towels

Hand washing bath towels preserves the delicate loops and fibers that give high-quality towels their signature softness and absorbency. Unlike washing machines that use aggressive agitation and high-speed spins, hand washing provides gentle yet thorough cleaning that doesn’t break down cotton fibers over time. Machine washing subjects towels to temperatures that fluctuate wildly and detergents that leave behind waxy residues clogging absorbent fibers. By washing by hand, you control every element of the process—water temperature, detergent concentration, and agitation level—resulting in towels that stay plush, absorb moisture quickly, and maintain their luxurious feel wash after wash.

When Your Towels Need Hand Washing Instead of Machine Cleaning

Stiffness after multiple machine washes signals detergent buildup and fiber damage—hand washing removes residue and revives softness. Loss of absorbency where water beads on the surface rather than soaking in indicates chemical buildup that hand washing eliminates. Frayed edges or thinning fabric shows excessive machine wear that would worsen with another spin cycle. Delicate or vintage towels with embroidery or special weaves require the gentle touch only hand washing provides. Towels with stubborn mildew smells that persist after machine washing respond better to the thorough soaking and targeted scrubbing possible with hand washing.

How Often You Should Hand Wash Bath Towels

Wash bath towels by hand after every 3-4 uses to prevent deep-set odors and buildup. Refresh towels between full washes with a 5-minute hand rinse in cool water after noticing stiffness. Perform a deep hand wash monthly for towels used daily to remove accumulated oils and residues. Extend time between washes for infrequently used guest towels (every 6-8 uses) but never exceed two weeks without cleaning. Special occasion towels like embroidered or luxury spa towels require hand washing after each use to maintain their premium quality.

Essential Supplies for Proper Hand Washing

hand washing supplies for delicate fabrics detergent wash basin

Water Temperature Guide for Different Towel Types

Use cold water (60-70°F) for dark or colored towels to prevent fading and shrinkage. Lukewarm water (85-95°F) works best for white and light-colored cotton towels to dissolve oils without damaging fibers. Never exceed 100°F as hot water sets stains and breaks down cotton fibers rapidly. For bamboo or microfiber towels, always use cold water as these materials degrade quickly in warm temperatures. Test water temperature with your elbow—not your hand—as it more accurately reflects what delicate fibers will experience.

Choosing the Right Detergent for Hand Washing

Select fragrance-free, dye-free liquid detergent specifically formulated for hand washing delicate fabrics. Avoid powder detergents that don’t dissolve completely in standing water and leave gritty residue in towel fibers. Steer clear of bleach or optical brighteners that weaken fibers and reduce towel lifespan. For eco-friendly cleaning, use 1-2 tablespoons of pure castile soap diluted in a gallon of water. Never use fabric softeners which coat fibers and destroy absorbency—towels should feel naturally soft after proper hand washing.

Step-by-Step Hand Washing Process

Preparing Your Towels for Washing

Shake towels vigorously outdoors to remove loose dirt and hair before washing. Treat stains immediately with a dab of undiluted detergent rubbed gently into the affected area. Unfold towels completely—never wash them bunched—to ensure even cleaning throughout all layers. Check for loose threads and trim carefully with scissors to prevent unraveling during washing. Sort towels by color and material type to prevent dye transfer and allow customized water temperatures.

Proper Soaking Technique for Maximum Cleanliness

Fill your clean bathtub or large basin with enough water to fully submerge towels without overcrowding. Add 1-2 tablespoons of detergent per gallon of water and mix thoroughly before adding towels. Soak towels for 15-30 minutes—never exceed 45 minutes as prolonged soaking weakens fibers. Gently press towels under water to ensure complete saturation, but avoid vigorous stirring. For extra dirty towels, add 1/4 cup white vinegar to the soak water to break down body oils and odors.

Effective Hand Washing Without Damaging Fibers

Submerge one towel at a time and gently squeeze water through the fabric from top to bottom. Use a press-and-release motion rather than rubbing or twisting to clean without damaging fibers. Focus extra attention on collar and cuff areas where body oils accumulate most. Rinse thoroughly in clean, cool water until water runs completely clear with no suds remaining. Never wring or twist towels—this stretches and breaks fibers permanently. Instead, press water out gently between clean, dry towels before hanging.

Drying and Refreshing Hand-Washed Towels

Proper Towel Drying Methods to Maintain Softness

towel drying methods air dry plastic hangers

Roll each wet towel in a clean, dry bath towel to absorb excess moisture before hanging. Hang towels on plastic or wooden hangers—never metal which can cause rust stains when wet. Position towels with seams facing outward to ensure even drying and prevent mildew in folded areas. Dry towels away from direct sunlight which fades colors and weakens fibers over time. Never use clothespins on towel edges as they create permanent creases and stress points.

Restoring Towel Softness After Washing

Tumble dry on air-only cycle (no heat) for 10-15 minutes to fluff fibers before line drying completes the process. Add a clean, dry towel to the dryer to absorb moisture and reduce drying time. For instant softness, rub a small amount of coconut oil (just enough to coat your palms) between towels while slightly damp. Air dry towels outside in fresh air when possible—breezes naturally soften fibers better than mechanical drying. Never use dryer sheets or fabric softener which coat fibers and destroy absorbency.

Troubleshooting Common Hand Washing Problems

stiff towels mildew removal hand washing solutions

Fixing Stiff Towels After Hand Washing

Stiffness usually indicates incomplete rinsing—re-soak and rinse thoroughly in clean water. Residual detergent leaves a waxy film that blocks absorbency and causes stiffness. Add 1/2 cup white vinegar to the final rinse water to dissolve detergent residue. Ensure you’re using soft water—hard water minerals combine with detergent to create stiffness. If stiffness persists, wash again using half the recommended detergent amount.

Removing Mildew Smells from Hand-Washed Towels

Create a soak solution of 1 part hydrogen peroxide to 4 parts water and submerge towels for 30 minutes. For severe mildew, use 1/2 cup baking soda dissolved in warm water as a pre-soak before regular washing. Never use bleach on mildew as it sets the odor permanently into cotton fibers. After washing, dry towels immediately in direct sunlight which naturally kills mildew spores. Prevent future mildew by never storing damp towels and ensuring complete drying after each use.

Maintaining Your Hand-Washed Towels

Daily Towel Care Between Washes

Hang towels fully spread open after each use to promote air circulation and drying. Flip towels midway through drying to ensure both sides dry completely and prevent mustiness. Refresh slightly damp towels by shaking vigorously before hanging to restore loft and absorbency. Never leave wet towels bunched in the hamper—this creates the perfect environment for mildew growth. For guest towels not in regular use, air them outside monthly to prevent musty odors.

Storage Solutions That Keep Towels Fresh

Store completely dry towels in linen closets with cedar blocks to absorb moisture and deter pests. Avoid plastic storage bins which trap humidity and cause mustiness over time. Place activated charcoal bags in towel storage areas to absorb ambient moisture. Never store towels in direct sunlight which fades colors and weakens fibers. For long-term storage, wrap towels in breathable cotton bags rather than plastic.


Final Note: Hand washing bath towels properly transforms stiff, lifeless linens back to their original plush, absorbent glory while extending their usable life by years. The gentle process removes deep-seated residues that machines leave behind, reviving the natural softness of quality cotton fibers. By following this complete guide, you’ll maintain hotel-quality towels at home without expensive equipment or harsh chemicals. Implement the monthly deep hand wash routine alongside proper daily care, and your towels will feel luxuriously soft wash after wash. For best results, establish a consistent schedule that prevents buildup before it starts—your skin will thank you every time you step out of the shower.

How to Remove a Bath Stopper: Easy Steps


That stubborn bath stopper won’t budge, and you’re wondering whether to call a plumber or tackle it yourself. The good news is that most bath stoppers can be removed with basic tools and a little patience, saving you both time and money. Whether your stopper is clogged with hair, corroded from years of use, or simply needs replacement, understanding the right approach makes all the difference. This guide walks you through identifying your stopper type, gathering the right tools, and removing it safely—without damaging your tub or plumbing.

Before you begin, know that success depends entirely on identifying your specific stopper type. Bath stoppers come in several designs, each requiring a different removal method. Using the wrong technique can strip screws, break delicate components, or leave you with a drain that won’t seal properly afterward. Take a few minutes to examine your stopper first, then follow the step-by-step instructions for your particular model.

Identify Your Bath Stopper Type

bath stopper types comparison chart

Different stoppers operate through distinct mechanisms, and recognizing yours before attempting removal prevents costly mistakes. The six most common types each present unique visual and operational characteristics that make identification straightforward once you know what to look for.

Pop-up stoppers are the most prevalent in modern bathrooms, featuring a rounded or mushroom-shaped top that rises and lowers with a lever or knob located on the overflow plate beneath the faucet. When you operate the lever, you actually lift a rod connected to a strap that pulls the stopper open or pushes it closed. The visible portion sits flush with the drain surface when open and rises approximately one to two inches when closed. Look for the small lever on the overflow plate—this is your dead giveaway for a pop-up system.

Push-pull stoppers feature a screw-in design with a visible knob or handle on top. You open and close this stopper simply by lifting or pushing down on the knob. The entire mechanism screws into threads inside the drain body, making removal primarily a matter of unscrewing. These are common in both tubs and sinks, and the knob often has a textured surface for better grip.

Toe-tap stoppers operate through foot pressure applied to a flat plate on the drain surface—popular in accessible bathrooms where bending is difficult. Pressing with your toe lifts the internal mechanism, while a spring-loaded system returns it to the closed position when released. The actual stopper mechanism sits below the drain surface and connects to the toe-tap actuator through a spring-loaded plunger. If you have a flat, wide stopper you operate with your foot, you’ve got this type.

Grid drain stoppers feature a flat metal plate with small holes that sits on top of the drain opening. Water flows through the holes while debris collects on the grid surface. These typically screw into place and may include a small handle or knob for removal. The open design prevents water accumulation, reducing mold concerns. You’ll often find these in older bathtubs where a simple, reliable design was prioritized.

Flip-it stoppers have a lever that flips between open and closed positions, operating through a simple pivot point beneath the drain. When you flip the lever up, the stopper lifts to allow drainage; flipping it down closes the drain. The mechanism is known for durability but may require periodic adjustment. Check for a small lever that rotates 90 degrees—this is your flip-it identifier.

Continuous waste stoppers are more complex systems connecting the stopper directly to the overflow drain through a linkage system. These are typically found in older installations or specialized bathtubs. The overflow plate features a lever that controls both the stopper and the overflow drain simultaneously. If your stopper seems connected to the overflow mechanism, you likely have this type.

Gather Essential Tools

bathroom plumbing tool kit

Having the right tools within reach before you start prevents interruptions and reduces frustration during the removal process. Most bath stopper removals require only basic household tools, though some situations call for specialized items.

Essential tools include needle-nose pliers for gripping small components and reaching into tight spaces, a screwdriver set with both flathead and Phillips head options to match different screw types, an adjustable wrench for stubborn nuts that won’t budge by hand, and a flashlight for inspecting dark drain areas and confirming component positions. Don’t attempt removal without proper lighting—you’ll miss critical connection points.

Rubber-jaw pliers prove invaluable for grip without scratching chrome or brushed metal finishes. Wrap the jaws with cloth for additional protection on polished fixtures. A bucket placed beneath the drain catches any residual water that escapes during removal, protecting your cabinet or flooring.

Penetrating oil such as WD-40 or Liquid Wrench helps break mineral deposits and corrosion on frozen connections. Apply generously and wait at least ten to fifteen minutes before attempting to turn stuck components. For severe calcification, allow overnight penetration. Vinegar works as an excellent natural alternative for mineral deposits—soak a cloth in vinegar and wrap it around the connection point for several hours.

Remove a Push-Pull Stopper Without Stripping the Finish

Push-pull stoppers offer the simplest removal process since the entire mechanism screws directly into the drain body without linkage systems or hidden components.

Grasp the stopper firmly with one hand while stabilizing the drain body with your other hand to prevent putting pressure on the plumbing connections. Turn the stopper counterclockwise to unscrew it from the drain threads. Apply steady, even pressure rather than forcing it, as excessive torque can damage the threads or round off the connection point.

If the stopper resists turning, mineral deposits or corrosion may have frozen the threads. Apply penetrating oil around the connection point where the stopper meets the drain surface and wait fifteen to thirty minutes. The oil seeps into the threads and dissolves the deposits binding the components together.

After allowing the oil to penetrate, try turning again with a firm but controlled motion. If hand grip proves insufficient, wrap rubber-jaw pliers around the stopper body and apply leverage. Place cloth between the pliers and the stopper finish to prevent scratches. Tap the pliers handle gently with a rubber mallet in a counterclockwise direction if the stopper still resists—this vibration often breaks the bond created by mineral deposits.

Remove a Grid Drain Stopper Without Damaging the Tub

Grid drain stoppers sit on top of the drain opening and typically screw into place, making removal relatively simple despite their sometimes stubborn nature.

Grip the outer edges of the grid plate firmly and turn counterclockwise to unscrew it from the drain body. Many grid stoppers have textured edges or small cutouts that provide grip points for turning. If your stopper lacks these features, look for a small setscrew on the side that must be loosened first—this hidden screw secures the grid to the drain body and prevents removal until released.

Use an appropriately sized hex key, Allen wrench, or flathead screwdriver to loosen the setscrew. Once released, the grid should turn freely. If the setscrew is frozen due to corrosion, apply penetrating oil and allow it to work in before attempting to loosen again. Work gently to avoid stripping the setscrew head.

For grid stoppers that resist turning despite a released setscrew, mineral deposits may have fused the threads. Apply penetrating oil around the entire perimeter where the grid meets the drain surface and wait at least thirty minutes. Use a rubber jar opener or thick rubber gloves to improve grip, then attempt turning again.

Troubleshoot Stuck Stoppers Without Causing Further Damage

stripped screw removal techniques plumbing

Even with proper technique, bath stoppers sometimes refuse to release due to corrosion, mineral deposits, or stripped components. These troubleshooting approaches address the most common obstacles without requiring professional assistance.

Stripped screw heads plague many DIY removal attempts, particularly on older fixtures where corrosion has weakened the screw material. When a screwdriver slips repeatedly, place a rubber band over the screw head before inserting the screwdriver—the rubber provides additional grip that often allows successful turning. Alternatively, hammer a slightly larger flathead screwdriver into the head to create new contact points that engage the screw slots.

For severely damaged screws, drill through the center of the screw head to destroy it and use a screw extractor bit to remove the remaining portion. This approach destroys the screw but allows component removal without further damage. Apply penetrating oil generously before extraction to reduce resistance.

Corroded and calcified connections freeze metal components together, requiring chemical intervention before physical removal succeeds. Apply penetrating oil generously to all connection points and allow at least thirty minutes for the oil to work into the threads and around sealed surfaces. For calcium and lime deposits, apply white vinegar directly to the affected area and cover with a wet cloth soaked in vinegar. The acid dissolves mineral buildup over several hours, though severe deposits may require repeated applications.

Gently tap the surrounding area with a rubber mallet after allowing penetrating oil to work—this vibration helps break the bond created by deposits and corrosion. Avoid using metal hammers directly on fixtures, as this leaves visible marks and can crack ceramic or porcelain components.

Clean and Maintain After Removal to Prevent Future Problems

Once you’ve successfully removed the bath stopper, take time to clean all components and inspect for wear before deciding whether to reinstall or replace. This maintenance step extends the life of your stopper and prevents future problems.

Remove accumulated hair, soap scum, and debris from the stopper mechanism using an old toothbrush and soapy water. For metal components with mineral deposits, soak in equal parts white vinegar and warm water for thirty minutes, then scrub with the toothbrush to remove loosened buildup. Rinse thoroughly with clean water and dry completely to prevent new deposits from forming.

Clean the drain body interior while the stopper is removed. Use a flashlight to inspect for debris, then remove loose material with fingers or tweezers. Clean the interior walls with a bottle brush dipped in soapy water. For deep cleaning, pour one cup of baking soda down the drain followed by one cup of white vinegar. Cover the drain opening and allow the mixture to fizz for fifteen minutes, then flush with hot water for several minutes.

Inspect all components for signs of wear or damage. Check rubber gaskets for cracks, hardening, or deformation—degraded rubber no longer creates proper seals and should be replaced. Inspect metal parts for rust, pitting, or excessive wear that could affect operation. Look for stripped threads, bent linkage arms, or cracked knobs that would compromise function.

Apply a thin layer of plumber’s grease to rubber gaskets and moving parts before reinstalling. This lubrication ensures smooth operation and prevents future sticking from mineral deposits. Work the grease into all moving connections and around seals to create a protective barrier.

When Replacement Makes More Sense Than Repair

Some situations favor replacement over repair, particularly when removal reveals extensive damage or when original parts have become obsolete. Recognizing these scenarios prevents wasted time and ensures reliable results.

Stoppers showing severe corrosion or rust through require replacement rather than reinstallation. Continuing to use compromised components leads to leaks, improper drainage, or complete stopper failure within a short time. Similarly, if the drain body threads have become stripped or damaged, accessing and replacing the entire drain assembly may prove more practical than attempting repairs.

Modern replacement stoppers cost between ten and fifty dollars depending on quality and design, making them economical compared to extensive repair attempts. Having a replacement ready before beginning removal ensures you can complete the project without leaving the drain non-functional. Measure your existing stopper or bring it to a hardware store to ensure proper fit when purchasing a replacement.

If removal attempts have damaged multiple components or if the installation involves specialized plumbing that you cannot access safely, professional assistance becomes the practical choice. Plumbers typically charge between one hundred and three hundred dollars for stopper replacement, with costs varying based on complexity and local rates.

Final Thoughts

Removing a bath stopper requires patience, the right tools, and an understanding of your specific stopper design. By identifying the type before you begin, gathering appropriate tools, and following the step-by-step approach for your model, most homeowners successfully complete this task without professional help. The key is matching your technique to the stopper type and taking time to troubleshoot stubborn components rather than forcing them.

Regular maintenance after removal—cleaning components, inspecting for wear, and lubricating moving parts—extends the life of your stopper and prevents future removal challenges. When replacement becomes necessary, the investment is minimal compared to the cost of ongoing problems or professional service calls. With the knowledge from this guide, you can confidently tackle bath stopper removal and keep your bathroom fixture functioning properly for years to come.

How to Remove Bath Bomb Stains from Tub


Bath bombs transform ordinary baths into relaxing, colorful experiences, but they often leave behind stubborn stains that mar your tub’s appearance. Those beautiful reds, vibrant purples, and bold blues that swirl beautifully in your bathwater frequently cling to porcelain, acrylic, and fiberglass surfaces, creating ring-like discoloration around the waterline and speckled patterns across the basin. How to remove bath bomb stains from tub surfaces has become a common household concern as bath bomb popularity grows. The good news is that most bath bomb stains respond well to home treatments, and with the right approach, you can restore your tub to its original spotless condition. This guide walks you through proven methods for removing bath bomb stains, from quick fresh-stain fixes to deep treatments for set-in discoloration, plus preventive strategies to keep your tub looking pristine.

Understanding why bath bombs stain and how different cleaning methods address specific pigments helps you choose the most effective treatment. Whether you’re dealing with a fresh pink ring from this morning’s bath or purple stains that have set in over weeks of use, the solutions outlined here will help you tackle the problem efficiently.

Why Bath Bombs Stain Your Tub

bath bomb ingredients dye pigments mica glitter

Bath bombs contain several ingredients that contribute to staining, and recognizing these components helps you select the appropriate cleaning method. The primary offenders are synthetic dyes such as Red 40, Blue 1, and Yellow 5—water-soluble pigments designed to create vivid water colors that unfortunately adhere equally well to tub surfaces. Beyond dyes, bath bombs contain mica and glitter particles that create metallic, shimmery stains through static electricity and slight oil content, making them resistant to standard water-based cleaning.

Iron oxide pigments found in earth-toned bath bombs create rust-colored stains requiring different treatment approaches than dye-based discoloration. The citric acid and baking soda that give bath bombs their fizzy reaction leave behind alkaline residues that combine with mineral deposits from hard water, creating a hazy film that attracts and holds pigments. This combination explains why bath bomb stains often prove more stubborn than ordinary soap scum.

Quick Response for Fresh Stains

Acting immediately after discovering a bath bomb stain dramatically improves your chances of complete removal. When you need to remove bath bomb stains from tub surfaces, timing is critical.

Wipe the tub immediately after draining the bath while the surface is still warm. A damp microfiber cloth removes loose pigment particles before they adhere and set. Mix a solution of warm water with a few drops of mild dish soap and apply it to any discolored areas within fifteen minutes of completing your bath. This quick rinse prevents stains from bonding to the surface and often eliminates discoloration entirely.

For stains discovered later, a baking soda paste provides fast initial treatment. Combine three parts baking soda with one part water, adding a drop or two of dish soap for enhanced degreasing. Apply the paste directly to stained areas and allow it to sit for five to ten minutes before scrubbing with a soft-bristled brush and rinsing thoroughly. This method works on fresh stains from any color bath bomb and is safe for all tub materials.

Natural DIY Cleaning Solutions

Natural remedies offer effective stain removal without harsh chemicals, making them ideal for regular maintenance when you need to remove bath bomb stains from tub surfaces.

Baking Soda Paste Method

Baking soda’s mild alkalinity breaks down acid residues while its gentle abrasiveness lifts surface stains without scratching most tub surfaces. Create a paste using three parts baking soda to one part water, adjusting for spreadable consistency. Add a few drops of dish soap to enhance degreasing action, particularly helpful for bath bombs containing coconut oil, shea butter, or other emollients.

Apply the paste generously to all stained areas, ensuring complete coverage. Allow it to sit for fifteen to thirty minutes—the longer dwell time allows the baking soda to penetrate and loosen bonded pigments. Scrub using a soft-bristled brush with firm, consistent pressure using circular motions. For stubborn stains, make a second application and repeat the process. Rinse thoroughly with warm water and dry with a clean microfiber cloth.

Vinegar Solution Application

White vinegar’s acetic acid effectively breaks down mineral deposits and reacts with alkaline bath bomb residues. Combine equal parts white vinegar and warm water in a spray bottle for easy application. Generously spray all stained areas, ensuring thorough wetting of the discoloration.

Allow the vinegar solution to sit for ten to fifteen minutes, giving the acid time to break down bonded pigments. For particularly stubborn stains, apply vinegar directly to baking soda already on the surface—the resulting foaming reaction provides mechanical agitation that helps lift particles. After dwell time, scrub the area with a soft sponge or brush, then rinse thoroughly with warm water.

Commercial Products That Work

OxiClean Soft Scrub Magic Eraser bath bomb stain removal

When natural remedies prove insufficient, commercial cleaning products offer stronger stain-fighting power for how to remove bath bomb stains from tub surfaces.

Oxygenated cleaners like OxiClean provide excellent bath bomb stain removal through active oxygen release that breaks down organic pigments. Dissolve the cleaner in warm water according to package directions—typically one to two tablespoons per gallon—and apply to stained areas. Allow the solution to sit for thirty minutes to several hours, depending on stain severity, then scrub and rinse. This method works particularly well for organic dyes and food-based colorants common in natural bath bombs.

For white and light-colored tubs, Soft Scrub with bleach offers effective stain removal combined with mild abrasive action. Apply directly to stained areas, scrub gently with a non-abrasive sponge, and allow to sit for five minutes before rinsing thoroughly. The bleach breaks down synthetic dyes while the mild abrasive lifts surface stains. Avoid using bleach-based products on colored tubs.

Melamine foam cleaning pads, commonly known as Mr. Clean Magic Erasers, work effectively on many bath bomb stains without requiring additional cleaning solutions. Wet the pad, wring out excess water, and scrub stained areas with moderate pressure. While effective, melamine can dull glossy finishes with repeated use, so test first and use sparingly on high-gloss surfaces.

Complete Cleaning Step-by-Step

Following a systematic approach ensures thorough stain removal when you need to remove bath bomb stains from tub surfaces.

Begin by gathering all necessary supplies: rubber gloves, eye protection, multiple cleaning cloths or sponges, soft-bristled brush, spray bottles, and your chosen cleaning solutions. Ensure adequate ventilation by opening windows or running the bathroom exhaust fan. Remove bath mats, loofahs, and other items from the tub to work unobstructed.

Test your chosen cleaning method on a small, inconspicuous area—perhaps a corner or the inner basin—to ensure it doesn’t damage or discolor the tub surface. Wait fifteen minutes and check for any adverse reaction before proceeding.

Apply your chosen cleaner generously to all stained areas, ensuring complete coverage. Allow the cleaner to sit for the recommended dwell time—longer times generally improve results for set-in stains. After dwell time, scrub stained areas using appropriate tools. For acrylic and fiberglass, use soft sponges or microfiber cloths to prevent scratching.

Thoroughly rinse all cleaned areas with warm water, checking for any remaining residue or cleaner film. For acid-based cleaners, a final rinse with a baking soda solution—two tablespoons per quart of water—neutralizes any remaining acid. Wipe surfaces dry with a clean microfiber cloth to prevent water spots.

Special Care by Tub Material

Different tub materials require specific approaches for how to remove bath bomb stains from tub surfaces without causing damage.

Porcelain-enameled cast iron tubs tolerate most cleaning methods but can be scratched by abrasive tools. Stick to soft-bristled brushes and non-abrasive sponges. Avoid steel wool, abrasive scrubbing pads, and powdered cleansers that can scratch the enamel finish.

Acrylic surfaces require gentle treatment to prevent scratching and surface damage. Avoid abrasive cleaners, scrubbing pads, and stiff brushes. Stick to soft sponges, microfiber cloths, and liquid or paste cleaners. Never use acetone, harsh solvents, or ammonia-based cleaners, as these can damage the acrylic surface.

Fiberglass needs gentle cleaning to maintain its glossy finish and prevent surface degradation. Avoid abrasive cleaners and scrubbing tools. Use liquid dish soap with warm water for regular cleaning, and test any commercial product in an inconspicuous area first.

Prevent Bath Bomb Stains

Prevention proves far easier than removal when dealing with how to remove bath bomb stains from tub issues. Implementing these strategies reduces cleaning time and keeps your tub looking pristine.

Using a bath bomb holder or mesh bag keeps the bath bomb contained and prevents direct contact with tub surfaces. Running bath water at a slightly lower temperature reduces dye activation and pigment release. Adding bath oil or dispersant products helps distribute pigments more evenly and prevents concentrated staining.

Placing a washcloth over the drain opening catches undissolved particles before they enter the drain and potentially stain the basin. Applying car wax or specialized tub protectant creates a barrier between bath bomb ingredients and the tub surface. Reapply monthly for best results, particularly if you use bath bombs frequently.

Choosing bath bombs with natural colorants like beet powder, spirulina, or mica rather than synthetic dyes generally results in easier stain removal. Select bath bombs with minimal glitter and shimmer additives, as these metallic particles adhere strongly to surfaces.

Maintenance Between Uses

Establishing a regular cleaning routine prevents bath bomb stains from building up. After each bath bomb use, rinse the tub immediately with warm water while the surface is still warm. This quick rinse removes loose pigment particles before they can adhere.

Perform a deeper cleaning weekly using mild dish soap and water, paying particular attention to the waterline where residue accumulates. Monthly deep cleaning with baking soda or a mild abrasive cleaner prevents buildup that leads to stubborn staining.

Keep a spray bottle of vinegar solution in the bathroom for easy access after baths. A quick spray and wipe after each use takes less than a minute and prevents most bath bomb stains from forming.

With consistent prevention and prompt treatment when stains appear, your tub can remain free of bath bomb discoloration for years. The methods outlined in this guide provide options for every stain severity and tub material, empowering you to maintain a clean, beautiful tub while enjoying your favorite relaxing baths.

How to Remove Plastic Bath Panel: Easy Steps


Your plastic bath panel suddenly cracks near the drain, and water pools on the floor. You grab a screwdriver, ready to remove it for a quick fix—only to snap a hidden clip and send sharp plastic shards into your plumbing access space. This common DIY disaster happens because 78% of homeowners attempt bath panel removal without verifying their specific model’s requirements, according to industry repair data. Plastic bath panels aren’t universal; forceful removal risks shattered pipes, mold growth behind walls, or voiding your warranty. In this guide, you’ll learn why skipping model-specific steps causes irreversible damage and exactly how to safely remove your panel—whether you’re fixing a leak, installing new tiles, or replacing a corroded component. Never risk flooding your bathroom again after understanding these critical removal protocols.

Why Standard Screwdriver Methods Crack Your Bath Panel

plastic bath panel clip types Kohler American Standard

How Hidden Clips Differ Across Major Brands Like Kohler and American Standard

Most DIYers assume bath panels attach with simple screws, but modern units integrate fragile plastic clips designed to snap under uneven pressure. Kohler models often use spring-loaded tension clips along the lower edge that require simultaneous inward pressure on both sides—a technique missed by 65% of first-time removers. American Standard panels frequently feature recessed pivot points near the faucet base that disengage only when lifted at a precise 15-degree angle. Forcing these with flathead screwdrivers shears the mounting tabs, turning a 10-minute repair into a $300 plumbing call. Always identify your brand’s clip system first by checking the panel’s rear edge for stamped logos or textured grip patterns—never pry blindly.

Recognizing When Your Panel Has Integrated Wiring for Jets or Lights

Spa baths with hydrotherapy jets or LED lighting add dangerous complexity: 40% of removal accidents involve severed low-voltage wires hidden behind panels. Before unscrewing anything, switch off power at the circuit breaker and inspect for thin cables snaking from the tub’s control panel toward the access area. Gently tug any visible wires—if they resist movement, they’re likely hardwired to the panel frame. Cutting these during removal disables jet functions permanently. Instead, photograph wire connections and label each terminal with masking tape before detaching. If your panel lacks wiring ports (common in basic acrylic models), skip this step—but never assume wiring is absent in post-2010 installations.

Essential Tools That Prevent $200 Repair Bills

nylon pry bar tools bath panel removal kit

Why Plastic Pry Bars Beat Metal Tools for Clip Disengagement

Metal screwdrivers scratch acrylic finishes and crack brittle plastic clips, while nylon pry bars flex to release tension without damage. Keep these three tools ready: a 1-inch wide nylon wedge (for spreading clip gaps), needle-nose pliers (to grip broken tabs), and a flashlight with magnetic base (to illuminate shadowed areas). For panels with twist-lock fasteners—common in Bette and Aquatica freestanding tubs—add a 5mm hex key to avoid stripping rounded heads. Never substitute coin edges or butter knives; their uneven pressure creates stress fractures that worsen during reinstallation. Test tool fit by sliding the nylon bar into seam gaps—if it catches on internal ribs, your model requires brand-specific release sequences.

How to Identify Your Panel’s Mounting System in 90 Seconds

Stand directly in front of the tub and run fingers along all panel edges. If you feel uniform screw heads every 6 inches, it’s a standard screwed assembly (common in budget models). But if the lower edge has smooth, unbroken plastic with slight give when pressed, it’s a clip system—typically found in higher-end units like Jacuzzi® or Kohler Sterling. For hybrid setups (screws at top with clips below), photograph fastener locations before removal. Note any discolored patches near fixtures; these indicate sealant points requiring utility knife scoring. This 90-second inspection prevents 90% of accidental breaks by confirming whether forceful prying or sequential clip release is needed.

Step-by-Step Removal for Clip-Based Bath Panels

Releasing Tension Clips Without Snapping Mounting Tabs

  1. Position yourself correctly: Kneel beside the tub with your dominant hand near the drain end—this gives optimal leverage for downward pressure.
  2. Locate the primary release point: Most panels disengage first at the lower front corner farthest from plumbing. Insert your nylon pry bar 1/4 inch into the seam and gently twist upward until you hear a soft click.
  3. Work toward plumbing connections: Move the pry bar 2 inches toward the faucet base, repeating the click-release motion. Never skip sections—uneven pressure cracks the frame.
  4. Support the panel’s weight: Once three clips release, slide one hand behind the panel to bear its weight. Sudden drops shatter plastic on tile floors.

Pro tip: Humidify the room for 10 minutes before starting. Warm, moist air softens aged plastic clips, reducing breakage risk by 30% in units over 5 years old.

Handling Integrated Drain Assemblies Without Leaks

If your panel surrounds the tub’s overflow drain, water will spill during removal. Place a folded towel inside the tub directly under the overflow plate, then unscrew the plate cover with a coin. Stuff a rag into the overflow hole before detaching the panel—this blocks residual water in the pipe. For models with pop-up drains (common in Kohler Archer tubs), lift the stopper mechanism out entirely before panel removal to avoid bending linkages. Always reconnect overflow components before reattaching the panel; testing drain function post-removal prevents trapped water behind walls.

Troubleshooting Broken Clips and Stuck Panels

broken bath panel clip repair epoxy fix

Why Forcing a Stuck Panel Shatters Internal Brackets

Panels resist removal when sealant bonds them to subflooring or when clips deform from humidity. Never yank harder—this snaps internal support brackets that hold plumbing access doors. Instead, slide a utility knife along all edges to slice hidden caulk lines. Apply penetrating oil (not WD-40) to visible screws for 5 minutes to loosen corrosion. If the panel still won’t budge, check behind the tub: some units anchor to wall studs via rear brackets requiring access from an adjacent closet. Forcing removal here cracks tile or sheetrock.

Repairing Snapped Clips With 10-Minute Epoxy Fixes

If a clip breaks during removal, don’t replace the entire panel. Sand the fractured tab with 220-grit paper, then mix a pea-sized epoxy dot. Press the broken piece into place for 3 minutes—hold with masking tape until set. For missing tabs, mold new ones using epoxy and a plastic scrap. Test stability by gently tugging before reinstallation. This fix lasts 2+ years in non-load-bearing areas but avoid epoxy on weight-bearing clips near the tub base; those require OEM replacements.

Preventing Reinstallation Failures That Cause Future Leaks

Aligning Panels Perfectly to Avoid Gaps and Water Intrusion

Misaligned panels create gaps where moisture seeps behind walls, causing mold in 6 months. Before screwing clips back, lay the panel on a flat surface and check for warping by sighting along the edges. If bent, place heavy books on high spots overnight. During reinstallation, attach the top screws first to anchor the panel, then work downward to the clips. Press firmly along the entire lower edge until all clips audibly lock—gaps here invite water entry. Finally, apply a bead of mildew-resistant silicone along exterior seams, but never seal the bottom edge; trapped moisture needs escape routes.

Testing Drain Integrity Before Finalizing the Repair

Skip this critical check, and you’ll face ceiling damage from hidden leaks. Fill the tub 2 inches deep, then pull the drain stopper. Watch the access area for 15 minutes—any drips mean misaligned overflow connections. For jetted tubs, run the system dry first to ensure no air pockets in pipes. If leaks appear, tighten overflow plate screws only 1/8 turn; over-tightening cracks plastic flanges. Re-test until completely dry. Never skip this step—even minor drips saturate insulation behind walls within weeks.


Final Note: Removing a plastic bath panel safely hinges on respecting your model’s unique engineering—never default to brute force. Always prioritize identifying clip types and wiring first, use nylon tools to prevent damage, and meticulously test for leaks post-reinstallation. For panels older than 8 years or with visible cracks, consult a plumber before removal; aged plastic often shatters unexpectedly. Bookmark your tub’s manufacturer guide for future repairs, and remember: spending 20 minutes on proper disengagement saves $500 in emergency flood damage. If you encountered stripped screws or complex wiring during your attempt, explore our guide on repairing bath panel mounting brackets for model-specific fixes.

How to Cut Plastic Bath Panel: Easy Steps


If your bathroom renovation has hit a snag because your plastic bath panel doesn’t fit perfectly, you’re not alone. Thousands of homeowners face this exact challenge each year when replacing or installing new bath panels. The good news is that cutting plastic bath panels to size is a manageable DIY task when done correctly—but it requires the right approach to avoid cracking, chipping, or creating unsafe edges. This guide will walk you through the proper techniques to cut plastic bath panels safely and effectively, ensuring a professional-looking finish that complements your bathroom’s aesthetic while maintaining structural integrity.

Essential Tools for Cutting Plastic Bath Panels

plastic cutting tools jigsaw utility knife safety goggles respirator

Before you make your first cut, gathering the right tools is critical for success. Using improper equipment often leads to jagged edges, melted plastic, or dangerous kickback that can ruin your panel and potentially cause injury.

Choosing the Right Saw for Your Material

The type of saw you select depends entirely on your specific plastic bath panel material. Most modern panels use either acrylic, PVC, or ABS plastic—each requiring different cutting approaches. For thin panels under 6mm thickness, a fine-toothed utility knife with multiple blade replacements works well. Thicker panels (6-10mm) typically require a jigsaw with a fine-toothed blade designed specifically for plastic. Circular saws should only be used by experienced DIYers with plastic-cutting blades that have 80+ teeth to prevent melting. Never use standard wood-cutting blades as their aggressive teeth will shatter plastic rather than cut cleanly.

Safety Equipment You Must Wear

Cutting plastic creates fine particles that can damage your eyes and respiratory system. Always wear ANSI-approved safety goggles that seal around your eyes completely—regular glasses won’t protect against flying debris. A NIOSH-rated N95 respirator is essential as plastic dust contains harmful chemicals when inhaled. Heavy-duty work gloves prevent slippage and protect against sharp edges, while ear protection is necessary when using power tools. Work in a well-ventilated area away from children and pets, with a fire extinguisher nearby since some plastics can ignite during cutting.

Measuring and Marking Techniques for Precision Cuts

Creating a Foolproof Measurement System

Accurate measurements prevent costly mistakes with bath panels, which are often custom-sized and expensive to replace. Always measure twice and cut once, using the “measure from multiple reference points” method. Start by measuring from the bath’s outer edge to your wall at three points (left, center, right), as walls are rarely perfectly straight. Use the smallest measurement to ensure your panel will fit without forcing. Transfer these measurements to the panel’s backside using a soft-lead pencil, marking your cut line with small ticks every 2 inches. Connect these ticks with a straight edge—never freehand—as even slight deviations become obvious after cutting.

Common Measurement Mistakes to Avoid

Most DIYers make the critical error of measuring from the floor rather than the bath itself, failing to account for bathroom leveling issues. Another frequent mistake is not leaving adequate expansion gaps—plastic expands with temperature changes, so always subtract 1/8 inch from your final measurement to allow for movement. Never measure against the bath’s curved edge; instead, use a straight piece of wood clamped along the bath’s straight edge as your reference point. If cutting around complex shapes like pipe openings, create a cardboard template first before transferring to your panel.

Step-by-Step Cutting Process for Clean Results

Preparing Your Work Area for Success

A stable cutting surface prevents dangerous movement during operation. Clamp your panel securely between two sacrificial boards (scrap wood) to prevent vibration and support the plastic along the entire cut line. Elevate your work surface at least 30 inches off the ground for proper ergonomics—bending over increases fatigue and reduces control. Position your lighting so it illuminates the cut line without creating glare on the plastic surface. For long cuts, set up roller stands at both ends to support the panel and prevent binding. Double-check all clamps are tight and your marked line is clearly visible before starting your saw.

Executing the Perfect Cut

Begin with your saw blade spinning at full speed before contacting the plastic. Maintain a slow, steady feed rate—rushing causes melting while going too slow creates excessive heat buildup. Keep the saw base flat against the panel at all times; tilting causes uneven cuts. For curved cuts, use a jigsaw with an orbital setting turned off and follow your line with small, deliberate movements. When approaching the end of your cut, slow down significantly to prevent blowout—the splintering that occurs when the plastic separates. For straight cuts, use a guide rail clamped parallel to your cut line for laser-straight results. Stop the saw completely before lifting it from the material.

Finishing and Installing Your Cut Panel

Smoothing Rough Edges Professionally

sanding plastic edges sandpaper grits plastic file polishing

Raw cut edges look unfinished and can be dangerously sharp. Start with 120-grit sandpaper to remove major burrs, working toward the edge to prevent chipping. Progress through 220, then 320-grit sandpaper for a smooth finish. For acrylic panels, use a plastic file followed by progressively finer sanding discs on a rotary tool. Never use steel wool as it can leave embedded particles that discolor plastic over time. Wipe away dust with a microfiber cloth dampened with isopropyl alcohol—water can cause static that attracts more dust. For premium finishes, apply a plastic edge banding tape that matches your panel color.

Proper Installation Techniques

When installing your cut panel, never force it into position as this creates stress points that lead to future cracking. Apply silicone sealant along the bath’s edge before positioning the panel, ensuring a watertight seal. Use plastic spacers to maintain consistent gaps around the perimeter, especially at corners where expansion occurs. Secure with plastic clips rather than screws whenever possible—they allow for necessary movement without damaging the panel. After installation, check for proper alignment by running your hand along the edges—any unevenness indicates misalignment that should be corrected before the sealant cures.

Troubleshooting Common Cutting Problems

repairing chipped plastic bath panel plastic welding rod gap filling trim

Fixing Mistakes Without Starting Over

If you’ve cut too much material or created an uneven edge, don’t automatically discard your panel. Small gaps can be hidden with decorative trim pieces available at most hardware stores. For minor chips along the edge, heat a plastic welding rod with a soldering iron and carefully fill the imperfection, then sand smooth. Slightly oversized cuts can sometimes be compensated for by adjusting your mounting brackets outward. If you’ve created a significant error, consider whether the cut piece could serve as a smaller panel elsewhere in your bathroom rather than wasting the material.

Preventing Future Cutting Failures

The most preventable cutting mistake is blade selection—always match your blade to your specific plastic type. ABS requires different blades than PVC, and using the wrong type causes melting. Keep blades sharp; dull blades generate excessive heat that warps plastic. Cut with the finished side facing down to minimize chipping on the visible surface. For complex cuts, practice on scrap material first to perfect your technique. Maintain consistent pressure—too light causes wandering while too heavy creates stress fractures. Finally, work during cooler parts of the day as heat exacerbates plastic’s tendency to warp during cutting.

Maintenance Tips for Long-Lasting Results

Once installed, properly cut plastic bath panels should last for decades with minimal maintenance. Clean with non-abrasive cleaners only—avoid anything with ammonia or acetone that can cloud plastic surfaces. Periodically check mounting hardware for tightness but don’t overtighten, as this creates stress points. Reapply silicone sealant around the bath edge every 2-3 years to maintain a watertight barrier. Keep sharp objects away from panel edges to prevent nicks and chips. During deep cleaning, inspect cut edges for any signs of stress cracking and address issues early before they compromise the panel’s integrity.

By following these precise techniques and safety protocols, you’ll achieve professional-quality results when cutting plastic bath panels. Remember that patience and proper preparation yield better outcomes than rushing through the process. The time invested in careful measuring, selecting appropriate tools, and executing clean cuts pays off with a finished installation that looks custom-made rather than DIY. When in doubt about any step, consult a professional—your safety and the longevity of your bathroom renovation depend on getting these details right.

How to Repair a Fibreglass Bath: Easy Fix Guide


Your fibreglass bath develops an ugly hairline crack near the drain after years of reliable service. You dread the cost of replacement—but what if you could fix it yourself for under $50? Fibreglass bath repairs are surprisingly achievable with the right approach, saving you hundreds compared to professional reglazing or replacement. Most common damage like cracks, chips, and surface wear stems from daily use, temperature shifts, or accidental impacts. This guide cuts through the confusion to deliver a practical, step-by-step repair process using accessible materials. You’ll learn exactly how to assess damage severity, select appropriate repair methods, and execute professional-looking fixes that restore both function and appearance—without requiring advanced skills.

Fibreglass baths are vulnerable to specific failure points that demand targeted solutions. Unlike porcelain enamel, fibreglass surfaces can develop stress fractures from flexing, hairline cracks from thermal shock, or deep gouges from dropped objects. The good news? Minor-to-moderate damage rarely compromises structural integrity and responds well to DIY repair when addressed promptly. Ignoring these issues allows moisture penetration that accelerates deterioration beneath the surface. By mastering the techniques in this guide, you’ll extend your bath’s lifespan significantly while avoiding unnecessary replacement costs. Let’s transform that damaged fixture back into a smooth, seamless centerpiece for your bathroom.

Identifying Your Fibreglass Bath Damage Type

fibreglass bath damage types comparison chart cracks delamination

Before grabbing tools, accurately diagnosing your bath’s damage is critical—repair methods vary drastically based on the problem. Misidentifying a stress fracture as a simple surface scratch leads to failed repairs that worsen over time. Run your fingers over the affected area: does it feel like a shallow scratch or a deep groove? Does light catch a hairline crack, or is there visible bubbling beneath the surface? These tactile clues separate cosmetic flaws from structural threats.

Hairline Cracks vs. Stress Fractures: What’s Really Wrong

Hairline cracks appear as thin, spiderweb-like lines barely visible to the naked eye, often radiating from drain fittings or corners where stress concentrates. They stay superficial without moisture seepage underneath. Stress fractures run deeper, feeling like ridges under your fingernail and potentially leaking water when filled. Pro Tip: Dab the area with acetone on a cotton swab—discoloration indicates moisture ingress, confirming a stress fracture needing structural repair. Never treat these as surface scratches; they require fibreglass matting reinforcement.

When Delamination Means Professional Help Is Needed

Delamination shows as raised, spongy blisters where the gelcoat separates from the fibreglass substrate. Press firmly: if it flexes like a drum skin or emits a hollow sound, moisture has compromised the core structure. Critical Warning: Attempting DIY repair on delaminated areas often spreads damage. Small blisters under 2 inches might respond to epoxy injection, but larger areas require professional stripping and re-laminating. If water pools beneath the surface when pressed, skip DIY and consult a specialist—this isn’t a weekend fix.

Essential Tools and Materials for Fibreglass Bath Repair

fibreglass bath repair kit tools and materials layout

Gathering the right supplies prevents mid-repair frustration and ensures adhesion. Generic household tools won’t cut it—fibreglass demands specific abrasives and resins. Skip the dollar-store sandpaper; improper grit causes pitting that ruins your finish. Most critical: never substitute polyester resin for epoxy in bath repairs. Water exposure causes polyester to degrade, leading to yellowing and re-cracking within months.

Must-Have Repair Kit Components

  • 80-400 grit sandpaper assortment: Start coarse (80 grit) for damage excavation, finish fine (400 grit) for seamless blending
  • Marine-grade epoxy resin kit: Specifically formulated for wet environments (not polyester resin!)
  • Fibreglass matting: 1.5 oz woven cloth for structural cracks, chopped strand mat for chips
  • Acetone in spray bottle: For final degreasing (avoid paper towels—lint ruins adhesion)
  • Silicone caulk: To seal perimeter edges after repair cures

Safety Gear You Can’t Skip

Working with epoxy requires serious protection:
Vapor-rated respirator mask (N95 filters won’t block fumes)
Nitrile gloves (latex dissolves in resin)
Eye protection with side shields (resin splashes cause corneal damage)
Ventilation fan blowing outward through an open window

Common Mistake: Skipping acetone cleaning after sanding. Oils from your hands prevent epoxy bonding, guaranteeing repair failure. Always wipe with acetone immediately before applying resin.

Step-by-Step Fibreglass Bath Repair Process

This sequence works for 90% of common damage—cracks, chips, and small holes. For stress fractures over 3 inches or delamination, stop after Step 2 and consult a professional. Total repair time: 4-6 hours active work plus 24-hour cure time. Difficulty: Moderate (requires careful sanding but no specialized skills).

Prepare the Damaged Area for Repair

Remove all contaminants with acetone on a lint-free cloth. Sand outward from the damage zone using 80-grit paper until you feel no edges—create a 2-inch feathered slope around cracks. For holes or deep chips, undercut the edges slightly with a utility knife to lock in new material. Vacuum dust thoroughly, then wipe again with acetone. Visual Cue: The area should feel uniformly smooth like fine sandpaper, not jagged. If light catches ridges, keep sanding.

Apply Fibreglass Matting for Structural Repairs

Mix epoxy resin per kit instructions (typically 2:1 resin-to-hardener). For cracks deeper than 1/16 inch:
1. Brush a thin epoxy layer into the sanded area
2. Press fibreglass matting into wet resin, avoiding wrinkles
3. Saturate matting completely until transparent
4. Add second matting layer if repairing holes
Pro Tip: Use a plastic spreader to force resin into matting—bubbles weaken the repair. Let cure 2 hours before proceeding.

Fill and Smooth the Surface

Once matting sets, mix epoxy putty (included in most kits) to peanut butter consistency. Apply with a flexible spreader, overfilling slightly. For non-structural scratches, skip matting and apply putty directly. Wait 15 minutes until “tacky,” then smooth with a spreader dipped in soapy water. Key Technique: Hold the spreader at 30 degrees and pull—not push—to avoid gouging. Cure 4 hours.

Final Sanding and Blending

sanding fibreglass bath repair blending technique
Progress through grits: 120 → 220 → 400. Sand in circular motions, checking frequently against surrounding surface. Stop when you feel no lip—over-sanding exposes matting. Wipe with acetone. Troubleshooting: If the repair feels rough after 400-grit, you didn’t fill deeply enough; reapply putty. Never sand below 400 grit before priming.

Critical Success Factors for Long-Lasting Repairs

Skipping these steps causes 80% of DIY repair failures. Epoxy won’t bond to contaminants, and improper curing invites moisture intrusion. Your repair’s lifespan depends entirely on execution here—not the product quality.

Why Ventilation Matters More Than You Think

Epoxy fumes inhibit curing in humid environments. Work with windows open and a fan blowing air outward for 24 hours post-repair. Below 60°F or above 85% humidity, curing slows dramatically—resin stays tacky for days, attracting dust. Urgent Consequence: Rushing this step traps moisture that reactivates old damage within weeks.

Matching Your Bath’s Finish Like a Pro

Most kits include white gelcoat, but baths yellow with age. Test-cure samples on scrap cardboard first. For off-white baths:
– Add a drop of brown pigment to epoxy
– Or mix 90% gelcoat + 10% white acrylic paint
Time-Saving Shortcut: Use a toothpick to apply tiny color samples inside the drain plug hole—cures in 2 hours for perfect matching.

When to Call a Professional Instead

Some damage exceeds DIY capabilities. Attempting complex repairs wastes money and worsens problems. Stop immediately if you see:
– Delamination covering >10% of the bath surface
– Cracks intersecting at drain or overflow fittings
– Previous repairs that feel spongy or discolored

Professional reglazing costs $300-$600 but includes structural assessment and warranty. For extensive damage, replacement ($500-$1,200) may be more economical long-term. Prevention Tip: Place non-slip mats in the tub—dropped bottles cause 60% of repairable chips.


Final Note: A properly executed fibreglass bath repair lasts 5-10 years with basic care. Avoid abrasive cleaners and reapply a thin epoxy topcoat annually to high-traffic zones. For hairline cracks under 2 inches, this method succeeds 9 times out of 10—saving you $400+ versus replacement. Bookmark this guide for future touch-ups: minor maintenance prevents major damage. If your repair holds after the 24-hour water test, you’ve just mastered a valuable home skill that pays for itself instantly.

How to Fix Bath Kit Repair Issues


That familiar crack when a shampoo bottle hits your tub floor sends a chill down every homeowner’s spine. A single moment of clumsiness can leave an unsightly chip, while years of use gradually wear away your bathtub’s finish. Instead of dreading the thousands required for full replacement, bath kit repair offers a practical solution that restores both appearance and function. With today’s advanced repair compounds and clear instructions, even beginners can achieve professional-looking results that extend your bathtub’s life by years. This isn’t just a temporary fix—it’s a strategic home maintenance decision that preserves your bathroom’s value without major renovation disruption.

Most homeowners don’t realize that over 70% of common bathtub damage qualifies for effective DIY repair. Whether you’re dealing with a dime-sized chip in an acrylic tub or a hairline crack in your fiberglass shower, understanding your specific repair needs transforms what seems like a costly problem into a manageable weekend project. The key lies in matching your approach to both the damage severity and your fixture’s material—fiberglass, acrylic, or porcelain each respond best to specific compounds. By the end of this guide, you’ll confidently diagnose your bathtub’s condition, select the right bath kit repair solution, and execute repairs that blend seamlessly with your existing fixture.

Types of Bathtub Damage

bathtub damage types comparison chart fiberglass acrylic porcelain

Before selecting any repair product, you need to accurately identify what type of damage your bathtub has sustained. Bath fixture damage falls into two primary categories, each requiring a different repair approach and different products.

Surface Chips and Scratches

Surface damage affects only the finish layer of your bathtub, leaving the underlying structural material intact. Small chips from dropped items, scratches from abrasive cleaning tools, and wear marks from regular use all qualify as surface damage. These cosmetic issues represent the most common bathtub problems and the easiest to repair. Surface damage repair focuses on restoring the appearance of the finish, filling in the missing material, and color-matching the repair to blend with the surrounding area.

The repair process for surface damage typically involves cleaning the damaged area thoroughly, applying a color-matched repair compound, allowing it to cure completely, then sanding or buffing the area to achieve a smooth, glossy finish that matches the surrounding surface. Most consumer-grade bath kit repair products handle surface damage effectively, making this a straightforward DIY project for most homeowners. For instance, the Ankita Fiberglass Tub Repair Kit at $16.99 works perfectly for these minor issues across multiple surface types including fiberglass, acrylic, porcelain, and tile.

Structural Cracks and Holes

Structural damage extends beyond the finish into the underlying material of your bathtub. Weight-bearing cracks in the tub floor, stress cracks that have formed over time, and holes from physical impact all constitute structural damage requiring more intensive repair approaches. These repairs must not only restore the appearance but also rebuild the structural integrity of the fixture to prevent water leakage and further damage.

Floor crack repair requires specialized products containing reinforced materials designed to bear weight and withstand the stresses placed on tub surfaces during normal use. The application process for structural damage involves more extensive surface preparation, often including reinforcement layers, multiple application stages, and longer curing times to ensure the repair can handle ongoing use without failing. These more comprehensive repairs typically require professional-grade kits rather than basic consumer products. The Tub Repair Company’s Floor Crack Repair kit at $170 exemplifies this category, featuring reinforced compounds specifically engineered for weight-bearing surfaces.

Material-Specific Damage Patterns

Different bathtub materials exhibit distinct damage patterns and require specialized repair approaches. Fiberglass tubs, known for their lightweight construction and affordability, commonly develop stress cracks from repeated flexing and delamination where the gel coat separates from the underlying fiberglass mat. Acrylic bathtubs, prized for their smooth finish and design flexibility, typically show cracks from impact damage or stress concentrations at specific points. Porcelain-enameled steel and cast-iron tubs feature a porcelain coating over metal, and chips in this coating expose the underlying metal to moisture, which leads to rust if not promptly repaired.

Understanding your fixture’s material helps you select compatible repair compounds and achieve results that last. Each material demands specific adhesion characteristics and cure properties to ensure the repair bonds properly and maintains integrity over time. For example, fiberglass requires compounds that bond with resin matrices, while porcelain needs formulations that adhere to vitreous surfaces without discoloration.

Choosing the Right Bath Kit

bath repair kit comparison chart consumer grade vs professional grade

The bath repair kit market offers products ranging from budget-friendly consumer solutions to professional-grade systems for serious damage. Selecting the appropriate kit for your situation prevents wasted money and disappointing results.

Consumer-Grade Kits for Minor Damage

Entry-level bath repair kits work effectively for small chips, superficial scratches, and minor cosmetic issues. These products typically cost between $15 and $40 and include basic repair compounds, application tools, and color-matching components. The Ankita Fiberglass Tub Repair Kit exemplifies this category, priced around $17 and containing all necessary materials for addressing minor damage on fiberglass, acrylic, porcelain, enamel, and tile surfaces.

Consumer kits like the Ankita product cure to form firmly adhered bonds that resist abrasion and maintain integrity under normal bathroom conditions. The compounds typically offer waterproof protection once cured, ensuring repairs don’t deteriorate through water exposure. Color-matching systems allow users to achieve invisible repairs by mixing tints according to provided instructions, though these kits work best on common colors like white, beige, almond, and similar bathroom fixture shades. With a 4.3 out of 5-star rating from over 240 customer reviews, users consistently praise its ease of use and effective color matching.

Professional-Grade Kits for Major Repairs

Structural damage and extensive repairs require professional-grade products containing more robust materials and comprehensive application systems. The Tub Repair Company offers a tiered product lineup addressing different severity levels, with prices ranging from $140 to $170 depending on the damage type addressed.

The Ultimate Chip Repair kit at $140 targets small cosmetic chips and cracks across fiberglass, acrylic, and porcelain surfaces. The Large Wall Damage kit at $155 addresses bigger areas of damage on walls surrounding tubs and showers. The Floor Crack Repair kit at $170 provides the most comprehensive solution for weight-bearing cracks in tub floors, using reinforced materials designed to restore structural integrity. These higher-priced kits include more materials, more robust compounds, and detailed guidance for achieving durable, professional-quality results.

Essential Tools and Materials

Most bath repair kits come with the core materials needed for successful repairs, but understanding what you need helps ensure a smooth project from start to finish.

Items Included in Quality Kits

Comprehensive bath repair kits contain all essential components for successful application. These typically include the repair compound in appropriate formulation for your damage type, color-matching tints with mixing instructions and color charts, application tools such as spreaders or brushes for compound application, sandpaper or polishing materials for finishing, and detailed instructions guiding you through each step of the process.

The Ankita kit, for example, includes resin-based repair compound, color tints for custom mixing, all necessary application tools, and instructions covering the complete repair process. This comprehensive approach eliminates the need for separate tool purchases and ensures all components work together effectively. Many users report that having everything in one package makes the process significantly less intimidating for first-time repairers.

Surface Preparation Steps

Proper surface preparation determines whether your bath kit repair succeeds or fails. Taking time to prepare the damaged area correctly creates the foundation for lasting results.

Cleaning and Degreasing

Begin by cleaning the damaged area and surrounding surface with a mild, non-abrasive cleaner. Remove soap scum, body oils, and any residue that might interfere with compound adhesion. Rinse thoroughly and allow the area to dry completely. Any moisture remaining on the surface can compromise the bond between the repair compound and the fixture material.

For best results, clean a slightly larger area than the visible damage, extending about an inch beyond the repair boundaries. This ensures the compound bonds to clean, prepared surface around the entire repair site. Professional repair technicians emphasize that 80% of repair failures stem from inadequate cleaning—don’t skip this critical step.

Applying Repair Compound

The application phase transforms prepared damage into a restored surface. Following proper technique ensures the compound fills the damage completely and bonds securely to the surrounding material.

Addressing Structural Cracks

Structural crack repair requires different technique than surface damage. After cleaning and preparing the crack, apply the compound in thin layers, working it deeply into the crack opening. Some repair systems require applying reinforcement material before the compound, creating a framework that restores structural integrity.

For floor cracks in particular, the repair must withstand the weight of water and users without flexing or breaking down. Professional-grade kits address this requirement with reinforced compounds designed specifically for weight-bearing surfaces. Allow extended curing time as specified in the product instructions, as structural repairs need longer to develop full strength. Many repair failures occur because homeowners rush this stage—be patient for lasting results.

Common Mistakes to Avoid

bathtub repair mistakes before and after examples

Learning from others’ errors helps you achieve better results on your first attempt. Several common mistakes consistently undermine bath repair projects.

Inadequate Surface Preparation

Skipping or rushing surface preparation causes more failed repairs than any other factor. Oil, soap residue, moisture, and smooth surfaces all compromise adhesion. Taking time to clean thoroughly and create proper texture ensures the compound bonds securely. Many DIYers mistakenly think that the compound will “stick anyway,” but without proper preparation, even the best products will fail.

Inadequate Cure Time

Using the repaired fixture before the compound fully cures damages the repair. The compound may appear hard on the surface while remaining soft underneath, making it susceptible to damage from normal use. Respect the cure times specified in product instructions, and when possible, allow additional time for maximum durability. The Tub Repair Company recommends waiting at least 48 hours before using the tub after major repairs—a small inconvenience compared to redoing the entire repair.

When to Call a Professional

Some situations warrant professional assessment rather than DIY repair. Extensive damage covering large areas, structural concerns like floor cracks in older fixtures, and valuable antique or high-end fixtures may benefit from professional attention. Similarly, if your repair attempt doesn’t achieve satisfactory results, a professional can often correct the situation or advise on next steps.

Professional tub repair services typically cost more than DIY kits but less than full fixture replacement. For damage that would require multiple DIY kits or involve uncertainty about underlying issues, professional assessment provides valuable guidance. The Tub Repair Company offers phone and text support at (877) 234-9882 and (417) 536-7785 to help diagnose your specific situation before you invest in materials.

Bath kit repair offers homeowners an effective way to address common bathtub damage without the expense and disruption of replacement. By understanding your damage type, selecting appropriate products, and following proper techniques, you can achieve results that restore your fixture’s appearance and extend its service life. Whether using consumer-grade products for minor chips or professional systems for structural repairs, the principles of proper preparation, careful application, and patient curing remain consistent. With attention to detail and realistic expectations, most homeowners can successfully complete bath repairs that look professional and last for years.

« Older posts Newer posts »