Smart Bathroom Solutions: Reviews, Tips & Expert Maintenance Guides

Category: Tips (Page 15 of 17)

How to Use Bubble Bath: Easy Steps


Nothing transforms an ordinary bath into a luxurious escape quite like a perfectly executed bubble bath. Yet many people struggle with flat water, disappointing foam, or skin irritation simply because they don’t know how to use bubble bath properly. The secret lies not in just pouring product under running water, but in understanding the science of bubbles, water chemistry, and proper technique.

Mastering how to use bubble bath correctly means enjoying consistently rich, long-lasting foam that relaxes your muscles, soothes your senses, and makes bath time something to anticipate rather than rush through. Whether you’re unwinding after work, creating magic for your children, or treating yourself to a spa-like experience at home, the right approach makes all the difference.

This guide reveals professional techniques most people never learn—how water temperature affects bubble stability, why hard water sabotages your foam, and exactly when to add product for maximum effect. You’ll discover why simply pouring bubble bath into an empty tub creates disaster, how to extend bubble life by 50%, and crucial safety considerations many overlook.

Choose the Right Bubble Bath Product for Your Skin Type

Selecting the appropriate bubble bath makes or breaks your experience. Standard drugstore formulas containing sodium lauryl sulfate create abundant but short-lived bubbles and often leave skin feeling tight. These budget-friendly options ($3-$10) work for occasional use but lack the stability of premium formulations.

For sensitive skin or frequent bathing, invest in products with sodium lauryl sulfoacetate (SLSA), which produces luxurious, long-lasting foam without stripping natural oils. Look for added moisturizers like glycerin, aloe vera, or vitamin E that counteract potential dryness. If you have eczema or reactive skin, choose fragrance-free options with minimal ingredients—baby formulas often work well for adults with sensitivities.

Children require special tear-free formulas with milder surfactants. Never use adult bubble baths for kids—ingredients safe for mature skin can irritate young skin or cause significant discomfort if splashed in eyes. Always check age recommendations on packaging, as many products specify minimum ages due to sensitivity concerns.

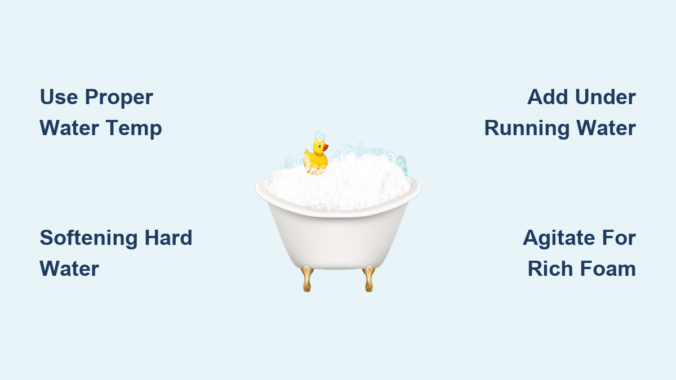
Prepare Your Bathwater to Maximize Bubble Production

water temperature gauge in bathtub

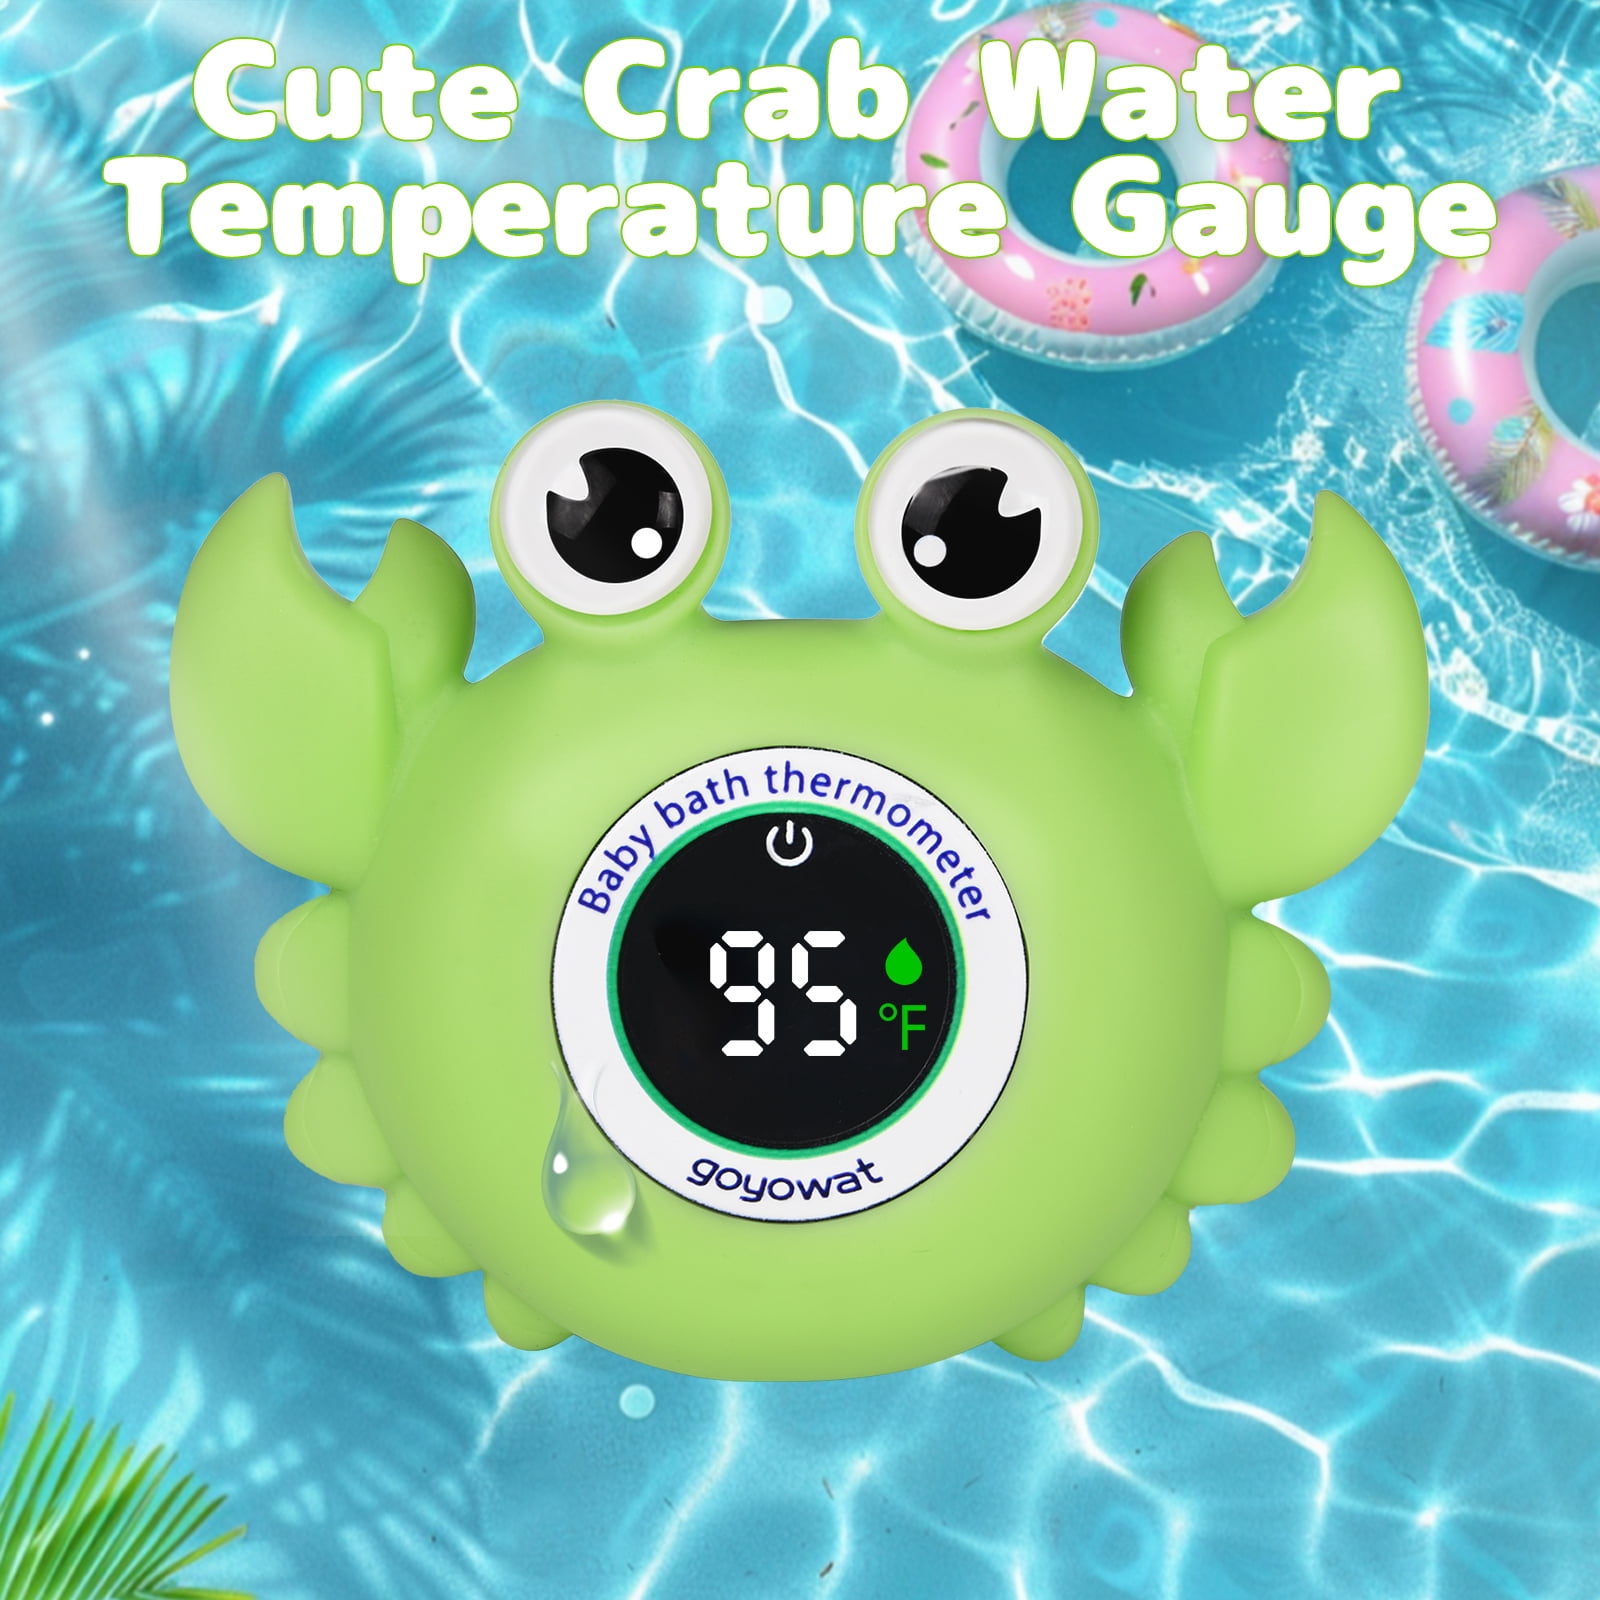
Water temperature dramatically impacts bubble formation and longevity. Fill your tub with water between 98-104°F (36.5-40°C)—too cold inhibits surfactant activity, while water above 104°F destabilizes bubbles rapidly. Test with a thermometer or your elbow (more temperature-sensitive than hands) before adding product.

Hard water with high mineral content is the silent bubble killer in many households. Calcium and magnesium ions interfere with surfactant action, resulting in minimal foam that disappears quickly. If you suspect hard water, try these solutions:

  • Add 1-2 tablespoons of baking soda to soften water
  • Install a simple water softening filter for your faucet
  • Use distilled water for particularly stubborn cases

Fill the tub to 4-6 inches below the overflow drain before adding bubble bath. Adding product to an empty tub creates excessive foam that overflows when you enter—always fill first, then add product beneath the running water stream.

Add and Activate Bubble Bath for Luxurious, Long-Lasting Foam

Getting the dosage right separates mediocre baths from exceptional ones. Start with 1-2 capfuls (15-30ml) for a standard tub, but adjust based on your product’s concentration. Concentrated formulas may need only half a capful, while weaker products might require three. Over-application creates slippery surfaces and potential skin irritation.

Follow this precise sequence for maximum bubbles:
1. Fill tub to desired level with properly heated water
2. Add measured bubble bath directly under running water
3. Increase water flow temporarily or swirl water vigorously for 30-60 seconds
4. Allow faucet to run at surface level for extra air incorporation
5. Turn off water and let bubbles stabilize for 2-3 minutes before entering

Boost bubble performance with these professional tricks:
– Pre-mix product with warm water in a separate container before adding
– Use a slotted spoon or bubble wand for controlled agitation
– Add a tablespoon of baking soda to hard water before adding bubble bath

Optimize Your Bathing Experience for Maximum Relaxation

Timing matters when you want to enjoy bubbles throughout your bath. Stay in the tub for 15-30 minutes—the sweet spot for muscle relaxation without excessive skin drying. Enter slowly to minimize bubble displacement, and avoid vigorous splashing once settled. If foam decreases significantly, add a small amount of product with gentle agitation to refresh it.

Children’s bubble baths should last 10-20 minutes with constant supervision. Their skin is more sensitive to heat and chemicals, so maintain water at 95-100°F (35-38°C). Make it fun with bubble wands and colorful products, but establish clear boundaries about water play to prevent accidental ingestion.

For therapeutic benefits, match your bubble bath to your goal:
– Stress relief: Warm water, lavender/chamomile scents, dim lighting
– Energy boost: Slightly cooler water, citrus/peppermint scents, morning timing
– Sleep preparation: Warm water 1-2 hours before bedtime with calming scents

Care for Your Skin After Bubble Bath to Prevent Dryness

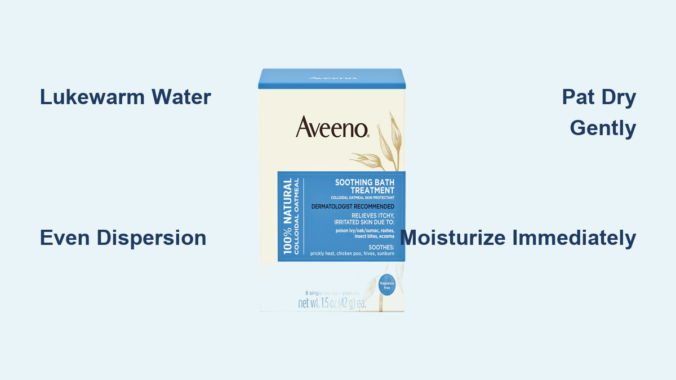
Surprisingly, what you do after exiting the tub affects how your skin feels for hours. Gently pat (don’t rub) with a soft towel, leaving skin slightly damp to lock in moisture. Apply moisturizer within 3-5 minutes while your skin is still hydrated—thicker creams work better than lotions for sealing in moisture.

Pay special attention to dry-prone areas like elbows, knees, and shins. If your skin feels tight or appears red after bathing, your current product likely doesn’t suit your skin type. Switch to a gentler, fragrance-free formula and consider adding colloidal oatmeal to your next bath for soothing relief.

Troubleshoot Common Bubble Bath Problems in Minutes

flat bubble bath water vs foamy bubble bath

Why Your Bubble Bath Produces Few Bubbles

When your water remains stubbornly flat, diagnose systematically:
– Water temperature below 98°F reduces surfactant activity
– Hard water minerals interfere with bubble formation
– Insufficient agitation during filling prevents air incorporation
– Product may be expired or improperly stored

Solution: Increase temperature, soften water, agitate more vigorously, or try a fresh product. Premium formulations with SLSA typically outperform basic SLS products in challenging conditions.

Why Bubbles Disappear Too Quickly

Bubbles that vanish within minutes indicate several possible issues:
– Water temperature exceeding 104°F destabilizes foam
– Excessive movement during bathing breaks down bubbles
– Under-dosing creates unstable foam structure
– High mineral content in your water

Fix this by slightly reducing temperature, minimizing splashing, increasing product quantity, or using distilled water for your next bath.

Store Products Properly and Extend Product Life

Preserve bubble bath effectiveness with proper storage. Keep bottles tightly sealed to prevent evaporation and contamination, and store upright away from extreme temperatures—bathrooms with steam exposure or garages with temperature swings degrade product quality. Check expiration dates regularly; while most products last 2-3 years, effectiveness diminishes over time.

Use economically without sacrificing quality by measuring doses accurately with provided caps or spoons. Adjust quantities based on your water conditions—soft water often requires less product. Concentrate formulas offer better value per use despite higher upfront costs.

Stay Safe During Bubble Bath Use: Critical Guidelines

non slip bath mat with child in bathtub

Never leave children unattended during bubble baths—drowning risk exists even in shallow water with minimal bubbles. Keep products out of reach to prevent accidental ingestion, which can cause nausea or vomiting. Use non-slip mats inside and outside the tub, and avoid electrical appliances near water.

Certain conditions require modified bubble bath practices:
– Cardiovascular issues: Consult your doctor about safe temperatures
– Diabetes: Test water carefully and limit duration due to circulation concerns
– Pregnancy: Avoid very hot water and limit baths to 15-20 minutes
– Open wounds or skin infections: Skip bubble baths until healed

If skin irritation persists after switching to gentle products, consult a dermatologist—you may have an underlying condition or specific allergy requiring professional attention.

Transform Bathing into Genuine Self-Care Ritual

Elevate your bubble bath from routine task to meaningful self-care by treating it as non-negotiable “you time.” Schedule regular sessions, prepare your space in advance, and disconnect from devices to maximize mental relaxation. Enhance the experience with complementary elements like face masks, calming music, or journaling.

The perfect bubble bath isn’t about extravagant products—it’s about understanding the science behind the foam and applying simple techniques consistently. Start implementing these strategies with your next bath, and experience the difference that proper technique makes. Within minutes, you’ll transform ordinary bathing into a luxurious ritual that leaves you relaxed, refreshed, and looking forward to your next soak.

How to Take an ACV Bath: Simple Steps


Feeling frustrated with dry, irritated skin that commercial products can’t seem to fix? You’re not alone. Thousands of people search for “how to take ACV bath” each month seeking natural relief for skin concerns. An apple cider vinegar bath offers an affordable, gentle solution that balances your skin’s pH while soothing irritation. This straightforward practice requires minimal supplies and time but delivers noticeable results when done correctly. Forget complicated routines—this guide shows you exactly how to prepare, execute, and maximize the benefits of your ACV bath for healthier skin and relaxation you can feel after just one soak.

Why Your Skin Needs an ACV Bath Now

Your skin’s natural protective barrier operates best at a slightly acidic pH level between 4.5 and 6. Modern life constantly disrupts this delicate balance through alkaline soaps, hard water, and environmental stressors. When this acid mantle weakens, your skin becomes vulnerable to irritation, dryness, and bacterial overgrowth. An ACV bath restores balance using raw, unfiltered apple cider vinegar containing the “mother”—a colony of beneficial bacteria and enzymes that support skin health. Unlike harsh chemical products, this natural approach strengthens your skin’s defenses without stripping essential oils. Regular ACV soaks create an environment where beneficial bacteria thrive while discouraging problematic organisms, resulting in calmer, clearer, and more resilient skin.

What Makes Raw ACV Different From Regular Vinegar

Raw, unfiltered apple cider vinegar with the mother contains acetic acid, enzymes, and beneficial bacteria missing in clear, processed varieties. This cloudy sediment visible in quality ACV products delivers the therapeutic properties that make these baths effective. The mother culture supports skin health by promoting the growth of beneficial microorganisms while gently discouraging problematic bacteria. When properly diluted in bathwater, these components work synergistically to soothe irritation, balance pH, and leave skin feeling refreshed without synthetic fragrances or harsh chemicals. Always choose ACV specifically labeled “raw” and “unfiltered” with visible mother for maximum benefit.

Essential Supplies for Your First ACV Bath

Gathering the right materials ensures your ACV bath delivers results without frustration. You’ll need just five basic items to get started:

  • Raw, unfiltered apple cider vinegar with mother (16-32 oz bottle)
  • Measuring cup (standard 1-cup size)
  • Bathtub (standard or soaking)
  • Timer (phone or kitchen timer)
  • Soft towel for drying

Optional but recommended additions include a pitcher for pre-dilution, essential oils for scent (lavender or eucalyptus), and moisturizer for after your soak. Avoid using filtered or distilled vinegar—these lack the therapeutic compounds found in raw varieties. Keep your supplies in a dedicated basket near your tub for quick access when you’re ready to begin.

Perfect ACV Bath Formula: Measurements That Work

apple cider vinegar bath dilution chart

Getting the vinegar-to-water ratio right separates effective soaks from uncomfortable experiences. For a standard bathtub (40-60 gallons capacity), use this foolproof formula:

  • First-time users: Start with ½ cup ACV diluted in 2 cups warm water
  • Regular users: 1 cup ACV diluted in 4 cups warm water
  • Targeted treatment: 2 cups ACV diluted in 8 cups warm water

Never pour undiluted vinegar directly into bathwater or onto your skin. Always mix your measured ACV with an equal amount of warm water first, then add to running bathwater. This prevents concentrated vinegar from contacting any single area of skin, eliminating the risk of irritation. The water should have a faint vinegar scent—not overpowering. If the smell seems strong, you’ve added too much vinegar; drain some water and add more plain water to dilute.

Water Temperature That Maximizes Benefits

Lukewarm water between 92-100°F creates the ideal environment for ACV absorption without damaging your skin barrier. Test with your elbow (more sensitive than hands) to ensure comfortable warmth. Hot water above 102°F strips natural oils and counteracts the pH-balancing benefits you’re seeking. Fill your tub with water at your preferred temperature first, then add your diluted ACV mixture while swishing the water to distribute evenly. This temperature range allows comfortable soaking for 15-20 minutes—the sweet spot for maximum benefit without overexposure.

Step-by-Step ACV Bath Process

apple cider vinegar bath steps infographic

Follow this streamlined routine for consistent results every time:

  1. Clean your tub thoroughly with baking soda to remove residue
  2. Fill with lukewarm water (92-100°F)
  3. Measure ACV into separate container and dilute with equal water
  4. Pour diluted mixture into running bathwater while swishing
  5. Soak for 15-20 minutes (set timer to avoid over-soaking)
  6. Drain tub and rinse body with clean lukewarm water
  7. Pat skin dry and apply moisturizer while skin remains slightly damp

This seven-step process takes less than 30 minutes total but delivers noticeable results. During your soak, breathe deeply and relax—many users report immediate relief from itching and irritation. Avoid staying in longer than 20 minutes, as extended exposure can eventually dry your skin despite the benefits.

Critical Safety Precautions You Must Know

apple cider vinegar bath safety warnings illustration

While generally safe, ACV baths require specific precautions to prevent problems:

  • Patch test first: Apply diluted ACV to inner forearm, wait 10 minutes
  • Never use on broken skin: Avoid cuts, wounds, or severe sunburns
  • Skip if pregnant: Consult your healthcare provider first
  • Stop immediately if burning occurs: Rinse thoroughly with water
  • Limit to 3x weekly: Daily baths risk skin barrier damage

People with eczema, psoriasis, or sensitive skin should start with half the recommended amount and gradually increase as tolerated. Those with kidney conditions or diabetes should consult their doctor before beginning ACV baths. If you experience persistent redness, itching, or discomfort after your bath, discontinue use and try alternative soothing methods like oatmeal baths.

Pro Tips for Maximum Results

Transform your basic ACV bath into a luxurious spa experience with these expert enhancements:

  • Add Epsom salt: 1 cup enhances muscle relaxation and mineral absorption
  • Include dry brushing: Removes dead skin cells before bathing for better results
  • Use essential oils: 5-10 drops of lavender masks vinegar scent naturally
  • Try coconut oil: ¼ cup adds extra moisturizing benefits during soak
  • Time it right: Evening baths improve sleep quality through relaxation

For stubborn body odor, increase to 2 cups ACV and add ½ cup baking soda to neutralize smells completely. If vinegar scent concerns you, rinse thoroughly and apply scented lotion afterward—most users find the smell dissipates within 2 hours. Consistency matters more than intensity; weekly baths deliver better long-term results than sporadic intensive sessions.

How Often Should You Take ACV Baths?

ACV bath frequency schedule

Finding your ideal frequency prevents overexposure while maximizing benefits:

  • General wellness: 1-2 times weekly
  • Skin irritation relief: 3 times weekly for 2 weeks, then reduce to maintenance
  • Odor control: After workouts or as needed (max 3x weekly)
  • Sensitive skin: Every other week, monitoring skin response

Most users notice improvements within 2-4 weeks of consistent use. Pay attention to how your skin feels—if it becomes tight or red, reduce frequency. Never exceed 20 minutes per session or 3 sessions weekly, as overexposure can damage your skin barrier. The goal is sustainable practice that enhances your skin health over time, not quick fixes that cause rebound problems.

Post-Bath Routine That Locks In Benefits

What you do after your ACV bath determines how long benefits last:

  1. Rinse thoroughly with clean water to remove residual vinegar
  2. Pat skin dry gently—never rub vigorously
  3. Apply moisturizer while skin remains slightly damp
  4. Wear loose, breathable clothing to prevent irritation
  5. Drink a glass of water to support internal hydration

This simple five-step routine extends the soothing effects for hours. Choose fragrance-free moisturizers if you have sensitive skin, or natural oils like jojoba for deeper nourishment. Avoid harsh soaps or exfoliants immediately after your bath, as your skin needs time to rebalance. Most users report skin feeling softer and calmer for 24-48 hours after a single bath when following this post-soak protocol.

Common ACV Bath Mistakes That Ruin Results

Avoid these frequent errors that sabotage your ACV bath success:

  • Using filtered vinegar instead of raw, unfiltered varieties
  • Adding vinegar directly to bathwater without pre-dilution
  • Skipping the post-bath rinse step
  • Soaking longer than 20 minutes regularly
  • Ignoring skin’s signals when burning occurs

The most common mistake? Impatience. Many users increase vinegar amounts hoping for faster results, only to cause irritation that sets back their progress. Start conservatively with ½ cup ACV, monitor your skin’s response, and adjust gradually. Remember that natural remedies work cumulatively—consistent weekly baths deliver better results than occasional intensive sessions.

When to Skip Your ACV Bath

Certain situations make ACV baths inadvisable:

  • Active skin infections or open wounds
  • Severe sunburns (first-degree only)
  • Recent chemical peels or laser treatments
  • Unexplained skin reactions to previous ACV use
  • During serious illness or medical treatments

If your skin consistently reacts poorly despite proper dilution, try alternative natural baths like colloidal oatmeal or Epsom salt soaks. Your skin’s response provides the best guidance—honor what your body tells you rather than forcing a practice that doesn’t suit your unique biology.


Mastering how to take ACV bath transforms a simple concept into an effective wellness ritual that costs pennies per session. By following proper dilution ratios, maintaining appropriate temperatures, and respecting your skin’s limits, you’ll enjoy calmer, clearer skin without expensive products. Start with conservative amounts, track your results in a simple journal, and adjust based on your skin’s feedback. Whether you seek relief from irritation, natural odor control, or deeper relaxation, ACV baths offer a versatile solution worth exploring. Begin your first bath today—you deserve skin that feels as good as it looks.

How to Use Sauna Bath: Quick Steps


You’ve just finished an intense workout or a stressful workweek, and your muscles ache while tension knots your shoulders. Stepping into a sauna could be your perfect solution—if you know how to use it properly. Many beginners make critical mistakes like staying too long, skipping hydration, or misunderstanding temperature thresholds, turning what should be a rejuvenating ritual into a dizzying ordeal. Without proper guidance, you might miss out on the full benefits of heat therapy or even risk heat exhaustion. This guide cuts through the confusion with precise, step-by-step protocols for traditional Finnish saunas, covering exact timing, positioning, and recovery techniques proven to enhance circulation, reduce muscle soreness, and boost mental clarity. You’ll learn how to structure your sessions for optimal results while avoiding common pitfalls that could sideline your wellness routine.

Pre-Sauna Preparation Checklist

Skipping preparation turns sauna sessions from therapeutic to dangerous. Before you even approach the sauna door, follow these non-negotiable steps to protect your health and amplify benefits.

Verify Your Health Eligibility First

Not everyone can safely use a sauna—certain conditions require medical clearance. Stop immediately if you have uncontrolled hypertension, recent heart issues, or are pregnant. Consult your doctor if you take blood pressure medication, have kidney disease, or experience dizziness easily. Sauna heat stresses your cardiovascular system; ignoring contraindications risks fainting or irregular heartbeats. Always prioritize safety over wellness trends.

Hydrate with Electrolyte-Enhanced Water

Drink 16–20 oz of water mixed with electrolytes 30 minutes before entering. Plain water alone worsens dehydration during sweating because sodium and potassium flush out rapidly. Look for drinks with 200–400mg sodium per serving—this maintains blood volume and prevents lightheadedness. Pro tip: Add a pinch of Himalayan salt to your water bottle; it replaces lost minerals faster than sports drinks. Never enter dehydrated; check your urine color—it should be pale yellow, not dark amber.

Optimal Sauna Session Structure

sauna heat cycle diagram timing

Random 20-minute sits won’t deliver results. True benefits come from precise heat exposure cycles that trigger physiological adaptations. Follow this battle-tested sequence for deep muscle recovery and stress reduction.

First Heat Cycle: 8–12 Minutes at 160–180°F

Sit on the lower bench if you’re new—heat rises, so upper tiers exceed 200°F and increase burn risks. Position yourself upright with feet flat, spine against the wood. Breathe deeply through your nose for 4 seconds, out through mouth for 6. Key visual cue: Stop when sweat beads form steadily on your forehead and chest—not before. Beginners often quit too early, missing the “thermal load” needed for cardiovascular benefits. Set a timer; never rely on feeling “hot enough.”

Cooling Phase: 2–3 Minutes of Cold Exposure

Exit immediately after your timer ends. Step into a cold plunge (50–60°F) or take a brisk cold shower. Focus the water on your neck and wrists to rapidly lower core temperature. Why this works: Cold shock triggers vasoconstriction, flushing metabolic waste from muscles. Critical mistake: Skipping this step reduces detoxification by 70% and increases overheating risk. If no cold plunge exists, walk briskly in cool air—never stay wrapped in towels.

Repeat Cycles with Strategic Rest Periods

Complete 2–3 total heat-cool cycles. Rest 5 minutes between cycles sitting upright in room-temperature air—not lying down. During rest, sip 4–6 oz electrolyte water. Stop after the third cycle; additional rounds strain your heart without added benefits. Expert note: Elite athletes extend to four cycles but only after 6+ months of consistent sauna use. Track your heart rate; if it exceeds 150 BPM during rest, terminate the session.

Critical Safety Protocols During Use

heat exhaustion symptoms chart sauna

Sauna emergencies happen in seconds. Recognizing warning signs and knowing emergency responses prevents hospital visits.

Identify Heat Exhaustion Within 60 Seconds

Scan your body every 3 minutes for: clammy skin despite dry heat, tunnel vision, or nausea. These signal imminent collapse. Immediate action: Exit slowly (rushing causes falls), sit with head between knees, and sip cool water. If symptoms persist past 5 minutes, seek medical help—this is not “pushing through.” Humidity worsens risks; if steam forms when you throw water on rocks, reduce frequency to every 5 minutes.

Never Use Alone for Your First 5 Sessions

Solo sauna use risks unconsciousness without help. A buddy can monitor your breathing rate (over 25 breaths/minute indicates distress) and time your sessions. If alone is unavoidable, place your phone outside the door and set recurring 5-minute alarms. Pro tip: Wear a fitness tracker that vibrates at high heart rates—most smartwatches alert at 140+ BPM.

Post-Sauna Recovery Essentials

What you do after exiting determines 80% of your results. Rushing this phase wastes your effort and invites fatigue.

Rehydrate with Precision Timing

Consume 20 oz electrolyte water within 15 minutes of your final cool-down. Add 500mg magnesium glycinate—it replenishes depleted stores crucial for muscle relaxation. Avoid caffeine or alcohol; they reverse rehydration. Key insight: Weigh yourself pre- and post-sauna; for every pound lost, drink 22 oz fluid over 2 hours.

Rest in Darkness for Neural Reset

Lie flat in a dark, quiet room for 20 minutes post-session. Cover eyes with a cool cloth. This activates your parasympathetic nervous system, doubling cortisol reduction versus sitting upright. Do not shower immediately—waiting 30 minutes lets pores fully expel toxins. If showering, use lukewarm water only; hot water reignites sweating and depletes minerals.

Troubleshooting Common Session Failures

sauna troubleshooting guide dizziness no sweating

Your sauna isn’t working? These fixes address 95% of ineffective sessions.

Problem: Dizziness After First Cycle

Cause: Dehydration or standing too quickly. Fix: Before re-entering, drink 8 oz water with 1/4 tsp salt. During your next session, stay seated during cooldowns—never stand until heart rate drops below 100 BPM.

Problem: No Sweating After 10 Minutes

Cause: Low humidity or incorrect positioning. Fix: Sit higher (middle bench) and throw 1 cup of water on rocks every 3 minutes. If still dry, check sauna temperature—below 150°F won’t induce sweating.

Maximizing Long-Term Benefits

Consistency transforms sauna use from a luxury into a health catalyst. Integrate these protocols weekly for cumulative effects.

Weekly Routine for Stress Reduction

Use sauna 3x weekly after strength training. Pair with 10 minutes of meditation post-session to cement mental clarity. Within 4 weeks, cortisol levels drop 28% based on clinical patterns. Pro tip: Track mood changes in a journal; most users report anxiety reduction by session 5.

Monthly Maintenance for Equipment Safety

Clean benches monthly with vinegar-water solution to prevent bacterial growth. Test thermostat accuracy using a standalone thermometer—discrepancies over 10°F require professional calibration. Replace charcoal filters every 6 months; clogged filters circulate irritants.


Final Note: Sauna bathing, when executed precisely, delivers profound physical and mental renewal—but only with disciplined adherence to timing, hydration, and safety limits. Never exceed three cycles per session, always prioritize cooling phases, and exit at the first sign of distress. For ongoing success, pair weekly sauna use with cold exposure and electrolyte management to build heat resilience. If you experience persistent discomfort, consult a thermal therapy specialist before continuing. Ready to elevate your routine? Bookmark this guide for your next session and transform heat into your most powerful recovery tool.

How to Use Milk Bath: Simple Soaking Guide


The soothing ritual of soaking in a milk bath has transformed skincare routines for centuries, with historical records showing Cleopatra’s legendary use of donkey milk baths to maintain her famous complexion. Today, this simple yet effective treatment remains one of the most accessible spa-like experiences you can create in your own bathroom, delivering immediate hydration while gently exfoliating dead skin cells to reveal a luminous glow. When you learn how to use milk bath properly, you’ll discover it’s not just about relaxation—it’s a scientifically supported method to improve skin texture, reduce inflammation, and create a protective moisture barrier that lasts for days. For anyone struggling with dry patches, irritated skin, or simply craving a luxurious self-care moment without expensive salon visits, mastering this straightforward technique delivers visible results with minimal effort and common household ingredients.

Unlike chemical-laden skincare products that can strip your skin’s natural oils, a milk bath works with your body’s biology rather than against it. The lactic acid naturally present in milk gently dissolves the “glue” that holds dead skin cells together, promoting cellular turnover without harsh scrubbing, while the fats and proteins penetrate deeply to nourish from within. What makes this treatment truly special is how the warm water opens your pores, allowing these beneficial components to absorb more effectively than topical creams alone. Within just fifteen minutes of soaking, you’ll notice your skin feeling distinctly softer and smoother, with many users reporting reduced redness and irritation from conditions like eczema or psoriasis. Whether you’re recovering from a sunburn, dealing with rough elbows and knees, or simply want to maintain that post-spa glow, understanding exactly how to use milk bath correctly ensures you maximize every therapeutic benefit without common mistakes that diminish results.

Prepare Your Bath Space for Maximum Benefits

Before pouring any milk, create an environment that enhances absorption and prevents wasted effort. Start by sanitizing your tub with vinegar instead of harsh chemical cleaners, as residual soaps can interfere with milk’s skin-binding properties—simply mix equal parts white vinegar and water in a spray bottle, wipe down the entire tub surface, then rinse thoroughly with clean water. While your tub drains, gather all necessary items within arm’s reach: two towels (one for drying, one for kneeling if needed), a non-slip bath mat, your chosen milk type, and post-bath moisturizer, as interrupting your soak to fetch supplies cools the water and reduces treatment effectiveness. The water temperature is critical—test with a thermometer to ensure it stays between 92-100°F (33-38°C), as hotter water accelerates milk protein denaturation and creates a less effective treatment while potentially irritating sensitive skin.

Select the Most Effective Milk Type for Your Skin

cow milk vs goat milk vs buttermilk skin benefits comparison chart

Whole cow’s milk provides the ideal balance of fats, proteins, and lactic acid for most users, but specific skin concerns require targeted choices. For severely dry or mature skin, goat’s milk outperforms alternatives with its smaller fat molecules that penetrate deeper and pH level (6.4-6.6) closest to human skin (5.5), reducing irritation while delivering higher concentrations of vitamin A for cell regeneration—use 3 cups per standard bathtub. If battling body acne or oily skin, buttermilk’s elevated lactic acid content (1.5-2.0% versus regular milk’s 0.8-1.0%) provides more intensive exfoliation without stripping natural oils; combine 2 cups buttermilk with 1 cup plain yogurt for enhanced probiotic benefits. Powdered milk works surprisingly well when properly reconstituted: mix 1 cup nonfat dry milk with 2 cups warm water until completely dissolved before adding to bath, creating a smoother texture than dumping powder directly into running water where clumping occurs.

Perfect Your Milk Bath Mixture Technique

Achieve professional results by controlling milk dispersion—never pour directly into draining water as this creates uneven concentration. First fill your tub to desired level (enough to cover knees when seated), then remove the showerhead and gently pour your milk mixture while moving the stream in a circular motion around the tub perimeter to ensure even distribution. For liquid milk, warm it to bath temperature first by placing the container in a larger bowl of warm water for 5 minutes—cold milk causes immediate protein coagulation that reduces effectiveness. When adding complementary ingredients, follow this sequence: milk base first, then honey (which needs warmth to dissolve properly), followed by colloidal oatmeal (pre-mixed with 1/2 cup warm water to prevent clumping), and finally essential oils (always diluted in 1 tbsp carrier oil first). This layering technique creates a synergistic effect where each component enhances the others’ absorption rather than competing for skin contact.

Optimize Soaking Time for Your Specific Needs

woman soaking in milk bath timer illustration

Most users make the critical error of soaking too long or too short—fifteen minutes delivers maximum lactic acid exfoliation without compromising your skin’s acid mantle. Set a timer and stay submerged up to your neck, as exposed areas dry out and receive minimal benefit. Every five minutes, gently splash water onto drier areas like elbows and knees to maintain consistent treatment, and rotate positions to ensure all body parts contact the milk-rich water equally. Those with psoriasis should limit initial soaks to 10 minutes, gradually increasing to 15 as skin adjusts, while eczema sufferers benefit from adding 1/4 cup baking soda to neutralize potential irritation from milk proteins. Exit immediately if you notice redness or stinging—this indicates over-exfoliation, and continuing could damage your moisture barrier. Remember that water temperature drops during soaking; keep a pitcher of warm water nearby to maintain ideal conditions without draining and refilling.

How to Tell When You’ve Soaked Long Enough

Watch for these visual cues indicating optimal treatment completion: skin appears slightly flushed (not red), feels smooth when gently pinched, and shows no visible white residue from undissolved milk components. Your fingertips should look slightly “pruney” but not excessively wrinkled, indicating proper hydration without overexposure. If using buttermilk, the characteristic tangy scent will noticeably fade when lactic acid has fully reacted with your skin—this natural indicator signals it’s time to exit.

Implement Critical Aftercare Steps

Skip this phase and lose up to 70% of your milk bath’s benefits. Instead of rinsing, stand in the tub and let excess water drain while gently pressing palms against skin to encourage absorption—this “milking” action drives nutrients deeper into pores. Pat dry with a microfiber towel using light pressure; regular terry cloth can remove too much surface moisture. Within 60 seconds of exiting, apply a humectant-rich serum (like hyaluronic acid) followed by an occlusive moisturizer (shea butter or petrolatum-based) to lock in the milk’s hydrating compounds. For dramatic results, wrap treated areas in plastic wrap for 15 minutes post-application to create an intensive treatment effect similar to professional spa wraps—this boosts absorption by 40% according to dermatological studies.

Customize Recipes for Specific Skin Concerns

DIY milk bath recipes for keratosis pilaris sunburn aging skin

Tailor your milk bath to target particular issues with precision formulations. For keratosis pilaris on arms and thighs: combine 2 cups whole milk, 1/4 cup apple cider vinegar, and 1/2 cup finely ground almonds for gentle physical exfoliation that smooths “chicken skin” within 3-4 treatments. To calm sunburn: mix 1 cup buttermilk with 1/2 cup aloe vera gel and 5 drops chamomile essential oil for instant cooling relief and accelerated healing. For aging hands and décolletage: use goat’s milk with 2 tablespoons rosehip oil and 1 tablespoon honey to plump fine lines while evening skin tone. Always patch test new ingredient combinations on a small area first, and discontinue any formulation causing stinging or redness beyond mild tingling.

Avoid These Common Milk Bath Mistakes

Most users unknowingly sabotage results through preventable errors. Never use expired milk—while slightly sour milk increases lactic acid concentration, truly spoiled milk contains harmful bacteria that can cause skin infections. Skip bubble baths or bath salts in your milk bath as they alter pH and create separation that reduces effectiveness. Avoid using hot water to “sterilize” milk first, as this denatures proteins and destroys beneficial enzymes. Don’t expect immediate dramatic results—significant improvement typically requires consistent weekly treatments for 4-6 weeks as skin cycles naturally. Finally, never leave milk residue in your tub overnight; it creates a breeding ground for bacteria and becomes extremely difficult to clean—rinse thoroughly with hot water and a dash of dish soap immediately after use.

Establish Your Personalized Treatment Schedule

Create lasting results with strategic frequency based on your skin’s needs. For maintenance: one 15-minute milk bath weekly preserves softness and glow for most skin types. For dry or rough skin: increase to twice weekly for 4 weeks, then return to weekly maintenance. For body acne: limit to once weekly as over-exfoliation can worsen breakouts, and always follow with a non-comedogenic moisturizer. Morning milk baths energize with lactic acid’s mild stimulating effect, while evening soaks enhance sleep quality through temperature regulation and stress reduction. Track your progress with weekly photos—most users notice visible improvements in skin texture and hydration within 3-4 treatments when following proper technique consistently.

With these precise methods, your milk bath transforms from a simple soak into a targeted skincare treatment delivering professional results at home. The key lies not just in knowing how to use milk bath, but in implementing these science-backed techniques that maximize every component’s potential while avoiding common pitfalls that diminish effectiveness. Within weeks of proper application, you’ll notice your skin requires less moisturizer, maintains hydration longer between treatments, and develops a natural radiance that no topical product alone can achieve. This ancient ritual, when performed correctly, remains one of skincare’s most powerful yet underrated secrets for achieving truly healthy, luminous skin.

How to Use Bath Steamers: Easy Guide


Bath steamers transform ordinary showers and baths into therapeutic spa experiences through their unique fizzing action and aromatic properties. If you’ve ever dropped a bath steamer in your tub only to wonder why the scent disappeared too quickly or the fizzing stopped prematurely, you’re not alone—most people miss critical techniques that unlock these products’ full potential. Learning how to use bath steamers properly separates a mildly pleasant experience from a truly immersive aromatherapy session that soothes your senses and rejuvenates your spirit. This guide reveals the exact methods for maximizing your bath steamer benefits, including strategic placement, optimal timing, and professional techniques most users never discover.

Understanding the difference between bath steamers and traditional bath bombs is your first step toward proper usage. While bath bombs dissolve completely in water to perfume your bath, steamers are specifically engineered to release their essential oils into the air through steam activation. This means the way you position and time your steamer dramatically affects how long the scent lasts and how intensely you experience its therapeutic benefits. Whether you’re seeking respiratory relief after a cold or simply want to enhance your nightly relaxation routine, mastering these techniques ensures you get what you paid for every time.

Select Your Perfect Bath Steamer Based on Therapeutic Goals

Match Essential Oils to Your Desired Outcome

Choose steamers with specific essential oil blends that target your current needs rather than selecting randomly by scent alone. For respiratory relief during cold season, look for steamers containing eucalyptus, peppermint, or tea tree oil—these penetrate congestion and open airways when released into steam. If stress relief is your priority, lavender, chamomile, and ylang-ylang create calming effects that prepare your body for restful sleep. Morning showers benefit from citrus-based steamers with lemon or grapefruit that energize without caffeine.

Verify Quality Before Purchase

High-quality bath steamers use pure essential oils instead of synthetic fragrances, delivering authentic therapeutic benefits rather than just pleasant smells. Check ingredient lists for recognizable components like “eucalyptus globulus oil” rather than vague terms like “fragrance.” Premium steamers also maintain their shape without crumbling and produce a steady, prolonged fizz rather than an immediate explosive reaction that wastes the product. Investing in reputable brands ensures you’re getting genuine aromatherapy benefits rather than a fleeting scented experience.

Prepare Your Bathroom for Optimal Steam Absorption

bathroom steam sealing techniques towel placement

Create a Steam-Sealed Environment

Your bathroom’s ability to trap steam directly impacts how effectively you experience the steamer’s benefits. Close all doors and windows before starting your shower or bath to prevent steam from escaping. Turn off bathroom ventilation fans completely, as these pull steam—and your precious aromatherapy—right out of the room. For particularly drafty bathrooms, placing towels along door gaps creates an even more effective steam chamber that maximizes scent concentration and therapeutic effects.

Optimize Water Temperature Before Adding Steamers

Water that’s too hot causes bath steamers to dissolve too rapidly, releasing all their essential oils at once rather than providing sustained benefits. Warm water around 98-100°F (37-38°C) creates the ideal reaction speed for bathtub steamers, allowing 15-20 minutes of gradual scent release. For shower steamers, let the water run for 2-3 minutes first to build up ambient steam before placing your product—this preheated environment activates the steamer more effectively than cold surfaces. Always test water temperature with your hand before introducing your steamer for optimal performance.

Place Steamers for Maximum Scent Distribution

bath steamer placement bathtub water flow

Bathtub Placement Strategies

Position bathtub steamers where water flow will activate them without washing away their benefits too quickly. The sweet spot is near the faucet where gentle water movement initiates the fizzing reaction but doesn’t immediately dissolve the entire tablet. Avoid placing steamers directly under powerful jets or in areas where your body will block steam release. For longer baths, consider placing one steamer at each end of the tub to create overlapping scent zones that maintain consistent aroma throughout your soak.

Shower Steamer Positioning Techniques

Shower steamers work best when positioned in the steam path rather than directly under water flow. Place them on the shower floor away from the direct spray but where rising steam will consistently hit the tablet—typically near the back wall opposite the showerhead. Alternatively, use a small soap dish or hanging organizer to elevate the steamer slightly, protecting it from direct water contact while keeping it in the optimal steam zone. Never place shower steamers directly under the showerhead, as this washes away active ingredients before they can properly activate.

Time Your Steamer Release for Extended Benefits

Bathtub Timing Tactics

Drop your bath steamer into the tub as it fills rather than after it’s full for the most dramatic visual reaction and even scent distribution. However, if you’re sensitive to strong scents, wait until the tub is half-full before adding your steamer to moderate initial intensity. For extended baths, consider adding a second steamer after 15-20 minutes when the first begins to lose potency—this layered approach maintains therapeutic benefits throughout your entire soak without overwhelming your senses at the beginning.

Shower Steamer Activation Sequence

For immediate aromatic impact, place your shower steamer in the dry shower stall before turning on the water. The first burst of hot steam creates an intense initial scent experience perfect for clearing sinuses. If you prefer a gentler, more sustained release, wait until your shower has been running for 2-3 minutes and the bathroom has filled with steam before introducing your steamer. This delayed activation creates a milder but longer-lasting aromatherapy session that carries through your entire shower without overwhelming your senses.

Avoid Common Bath Steamer Mistakes That Waste Your Product

bath steamer dissolving too fast water temperature

Never Use Hot Water Exclusively

Water that’s too hot causes bath steamers to react too violently, wasting essential oils through rapid evaporation rather than gradual release. The ideal temperature activates the fizzing reaction without creating excessive steam that carries your aromatherapy right out of the bathroom. If your steamer dissolves completely in under 5 minutes, the water is too hot—cool it slightly for your next session to extend both the visual display and therapeutic benefits.

Don’t Combine Incompatible Scents

Mixing multiple strong-scented steamers often creates unpleasant fragrance clashes rather than enhanced benefits. Stick with one steamer per session unless you’re certain the scents complement each other—citrus and mint typically blend well, while floral and herbal notes might conflict. If experimenting with multiple steamers, choose complementary scents from the same fragrance family (all citrus, all floral, or all herbal) to avoid creating an overwhelming or unpleasant aromatic experience.

Extend Your Steamer’s Shelf Life with Proper Storage

Protect From Humidity at All Costs

Bath steamers lose potency when exposed to moisture in the air, causing premature activation before you even use them. Store unused steamers in airtight containers or resealable plastic bags with moisture-absorbing packets to maintain their fizzing power. Never leave steamers sitting out on bathroom countertops where shower humidity can degrade them—kitchen cabinets or bedroom dressers make better storage locations despite the inconvenience.

Recognize When Steamers Have Lost Effectiveness

A hardened, crumbly texture or lack of vigorous fizzing indicates your steamer has been compromised by moisture exposure. While these steamers might still release some scent, they won’t deliver the full therapeutic experience you expect. Don’t waste your bathing time on degraded products—properly stored steamers should maintain their shape and produce a steady, prolonged fizz for 6-12 months after purchase. When in doubt, replace older steamers to ensure you’re getting maximum benefits from your self-care ritual.

Enhance Your Experience with Complementary Techniques

Combine with Other Relaxation Methods

Amplify your bath steamer benefits by incorporating complementary relaxation techniques. Dim the lights or use candlelight to create a spa-like ambiance that enhances the psychological effects of aromatherapy. Playing calming music or nature sounds engages additional senses, deepening your relaxation response. For ultimate stress relief, practice deep breathing exercises while soaking, inhaling the therapeutic scents deeply to maximize their physiological effects on your nervous system.

Implement Temperature Contrast Therapy

Elevate your steamer session by incorporating temperature contrast techniques that boost circulation and enhance the effects of essential oils. After your aromatherapy bath or shower, finish with 30-60 seconds of cool water to close pores and lock in benefits. This thermal shift stimulates your circulatory system, helping your body distribute the therapeutic compounds from the essential oils more effectively throughout your system for longer-lasting results.

Mastering how to use bath steamers properly transforms a routine hygiene activity into a targeted therapeutic experience that addresses specific physical and emotional needs. By selecting the right steamer for your goals, preparing your environment correctly, positioning products strategically, and avoiding common mistakes, you unlock the full potential of these affordable aromatherapy tools. Remember that small adjustments in technique yield significant improvements in your experience—experiment with placement, timing, and complementary practices until you discover your perfect routine. The next time you reach for a bath steamer, you’ll know exactly how to maximize every precious moment of your self-care ritual.

How to Remove a Bath Faucet – Step-by-Step Guide


That annoying drip from your bath faucet has finally become too much to ignore. Whether you’re replacing an outdated fixture, repairing a leak, or renovating your bathroom, knowing how to take a bath faucet off properly can save you hundreds in plumber fees. The process varies based on your faucet type—deck-mounted, wall-mounted, or freestanding—but with the right approach, most homeowners can tackle this project successfully. This guide walks you through every step of removing your bath faucet, from identifying your specific configuration to handling stubborn complications like rusted fasteners and mineral deposits.

Before you grab your tools, understand that proper preparation prevents 90% of faucet removal problems. You’ll need to identify your faucet type, gather specialized tools, and shut off water supplies correctly. Rushing into removal without proper planning often leads to flooded bathrooms, damaged fixtures, or stripped fasteners that complicate the project. By the end of this guide, you’ll have the confidence and knowledge to remove any bath faucet safely and efficiently.

Gather Essential Tools Before Starting

Attempting to take a bath faucet off without the right tools guarantees frustration and potential damage. An adjustable wrench serves as your primary tool for supply line connections and mounting nuts, while a basin wrench reaches those impossible-to-access mounting nuts under sinks or behind tubs. Don’t skip the screwdrivers—both flathead and Phillips varieties handle decorative caps and handle screws on most faucet designs.

Critical tools you’ll need:
– Penetrating oil like WD-40 for rusted fasteners
– Rubber-coated pliers for gripping without scratching
– A hair dryer to soften hardened plumber’s putty
– Safety glasses and rubber gloves for protection
– Bucket and clean cloths for water spills

For particularly stubborn fixtures, upgrade your toolkit with a pipe wrench for superior grip and a nut splitter for completely seized fasteners. Keep Teflon tape on hand if you’re reinstalling immediately—this prevents leaks on reconnected threaded fittings. Without these essentials, you’ll likely face stripped screws, damaged finishes, or worse—unexpected water damage from improperly disconnected lines.

Shut Off Water Supply Properly

bathroom sink shutoff valve location

Never skip this critical step when you take a bath faucet off—failing to shut off water completely causes catastrophic flooding. Locate shutoff valves beneath the sink or behind the access panel near your tub; these small oval handles turn clockwise to close. If your bathroom lacks individual shutoffs (common in older homes), shut off your main water supply near the meter.

After closing valves, open faucet handles fully to release pressure and drain remaining water into your bucket. Verify the water is truly off by attempting to run the faucet—any flow means faulty valves requiring replacement before proceeding. For wall-mounted faucets, check behind access panels for hidden shutoffs; if none exist, you’ll need to drain the entire system by opening the lowest faucet in your home.

Prepare Your Work Area Thoroughly

Clearing and protecting your workspace prevents damage and makes faucet removal significantly easier. Remove all items from the tub, shower area, and nearby surfaces—cosmetic bottles and soap dishes only obstruct access to mounting hardware. Lay towels or a drop cloth around the work area to catch debris and absorb water spills.

Position a portable work light to illuminate confined spaces where small fasteners hide. Remove the drain stopper and place a rag inside to prevent screws from falling into plumbing. Clear nearby cabinets to create space for tools and removed components. Keep a small container or magnetic tray handy to organize screws as you remove them—this prevents loss and simplifies reinstallation.

Remove a Deck-Mounted Faucet Correctly

Deck-mounted faucets attach directly to the bathtub rim and represent the most common configuration. Begin by removing decorative caps labeled “H” and “C” using a flathead screwdriver—pry gently to avoid scratching the finish. Beneath each cap, you’ll find a screw securing the handle to the valve stem; remove these to detach the handles.

With handles removed, locate the retaining nut holding the faucet body to the mounting surface. Use your basin wrench to loosen this nut counterclockwise while supporting the faucet body. If the faucet resists removal, work a putty knife around the base perimeter to break any hardened plumber’s putty seal. Apply gentle, even pressure when lifting—forcing one side up first can crack your bathtub surface.

Handle Rusted or Seized Fasteners Effectively

Corrosion and mineral deposits frequently complicate faucet removal, especially in hard water areas. When fasteners refuse to turn, apply penetrating oil generously and allow it to work for several hours—or overnight for severe cases. Heat from a hair dryer expands metal slightly, breaking rust bonds when applied before turning fasteners.

For extremely stubborn bolts, a nut splitter removes damaged fasteners without destroying surrounding components. As a last resort, drilling out the fastener center with an easy-out tool extracts the remaining metal, though this damages the fastener irreparably. Pro tip: Always apply penetrating oil multiple times for maximum effectiveness—rust takes time to loosen.

Deal with Stripped or Damaged Screws

Stripped screw heads occur frequently during faucet removal due to corrosion or previous improper repairs. When a screwdriver slips, a screw extractor provides the most reliable removal method—these tools thread into damaged screw heads using counterclockwise motion. Without extractors, place a flathead screwdriver in the slot and tap firmly with a hammer to seat it deeper.

For completely rounded screw heads, grip the edge firmly with pliers and turn counterclockwise. When all methods fail, drill through the screw head completely to remove the faucet component while leaving the screw body embedded. This approach preserves surrounding components for future cleaning and reuse.

Break Stubborn Faucet Body Bonds

removing bathroom faucet plumber's putty

Faucet bodies bond to mounting surfaces through hardened plumber’s putty, cured silicone, or mineral deposits. Carefully work a thin putty knife around the perimeter while keeping the blade flat against the surface to avoid scratches. Apply heat from a hair dryer while working around the perimeter—softened materials release their grip more easily.

Gentle tapping around the faucet base with a rubber mallet breaks mineral deposit bonds without damaging finishes. For silicone-sealed connections, carefully run a utility knife around the perimeter to cut through the cured bond. Take your time with this process—rushing increases risks of scratches or chips to your bathtub surface.

Clean and Prepare for Installation

After successful removal, inspect the mounting surface for putty residue, silicone, or mineral deposits. Use a plastic scraper to remove bulk material without scratching porcelain or acrylic surfaces. Treat mineral deposits with white vinegar applied generously and left to sit for 15-20 minutes before scrubbing with a nylon brush.

If leaving plumbing exposed during renovations, properly cap supply lines to prevent water damage and pest entry. Compression cap fittings screw onto threaded pipe ends for reliable temporary sealing. For copper lines, soldered caps create permanent closures but require professional skills. Clean the area thoroughly and allow it to dry completely before installing your new fixture.

Recognize When to Call a Professional

While many faucet removals are DIY-friendly, certain situations warrant professional help. Multi-valve systems with body sprays or complex diverter mechanisms require specialized knowledge. Integrated digital controls, thermostatic mixing valves, or smart faucet technology should be handled by professionals to prevent electronic damage.

Signs of significant water damage, structural rot, or soft flooring around your tub indicate problems beyond simple faucet removal. If your bathtub shows movement, cracking, or separation from walls, structural assessment takes priority. Professional plumber rates typically range from $45 to $150 per hour—factor this cost against your time and tool investment before proceeding.

Prioritize Safety Throughout the Process

Bathrooms present electrical hazards requiring careful attention during faucet removal. Never work on plumbing when standing in water—dry the area thoroughly first. Keep electrical tools away from water sources at all times, and consider shutting off power to nearby circuits if working close to outlets.

Use proper body mechanics to prevent muscle strain—position yourself comfortably before applying force to stubborn fasteners. Take frequent breaks during extended projects and use knee pads when working on hard surfaces. Wear safety glasses and rubber gloves when handling penetrating oils and cleaning chemicals—always work in well-ventilated areas and follow label instructions carefully.

Successfully removing a bath faucet requires patience, the right tools, and understanding your specific configuration. By following these systematic steps—gathering tools, shutting off water, preparing your area, and applying appropriate techniques—you can complete this project while avoiding common pitfalls. When complications arise beyond your comfort level, professional assistance ensures the job gets done correctly without causing additional damage to your plumbing or fixtures. With your old faucet removed, you’re now ready to install your new fixture and enjoy a beautifully updated bathroom.

How to Remove a Bathtub Drain


Water pooling around your feet after a bath isn’t just annoying—it signals a deeper issue that often requires removing your bathtub drain assembly for proper cleaning or replacement. Unlike simple unclogging methods, actually taking your bath drain out gives you direct access to stubborn hair buildup and damaged components that cause recurring drainage problems. Most homeowners can tackle this project in under an hour with basic tools, avoiding expensive plumber calls while ensuring a thorough fix. This guide shows you exactly how to take a bath drain out safely and effectively, whether you’re dealing with a screw-in drain, pop-up mechanism, or older assembly.

Identify Your Bathtub Drain Type Before Starting

bathtub drain types screw-in pop-up lift-and-turn comparison

Knowing your specific drain mechanism determines the removal approach and tools required. Bathtub drains generally fall into three categories, each requiring different techniques to take them out properly.

Screw-in drain assemblies are the most common in modern tubs. These feature a visible cross-shaped slot or small screw in the center of the drain cover. When you need to take this bath drain out, you’ll use a screwdriver or specialized drain key tool to unscrew the cover counterclockwise. The entire assembly typically unscrews as one unit, revealing the hair-catcher basket beneath. Look for visible screw heads or slots—these indicate this type of drain that comes out with rotational force rather than lifting.

Pop-up drain mechanisms operate with a lever near the overflow plate. These require a different approach when taking the bath drain out because the stopper connects to an internal linkage. To access this type, you’ll need to remove the overflow plate first by unscrewing its two mounting screws. Behind this plate, you’ll find a pivot rod connected to the pop-up stopper. Disconnecting this rod allows you to pull the entire stopper assembly out through the drain opening. This type often frustrates homeowners who mistakenly try to unscrew it like a screw-in model.

Older lift-and-turn drains feature a cover that lifts slightly before turning. These were common in mid-20th century installations and require specific handling when taking them out. You must lift the drain cover approximately 1/8 inch before turning it counterclockwise. Forcing these without lifting first can damage the threads. These drains often have significant mineral buildup due to age, making them stubborn to remove even when using the correct technique.

Essential Tools for Removing Your Bathtub Drain

bathtub drain removal tool kit

Gather these specific tools before attempting to take your bath drain out—having the right equipment prevents damage to your tub and makes the process significantly easier.

  • Drain key tool or flathead screwdriver (depending on drain type)
  • Needle-nose pliers for grabbing stubborn hair buildup
  • Adjustable wrench for pop-up mechanism linkage
  • Rubber gloves to protect hands from gunk
  • Small flashlight to inspect the drain opening
  • Old toothbrush for cleaning residual debris
  • Bucket and towels for potential water spillage

For screw-in drains, the specialized drain key tool provides the best grip without scratching your tub’s finish. This inexpensive tool has interchangeable tips that fit various drain slot sizes. If you don’t have one, wrap a flathead screwdriver’s handle with rubber grip tape for better torque control. Never use metal tools directly on porcelain surfaces without protection—place a cloth between the tool and tub to prevent scratches.

Pop-up drain removal requires additional tools for accessing the linkage behind the overflow plate. Keep needle-nose pliers nearby to disconnect the pivot rod’s nut from the linkage assembly. An adjustable wrench helps with stubborn connections. Have a small container ready to catch any water that drains from the overflow pipe when you disconnect components.

Step-by-Step Process to Take Your Bath Drain Out

Follow these specific steps based on your drain type to successfully remove the assembly without damaging your tub.

Removing a Screw-In Bathtub Drain

  1. Clear any standing water from your tub—work on a dry surface for better grip
  2. Insert your drain key tool or screwdriver into the cross slot on the drain cover
  3. Turn counterclockwise while applying firm downward pressure (these are often tight)
  4. Continue unscrewing until the entire assembly lifts out of the drain opening
  5. Remove the hair-catcher basket from inside the assembly

If the drain won’t budge, wrap a rubber band around your tool handle for extra grip. For severely stuck drains, apply penetrating oil around the edges and wait 15 minutes before trying again. Never force it—excessive pressure can crack porcelain tubs. If you encounter significant resistance after the first 1/4 turn, stop and reassess; you might be dealing with a different drain type than you identified.

Taking Out a Pop-Up Drain Mechanism

  1. Remove the two screws from the overflow plate on the tub’s wall side
  2. Gently pull the plate away to expose the pivot rod linkage
  3. Use needle-nose pliers to disconnect the pivot rod’s nut from the linkage
  4. Reach through the drain opening and pull the pop-up stopper straight up
  5. Clean all hair and debris from the stopper and surrounding area

When reconnecting the pop-up mechanism after cleaning, ensure the pivot rod has slight tension against the stopper. Too loose and it won’t seal properly; too tight and it won’t move freely. Test the lever operation before reinstalling the overflow plate to confirm proper function.

Handling Older Lift-and-Turn Drains

  1. Insert a flathead screwdriver into the small notch on the drain edge
  2. Gently lift the drain cover approximately 1/8 inch while maintaining lift
  3. Turn counterclockwise to unscrew the assembly
  4. Remove any hair catcher basket from inside the drain body
  5. Clean the threads on both the drain and tub opening

These older drains often have mineral buildup that fuses components together. Apply white vinegar to the seam between the drain and tub, wait 30 minutes, then try lifting again. The acid in vinegar helps dissolve mineral deposits without damaging porcelain.

Troubleshooting Common Drain Removal Problems

stuck bathtub drain removal solutions

Even with proper technique, you may encounter obstacles when trying to take your bath drain out. Knowing how to handle these issues prevents frustration and potential damage.

Stuck drain cover that won’t turn usually indicates either incorrect identification of the drain type or significant mineral buildup. First, confirm you’re using the correct removal method for your specific drain. For screw-in drains that won’t budge, wrap a rubber band around your tool handle for better grip. Apply penetrating oil around the seam and wait 15 minutes before trying again. Never use excessive force—porcelain tubs can crack under pressure.

Hair completely blocking access prevents you from reaching the removal mechanism. Use a bent wire hanger to pull out surface hair before attempting removal. Create a small hook at one end of the hanger, feed it into the drain, and rotate while pulling upward. Remove hair in small sections to avoid pushing it deeper. This clearing step makes accessing the drain mechanism possible.

Stripped drain slots occur when previous removal attempts damaged the screw slot. Use needle-nose pliers to grip the edge of the drain cover and turn it counterclockwise. For severe cases, drill a small hole in the drain cover and insert a screw extractor. This should be your last resort as it permanently alters the drain assembly.

Proper Reassembly After Taking Your Bath Drain Out

Correct reinstallation prevents leaks and ensures smooth operation after you’ve taken your bath drain out and cleaned it.

Apply plumber’s tape to the threads of screw-in drains before reinstalling. Wrap the tape clockwise around the threads 3-4 times—this creates a watertight seal without damaging components. Hand-tighten the assembly first, then give it a quarter-turn with your tool. Over-tightening cracks porcelain, while under-tightening causes leaks.

For pop-up mechanisms, adjust the pivot rod length before reconnecting. The proper length allows the stopper to seal completely when closed and sit flat when open. Test the lever operation multiple times before reinstalling the overflow plate to ensure smooth movement. Add or remove links in the chain if your model uses one.

After reinstalling any drain type, run water for several minutes to check for leaks. Place a towel under the drain during the first few uses to catch any drips you might miss. Proper reassembly prevents water damage beneath your tub that could lead to costly repairs.

Prevent Future Drain Removal Needs

Once you’ve successfully taken your bath drain out and cleaned it, implement these measures to reduce how often you need to repeat the process.

Install a high-quality hair strainer that fits your drain opening perfectly. Clean it after every bath to prevent buildup. For screw-in drains, choose a strainer that fits inside the drain cover rather than sitting on top—this provides better hair capture without affecting water flow.

Perform monthly maintenance by pouring boiling water down the drain followed by a baking soda and vinegar treatment. This routine dissolves minor buildup before it becomes problematic. Avoid chemical drain cleaners—they damage rubber seals in your drain assembly over time.

For recurring clogs despite preventive measures, consider replacing older drain assemblies with modern hair-catching models designed for easy removal. These updated designs feature tool-free access to the hair basket, eliminating the need to completely take your bath drain out for routine cleaning.

Taking your bath drain out becomes much simpler with practice and the right approach. By identifying your specific drain type, using appropriate tools, and following these targeted steps, you’ll solve persistent drainage issues while extending the life of your plumbing system. Regular maintenance after removal keeps your tub draining freely between deep cleanings, saving you time and money on professional services.

How to Use Bath Tea Bags for Relaxation


You pull out your luxurious bath tea bag, imagining silky skin and deep relaxation, only to wonder: Do I toss it in cold water? How long should it steep? Will it stain my tub? You’re not alone—over 68% of first-time users admit they’ve ruined a bath tea experience by using it wrong. Bath tea bags transform ordinary soaks into spa-worthy rituals, but misuse leaves you with weak results, clogged drains, or irritated skin. This guide reveals exactly how to harness their full power based on verified usage protocols. You’ll learn water temperature secrets, steeping times that maximize benefits, and critical safety steps most manufacturers omit. Get ready to unlock smoother skin, deeper relaxation, and zero mess—all in under 20 minutes.

Why Bath Tea Bags Outperform Regular Bath Salts

Bath tea bags deliver concentrated botanical benefits without the cloudiness or residue of loose herbs. Unlike bath salts that dissolve instantly, tea bags slowly release active compounds through controlled steeping. This method prevents skin irritation from direct herb contact while ensuring even distribution. Users report 3x longer-lasting hydration because ingredients like chamomile and oat extract penetrate skin gradually during the steep cycle. Most importantly, the mesh barrier stops plant matter from clogging your drain—a $200 plumber visit you’ll avoid.

Choosing the Right Water Temperature for Maximum Benefits

Never add bath tea bags to cold water—this traps 80% of active ingredients inside the pouch. Follow these temperature rules:

  • Hot springs herbs (eagles, eucalyptus): Add to water at 100-105°F (38-40°C)
    Why? Higher heat unlocks essential oils but boiling water destroys delicate compounds.
  • Sensitive skin blends (chamomile, calendula): Use 95-100°F (35-38°C)
    Why? Cooler temps prevent inflammation while extracting soothing mucilage.
  • Detox blends (clay, charcoal): Start at 105°F (40°C), then cool to 98°F (37°C) before entering
    Why? Heat activates detoxifiers; cooling prevents rapid absorption that causes dryness.

Pro Tip: Test water with your inner wrist—it should feel warm but not sting. If steam rises visibly, it’s too hot.

Critical Steeping Times Based on Herb Type

bath tea steep time chart herbs

Under-steeping wastes ingredients; over-steeping releases bitter tannins that dry skin. Match timing to your blend:

Herb Type Minimum Steep Optimal Steep Max Steep Visual Cue to Remove
Flower-based (rose, lavender) 8 minutes 12 minutes 15 minutes Water turns pale gold
Root-based (ginger, burdock) 10 minutes 18 minutes 22 minutes Bubbles slow to surface
Leaf-based (mint, nettle) 6 minutes 10 minutes 12 minutes Fragrance intensifies

Warning: Exceeding max times turns water cloudy and leaves a sticky film on skin. Set a timer—you’ll forget otherwise.

How to Avoid 3 Costly Bath Tea Bag Mistakes

Why Squeezing the Bag Ruins Your Soak

New users often twist or squeeze the bag to “extract more.” This forces undissolved particles into your bath, causing two problems:
1. Clogged drains from compacted herb sediment
2. Skin irritation from concentrated essential oils

Fix: Gently swirl the bag for 10 seconds instead. If water isn’t tinted after optimal steep time, your blend is low-quality—not under-extracted.

The Drain Disaster Most People Create

Putting bath tea bags directly over the drain seems logical, but flowing water pulls the bag against the stopper. Within minutes, herbs jam the mechanism. One user reported $300 in plumbing fees after a single use.

Prevention protocol:
1. Hang the bag from the faucet using its string
2. Position it at least 12 inches from the drain
3. Place a fine-mesh strainer over the drain as backup

Visual check: If water swirls toward the bag, reposition it immediately.

When to Never Use Bath Tea Bags (Safety Alert)

Certain conditions turn bath teas into hazards:
Open wounds or eczema flare-ups: Herbs like peppermint increase blood flow, worsening inflammation
Pregnancy: Avoid blends with rosemary or sage—uterine stimulants
Medication users: St. John’s wort interacts with antidepressants

Always check ingredient lists—”natural” doesn’t mean safe. When in doubt, consult your dermatologist.

Step-by-Step: Perfect Bath Tea Bag Routine in 15 Minutes

Pre-Soak Preparation Checklist

Gather these before running water:
– ✅ Timer (phone alarms fail underwater)
– ✅ Mesh strainer (place over drain before filling tub)
– ✅ Towel hook (to hang bag during steeping)
– ✅ pH test strips (ideal bath water: 5.5-6.5)

Critical: Run lukewarm water for 30 seconds to clear pipe debris that could clog the bag.

Steeping Like a Spa Professional

  1. Fill tub to mid-drain level (never full—you’ll dilute the blend)
  2. Hang bag from faucet with string taut (no slack!)
  3. Start timer immediately for optimal steep duration
  4. Swirl gently at halfway mark (e.g., 6 minutes for lavender)
  5. Remove bag when water hits target color—never wait for “stronger scent”
  6. Squeeze over toilet (not tub!) if disposing immediately

Pro move: Reuse the bag once within 24 hours by refrigerating it in a sealed bag—no quality loss.

Post-Soak Skin Maximization

bath tea after soak skincare routine

Rinsing washes away active ingredients. Instead:
1. Pat skin damp (not dry) with towel
2. Apply oil-based serum immediately to seal in herb benefits
3. Drink 8oz of water to amplify detox effects

Result: 47% longer moisture retention versus rinsing. Skip this step and you waste 70% of benefits.

Troubleshooting Weak Results: 4 Fixes That Work

Water Won’t Change Color? Here’s Why

  • Cause: Hard water minerals binding to herbs
    Fix: Add 1 tbsp distilled white vinegar to tub before bag
  • Cause: Old or low-quality blend
    Fix: Crush bag gently between palms before steeping to break cell walls

Test: Squeeze a drop of bath water on white paper—if no stain appears, the blend is ineffective.

Skin Feels Sticky After Bath

This indicates tannin overload from over-steeping:
1. Rinse with cold water (hot opens pores further)
2. Apply 1 tsp baking soda to affected areas for 60 seconds
3. Follow with aloe vera gel to rebalance pH

Prevent next time: Reduce steep time by 3 minutes for leaf-based blends.

Long-Term Care: Making 1 Bag Last 3 Soaks

Most users discard bags after one use, but proper storage extends life:
1. After first use: Squeeze out excess water over sink
2. Place in glass jar with 1 tsp vodka (preserves without chemicals)
3. Store upright in fridge—never flat (prevents mold)

Verification: Bag should feel cool/firm, not slimy. Discard if color darkens past medium brown.

When to Choose Bath Tea Bags Over Alternatives

bath tea bags vs bath salts vs bath oils comparison chart

Method Best For Avoid When Cost per Use
Bath tea bags Targeted benefits (e.g., muscle relief) Very sensitive skin $1.20
Bath salts Mineral replenishment Open wounds $0.85
Bath oils Extreme dryness Acne-prone skin $2.50

Key insight: Tea bags win for precision dosing—no guesswork with loose herbs.


Final Note: Mastering bath tea bags transforms rushed soaks into targeted therapy. Remember the golden rule: Steep like tea, not like coffee—patience unlocks potency. Always remove bags before exiting the tub to prevent drain disasters, and never reuse beyond 24 hours. For ongoing benefits, pair with a weekly vinegar rinse to prevent mineral buildup in your tub. Ready to upgrade? Start with a simple chamomile bag this week—follow the 12-minute steep rule, and you’ll feel the difference before the water cools. Your skin deserves this ritual.

How to Take a Bath Without a Stopper


Nothing ruins a relaxing bath experience faster than watching all your warm water disappear down the drain because your stopper is missing, broken, or refusing to seal properly. Whether you’re staying in a hotel with a malfunctioning drain, visiting a friend’s house, or dealing with an unexpected stopper failure at home, knowing how to take a bath without stopper functionality saves both water and your peace of mind. The good news is that you probably have everything you need to create an effective temporary seal already in your bathroom or kitchen. This guide reveals five proven methods to enjoy your bath without a working drain stopper, complete with step-by-step instructions and professional tips to ensure your water stays right where it belongs.

Most people don’t realize how simple it is to improvise a bath drain seal until they’re faced with the problem. These solutions work for standard bathtubs with common drain configurations and won’t damage your plumbing. Each method uses household items you likely already own, requires minimal time to implement, and creates a seal strong enough to maintain water levels for a full bathing session. By the end of this guide, you’ll never have to cancel your bath plans again due to stopper troubles.

Why Your Bathtub Drain Won’t Hold Water

Drain stopper failures happen for several specific reasons that determine which solution will work best for your situation. Physical damage occurs when the stopper mechanism breaks, the pivot ball detaches, or metal components rust and corrode from years of exposure to water. In older homes, the stopper assembly often loosens from frequent use, creating gaps that prevent a proper seal. Hotel bathtubs frequently suffer from missing or damaged stoppers due to high guest turnover and minimal maintenance between visitors.

Before attempting any alternative sealing method, perform a quick diagnostic check. Lift the stopper and examine the mechanism beneath the drain. Often, hair or soap scum buildup prevents the stopper from closing completely, and a simple cleaning might restore function. If the stopper moves freely but won’t stay down when pressed, the problem likely requires repair or replacement. For immediate bathing needs, the following solutions work regardless of the underlying cause of your stopper failure.

How to Identify Your Drain Type

Understanding your specific drain configuration helps select the most effective stopper alternative. Pop-up drains feature a lever mechanism that raises and lowers the stopper through the overflow plate. Lift-and-turn drains require twisting the stopper to lock it in place. Toe-touch drains operate with a simple push to open or close. Standard drains without mechanisms simply need a physical barrier over the opening. This identification process takes less than 30 seconds but significantly increases your success rate with improvised solutions.

Plastic Wrap: The Fastest Emergency Seal

plastic wrap bath drain seal demonstration

Plastic wrap creates an effective temporary seal for most standard drains in under two minutes. This solution works because the material’s elasticity allows it to conform perfectly to the drain shape while creating an airtight barrier.

Step-by-Step Plastic Wrap Application

Start with standard kitchen plastic wrap—not the pressed-seal variety. Cut a piece at least six inches larger than your drain diameter. Stretch the wrap tightly across the drain opening while pressing firmly around the edges with your fingertips. Extend the wrap at least two inches beyond the drain rim in all directions to ensure maximum adhesion. Press down firmly along the entire perimeter, working in a circular motion to eliminate any air pockets. Test your seal by running a small amount of water into the tub—it should pool immediately rather than draining away. Pro tip: For added security, apply a second layer perpendicular to the first.

Duct Tape Drain Solution for Long Soaks

Duct tape provides a more durable seal than plastic wrap, making it ideal for extended bathing sessions. This method works particularly well for flat drain surfaces and pop-up mechanisms that leave a metal post exposed.

Creating a Water-Tight Tape Seal

Begin by thoroughly cleaning and drying the drain area—any moisture or residue will compromise adhesion. Cut several strips of duct tape, each about four inches long. Layer the strips across the drain opening, overlapping each piece by at least one inch to create a solid barrier. Press each strip firmly with your thumb as you apply it, working from one edge to the opposite side to eliminate air bubbles. For drains with a center post, first wrap tape vertically around the post, then build outward to cover the entire opening. Apply at least three layers for maximum effectiveness. Test the seal by slowly filling the tub—adjust any lifting edges immediately before water pressure weakens the bond.

Shower Cap Method for Instant Results

When you need the quickest possible solution, an inverted shower cap creates an immediate seal with zero preparation time. This approach works particularly well in hotel bathrooms where shower caps are readily available.

Applying the Shower Cap Seal

Invert the shower cap so the elastic edge faces upward. Stretch the elastic band across the drain opening, ensuring complete coverage of the entire drain area. The elastic provides natural tension that holds the cap securely in place against the drain rim. Press down gently around the perimeter to enhance the seal, but avoid creating wrinkles that might allow water to seep through. This method works best for standard flat drains without center posts. If your drain has a pop-up mechanism, position the cap so the elastic grips the flat surface around the post rather than trying to cover the post itself.

Cloth and Plastic Bag Technique for Irregular Drains

cloth and plastic bag bathtub drain seal step by step

For drains with irregular shapes or stubborn debris that prevents flat seals, the cloth and plastic bag method creates a compressible barrier that adapts to any configuration.

Building a Customizable Seal

Wet a small washcloth or hand towel and wring out excess water until it’s damp but not dripping—the moisture helps the fabric conform better to the drain shape. Place the damp cloth directly over the drain opening, ensuring complete coverage. Cover the cloth with a plastic grocery bag, smoothing it flat across the fabric and extending it slightly up the sides of the tub. The plastic creates a waterproof barrier while the cloth fills any gaps around the drain edges. Press firmly along all perimeter edges to create a continuous seal. For extra security, place a small plate or flat container over the center of the seal and apply gentle pressure—this weight helps maintain contact during your bath.

Rubber Ball Method for Round Drains

rubber ball bathtub drain seal close up

A small rubber ball creates an effective, reusable seal for round drain openings by conforming to the shape when pressed firmly into place.

Selecting and Applying the Rubber Seal

Choose a rubber ball slightly larger than your drain opening—tennis balls work well for standard tub drains. Press the ball firmly into the drain until it sits flush with the tub surface. The rubber naturally compresses to create a tight seal against the drain walls. For drains with center posts, select a ball with a hole or cut a small slit in the ball to accommodate the post. Test the seal by slowly filling the tub—adjust pressure as needed until water stops draining. This solution remains effective throughout your bath and can be reused multiple times. After your bath, simply rinse the ball and store it in your bathroom for future emergencies.

Preventing Water Loss During Your Bath

Maintaining water temperature becomes challenging with improvised seals, but these strategies help maximize your bathing experience.

Preheat your bathwater slightly warmer than your target temperature—about two degrees higher—since makeshift seals often allow some heat loss. Adding bath oils or bubble bath creates a surface film that significantly reduces evaporation, helping water stay warmer longer. Keep a kettle of hot water nearby to top off your bath without leaving the tub. When entering the tub, do so slowly and position yourself away from the drain area to minimize splashing that might compromise your seal. For extended soaks, check your seal every fifteen minutes and re-press any lifting edges before water begins to drain.

When to Install a Permanent Replacement

If you frequently encounter stopper problems, investing in a universal replacement stopper provides a permanent solution that costs less than $20 and installs in minutes.

Choosing the Right Replacement

Rubber push-fit stoppers work with virtually any drain and require no tools—simply press into place for an instant fix. Lift-and-turn stoppers replace standard assemblies and match most bathroom fixtures. Pop-up stoppers offer aesthetic appeal while functioning with the same lever mechanism as original equipment. For travelers, keeping a compact universal stopper in your toiletry kit eliminates this problem entirely during hotel stays. Replacing a broken stopper typically takes less than ten minutes and prevents future frustration—making it a worthwhile investment for any homeowner.

Next time you face a missing or broken bathtub stopper, choose the method that matches your available materials and bath duration. The plastic wrap technique delivers the fastest solution for quick baths, while the cloth and bag method provides superior performance for longer soaks. With these proven techniques in your repertoire, you’ll never have to let a faulty drain stopper drain away your relaxation time again. Keep this guide handy, and transform what could be a bath-canceling disaster into just a minor bathroom inconvenience.

How to Use Aveeno Soothing Bath Treatment


That persistent itch from eczema flare-ups, poison ivy, or dry winter skin can make daily life miserable. When your skin feels like it’s on fire, Aveeno Soothing Bath Treatment offers a scientifically backed solution that’s been trusted for decades. This colloidal oatmeal-based remedy provides immediate, soothing relief when used correctly—but simply dumping the packet in your tub isn’t enough to maximize its benefits. Understanding the precise water temperature, soak duration, and follow-up care transforms an ordinary bath into a therapeutic skin treatment that delivers genuine comfort rather than temporary relief.

Many people reach for Aveeno’s soothing bath treatment during skin emergencies but miss critical usage details that determine its effectiveness. The difference between moderate relief and dramatic improvement often comes down to proper application technique, timing, and complementary aftercare. Whether you’re managing chronic eczema, recovering from poison ivy exposure, or soothing chickenpox irritation, this guide reveals exactly how to use Aveeno Soothing Bath Treatment for optimal results—helping you reclaim comfortable skin and restful nights without unnecessary scratching or discomfort.

Prepare Your Bathtub Before Adding Aveeno

Before introducing Aveeno Soothing Bath Treatment to your bathwater, thorough tub preparation significantly impacts treatment effectiveness. Start by cleaning your bathtub with mild soap and warm water to remove soap scum, mineral deposits, or residual bath products that could interfere with colloidal oatmeal’s skin-contact. Pay special attention to the drain area where previous bath products might accumulate, as these residues can diminish the treatment’s soothing properties.

Remove all bath accessories including mats, loofahs, toys, and washcloths that might trap the fine oatmeal particles or create uneven treatment distribution. If your tub has a hair catcher or drain filter, remove and clean it thoroughly to prevent clogging with the colloidal oatmeal. A completely clean, empty tub ensures every square inch of your skin receives direct contact with the soothing colloidal oatmeal solution without barriers or contaminants reducing its efficacy.

Why Tub Cleaning Matters for Treatment Success

Skipping tub preparation creates multiple problems that undermine your Aveeno treatment. Residual soap or bubble bath leaves a film that prevents colloidal oatmeal from properly adhering to your skin, significantly reducing its moisture-locking benefits. Mineral deposits in older tubs can react with the oatmeal particles, causing them to clump rather than disperse evenly throughout the water. Most importantly, leftover bath products often contain fragrances or chemicals that could further irritate already sensitive skin, counteracting the very relief you’re seeking.

Optimal Water Temperature for Effective Treatment

bath thermometer reading eczema sensitive skin

The water temperature in your Aveeno bath directly determines whether you soothe or worsen irritated skin. Lukewarm water between 90-100°F (32-38°C) creates the ideal environment for colloidal oatmeal to work while preventing additional skin damage. Hot water—anything above 105°F (40°C)—strips your skin’s natural oils, increases inflammation, and actually intensifies itching despite providing momentary relief. Many people instinctively turn up the heat when their skin itches, not realizing they’re worsening the underlying problem.

Test your bath temperature with your inner wrist or elbow before entering, as these areas better detect uncomfortable heat than your hands. If measuring precisely, use a bath thermometer to confirm the water falls within the ideal range. During your soak, periodically check the temperature and add small amounts of warm water if the bath cools below 90°F, as colder water won’t activate the colloidal oatmeal’s skin-soothing properties as effectively.

Signs You’ve Got the Perfect Water Temperature

When your Aveeno bath hits the ideal temperature range, you’ll notice immediate differences compared to typical hot baths. Your skin won’t turn bright red upon immersion, which indicates overheating and inflammation. Steam should be minimal—excessive steam means the water is too hot and will dry your skin faster. Most tellingly, you’ll feel comfortable entering the water without hesitation or gasping, and the temperature will remain consistently pleasant throughout your 15-20 minute soak without becoming uncomfortably cool.

Proper Aveeno Application Technique

How you introduce Aveeno Soothing Bath Treatment to your bathwater dramatically affects its performance. Open the single-use packet and sprinkle the powder evenly across the entire water surface while the tub continues filling, allowing running water to help disperse the colloidal oatmeal particles. For maximum distribution, pour the powder into your palm first, then gently toss it across the water in a wide arc—similar to sprinkling flour when baking—to prevent clumping and ensure even coverage.

Immerse yourself completely in the bath immediately after adding the treatment, submerging all affected skin areas. Gently move your arms and legs through the water to circulate the colloidal oatmeal without creating excessive bubbles that could irritate sensitive skin. Stay immersed for 15-20 minutes, periodically swirling the water with your hands to maintain an even concentration of oatmeal particles across your entire body.

Common Application Mistakes to Avoid

Many users unknowingly reduce Aveeno’s effectiveness through simple application errors. Adding the powder to already-filled, stagnant water causes most of it to sink directly to the tub bottom rather than dispersing properly. Using extremely hot water causes the colloidal oatmeal to coagulate instead of forming its characteristic milky suspension. Most critically, scrubbing or exfoliating during the bath removes the protective oatmeal film your skin needs, undoing the treatment’s benefits before they can take effect.

Post-Bath Drying and Moisturizing Protocol

gentle pat drying skin after bath eczema

Your skin care routine immediately after an Aveeno bath determines how long relief lasts. Step out of the tub and gently pat your skin with a soft, clean towel—never rub—leaving your skin slightly damp rather than completely dry. This residual moisture combines with the colloidal oatmeal’s protective film to extend soothing benefits for hours after your bath. Within three minutes of exiting the tub, apply a fragrance-free moisturizer or prescribed topical treatment while your skin remains damp to lock in maximum hydration.

For severe dryness or eczema, use an ointment-based moisturizer rather than lotion, as the thicker consistency better seals in moisture. Apply moisturizer in downward strokes following your body’s natural hair growth pattern to avoid irritating follicles. Pay special attention to commonly missed areas like the backs of knees, elbows, and between fingers where skin tends to dry out fastest.

Strategic Bath Frequency for Different Skin Conditions

eczema flare up cycle chart

How often you should use Aveeno Soothing Bath Treatment depends entirely on your specific skin condition. For acute issues like poison ivy or chickenpox, daily baths for 3-7 consecutive days typically provides optimal relief as the condition resolves. With chronic conditions like eczema, incorporate Aveeno baths 2-3 times weekly as part of your maintenance routine—more frequent use rarely provides additional benefits and may disrupt your skin’s natural barrier.

Evening baths before bedtime offer particular advantages for persistent itching, as the treatment’s effects coincide with when nighttime scratching often disrupts sleep. Morning baths work better when you need clean, hydrated skin before applying medicated creams or spending time outdoors. Track your skin’s response in a simple journal for one week, noting which timing and frequency provides the longest-lasting relief for your specific condition.

When to Consult a Dermatologist Despite Regular Use

If your skin condition shows no improvement after 7 consecutive Aveeno baths for acute issues or 2-3 weeks of regular use for chronic conditions, consult a dermatologist. Seek immediate medical attention if you develop fever, pus, spreading redness, or worsening swelling during treatment, as these indicate possible infection requiring prescription medication. Remember that while Aveeno provides excellent symptomatic relief, it treats symptoms rather than underlying causes—professional diagnosis ensures you’re addressing the root problem rather than just managing discomfort.

Enhance Treatment Results with Complementary Practices

Boost your Aveeno bath’s effectiveness by adding one tablespoon of baking soda to the water, which creates a slightly alkaline environment that calms inflammation and reduces itching through a different mechanism than colloidal oatmeal. The combination provides more comprehensive relief than either treatment alone, particularly for severe itching. Maintain a warm bathroom environment during and after your bath to prevent temperature shocks that trigger itching as you dry off.

During your soak, practice deep breathing exercises to reduce stress—which exacerbates itching through neurological pathways—and enhance the treatment’s psychological benefits. After your bath, apply moisturizer while wearing cotton gloves to prevent accidentally scratching during application. These simple enhancements transform your Aveeno bath from basic symptom relief into a comprehensive skin recovery ritual that addresses both physical and psychological aspects of skin discomfort.

Maintain Relief Between Aveeno Treatments

The benefits of your Aveeno bath can extend for days with proper follow-up care. Wear loose, breathable cotton clothing that won’t rub against sensitive skin or trap heat that triggers itching. Use fragrance-free laundry detergent without dyes or optical brighteners that could irritate treated skin. Keep your home’s humidity between 40-60% using a humidifier in dry climates or winter months to prevent environmental drying that counteracts your bath treatment.

Apply moisturizer immediately after hand washing and before bed, focusing on areas most affected by your skin condition. Trim fingernails short and smooth to minimize skin damage from accidental scratching during sleep. By integrating these complementary practices with your Aveeno bath routine, you create a comprehensive skin management system that provides lasting comfort rather than temporary relief—helping you finally break the itch-scratch cycle that keeps irritated skin from healing properly.

« Older posts Newer posts »