Smart Bathroom Solutions: Reviews, Tips & Expert Maintenance Guides

Author: bathroom27 (Page 9 of 23)

How to Make a Hummingbird Bath: Easy DIY Guide


Hummingbirds transform ordinary gardens into living jewels with their iridescent feathers and acrobatic flights. Yet these tiny dynamos face a critical challenge: finding safe, accessible water sources. Standard bird baths are death traps for hummingbirds—their depth drowns these delicate visitors, and stagnant water breeds disease. Without a properly designed water feature, you’re missing daily opportunities to witness their intricate bathing rituals where they hover, dip, and shake droplets like living rainbows. Creating a hummingbird bath isn’t just about adding water; it’s engineering a life-sustaining oasis that meets their unique physiological needs. In this guide, you’ll discover exactly how to make hummingbird bath solutions that attract these pollinators reliably while avoiding common pitfalls that turn water features into hazards.

Why Standard Bird Baths Fail Hummingbirds

Hummingbirds’ survival depends on specialized water access that matches their biology. Their lightweight bodies—often under 4 grams—can’t handle water deeper than a few drops. When forced to use conventional baths, they risk drowning in mere inches of water or becoming easy targets for predators while struggling to exit steep sides. More critically, still water becomes a breeding ground for mosquitoes and pathogens within hours, directly threatening hummingbird health through diseases like avian malaria. You’ll know your current setup is failing if you only see hummingbirds drinking from leaky faucets or dew-covered plants instead of engaging in their characteristic splash-and-shake bathing behavior. The solution requires water features mimicking natural shallow puddles they evolved to use.

How Hummingbird Bath Depth Impacts Survival Rates

Water depth directly determines whether your bath becomes a sanctuary or a death trap. Hummingbirds require water no deeper than 1/4 to 1/2 inch—roughly the thickness of two stacked dimes. At this depth, they can safely hover and dip their breasts without submerging their bodies. Deeper water forces them to perch, leaving them vulnerable to cats and other predators. Crucially, this shallow depth also prevents mosquito larvae development, which requires at least 1 inch of stagnant water. When building your how to make hummingbird bath project, always test depth by placing your fingertip vertically in the water; if the water covers your fingerprint ridge, it’s too deep. This micro-depth mimics natural rain puddles on broad leaves that hummingbirds seek in the wild.

3 Foolproof Methods to Make Hummingbird Bath Features

Forget complicated store-bought solutions that often ignore hummingbird physiology. These three DIY approaches use household items to create baths matching their exact needs. Each method prioritizes the critical elements: extreme shallowness, gentle movement, and strategic red accents. You’ll complete any project in under 30 minutes with tools already in your garage.

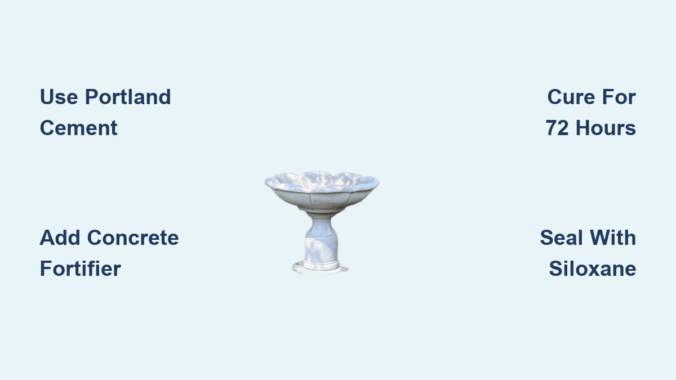
The Saucer Method: Transform Plates into Hovering Stations

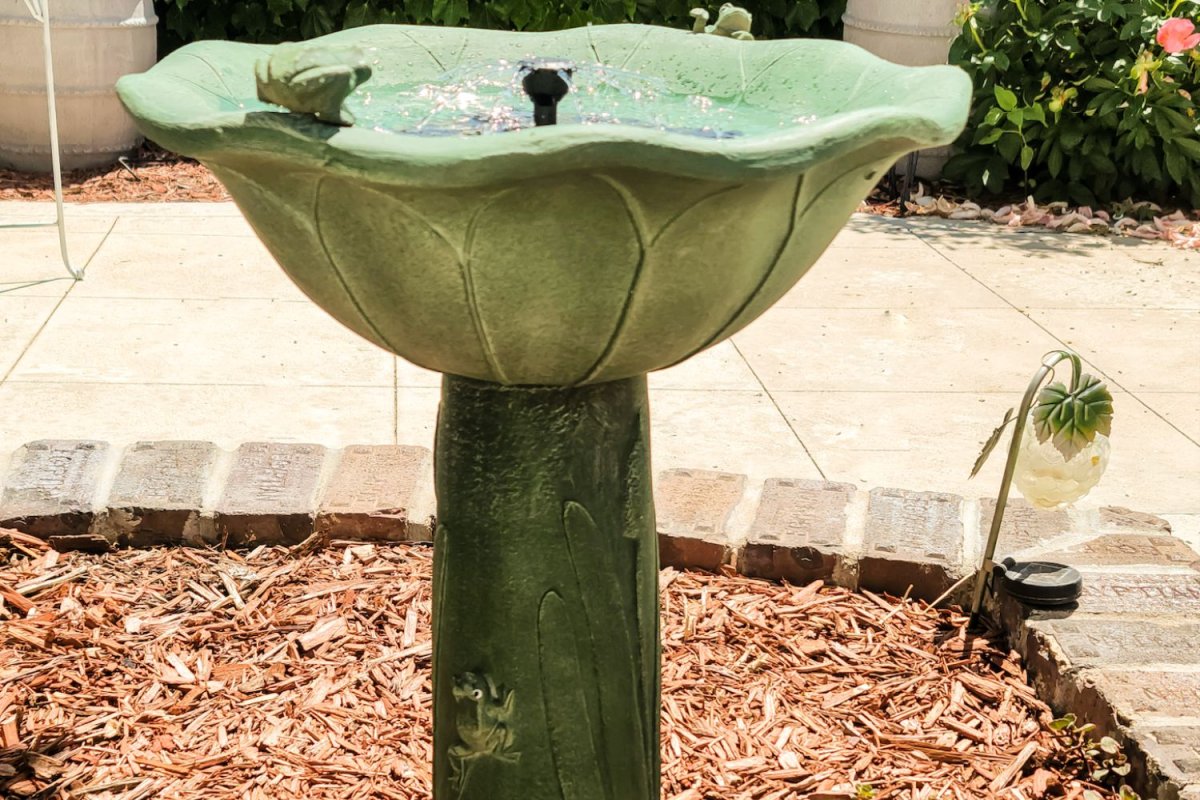
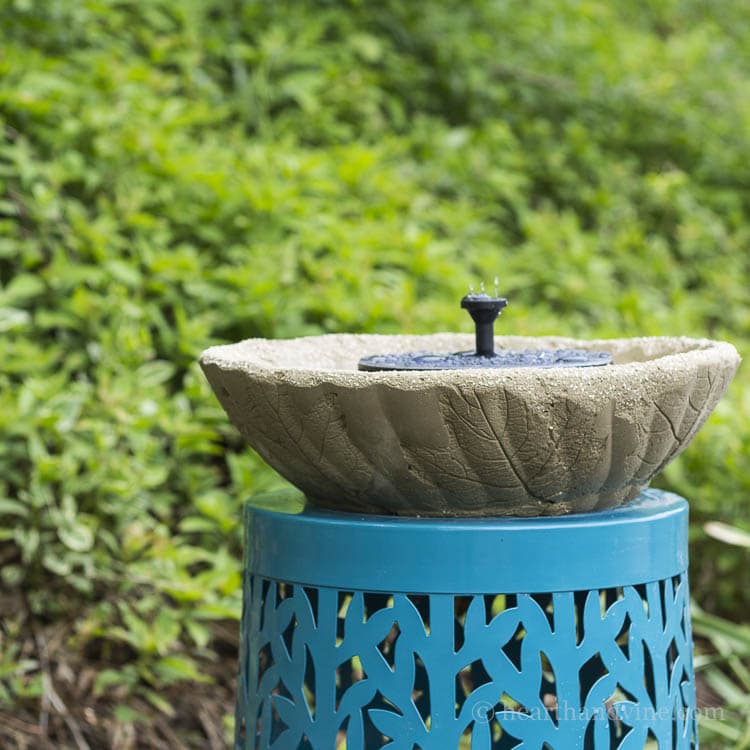
This simplest how to make hummingbird bath technique turns everyday dishes into instant watering holes. Select a shallow ceramic saucer (under 1 inch deep) or repurpose a broken flowerpot base. The key is creating textured footing—smooth surfaces cause hummingbirds to slip when wet. Press small pebbles or river rocks into the bottom in concentric circles, leaving just enough space between stones for water to pool. Fill to the absolute brim so water barely covers the pebbles—any deeper and it becomes hazardous. Suspend the saucer 3-4 feet high using rust-proof wire looped through drainage holes, positioning it where morning sun hits to encourage evaporation and prevent algae. Within hours, you’ll see hummingbirds hovering above the pebbles, dipping their chests while wings beat 50 times per second. Pro tip: Paint the saucer’s underside matte red (never glossy—reflection scares birds) to attract attention without creating dangerous heat traps.

The Drip System: Mimic Natural Rainfall with Zero Electricity

DIY hummingbird drip bath setup

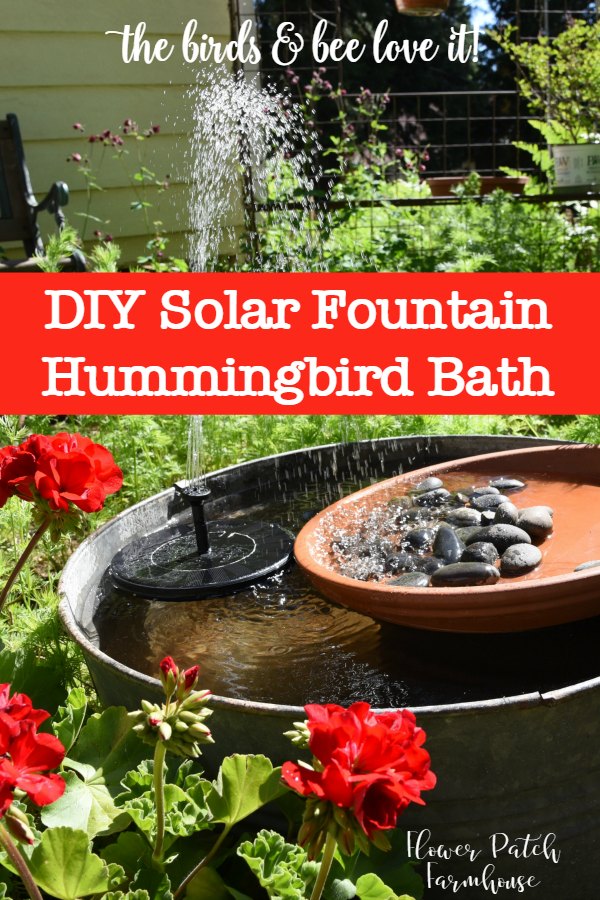
Hummingbirds instinctively seek dripping water sources in nature, making this how to make hummingbird bath method irresistible. You’ll need a 5-gallon food-grade bucket (never chemical containers), ¼-inch irrigation tubing, and a small drill. Drill a hole near the bucket’s base, insert the tubing, and seal with aquarium-safe silicone. Position the bucket on a stand 6-8 feet high—elevation triggers their natural feeding instincts. Adjust the drip rate to one drop per second; faster flows create splashes that scare birds, while slower rates won’t attract them. Below the drip point, place a shallow terra cotta dish (1/2 inch deep) filled with pea gravel. The gravel provides footing while slowing water dispersion. Key troubleshooting: If water pools deeper than 1/4 inch, elevate the dish with stacked bricks. This system works 24/7 without pumps, using gravity to replicate mountain stream drips hummingbirds follow during migration.

The Misting Garden: Create Hovering Zones Near Nectar Sources

For gardens with established hummingbird feeders, integrate misting directly into their flight paths. Attach a fine-mist spray nozzle to your garden hose, positioning it to spray upward at a 45-degree angle 18 inches above nectar-rich flowers like bee balm or salvias. The nozzle must produce micro-droplets under 0.5mm—larger droplets weigh down their feathers. Set the spray duration for 10 minutes every 2 hours during peak hummingbird activity (dawn and dusk), controlled by a simple $10 irrigation timer. Critical adjustment: Stand where hummingbirds feed and observe—mist should create a visible “fog zone” they fly through, not a direct spray on their bodies. Within days, you’ll witness their spectacular bathing ritual: hovering mid-air, opening beaks to catch mist, then shaking violently while suspended. Warning: Never use ultrasonic misters—they create water particles too small for effective hydration.

Strategic Placement That Maximizes Visits

hummingbird bath placement garden shrubs

Location determines whether your how to make hummingbird bath project succeeds or gathers dust. Hummingbirds avoid baths placed in open yards where hawks patrol. Instead, position baths within 10 feet of dense shrubs like azaleas or hollies that provide instant cover from predators. Crucially, place it at eye level with sitting humans (about 4 feet high)—this matches their natural foraging height and creates magical close-up viewing. Avoid positioning near feeders; hummingbirds establish separate “bath zones” to prevent contamination. South-facing locations work best in northern climates for morning sun warmth, while southern zones need afternoon shade to prevent scalding water. You’ll know placement is perfect when hummingbirds use the bath within 48 hours of installation—any longer indicates visibility or safety issues.

Why Hummingbirds Avoid Still Water (And How to Fix It)

Stagnant water repels hummingbirds because it signals danger in their evolutionary memory. In the wild, motionless ponds indicate predators or disease. Your bath must incorporate gentle movement through one of three methods: a slow drip (as in the bucket system), wind-driven ripples (add floating wine corks to saucer baths), or micro-misting. Still water also heats rapidly—temperatures over 85°F (29°C) can scald their delicate skin. Combat this by adding white marbles to the bath base; they reflect heat while creating visual interest. Test water temperature by touching it with your wrist—if it feels warm to you, it’s dangerously hot for hummingbirds. Refresh water daily during summer heatwaves, as evaporation concentrates contaminants even in shallow baths.

Maintenance Protocols That Prevent Disease Outbreaks

A neglected hummingbird bath becomes a disease vector faster than feeders. Algae growth and insect larvae develop within 48 hours in summer heat, introducing pathogens like salmonella. Clean baths every 2-3 days using only white vinegar and a soft brush—chemical cleaners leave toxic residues. Never use bleach near hummingbird zones; its fumes linger on porous materials. During cleaning, check for mineral deposits around drip points; these restrict water flow and require gentle scrubbing with an old toothbrush. Refill with filtered or rainwater only—chlorinated tap water irritates hummingbirds’ sensitive respiratory systems. Pro tip: Keep a dedicated “bath cleaning kit” (small brush, vinegar spray bottle) near your garden to make maintenance effortless.

Transform Your Garden into a Hummingbird Haven Today

Creating a hummingbird bath isn’t about adding another garden ornament—it’s building a lifeline for these vital pollinators. By implementing the saucer, drip, or misting methods outlined in this how to make hummingbird bath guide, you’ve engineered water access matching their evolutionary needs: extreme shallowness, gentle movement, and strategic placement near cover. Remember the non-negotiables: water depth under 1/2 inch, daily refills with non-chlorinated water, and vinegar-based cleaning every 48 hours. Within a week, you’ll witness the magic of hummingbirds performing their aerial ballet at your custom bath—hovering, dipping, and shaking with iridescent precision. Start with one simple method today; within days, your garden will pulse with life as these feathered jewels claim your creation as their essential watering hole. The real reward isn’t just the spectacle—it’s knowing you’ve provided a critical resource that sustains hummingbird populations in your local ecosystem.

How to Seal Bird Bath: Easy Steps


Your bird bath has become a favorite gathering spot for neighborhood songbirds, but you’ve noticed cracks forming in the concrete and water seeping through the base. Without proper sealing, your bird bath won’t survive another winter—freeze-thaw cycles will only worsen these cracks until the structure fails completely. Learning how to seal bird bath properly isn’t just about preserving your garden decor; it’s essential for maintaining a safe, clean water source that won’t contaminate with crumbling materials. This guide delivers the exact sealing process professionals use to protect bird baths from water damage, UV deterioration, and seasonal extremes.

Choose the Right Bird Bath Sealant for Your Material Type

concrete sealant vs resin sealant vs metal sealant comparison chart

Selecting the appropriate sealant makes or breaks your entire project. Using the wrong product leads to premature failure, wasted money, and potentially harmful chemicals leaching into water where birds drink and bathe. Your bird bath’s material determines which sealant will provide lasting protection.

Concrete and Stone Bird Bath Sealing Solutions

Porous materials like concrete, natural stone, and terracotta require penetrating sealants that soak deep into the material rather than forming a surface coating. These sealants—typically containing silanes, siloxanes, or fluoropolymers—create an invisible hydrophobic barrier within the pores while allowing the material to breathe. This prevents trapped moisture from causing spalling and cracking during freeze-thaw cycles.

Critical selection tip: Always choose sealants specifically labeled safe for wildlife and aquatic environments. Standard masonry sealers often contain biocides that kill algae but will also harm birds. Look for products with EPA approval for potable water contact or explicit “safe for bird baths” labeling. Expect to pay $15-$40 for quality penetrating sealants covering 100-200 square feet.

Resin and Fiberglass Bird Bath Protection

Non-porous resin and fiberglass baths need surface sealants that adhere to smooth materials. Marine-grade polyurethane or two-part epoxy coatings provide the best protection against UV damage and constant water exposure. Before application, lightly sand the surface with 120-150 grit sandpaper to create microscopic texture for better adhesion.

Pro tip: For existing resin baths with peeling finish, completely remove old coating before sealing. Resin sealants won’t bond properly to compromised surfaces, guaranteeing premature failure. Budget $25-$60 for professional-grade marine sealants that withstand years of outdoor exposure.

Metal Bird Bath Preservation Techniques

Cast iron, copper, and galvanized steel require rust-inhibiting sealants designed for constant water contact. Clear marine coatings formulated for boat hardware work exceptionally well, providing UV protection without trapping moisture against the metal surface.

Important consideration: Copper bird baths present a special case. If you want to preserve the bright copper finish, apply multiple thin coats of marine-grade clear coat. For the natural green patina look, skip sealing entirely—copper oxide is harmless to birds and creates beautiful aging.

Prepare Your Bird Bath Surface for Perfect Sealant Adhesion

Surface preparation accounts for 80% of sealing success. Many DIYers rush this step, only to watch their sealant peel off within months. Proper preparation ensures your sealant bonds permanently to the substrate.

Deep Cleaning Process Before Sealing

Begin with a thorough cleaning to remove all contaminants that prevent proper adhesion:

  1. Empty the bath completely and remove loose debris
  2. Scrub with white vinegar and water (1:1 ratio) to dissolve mineral deposits
  3. For stubborn algae, use a soft-bristled brush with mild dish soap
  4. Rinse thoroughly with clean water—no soap residue should remain
  5. Allow to dry completely for 24-48 hours in direct sunlight

Warning: Never apply sealant to a damp surface. Test dryness by placing plastic wrap on the surface; condensation forming underneath indicates trapped moisture that will cause sealant failure.

Repair Existing Damage Before Sealing

Inspect your bird bath for cracks, chips, and other damage. Small cracks in concrete can be repaired with hydraulic cement, while stone baths benefit from stone-colored epoxy fillers. Allow all repairs to cure for at least 48 hours before proceeding.

Critical step: Sand repair areas smooth after curing so they blend with surrounding material. Uneven repairs create weak points where water can penetrate beneath the sealant.

Apply Bird Bath Sealant with Professional Results

Now that your surface is properly prepared, it’s time for the actual sealing process. Follow these techniques to achieve even coverage and maximum protection.

Optimal Application Tools and Methods

Match your tools to your sealant type and bird bath material:

  • Penetrating sealants: Use low-nap rollers for flat surfaces, soft brushes for textured areas
  • Surface sealants: Foam brushes create the smoothest finish on non-porous materials
  • Spray sealants: Ideal for detailed ornamentation but require careful masking

Pro technique: Apply sealant in thin, even coats rather than one thick application. For concrete baths, apply until the surface stops absorbing the sealant—this indicates full penetration. On non-porous surfaces, avoid pooling that leads to drips and uneven curing.

Multi-Coat Application Process

Most bird baths require at least two coats for adequate protection:

  1. Apply first coat in one direction, working from top to bottom
  2. Allow proper drying time (check product instructions—typically 2-4 hours)
  3. Apply second coat perpendicular to first coat for complete coverage
  4. For maximum durability, apply a third coat on high-wear areas

Expert tip: On concrete baths, the second coat should be applied when the first coat has dried to the touch but hasn’t fully cured—this creates a chemical bond between layers for superior protection.

Ensure Complete Curing Before Bird Bath Use

sealant curing time chart weather conditions

Rushing this stage is the #1 cause of sealant failure. Incomplete curing results in soft, easily damaged coatings that peel prematurely.

Curing Time Requirements by Sealant Type

Sealant Type Surface Dry Time Full Cure Time Water Test Ready
Penetrating Concrete Sealers 2-4 hours 48-72 hours 72 hours
Marine Polyurethane 4-6 hours 72-96 hours 96 hours
Two-Part Epoxy 6-8 hours 5-7 days 7 days

Critical warning: Never fill your bird bath before the full cure time has elapsed. Water exposure during curing compromises the chemical bonding process, resulting in poor adhesion and premature failure.

Weather Considerations for Optimal Curing

Temperature and humidity dramatically affect curing:

  • Ideal conditions: 60-80°F with humidity below 60%
  • Avoid sealing when temperatures will drop below 50°F within 48 hours
  • High humidity (>75%) significantly extends drying times
  • Never seal if rain is forecast within 72 hours

Pro tip: Morning applications allow maximum daytime curing before nighttime temperature drops. In cooler climates, aim for late spring through early fall for best results.

Maintain Your Sealed Bird Bath for Long-Term Protection

Even the best sealant eventually wears, especially with constant water exposure and seasonal extremes. Proper maintenance extends protection and prevents costly repairs.

Annual Maintenance Checklist

  1. Inspect monthly for cracked, peeling, or thinning sealant—especially at water line
  2. Clean gently with vinegar solution (never harsh chemicals or abrasive tools)
  3. Touch up problem areas immediately with matching sealant
  4. Plan resealing every 1-3 years based on climate and usage

Expert insight: Document your sealing dates and note performance issues. This helps establish the optimal resealing schedule for your specific climate and bird bath location.

Resealing Process for Existing Coatings

When it’s time for a full reseal:

  1. Clean thoroughly with vinegar solution
  2. Lightly sand existing coating with 220-grit sandpaper
  3. Remove all dust with tack cloth
  4. Apply new sealant following original application process

Warning: Never apply new sealant over peeling or compromised existing coating. Complete removal is necessary for proper adhesion of the new layer.

Avoid These 4 Costly Bird Bath Sealing Mistakes

bird bath sealing mistakes before and after

Learning how to seal bird bath properly means understanding common pitfalls that lead to premature failure:

  1. Skipping surface prep – Dust, moisture, and contaminants prevent proper adhesion
  2. Using wrong sealant – Standard sealers often contain harmful chemicals
  3. Rushing curing time – Incomplete curing causes soft, easily damaged coatings
  4. Applying too thick – Thin coats cure properly; thick coats peel and bubble

Pro tip: When in doubt about sealant safety, contact the manufacturer directly and ask: “Is this product safe for constant contact with water that birds will drink and bathe in?”

Sealing your bird bath properly protects your investment and provides a safe, attractive water source for backyard birds for years to come. By choosing the right sealant for your material, preparing the surface thoroughly, applying correctly, and allowing complete curing, you’ll enjoy a bird bath that withstands seasons of use without deterioration. Take the time to seal your bird bath correctly today—your feathered friends will thank you with their joyful splashing all season long.

How to Install a Bird Bath: Easy Steps


Adding a bird bath to your garden creates an instant wildlife oasis, transforming ordinary backyard spaces into vibrant hubs of feathered activity. Proper installation ensures your bird bath remains stable, functional, and appealing to birds throughout the seasons. This guide eliminates guesswork by walking you through each critical step of the installation process, from selecting the perfect location to performing essential maintenance that keeps birds returning day after day. You’ll learn professional techniques that prevent common problems like tipping, algae growth, and mosquito breeding—issues that plague many DIY installations.

Before you begin, gather essential tools: a shovel or post-hole digger, level, measuring tape, gravel or sand for drainage, concrete mix (for pedestal installations), and basic hand tools. Having everything ready prevents interruptions and ensures you complete the project efficiently in one session. Most installations take 2-4 hours from start to finish, making it an ideal weekend project that yields immediate rewards as birds discover their new watering hole.

Select the Perfect Bird Bath Location for Maximum Activity

Birds avoid baths placed in predator-friendly locations, so position your bath in an open area where feathered visitors can spot approaching threats from all directions. Avoid placing it directly under dense tree canopies or against tall fences that create hiding spots for cats. The ideal spot offers partial shade during the hottest part of the day—typically afternoon shade—keeping water cooler longer while reducing algae growth that plagues sun-drenched baths.

How Far Should Bird Bath Be From Trees and Shrubs?

Place your bath 10-15 feet from natural cover like shrubs or small trees, giving birds safe perching spots to survey the area before approaching. This strategic distance creates a safety buffer that deters cats while providing quick escape routes. If your yard has limited tree cover, consider installing short perching posts 5-7 feet from the bath to give birds observation points.

What Drainage Patterns Should You Watch For?

Avoid low-lying areas where water naturally pools after rainfall, as these locations create muddy conditions that discourage bathing and become mosquito breeding grounds. Choose a slightly elevated position with natural drainage or plan to create an artificial drainage base during installation. The location should also be within easy reach of your garden hose for convenient refilling and cleaning.

Build a Foundation That Prevents Tipping and Sinking

bird bath foundation gravel base installation

Most bird bath failures stem from inadequate foundations, leading to tipping, sinking, or cracking within months of installation. For ground-level installations, dig a hole 6-8 inches deep and twice the width of your bath’s base. Remove all grass, roots, and debris, then compact the soil at the bottom using the back of your shovel. This preparation prevents shifting that causes uneven water distribution.

What Drainage Layer Works Best for Bird Baths?

Create a 2-3 inch drainage layer using crushed gravel or river stones at the bottom of your prepared hole. This layer allows water to drain away from the bath’s base, preventing moisture buildup that causes cracking during freeze-thaw cycles. In clay soil areas prone to expansion, mix the gravel with coarse sand for improved drainage and even load distribution.

How to Secure Bird Baths on Hard Surfaces

For patio or deck installations, clean the surface thoroughly before applying a specialized outdoor adhesive designed for stone and concrete. Apply the adhesive in a zigzag pattern on the bath’s base, position carefully, and allow 24-48 hours for full curing before adding water. Renters or those avoiding permanent installations should consider weighted bases filled with sand or water that provide stability without damaging surfaces.

Assemble Your Bird Bath Like a Professional

Most bird baths arrive disassembled, requiring careful assembly before installation. Begin by reviewing the manufacturer’s instructions thoroughly, as different designs have unique assembly sequences. Lay out all components on a clean, flat surface where you can work comfortably without tripping over tools.

What Assembly Mistakes Should You Avoid?

Most pedestal baths use threaded rods, washers, and nuts to secure the bowl. Hand-tighten all connections first to prevent cracking ceramic or stone components before using tools for final tightening. Apply plumber’s tape to threaded connections if your bath has a fountain system to prevent leaks. Check all pieces for hairline cracks before assembly, as these will expand when filled with water and subjected to freezing temperatures.

How to Test Your Assembly Before Final Installation

Fill the assembled bath with a small amount of water before permanent placement to identify leaks or instability issues. Observe how the bath sits on a level surface—any rocking or unevenness indicates foundation problems that need correction. This simple pre-test saves hours of frustration later when the bath is permanently positioned.

Position Your Bird Bath for Optimal Bird Usage

leveling bird bath pedestal installation

With foundation prepared and assembly complete, position the bath carefully in its permanent location. Use a level to verify the bowl sits perfectly horizontal across all axes—tilting causes water to pool at one edge, reducing usable bathing area. For pedestal installations, apply a thin bead of exterior-grade silicone sealant around the connection point between pedestal and bowl to prevent water seepage.

What Backfill Technique Prevents Future Settling?

Backfill around ground-level installations using the soil you removed earlier, tamping gently as you work to eliminate air pockets that cause settling. Add a final layer of small gravel or river stones around the base’s perimeter, extending 6 inches beyond the bath’s edge, to create a splash zone that prevents mud from splashing onto the bowl during use.

Create Effective Drainage to Prevent Stagnant Water

bird bath drainage hole drilling masonry bit

Proper drainage prevents your bird bath from becoming a mosquito breeding ground while keeping water fresh for birds. If your bath lacks a built-in drainage hole, drill one near the bowl’s edge using a masonry bit—work slowly with light pressure to avoid cracking stone or ceramic materials. The hole should sit slightly above the lowest water level so dirty water drains while a small amount remains to attract birds.

How Moving Water Boosts Bird Activity

Add a solar-powered dripper or fountain attachment to keep water circulating. Moving water attracts birds from greater distances while discouraging mosquito breeding. The gentle sound of flowing water creates a natural focal point in your garden that enhances your own enjoyment while serving wildlife needs.

Adjust Height for Safety and Accessibility

Standard bird bath heights range from 18-30 inches from ground to water surface, with 24 inches representing the most versatile option. Lower baths suit ground-feeding birds like robins and make cleaning easier, while higher baths keep water cleaner by reducing dirt splashing. If predators threaten your birds, elevate the bath higher than 30 inches on a shepherd’s hook or hanging bracket.

What Water Depth Attracts the Most Bird Species?

Maintain water depth of 1-2 inches at the deepest point with a gradual slope toward the center. Add clean river stones to create varying depths that accommodate different bird sizes—smaller birds prefer shallower edges while larger species use deeper centers. This simple modification dramatically increases the variety of birds visiting your bath.

Perform Final Testing Before Bird Welcome

Before birds arrive, fill the bath with water and observe for 24 hours to check for leaks, stability issues, and drainage performance. Watch evaporation rates, splash patterns, and debris accumulation areas—all provide valuable insights for long-term maintenance. Add clean stones to the water’s center to give birds secure perching spots while breaking surface tension for easier drinking.

How to Create a Bird-Friendly Environment

Trim obstructing vegetation to create clear flight paths to your bath, ensuring birds can see it from perching spots and approach confidently. Add nearby perching branches at varying heights so birds can wait their turn and survey for safety. Avoid adding fish to bird baths, as they disrupt water chemistry and create maintenance challenges incompatible with regular bird use.

Establish a Maintenance Routine for Year-Round Success

Clean your bird bath at least once weekly during peak usage seasons using a stiff brush and mild vinegar solution to remove mineral deposits and algae. Rinse thoroughly before refilling with fresh water. During hot weather, clean every 2-3 days to prevent rapid algae growth that deters birds.

Winter Bird Bath Strategies

In freezing climates, either drain the bath completely and store the bowl indoors or use a heated base designed specifically for bird baths. Heated options require electrical connections but provide essential water access for birds during harsh winter months when natural sources freeze. Inspect your bath regularly for damage after severe weather events and address cracks promptly with appropriate sealants.

Properly installed and maintained, your bird bath becomes a year-round wildlife sanctuary that enhances your garden’s beauty while supporting local bird populations. By following these specific installation techniques, you’ll avoid common pitfalls that turn promising bird baths into neglected yard features. Within days of installation, you’ll notice increased bird activity as feathered visitors discover their new watering hole—transforming quiet afternoons into lively bird-watching opportunities right outside your window. Start with these fundamentals, observe how birds use your installation, and make minor adjustments as needed for maximum enjoyment throughout the seasons.

How to Repair Bird Bath: Easy Fix Guide


Bird baths transform your garden into a vibrant wildlife sanctuary, but constant exposure to weather, birds, and debris inevitably leads to damage that disrupts their function. Learning how to repair bird bath problems yourself saves hundreds compared to professional restoration or replacement—especially when you understand the material-specific techniques required for concrete, stone, ceramic, metal, or resin fixtures. Most common issues like hairline cracks, leaks, and unstable bases can be fixed in under two hours with the right materials and approach. This guide reveals exactly how to diagnose damage, select appropriate repair compounds, execute professional-quality fixes, and implement preventive maintenance to extend your bird bath’s life for years.

Diagnose Your Bird Bath Damage Type First

Before gathering tools, accurately identify what’s wrong with your bird bath—different materials require vastly different repair approaches. Concrete and stone units typically develop hairline surface cracks or deeper structural fissures from freeze-thaw cycles. Ceramic models suffer chips along edges and glaze crazing from thermal stress. Metal baths show rust spots and pinhole leaks where protective coatings have failed. Resin and plastic units develop stress cracks from UV exposure or impacts.

Critical visual inspection steps:
– Drain water completely and dry the exterior with a towel
– Run your fingers along seams, joints, and corners for hidden cracks
– Check for soft spots indicating material degradation
– Look for white mineral deposits highlighting leak paths
– Test stability by gently rocking the basin while observing pedestal connections

Misdiagnosing the problem leads to failed repairs—patching a concrete crack with epoxy creates weak adhesion, while using hydraulic cement on ceramic causes further damage. The repair compound must match both the material and damage type for lasting results.

Gather Material-Specific Repair Supplies

Bird bath repairs fail when DIYers use generic patching compounds instead of material-appropriate solutions. Your toolkit must match your fixture’s construction:

Concrete & stone repair essentials:
– Hydraulic cement (sets fast underwater)
– Masonry sealant for waterproofing
– Pointing trowel for precise application
– Wire brush to clean cracks
– Digital moisture meter to verify dryness before sealing

Ceramic & glazed bath requirements:
– Waterproof epoxy resin (clear or color-matched)
– Fine-grit sandpaper (220-400)
– Acetone for surface cleaning
– Diamond bit for crack preparation

Metal repair must-haves:
– Rust converter primer
– Metal epoxy filler
– Outdoor-rated spray paint
– 000-grade steel wool

Resin & plastic repair kit:
– Plastic-specific adhesive
– Sandable body filler
– Marine-grade UV epoxy

Don’t skip the moisture meter—applying sealants to damp surfaces causes adhesion failure. For best results, buy professional-grade materials from masonry or marine supply stores rather than generic hardware store patches.

Stop Concrete Bird Bath Leaks in 4 Steps

hydraulic cement concrete repair bird bath

Concrete bird baths develop leaks when hairline cracks widen from freeze-thaw cycles. Most homeowners make the critical mistake of using standard concrete patch that lacks waterproofing properties. Hydraulic cement’s expanding formula creates watertight seals that withstand constant water exposure.

Repair process:
1. Drain water and move to flat surface (20-30 minutes)
2. Clean crack with wire brush, then widen to V-shape (1/2″ deep)
3. Dampen area lightly, mix hydraulic cement to peanut butter consistency
4. Press firmly into crack with pointing trowel, overfill slightly

Pro tips:
– Work in temperatures above 50°F for proper curing
– Mist repair with water and cover with plastic for 48 hours
– Apply masonry sealant after 72-hour cure (two perpendicular coats)
– Sand any high spots with 120-grit paper before sealing

This method works for cracks up to 1/2 inch wide. Larger structural damage requires professional assessment, but 95% of concrete bird bath leaks are fixable with this approach.

Fix Stone Bird Bath Chips Without Visible Repairs

stone chip repair epoxy granite sandstone travertine

Natural stone bird baths need specialized restoration since generic fillers create obvious patches. The secret is matching both color and texture—granite requires different techniques than porous sandstone or travertine.

Stone-specific solutions:
Granite: Use clear epoxy with stone dust from same source
Limestone/Sandstone: Mix epoxy with matching pigment powder
Travertine: Fill holes with colored epoxy before texturing

Step-by-step chip repair:
1. Clean area with acetone on cotton swab
2. Apply thin epoxy layer into chip base
3. Build up in thin layers (curing 1 hour between coats)
4. Sand flush with 80-220 grit paper when fully cured
5. Texturize with brush or stamp to match original pattern

For hairline cracks, inject colored epoxy using syringe applicator. Let cure 24 hours before applying penetrating stone sealer—never use surface sealers on natural stone as they create peeling film.

Mend Ceramic Bird Bath Cracks That Hold Water

Ceramic bird baths suffer from two distinct damage types requiring different approaches: surface glaze cracks versus structural fractures penetrating the ceramic body. Most DIY attempts fail by treating both the same way.

Glaze-only damage (fine surface crazing):
– Clean with mild detergent
– Apply porcelain repair compound
– Buff with polishing compound

Structural cracks (water leaks through):
1. Create V-groove along crack with diamond bit (1/16″ deep)
2. Clean with acetone swab, working from center outward
3. Apply thin cyanoacrylate glue along entire crack
4. For wider cracks, use multiple thin epoxy layers

Critical mistake to avoid: Sanding too aggressively after repair—start with 150-grit and progress to 600-grit for seamless blending. Glossy finishes require final polishing with jeweler’s rouge compound.

Seal Metal Bird Bath Rust Holes Permanently

metal bird bath rust repair phosphoric acid epoxy

Rust holes in metal bird baths compromise both appearance and function, but most homeowners worsen the problem by painting over active rust. The correct sequence stops corrosion at the source before rebuilding damaged areas.

Effective rust repair sequence:
1. Remove all loose rust with wire brush (stop when surface feels firm)
2. Apply phosphoric acid rust converter (let react 20 minutes)
3. Neutralize with baking soda solution if required
4. Fill holes with metal epoxy, overfilling slightly
5. Sand smooth after 4-hour cure
6. Apply rust-inhibiting primer
7. Finish with 2 thin spray paint coats

Pro tip: For copper baths with leaks, solder with lead-free alloy after cleaning to bright metal—never use epoxy as it fails under constant water exposure. Aluminum baths require special etching primer before painting.

Stabilize Wobbly Bird Bath Bases in 15 Minutes

A wobbly bird bath creates dangerous stress points that accelerate cracks and leaks. Most homeowners incorrectly try to level on soft soil, guaranteeing the problem returns within weeks.

Permanent stabilization method:
1. Lift basin carefully (get help for heavy units)
2. Place 1/8″ stainless steel shims under low corners
3. Check level in both directions
4. Apply exterior-grade construction adhesive between basin and pedestal
5. For ground-mounted units: excavate 4″ of soil, replace with compacted gravel base

Warning: Never use wood shims—they rot when wet, causing renewed instability. Composite or metal shims maintain thickness permanently.

Prevent Future Bird Bath Damage With These Habits

The most cost-effective bird bath repair is the one you never need to do. Implement these maintenance habits:

  • Weekly: Empty, scrub with vinegar solution (1:10 ratio), rinse thoroughly
  • Monthly: Check for new cracks and tighten hardware
  • Biannually: Reseal concrete/stone units, touch up metal finishes
  • Seasonally: Store portable baths indoors during freezing weather

Critical mistake: Using bleach for cleaning—it degrades materials over time and harms birds. Vinegar dissolves mineral deposits without damaging surfaces.

When Repair Costs Exceed Replacement Value

Not all bird baths warrant repair. Replace rather than fix when:
– Rust holes exceed 2″ in diameter on metal units
– Multiple intersecting cracks on ceramic models
– Structural damage compromising stability
– Repair costs exceed 60% of replacement value

Cost comparison: Professional concrete crack repair ($75-$200) often beats replacement ($150+), while ceramic restoration ($100-$300) may not justify for inexpensive models.

Extend Bird Bath Lifespan With These Pro Secrets

Professional restorers use these advanced techniques to maximize longevity:

  • Position baths under deciduous trees (summer shade, winter sun)
  • Use distilled water to prevent mineral deposits
  • Add copper pennies (pre-1982) to inhibit algae naturally
  • Apply UV inhibitor wax annually to resin units

Most importantly, address small problems immediately—waiting allows moisture to penetrate deeper, turning simple crack repairs into major structural fixes. With proper care, your bird bath can provide beauty and function for 10+ years.

By following these material-specific repair methods, you’ll transform a leaking, unstable eyesore back into a vibrant wildlife attraction—saving money while preserving your garden’s aesthetic charm. Remember: the key to successful bird bath repair lies in matching the solution precisely to both the material and damage type.

How to Clean Bird Bath Fountain: Easy Steps


Dirty bird bath fountains become dangerous traps for birds within days. When algae coats the basin or mineral deposits clog the pump, your backyard oasis turns into a breeding ground for harmful bacteria that can spread disease. Most bird lovers don’t realize stagnant water in decorative fountains requires twice-weekly maintenance—not just occasional scrubbing—to protect feathered visitors. This guide delivers actionable steps to clean your bird bath fountain safely using only basic household tools, ensuring crystal-clear water that attracts songbirds while preventing pump failures. You’ll learn precise techniques for delicate fountain components and discover why certain “quick fixes” actually harm birds.

Why Weekly Fountain Cleaning Saves Bird Lives

Birds contract deadly diseases like avian pox and salmonellosis from contaminated bath water. A single dirty fountain can infect entire neighborhood flocks through repeated visits. When algae forms slippery biofilm on basin surfaces, birds lose footing and drown—especially fledglings still developing balance.

How Fast Contamination Spreads in Stagnant Water

Within 48 hours of filling, still water develops invisible bacterial colonies that double hourly in warm weather. By day three, visible green slime indicates dangerous pathogen levels. Fountains with working pumps delay this process but don’t eliminate risk—mineral deposits from spray nozzles create perfect bacterial hideouts.

Critical Signs Your Fountain Needs Immediate Cleaning

Check for these red flags daily: cloudy water that won’t clear after refilling, slimy residue on pump housings, or reduced water flow from spray heads. If birds avoid the bath despite visiting feeders, contamination is likely the culprit. Ignoring these signals risks disease transmission that can wipe out local populations.

Essential Non-Scratch Cleaning Tools for Fountain Basins

Your standard kitchen scrub brush will scratch acrylic or ceramic basins, creating micro-grooves where bacteria hide. These abrasions accelerate future algae growth by giving spores anchor points.

Must-Have Supplies for Safe Scrubbing

  • Natural fiber scrub brush (never synthetic bristles that shed microplastics)
  • Old toothbrush for pump crevices and spray nozzles
  • Plastic putty knife (metal versions scar resin surfaces)
  • Bucket dedicated solely to bird bath maintenance
  • Garden hose with adjustable nozzle for targeted rinsing

Avoid vinegar solutions unless your fountain manual explicitly approves them—acidic mixtures corrode copper pumps and leach toxins from certain stone basins. Plain water with mechanical scrubbing removes 95% of contaminants safely.

Step-by-Step Fountain Deep Cleaning Without Chemicals

Complete this process in under 20 minutes with zero harsh cleaners. Always unplug electric pumps before starting—never immerse cords in water during cleaning.

Step 1: Drain and Remove Bulk Debris (2 Minutes)

Tilt the basin to pour out water away from plants (mineral-rich runoff harms roots). Scoop leaves and twigs with your hands wearing rubber gloves. Never use nets—they tangle in pump intakes. For stubborn mud, flood the basin with fresh water to loosen deposits before draining again.

Step 2: Target Algae Hotspots With Dry Scrubbing (5 Minutes)

Scrub completely dry surfaces first using your natural fiber brush. Dry algae lifts easier than wet slime. Focus on:
– Waterline rings where evaporation concentrates minerals
– Pump housing seams where biofilm accumulates
– Spray head outlets blocked by calcium deposits
Apply firm circular motions—never scrape vertically which creates grooves.

Step 3: Blast Spray Nozzles With Hose Pressure (3 Minutes)

Set your hose to “jet” mode. Hold nozzle openings 2 inches away, pulsing water in short bursts to dislodge clogs. Rotate spray heads while blasting to clear all channels. If flow remains weak, use the old toothbrush to gently rotate inside the outlet holes—never insert wires that could damage impellers.

Step 4: Final Rinse Protocol That Prevents Recontamination (4 Minutes)

Refill the basin halfway. Swish water vigorously with your hand to dislodge hidden particles. Drain completely. Repeat twice until runoff water looks clear. Tilt basin at 45-degree angles during final rinse to flush corner sediments. Never skip this—residual dirt restarts the contamination cycle instantly.

Seasonal Cleaning Schedules That Prevent Pump Damage

bird bath fountain winterization checklist

Summer heat demands aggressive maintenance while winter requires strategic shutdowns. Adjust frequency based on these visual indicators—not calendar dates.

Summer Emergency Cleaning Triggers

Clean immediately when:
– Water develops cloudy film within 24 hours of filling
– Bees swarm the bath (indicates fermenting organic matter)
– Spray height drops by 30% from normal
During heatwaves, perform Step 1 daily and full cleaning every 3 days. Place fountains in partial shade—full sun accelerates algae 300%.

Winterization Steps to Avoid Cracked Basins

Before first frost:
1. Drain completely and remove pump
2. Wipe basin interior with dry cloth (no water left to freeze)
3. Store pump submerged in distilled water in garage
4. Tilt basin upside down or cover with tarp
Never leave fountains filled in freezing temps—expanding ice cracks resin and ceramic in hours.

Troubleshooting Clogged Fountain Pumps Safely

bird bath fountain pump diagram

Pump failures cause 80% of fountain abandonment by birds. Most “clogs” are actually preventable mineral buildups—not broken motors.

Why Standard Vinegar Soaks Damage Pumps

Soaking copper or brass pump components in vinegar dissolves protective coatings, releasing toxic metal particles into bath water. Within weeks, birds develop heavy metal poisoning from repeated exposure. Instead, use this safer method:

Unclogging Spray Nozzles Without Disassembly

  1. Unplug pump and remove from basin
  2. Flush intake screen under running water
  3. Submerge only the outlet nozzle in warm water
  4. Use toothbrush to scrub exterior openings
  5. Reinstall and test flow before refilling basin
    If pressure doesn’t restore, replace nozzles—never force disassembly which voids warranties.

Preventing Algae Between Cleanings With Smart Placement

bird bath fountain placement sunlight exposure

Strategic positioning reduces cleaning time by 70%. Avoid these common placement mistakes that accelerate contamination.

Optimal Location Checklist

  • Morning sun only: 4+ hours of morning light deters mosquitoes but avoids afternoon algae-boiling heat
  • Downwind from feeders: Birdseed debris won’t blow into water
  • Near shrubs but not under trees: Provides bird cover without leaf litter fallout
  • Elevated 3+ feet: Prevents ground contaminants from splashing in

Move fountains seasonally—reposition deeper into shade during summer solstice when sun angle intensifies.

Post-Cleaning Verification: Is Your Fountain Truly Safe?

Many think “clean” means visually clear water. But unsafe fountains pass this test while harboring dangers. Perform these final checks before birds return:

The Tactile Safety Test

Run your finger along the basin bottom and pump housing. If surfaces feel slippery or gritty, hidden biofilm remains. Repeat Step 2 scrubbing until all areas feel consistently smooth like porcelain. Algae residue often hides under pump mounts—lift components to check.

Flow Rate Validation

Time how long it takes to fill a 1-cup measuring cup from the spray. Compare to:
New pump: 15-20 seconds per cup
1-year pump: 22-25 seconds per cup
If flow exceeds 30 seconds, mineral deposits restrict water movement—schedule deep cleaning within 48 hours.

Year-Round Fountain Maintenance That Protects Birds

Consistent care prevents 90% of problems. Integrate these micro-habits into your routine:

  • Daily: Top off water to maintain flow (never let pump run dry)
  • Every 3 days: Swish basin with hand to disrupt early algae
  • Monthly: Inspect pump cords for cracking
  • Seasonally: Replace spray nozzles before peak bird migration

Store replacement nozzles and brushes together near the fountain. When cleaning supplies live onsite, completion rates jump from 40% to 95% according to wildlife habitat surveys.

A pristine bird bath fountain becomes your garden’s heartbeat—drawing vibrant species while safeguarding local ecosystems. By mastering these non-toxic cleaning techniques, you transform routine maintenance into an act of conservation. Remember: crystal-clear water isn’t just about appearance; it’s the difference between a life-giving sanctuary and a silent death trap. Start today by verifying your fountain’s flow rate, and within a week, you’ll notice birds lingering longer, singing louder, and returning reliably to your thoughtfully maintained oasis.

How to Make a Bird Bath Fountain


Nothing brings life to your backyard quite like the gentle splashing of water and the cheerful songs of birds gathering at your own handmade water feature. Creating a bird bath fountain transforms ordinary outdoor spaces into vibrant wildlife sanctuaries while adding soothing auditory elements to your garden. DIY bird bath fountains cost significantly less than store-bought options—typically $50-$150 compared to $200+ for commercial versions—and let you customize every detail to match your landscape aesthetic. Whether you’re working with repurposed containers, natural stone, or modern materials, this guide shows you exactly how to make bird bath fountain installations that attract diverse bird species while requiring minimal maintenance. You’ll discover practical construction techniques, smart pump selection strategies, and professional finishing touches that ensure your fountain becomes a reliable water source for feathered visitors throughout the seasons.

Choose Your Design and Style Wisely

Selecting the right design determines both the visual impact and functionality of your bird bath fountain. Pedestal-style fountains work best in formal gardens, standing 24-36 inches tall to provide birds with clear predator visibility while creating an elegant focal point. Ground-level basin systems blend seamlessly into naturalized landscapes where birds feel more secure approaching water from surrounding vegetation. Wall-mounted or hanging configurations maximize space in small urban yards or patios where traditional designs won’t fit.

Consider your local bird population when choosing height—ground-feeding species like sparrows and robins prefer basins within 12 inches of the ground, while smaller birds like finches feel safer at elevated heights. For gardens with limited space, repurpose a large terra cotta pot as both basin and pedestal by stacking inverted pots of decreasing sizes. Modern landscapes benefit from sleek stainless steel bowls coupled with minimalist copper tubing for water flow. Always prioritize shallow water depths—1-2 inches maximum—with textured surfaces birds can grip comfortably. Designs with removable basins simplify cleaning, while integrated pump housings protect equipment from debris and curious wildlife.

Gather Essential Materials Before Starting

DIY bird bath fountain materials list

Collecting complete materials before beginning prevents frustrating interruptions and ensures professional results. The core components include:

  • Water basin: Pre-made ceramic bowl (16-24 inches diameter), repurposed serving platter, or galvanized metal tub
  • Pump system: Submersible fountain pump rated for your basin size (50-400 GPH depending on design)
  • Water tubing: ½-inch or ¾-inch flexible vinyl tubing matching pump outlet size
  • Decorative elements: Copper spout, natural stone waterfall feature, or stacked ceramic cups

Essential tools you’ll need:
– Drill with masonry or wood bits (depending on base material)
– Spirit level for ensuring stability
– Waterproof silicone sealant rated for outdoor use
– Measuring tape and marker
– Scissors or tubing cutter

When selecting your pump, match flow rate to basin size—small tabletop fountains need 50-100 GPH pumps, while larger pedestal designs require 200-400 GPH units. Choose a pump with adjustable flow control to customize water movement for different bird preferences. For cold climates, select a model with winter operation capability or plan to remove it during freezing months. Always purchase tubing slightly longer than needed—you can trim excess but can’t extend too-short tubing.

Position Your Fountain for Maximum Bird Activity

Strategic placement significantly impacts bird usage and fountain longevity. Birds prefer water sources with 10-15 feet of clear sightlines to spot predators while bathing, so avoid placing fountains directly under dense tree canopies where falling leaves clog pumps. Choose locations with partial shade—morning sun with afternoon shade maintains comfortable water temperatures while slowing algae growth. Position your fountain near natural cover like shrubs or small trees (5-10 feet away) where birds can quickly retreat if threatened.

Ensure practical accessibility for maintenance by placing within reach of your garden hose and near an outdoor electrical outlet for pump operation. If using solar-powered pumps, verify the location receives 6-8 hours of direct sunlight daily. Test potential sites by observing bird traffic patterns in your yard—place a temporary bowl of water where birds naturally gather to confirm the spot’s appeal. Avoid locations near bird feeders where seed debris contaminates water, and steer clear of high-traffic areas where human activity scares away visitors. For safety, position fountains away from windows to prevent bird collisions—place within 3 feet of glass or beyond 30 feet.

Build a Stable, Leak-Proof Basin Structure

Constructing a sturdy basin prevents wobbling that scares birds and ensures years of reliable service. For pedestal designs, stack concrete blocks to desired height, using construction adhesive between layers and filling hollow cores with gravel for stability. Create a perfectly level top surface using a spirit level—critical for proper water distribution. Alternatively, pour a custom concrete pedestal using a cardboard tube form, embedding a metal mounting plate at the top for secure basin attachment.

Mounting the basin requires careful attention to water management. Apply a thick bead of waterproof silicone around the contact area between basin and pedestal, pressing firmly into place and allowing 24 hours curing before adding water. For repurposed containers like large serving bowls, seal interior cracks with pond-safe sealant and drill small overflow holes near the rim to maintain consistent water levels. Create textured footing for birds by embedding small pebbles in wet concrete or scratching grooves into plastic basins with sandpaper. For multi-tier designs, stack bowls of decreasing sizes, securing each with silicone and ensuring proper water flow between levels.

Install the Pump System Correctly

Submersible fountain pump installation diagram

Proper pump installation ensures reliable water circulation while protecting equipment from damage. Position your submersible pump at the basin’s lowest point, either resting on a small brick to prevent sediment suction or suspended from the edge using the included mounting bracket. Attach flexible tubing to the pump outlet, threading it up through the center of your fountain structure to emerge at the desired waterfall location.

Secure tubing with cable ties to prevent sagging and ensure consistent water flow. At the tube’s upper end, attach your chosen decorative element—a copper elbow creating a gentle drip, stacked stones forming a cascade, or ceramic spout directing water flow. The discharge height determines your water pattern: higher placements create splashing action that birds find irresistible, while lower positions produce gentle ripples. Test the pump submerged in a bucket before final installation to verify operation and check all connections for leaks. For multi-tier designs, use T-connectors to split flow between levels, adjusting each branch with flow control valves to balance water distribution.

Enhance with Bird-Friendly Decorations

Personalizing your fountain adds visual interest while creating a more welcoming environment for birds. Line the basin rim with smooth river rocks that provide secure footing and create natural-looking transitions. Position moss-covered boulders around the base to integrate the fountain into surrounding plantings, ensuring all stones have rounded edges that won’t injure delicate bird feet.

Incorporate moisture-loving plants like hostas, ferns, or astilbes around the fountain to create a naturalized look while providing nearby cover. For themed gardens, add copper elements that develop attractive patina over time, mosaic tile patterns around the basin rim, or colored glass pieces embedded in concrete for sparkle. Install solar-powered LED lights near (not in) the fountain to highlight your creation after dark—birds don’t visit at night, but the illumination showcases your work to human visitors. Avoid adding floating objects like rubber ducks that scare birds, and never use decorative elements with sharp edges or toxic materials.

Fine-Tune Water Flow for Bird Attraction

Initial testing reveals installation issues and allows optimization for maximum bird appeal. Fill the basin completely, ensuring the pump is submerged, then connect power and observe water movement. Listen for unusual pump noises indicating improper mounting or air pockets, and check for leaks at all connections. Allow the system to run for several hours while monitoring water levels—significant evaporation suggests excessive flow rate, while stagnant water indicates insufficient circulation.

Adjust the flow rate using your pump’s control dial or by partially clamping the tubing. Birds prefer gentle water movement rather than powerful jets; strong flows create splashing that disturbs bathing birds and wastes water. The ideal flow creates subtle ripples across the water surface with soft bubbling sounds at the spout—loud splashing actually deters many species. If your design includes multiple tiers, adjust individual tube sections to balance flow between levels. Fine-tune based on bird behavior: if birds avoid the fountain, reduce flow intensity; if they seem hesitant to approach, add more gentle movement to attract their attention.

Implement Essential Maintenance Practices

Consistent maintenance keeps your bird bath fountain functioning properly and protects bird health. Perform daily checks to verify adequate water levels—birds need 1-2 inches of depth for bathing, and low water scares away visitors while concentrating contaminants. Every two to three days, skim debris like leaves and insect matter from the water surface using a fine mesh net.

Weekly maintenance includes disconnecting power and removing the pump to clean the intake screen with a soft toothbrush, checking for clogs that reduce flow. Deep clean every two to three weeks by draining completely, scrubbing all surfaces with a 10% bleach solution (1 part bleach to 9 parts water), rinsing thoroughly until no chemical odor remains, and refilling with fresh water. Avoid harsh chemical cleaners that leave toxic residues. Monthly, inspect tubing for algae buildup and clean with a bottle brush if necessary. During winter in cold climates, either drain the system completely and store the pump indoors, or maintain a continuous very low flow to prevent complete freezing. Proper maintenance extends your fountain’s lifespan to a decade or more while ensuring it remains a safe, inviting destination for local bird populations.

How to Make a Cement Bird Bath: Easy DIY Guide


Watching birds splash and preen in a bird bath you crafted yourself creates a special connection to your garden that store-bought alternatives simply can’t match. A well-constructed cement bird bath costs a fraction of premium decorative options—often under $50 in materials compared to $150-$500 for comparable store-bought pieces—while delivering decades of reliable service. This guide walks you through every step of creating a durable, attractive cement bird bath that withstands freeze-thaw cycles, UV exposure, and regular use, ensuring your feathered visitors have a safe, inviting water source year after year.

Essential Materials and Tools for Cement Bird Bath Construction

concrete mixing tools cement types portland cement quikrete sakrete

Cement Types and Mixtures

Choose Type I/II Portland cement from reliable brands like Quikrete or Sakrete for optimal outdoor durability. For beginners, pre-mixed concrete (cement combined with sand and gravel) simplifies the process—just add water. A 60-pound bag costs $4-$7 and yields enough material for one medium-sized bird bath. For smoother finishes on visible surfaces, mix one part Portland cement with two to three parts fine play sand. Add water gradually until reaching a thick, workable consistency similar to cookie dough—excess water weakens the final product.

Critical Additives and Safety Gear

Acrylic concrete fortifier boosts water resistance by up to 30% when added at one cup per batch—essential for outdoor bird baths exposed to constant moisture. Iron oxide pigments (one ounce per bag) create natural stone shades without compromising durability. Never skip safety equipment: nitrile gloves, safety glasses, and a dust mask protect against cement’s caustic nature, which irritates skin, eyes, and lungs even during brief handling.

Select Your Bird Bath Construction Method

Mold-Based Technique for Beginners

This approach produces consistent results with minimal shaping skills. Use a 14-18 inch plastic bowl as your basin mold—test its size by placing it where your finished bird bath will live. Apply cooking oil to all interior surfaces as mold release before adding cement. For professional results, cast the basin and pedestal separately using the two-mold technique, allowing each component to cure fully before assembly. This method requires approximately two weeks from start to finish but delivers the most reliable outcome for first-time builders.

Freeform Options for Experienced Crafters

Freeform construction creates unique, organic designs but demands more skill. The “cob” technique involves adding cement mixture in layers over wire mesh reinforcement, sculpting while partially set. Alternatively, build plywood forms from ½-inch exterior-grade material to guide your shaping while allowing customization. This middle-ground approach accommodates larger designs while maintaining reasonable control over final proportions.

Prepare Your Workspace and Mix Cement Properly

Workspace Setup Essentials

Select a covered area protected from direct sunlight and rain—garage floors or covered patios work perfectly. Cover your work surface with plastic sheeting to prevent staining and simplify cleanup. Organize tools within arm’s reach: mixing supplies on one side, shaping tools on the other, with a water bucket nearby for immediate spill cleanup. Cement becomes increasingly difficult to remove as it dries, so prompt action prevents permanent messes.

Perfect Mixing Ratios

Combine dry ingredients first—thoroughly mix cement and sand before adding water. For basin areas exposed to constant moisture, use a richer one-to-one-and-a-half cement-to-sand ratio for added durability. Add water incrementally, mixing completely between additions. The ideal consistency holds its shape when formed into a ball but spreads easily under light pressure. If mixture becomes too wet, add small amounts of dry mix rather than starting over.

Build Your Bird Bath Basin Correctly

cement bird bath basin construction mold filling freeform shaping cement texture techniques

Mold Preparation and Filling

For mold-based construction, apply a ½-inch “face coat” of cement mixture to the mold’s interior, pressing firmly to eliminate air pockets. Allow this layer to set for 30-60 minutes until touch-dry, then fill the remaining space with a stiffer mixture containing optional pea gravel for bulk. For decorative textures, place sea glass, mosaic tiles, or textured mats oil-side-down inside the mold before adding cement.

Freeform Basin Shaping

When building without molds, work from outside the planned basin area, building walls approximately 2-3 inches thick for stability. Create the gradual slope birds prefer for safe bathing entry and exit by smoothing the interior surface with a wet trowel or sponge. Maintain consistent wall thickness—too thin invites cracking, too thick creates unnecessary weight. The ideal basin depth ranges from 1-2 inches at the edges to 2-3 inches in the center.

Construct a Stable Pedestal Foundation

Pedestal Design Essentials

Standard pedestal heights range from 24-36 inches, with 30 inches representing the ideal balance between bird accessibility and human viewing comfort. Wider bases (18-24 inches diameter) provide greater stability, particularly important in windy locations. Incorporate a ½-inch drainage hole through the pedestal top slightly off-center—insert PVC pipe as a sleeve to create a clean drainage channel that prevents water accumulation at the basin-pedestal joint.

Two Effective Construction Methods

For mold-based pedestals, use nested containers—a large outer container determines the exterior shape while a smaller inner container creates a hollow center that reduces weight. Apply a face coat to the outer mold, allow partial setting, then fill with gravel-enhanced mixture. Alternatively, build freeform pedestals using stacked cement “logs”—rolled mixture approximately 2 inches diameter and 12-18 inches long—stacked in overlapping layers and smoothed together. This technique creates organic, stacked-stone appearances that blend naturally into garden settings.

Securely Join Basin and Pedestal

cement bird bath assembly adhesive application masonry anchors basin pedestal joining

Curing Timeline Before Assembly

Allow both components to cure for a minimum of 72 hours before joining—rushing this step creates weak points that fail under stress. Test readiness by pressing a fingernail into a hidden surface area; properly cured cement resists indentation without crumbling. Curing time varies significantly with temperature and humidity—be patient, as premature joining leads to frustrating failures requiring complete reconstruction.

Professional-Quality Attachment

Apply waterproof construction adhesive designed for concrete to the pedestal’s top surface using a notched trowel for even coverage. Center the basin carefully, checking from multiple angles to ensure proper alignment. Apply firm, even pressure across the basin rim to squeeze out excess adhesive. Allow the adhesive to cure for 48 hours before moving or filling with water. For larger bird baths, add stainless steel masonry anchors through the basin bottom into the pedestal after adhesive curing completes.

Apply Protective Finishes and Sealants

Surface Smoothing and Texturing

Remove rough spots using progressively finer sandpaper (80-grit to 220-grit) once cement has cured for at least one week, keeping surfaces consistently wet to prevent dust inhalation. Pay particular attention to the basin interior, as rough surfaces harbor algae. Create decorative textures with rubber stamps pressed into partially set cement, or use bristle brushes to make swirl patterns that complement your garden’s aesthetic.

Sealant Application for Longevity

Allow fresh cement to cure for 28 days before sealing. Apply penetrating siloxane-based sealant with a garden sprayer for complete coverage without surface films that could flake into water. Test sealant effectiveness by sprinkling water on the surface—beading indicates intact protection, while absorption signals reapplication is needed. Plan to reseal every 1-3 years depending on climate exposure.

Position and Maintain Your Bird Bath for Maximum Bird Usage

Strategic Placement Tips

Position your bird bath where you can enjoy watching birds from indoor spaces like kitchen windows. Birds prefer baths with nearby overhead protection from predators but clear sightlines to detect danger—place beneath mature trees or near dense shrubs. Ensure the bath sits on a stable, level surface; a concrete pad or compacted gravel base provides excellent drainage and prevents dangerous tilting over time.

Essential Maintenance Routine

Clean your bird bath weekly during warm weather using a stiff brush (never soap or detergents harmful to birds). A 10% white vinegar solution removes mineral deposits and algae without harsh chemicals. In cold climates, winterize by emptying completely and covering, or use bird bath heaters designed for outdoor use—never allow water to freeze in the basin, as expanding ice cracks cement.

Troubleshooting Common Issues

Crack Repair Techniques

Hairline cracks (less than 1/16 inch) often seal themselves through normal water exposure. For larger cracks, clean thoroughly with a wire brush, then fill with hydraulic cement slightly proud of the surrounding surface. Sand smooth after curing. Structural cracks extending through the cement’s thickness typically require professional assessment.

Algae and Mineral Deposit Solutions

Increase cleaning frequency and reduce sun exposure to combat algae growth—never use pool chemicals, which are toxic to birds. Remove white mineral deposits (efflorescence) with a stiff brush, and improve drainage around the bird bath to reduce recurrence. Proper sealing prevents new deposits by blocking water migration through the cement.

Creating a cement bird bath combines practical DIY skills with creative expression, resulting in a functional garden feature that brings years of birdwatching pleasure. With attention to proper construction techniques and ongoing maintenance, your handcrafted cement bird bath becomes a lasting centerpiece of your garden ecosystem—providing essential wildlife habitat while showcasing your craftsmanship. The satisfaction of watching birds flock to your creation makes every minute of effort worthwhile.

How to Clean Cement Bird Bath: Easy Steps


A neglected cement bird bath transforms from a garden jewel into a slippery hazard that drives away the very birds you want to attract. When algae coats the basin or mineral deposits form unsightly rings, your feathered visitors avoid the water source you’ve provided. Knowing how to clean cement bird bath surfaces properly revives this essential wildlife feature while protecting your investment. Unlike smoother materials, cement’s porous nature demands specific cleaning techniques to prevent damage while removing stubborn buildup. This guide delivers a comprehensive, step-by-step approach that restores even the most neglected cement bird bath to a clean, safe condition—without expensive professional services or harsh methods that accelerate deterioration.

Why Cement Bird Baths Need Special Cleaning Approach

Cement’s microscopic pores create the perfect environment for algae, bacteria, and mineral deposits to take root and thrive. Unlike glazed ceramic or metal bird baths, cement absorbs water deep into its structure, allowing contaminants to penetrate beyond surface level. This absorption leads to persistent green algae blooms that create dangerous slippery surfaces where birds can lose their footing. The same porosity that makes cement vulnerable to staining also means standard cleaning methods often fail—they remove surface discoloration while leaving embedded contaminants intact.

Hard water mineral deposits manifest as chalky white rings that cling stubbornly to cement surfaces, especially at the waterline where evaporation concentrates minerals. These deposits aren’t just unsightly—they create rough surfaces that accelerate wear during cleaning. Organic debris like leaves and bird droppings decompose on cement surfaces, releasing tannins that penetrate deep into the material, causing yellow or brown discoloration that regular scrubbing won’t remove. Without proper cleaning techniques, these issues compound over time, leading to permanent staining and structural weakening that shortens your bird bath’s lifespan.

Essential Tools for Cement Bird Bath Cleaning

cement bird bath cleaning tools kit

Assembling the right tools before starting ensures efficient cleaning without damaging your bird bath. A stiff-bristled nylon brush with durable bristles penetrates cement pores without scratching, while a soft-bristled detail brush handles decorative elements. Rubber gloves protect your hands from cleaning solutions, and safety goggles prevent accidental splashes—especially important when using vinegar or oxygen bleach. A garden hose with adjustable nozzle provides controlled water pressure for rinsing without eroding cement surfaces.

Your cleaning solution arsenal should include white vinegar for mineral deposits, oxygen bleach for organic stains, and baking soda for gentle abrasive action. Commercial cement cleaners designed specifically for outdoor masonry offer powerful options for severe buildup but require careful handling. A plastic scraper helps remove dried debris without damaging cement surfaces, while a wet-dry vacuum or large sponge removes excess water during the drying phase. Most importantly, a high-quality masonry sealant completes your toolkit, creating a protective barrier against future staining.

Step-by-Step Cement Bird Bath Cleaning Process

Initial Debris Removal

Begin by scooping out standing water and disposing of it away from garden plants, as it may contain contaminants. Use a stiff brush to sweep away dried leaves, seed hulls, and bird droppings from the basin and pedestal, focusing on corners and decorative grooves where debris accumulates. For stubborn organic matter, a plastic scraper gently lifts material without scratching cement surfaces. Rinse thoroughly with your garden hose, directing water at an angle to push debris outward rather than deeper into crevices. This critical first step prevents you from grinding debris into cement pores during deeper cleaning.

Targeted Stain Treatment

Different stains require specific treatment approaches for optimal results. For green algae growth, mix one part oxygen bleach with four parts water and apply generously to affected areas. Let the solution dwell for 15-20 minutes to penetrate deep into cement pores before scrubbing with your stiff brush using firm circular motions. Oxygen bleach effectively kills algae without the harsh effects of chlorine bleach on cement surfaces. For white mineral deposits, apply undiluted white vinegar directly to the affected areas and allow it to sit for 10-15 minutes—the acid dissolves alkaline mineral buildup. Stubborn rust stains respond well to a paste of cream of tartar and water applied thickly and allowed to dry completely before rinsing.

Thorough Rinsing Protocol

Proper rinsing removes all traces of cleaning solutions and loosened contaminants that could harm visiting birds. Rinse multiple times with clean water, starting from the top and working downward to ensure complete coverage. Fill the basin with clean water and empty it three to four times, checking that rinse water runs clear before proceeding. Pay special attention to textured areas and the waterline where cleaning solutions tend to collect. Incomplete rinsing leaves residue that can interfere with sealant application and potentially harm birds.

Sealant Application for Long-Term Protection

masonry sealant application bird bath

Sealing your cleaned cement bird bath creates an invisible barrier that significantly reduces future staining and simplifies maintenance. Select a breathable masonry sealant specifically formulated for outdoor concrete applications—avoid film-forming sealants that create a glossy surface and eventually peel. Penetrating sealants absorb into the cement, providing durable protection while maintaining the natural appearance.

Apply sealant on a dry day with no rain forecast for at least 24 hours. Use a paintbrush to apply thin, even coats following the manufacturer’s recommended coverage rate—most sealants require two to three thin coats rather than one heavy application. Allow each coat to dry completely (typically two to four hours) before applying the next. The bird bath should remain dry for a minimum of 48 hours after the final coat to allow full curing before refilling with water. Properly sealed cement bird baths resist staining and require less frequent deep cleaning.

Maintenance Schedule for Ongoing Cleanliness

Preventative maintenance dramatically extends the time between deep cleaning sessions. Change the water every two to three days during warm weather to prevent algae growth—daily changes may be necessary during heat waves. Each time you refresh the water, give the basin a quick scrub with a stiff brush and water containing a splash of white vinegar to prevent mineral and algae buildup.

Perform a light cleaning every two to four weeks using a vinegar-water solution to maintain pristine condition. Inspect your sealant annually by sprinkling water on the surface—if it beads up, the sealant remains effective; if it soaks in immediately, it’s time to reapply. Schedule thorough deep cleanings twice yearly, typically in early spring before nesting season and again in late fall. This consistent maintenance prevents the rapid reaccumulation of stains that makes deep cleaning more difficult over time.

Troubleshooting Persistent Cement Bird Bath Issues

repairing cracks in cement bird bath

Slippery surfaces despite regular cleaning indicate residual biofilm that requires targeted treatment. Apply a solution of one part hydrogen peroxide to two parts water, let it dwell for 10 minutes, then scrub thoroughly—the oxidation action breaks down stubborn biofilm. For persistent slipperiness, lightly sand the surface with 120-grit sandpaper to remove the slick layer without damaging underlying cement.

Small cracks should be repaired immediately with hydraulic cement or concrete patching compound to prevent water penetration that accelerates deterioration. Clean the crack thoroughly before applying filler, and allow complete curing before refilling with water. White powdery residue (efflorescence) appears when salts migrate from within the cement to the surface—scrub with a vinegar solution and ensure proper sealing to prevent recurrence.

Final Maintenance Tips

A clean cement bird bath serves both aesthetic and ecological purposes in your garden. Proper cleaning techniques preserve the structural integrity of your bird bath while providing safe, healthy water sources for local birds. Remember that cement requires more maintenance than non-porous materials, but its natural appearance and durability make the extra effort worthwhile. The birds visiting your yard depend on reliable water sources, especially during extreme weather—keeping your bird bath clean ensures you’re providing safe hydration throughout the seasons.

Pro Tip: Place your cement bird bath in a location that receives morning sun but afternoon shade—this reduces algae growth while allowing birds to cool off during hot days. Position it near cover but with clear sightlines so birds feel safe from predators while bathing. With regular maintenance following this guide, your cement bird bath will remain a beautiful, functional garden feature for years to come.

How to Fix Broken Cement Bird Bath


Your cement bird bath has served as a charming garden centerpiece for years, but now a crack runs through the basin or perhaps the pedestal has snapped clean in two. Before you resign it to the trash pile, know that most cement bird bath damage can be repaired with basic tools and materials from your local hardware store. Whether you’re dealing with hairline fractures from winter freeze-thaw cycles or a completely shattered base, this guide provides proven techniques to restore your bird bath’s functionality and appearance. You’ll learn exactly how to fix broken cement bird bath components using methods that withstand weather exposure while creating seamless repairs that blend with the original structure.

Diagnose Your Bird Bath Damage Type

Jumping into repairs without understanding your specific damage leads to wasted effort and materials. Cement bird baths fail in predictable patterns based on weather exposure, physical impact, and manufacturing quality. Identifying your exact problem determines the appropriate repair strategy.

Identify Freeze-Thaw Damage Patterns

Examine your bird bath for classic freeze-thaw damage: horizontal cracks around the water line, spalling (surface flaking), or vertical cracks radiating from drainage holes. These form when water penetrates microscopic pores in the cement, freezes, and expands outward with tremendous force. If you live in a climate with freezing temperatures, these repairs must include waterproofing to prevent recurrence.

Determine Structural vs. Cosmetic Damage

Run your fingers along cracks to assess depth. Surface cracks less than 1/8 inch wide that don’t penetrate through the cement typically need only cosmetic repair. Structural damage features wide cracks that go all the way through the material, broken connections between basin and pedestal, or any damage that causes instability when filled with water. Structural repairs require mechanical reinforcement beyond simple patching.

Check for Hidden Damage

Turn your bird bath upside down to inspect the underside of the basin and inside the pedestal. Water collects in these areas during rain, leading to hidden deterioration. Probe suspicious areas with a screwdriver—soft or crumbly cement indicates advanced damage requiring more extensive repair than surface cracks.

Gather the Right Repair Materials for Cement Bird Baths

cement repair materials bird bath epoxy concrete bonding agent

Using inappropriate materials causes failed repairs that worsen the problem. Cement bird baths require products specifically formulated for masonry restoration in outdoor environments.

Select Cement-Specific Patching Compounds

Standard concrete mix won’t bond properly to existing cement surfaces. Instead, choose a polymer-modified patching compound designed for vertical surfaces and thin applications. Products labeled “hydraulic cement” set quickly underwater and work well for basin repairs. For hairline cracks, use a cement crack filler in a caulk tube that you can inject directly into the crack.

Choose Between Epoxy and Construction Adhesives

Two-part epoxy provides the strongest bond for reattaching broken pieces but requires precise mixing and has a short working time. Construction adhesives like Liquid Nails Concrete & Masonry offer easier application with longer working time but slightly less strength. For pedestal repairs that bear weight, epoxy is essential; for cosmetic repairs, construction adhesive may suffice.

Don’t Skip the Bonding Agent

Many failed repairs result from skipping this critical step. Concrete bonding agent—a milky liquid you paint onto prepared surfaces—creates a chemical bridge between old and new cement. This latex-based product soaks into the existing cement, then bonds mechanically with the repair material as it cures.

Prepare Surfaces for Maximum Adhesion

Proper preparation accounts for 80% of repair success. Rushing this stage leads to patch failures within weeks.

Clean Thoroughly with Proper Technique

Remove all dirt, algae, and loose material using a stiff wire brush and water. For stubborn growth, use a 1:3 bleach-to-water solution, scrub well, and rinse completely. Allow surfaces to dry for 24 hours before proceeding—moisture prevents proper bonding and creates weak spots in your repair.

Roughen Smooth Surfaces

Cement doesn’t bond well to smooth surfaces. Use a chisel or rotary tool to create shallow grooves in the area around your repair. This “tooth” gives the patching material mechanical grip. For hairline cracks, widen them slightly with a chisel to create a V-shaped groove that locks the patch in place.

Remove All Compromised Material

Any crumbling or soft cement must go before repair. Probe questionable areas with a screwdriver; material that gives way needs removal. Continue until you reach solid cement. This often creates a larger repair area than expected but ensures your patch bonds to stable material.

Execute Hairline Crack Repairs Properly

Surface cracks require different techniques than structural damage. These common repairs prevent minor damage from becoming major problems.

Inject Flexible Crack Filler

For hairline cracks under 1/8 inch wide, use a cement crack filler in a caulk tube. Cut the nozzle narrow enough to insert into the crack, then squeeze material deep inside while moving slowly along the crack. Overfill slightly, then smooth with a putty knife dipped in water. The flexibility of these products accommodates normal cement movement without reopening.

Apply Multiple Thin Layers

Thick applications shrink and crack as they dry. Instead, apply patching compound in thin layers using a putty knife, allowing each layer to set before adding the next. For best results, mix compound to a thick paste consistency similar to peanut butter—too watery weakens the repair.

Match Surface Texture Immediately

Before the patch dries, texture it to match surrounding cement using a stiff brush, sponge, or textured roller. Practice on cardboard first to perfect your technique. Proper texturing makes repairs nearly invisible once the bird bath weathers naturally.

Repair Structural Cracks and Broken Pieces

fiberglass mesh cement repair bird bath epoxy reattach broken pieces

Wide cracks or completely broken sections require reinforcement to restore structural integrity.

Reinforce Wide Cracks with Fiberglass Mesh

For cracks wider than 1/4 inch, create a V-shaped groove one inch deep using a chisel. Apply bonding agent, then press fiberglass mesh tape into wet patching compound. Cover with additional compound to embed the mesh completely. The mesh acts like rebar in concrete, preventing the repair from failing under stress.

Reattach Broken Pieces with Epoxy

Dry-fit broken pieces first to ensure proper alignment. Clean both surfaces thoroughly, then mix two-part epoxy according to package directions. Apply a thick layer to both mating surfaces, press firmly together, and clamp in place. Wipe away excess epoxy immediately with a damp cloth before it cures hard.

Rebuild Missing Sections Layer by Layer

For chunks that have broken off completely, build up replacement material in 1/4-inch layers. Allow each layer to set before adding the next to prevent sagging. Use cardboard forms to maintain the original shape when rebuilding curved sections. Each layer should be roughened before applying the next for maximum bond strength.

Protect Your Repairs from Future Damage

The final step determines whether your repair lasts one season or many years.

Apply Breathable Concrete Sealer

After repairs cure completely (wait at least 7 days), apply a breathable concrete sealer designed for outdoor masonry. These sealers penetrate the surface to block water while allowing trapped moisture to escape—critical for preventing freeze damage. Avoid non-breathable sealers that trap moisture beneath the surface.

Seal Both Inside and Out

Many DIYers only seal the exterior, but water damage occurs from the inside too. Thoroughly seal the entire basin interior, paying special attention to repair areas. Apply two thin coats rather than one thick coat for maximum protection without altering the surface appearance.

Maintain Proper Winter Care

In freezing climates, prevent water from collecting in your bird bath. Empty it before hard freezes or use a bird bath heater. Consider storing it indoors during winter if possible. Annual resealing in the fall provides additional protection against seasonal damage.

Prevent Future Cement Bird Bath Damage

Proper maintenance extends the life of both original and repaired cement bird baths significantly.

Improve Drainage to Prevent Water Accumulation

Ensure drainage holes remain clear of debris. If your basin doesn’t drain properly, drill additional 1/4-inch holes around the perimeter. Standing water accelerates deterioration and increases freeze damage risk.

Clean Weekly with Bird-Safe Solutions

Use a mild bleach solution (1 part bleach to 9 parts water) for weekly cleaning to prevent algae buildup that holds moisture against the cement. Rinse thoroughly to ensure no residue remains that could harm visiting birds.

Inspect Monthly for Early Damage

Check your bird bath regularly for new cracks or problem areas. Addressing small issues immediately prevents them from becoming major structural problems requiring extensive repair.


Final Note: With proper technique, most cement bird bath repairs last for years and often outlast new replacements. The key is understanding your specific damage type, using appropriate materials, and allowing adequate curing time before exposing repairs to water. By following these proven methods, you’ll restore both function and beauty to your garden fixture while saving money compared to replacement. Regular maintenance after repair prevents recurrence and keeps your bird bath welcoming feathered visitors season after season.

How to Regrout Bath Tile: Step-by-Step Guide


Tired of staring at dingy, discolored grout lines that make your once-beautiful bathroom look worn and neglected? Regrouting bath tile is one of the most cost-effective bathroom upgrades you can tackle yourself, transforming your space for a fraction of the cost of a full remodel. Over time, bathroom grout deteriorates from constant exposure to moisture, cleaning chemicals, and daily wear, leading to unsightly cracks, stubborn stains, and even mold growth that regular cleaning can’t fix. The good news is that with the right approach, regrouting your bathroom tiles is a manageable DIY project that most homeowners can complete in a weekend without professional help.

This guide provides the exact steps needed to successfully regrout your bath tiles, saving you hundreds compared to hiring a contractor. You’ll learn how to properly assess your grout condition, select the right materials, and execute each phase of the process for professional-looking results. Whether your grout has turned yellow from hard water, developed hairline cracks, or harbors persistent mildew that won’t wash away, this comprehensive walkthrough gives you everything needed to restore your bathroom’s appearance and prevent further water damage behind your tiles.

Assess Your Grout Condition Before Starting

Taking time to properly evaluate your existing grout prevents wasted effort and materials by ensuring regrouting will actually solve your problem.

Identify Which Areas Need Regrouting

Run your fingers along all grout lines to feel for cracks, crumbling sections, or areas where grout has pulled away from tiles. Pay special attention to grout around the tub edge, shower floor, and corners where water collects. Discolored grout that resists regular cleaning typically needs replacement, as stains have penetrated deep into the porous material. If you see powdery residue when touching grout lines, this indicates efflorescence from moisture behind the tile that requires addressing before regrouting. For minor issues affecting less than 20% of your grout lines, spot repair might suffice, but widespread deterioration calls for complete regrouting.

Spot Warning Signs of Underlying Problems

Before investing time in regrouting, check for problems that would undermine your efforts. Press firmly on tiles in affected areas—if any feel loose or wobbly, you likely have substrate damage requiring professional attention. Soft spots on walls or floors near tile areas indicate water damage that must be repaired first. Visible mold growth extending beyond grout lines into wall cavities means you need remediation before proceeding. If grout fails repeatedly in the same spot, this often signals an unresolved moisture issue behind the tile that will compromise your new grout. Addressing these underlying problems first saves you from redoing your work prematurely.

Gather Essential Tools and Materials for Success

bathroom regrouting tools kit oscillating multi-tool grout saw

Having the right equipment ready prevents project delays and ensures professional results when regrouting bath tile.

Specialized Grout Removal Equipment

An oscillating multi-tool with a carbide-tipped grout removal blade makes quick work of old grout while minimizing tile damage—this single tool dramatically reduces project time compared to manual methods. For smaller jobs or tight corners, a manual grout saw with a diamond-encrusted blade provides precision control. Keep multiple utility knife blades on hand for cleaning out stubborn residue from corners and edges. A narrow grout scoop or flathead screwdriver helps remove loosened debris from between tiles without scratching surfaces. Don’t forget a shop vacuum with a HEPA filter to capture fine dust particles during removal.

Application and Finishing Supplies

A high-quality rubber grout float with a firm base ensures even pressure when spreading new grout. You’ll need at least two large buckets—one for mixing grout and another for clean water during cleanup. High-density cellulose sponges work better than regular sponges for grout cleanup without leaving lint behind. A grout haze remover specifically designed for bathroom use saves hours of scrubbing after the main project. Have several microfiber towels ready for the final polishing stage when grout has partially set. A margin trowel makes mixing small batches of grout to perfect consistency much easier.

Select the Right Grout Type for Bathroom Conditions

sanded vs unsanded grout comparison chart bathroom tile

Choosing appropriate grout ensures your regrouting project withstands bathroom moisture and maintains its appearance long-term.

Sanded vs. Unsanded: Making the Right Choice

For most bathroom applications, sanded grout provides superior durability in joints wider than 1/8 inch, which includes standard wall tile installations and all floor tiles. The fine sand particles add structural integrity that prevents shrinkage cracks in wider joints. Reserve unsanded grout for joints 1/8 inch or narrower, particularly on polished stone, glass tile, or other delicate surfaces where sand particles could cause scratching. In high-moisture areas like shower floors, epoxy grout offers the best long-term performance despite higher cost and more challenging application, as it resists staining and won’t degrade from constant water exposure.

Strategic Color Selection for Practical Results

While pure white grout creates a clean, spa-like appearance, it shows dirt and discoloration quickly in bathroom environments. Medium gray or beige tones provide excellent camouflage for everyday wear while maintaining a bright appearance. Dark charcoal or brown grout hides soap scum and hard water stains effectively but can make small bathrooms feel visually smaller. For dramatic visual impact, consider complementary colors that match other bathroom elements—navy blue grout pairs beautifully with white subway tile when accented by navy towels or accessories. Always purchase grout samples and test them against your tile in actual bathroom lighting before committing to a full purchase.

Execute Proper Grout Removal Techniques

The quality of your grout removal directly impacts how well new grout bonds and the professional appearance of your finished project.

Power Tool Removal Best Practices

Set your oscillating tool to medium speed to avoid excessive vibration that could damage tile edges. Maintain a consistent 30-degree angle between the blade and grout surface for optimal cutting without gouging tiles. Work methodically along each grout line, removing material to a uniform depth of about 1/8 inch—deeper removal risks damaging the tile substrate. Pause every few minutes to vacuum debris from joints, as accumulated dust reduces cutting efficiency. For corners and tight spaces, switch to a smaller blade attachment rather than forcing the main blade into awkward positions that could chip tiles.

Thorough Post-Removal Cleaning

After removing the bulk of old grout, use a stiff-bristled nylon brush to dislodge remaining particles from joint corners. Vacuum all surfaces thoroughly, including directing the nozzle along each grout line to extract fine dust. Wipe the entire area with a damp cloth to remove surface residue, then allow at least 24 hours for complete drying before applying new grout. Proper cleaning prevents dust contamination that would weaken the bond of your new grout and create visible imperfections once cured.

Apply New Grout for Professional Results

Mastering grout application technique transforms your DIY project from amateur to professional quality with minimal additional effort.

Perfect Mixing Consistency Every Time

Measure water precisely according to package instructions before adding grout powder. Mix small batches (enough for 2-3 square feet) to prevent premature setting. Achieve a thick, peanut butter-like consistency that holds its shape without sagging—too much water weakens grout strength, while too little makes application difficult. Allow mixed grout to slake (rest) for 5-10 minutes, then remix briefly before application. Discard any grout that begins to stiffen in the bucket rather than adding more water, as this compromises strength.

Effective Application Methodology

Hold your grout float at a 45-degree angle and press firmly to force grout deep into joints using diagonal sweeping motions across tile surfaces. Work in manageable 3×3 foot sections to maintain control before grout begins setting. After initial application, tilt the float nearly vertical to remove excess grout while maintaining joint fill. For vertical surfaces like shower walls, work from bottom to top in overlapping sections to prevent sagging. Allow grout to firm slightly (15-30 minutes) before tooling joints to create the characteristic concave profile that sheds water effectively.

Seal and Maintain Your Regrouted Bathroom

Proper sealing and maintenance protect your investment and dramatically extend the lifespan of your newly regrouted bathroom.

Critical Sealing Protocol

Wait the full curing time specified by your grout manufacturer (typically 72 hours for cement-based grouts) before applying sealer. Apply grout sealer using a small brush or applicator bottle, focusing only on grout lines while avoiding tile surfaces. Allow sealer to penetrate for 10-15 minutes, then wipe away excess with a clean microfiber cloth. Apply a second coat for maximum protection in shower areas. Annual resealing maintains protection against moisture penetration and staining—test by sprinkling water on grout lines; if it beads up, sealer remains effective.

Daily Maintenance for Longevity

Squeegee shower walls after each use to minimize water exposure on grout lines. Clean grout weekly with a pH-neutral cleaner specifically formulated for tile and grout—avoid vinegar-based cleaners on cement grout as they gradually degrade the material. Address any mold or mildew spots immediately with appropriate cleaners before they penetrate deep into grout. Check grout lines quarterly for cracks or deterioration, addressing small problems before they become major repairs. Proper maintenance ensures your regrouted bathroom maintains its fresh appearance for 5-10 years before requiring another refresh.


Regrouting bath tile delivers dramatic visual improvements while protecting your bathroom structure from moisture damage. By following these precise techniques for assessment, preparation, application, and maintenance, you’ll achieve professional results that transform your bathroom’s appearance without the expense of a full remodel. The key to success lies in proper preparation, selecting appropriate materials for bathroom conditions, and taking time with each step rather than rushing the process. With your newly regrouted tiles, you’ll enjoy a cleaner, brighter bathroom that feels like new for years to come—all accomplished through a manageable weekend project that puts thousands back in your pocket compared to professional retiling.

« Older posts Newer posts »