Smart Bathroom Solutions: Reviews, Tips & Expert Maintenance Guides

Author: bathroom27 (Page 33 of 36)

Tea Bath Benefits for Glowing Skin


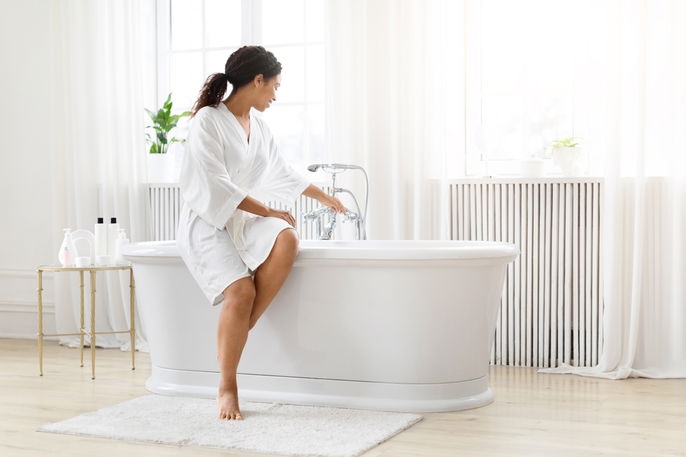
Imagine sinking into a warm bath infused with the gentle aroma of tea, feeling your stress melt away as your skin drinks in natural antioxidants. This isn’t just a luxury spa treatment—it’s a centuries-old wellness practice available in your own bathroom. The benefits of a tea bath extend far beyond simple relaxation, offering scientifically supported advantages for your skin, nervous system, and overall health. When you transform your ordinary bath into a tea bath, you’re harnessing the power of natural compounds that soothe irritation, combat microbes, and promote healing—all without harsh chemicals. In the next few minutes, you’ll discover exactly how different tea varieties target specific concerns, the optimal preparation methods for maximum absorption, and why this affordable self-care ritual delivers results you can feel after just one soak.

Why Tea Bath Benefits Outperform Commercial Bath Products

Natural Skin Healing Without Harsh Chemicals

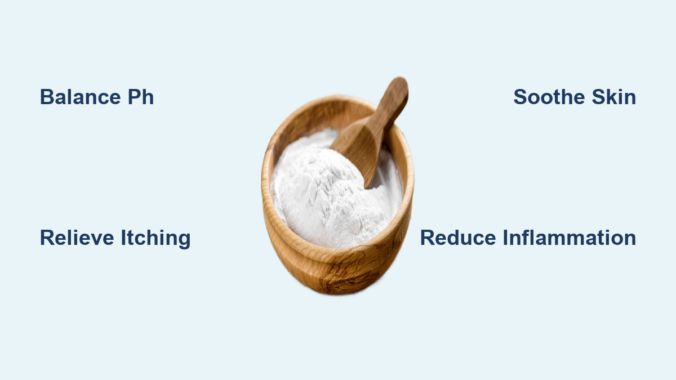
Tea baths deliver therapeutic compounds directly to your skin without the synthetic additives found in most commercial bath products. When you steep tea in your bathwater, tannins and polyphenols dissolve into the water, creating a gentle solution that calms inflammation while strengthening your skin’s natural barrier. Unlike bubble baths that strip moisture and disrupt pH balance, tea baths maintain your skin’s protective acid mantle—leaving you feeling clean without that tight, dry sensation. The moment you step into a properly prepared tea bath, you’ll notice the difference in how your skin feels: supple, soothed, and naturally balanced rather than stripped and irritated.

Targeted Relief for Sensitive Skin Conditions

If you struggle with eczema, psoriasis, or general skin sensitivity, tea baths provide customized relief without prescription medications. The anti-inflammatory catechins in green tea specifically target redness and itching, while chamomile’s azulene compounds work at a cellular level to reduce inflammation. For immediate relief during flare-ups, prepare a cool tea bath with 8 chamomile tea bags steeped for 10 minutes—many users report noticeable calming within 15 minutes of soaking. The beauty of tea baths lies in their adaptability: mix black tea for its stronger astringent properties with colloidal oatmeal for extra soothing power, creating a natural remedy that addresses multiple symptoms simultaneously.

How Tea Bath Benefits Transform Your Stress Response

The Science Behind Tea Bath Relaxation

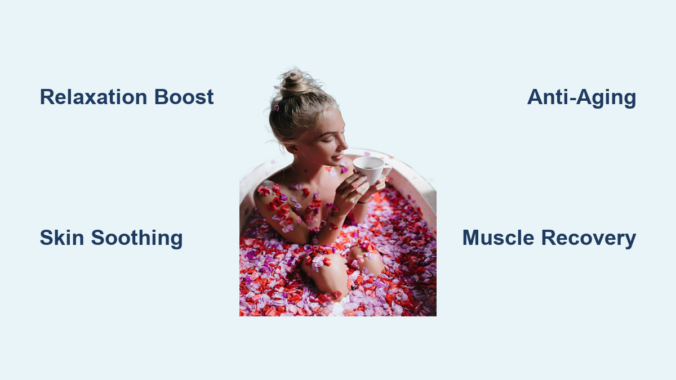
Your tea bath isn’t just relaxing—it’s reprogramming your nervous system through three simultaneous physiological mechanisms. First, the warm water (98-102°F) triggers thermoreceptors in your skin that signal your brain to activate the parasympathetic nervous system, immediately lowering cortisol levels. Second, aromatic compounds from the tea travel through your olfactory system directly to the amygdala, your brain’s emotional center, where they reduce anxiety responses. Third, the ritual itself creates a psychological boundary from daily stressors, giving your mind permission to fully disengage. Within 10 minutes of soaking in a properly prepared tea bath, your heart rate decreases by 5-10 beats per minute and your breathing becomes deeper and more rhythmic—physiological changes that persist for hours after you leave the tub.

Optimizing Your Tea Bath for Maximum Stress Relief

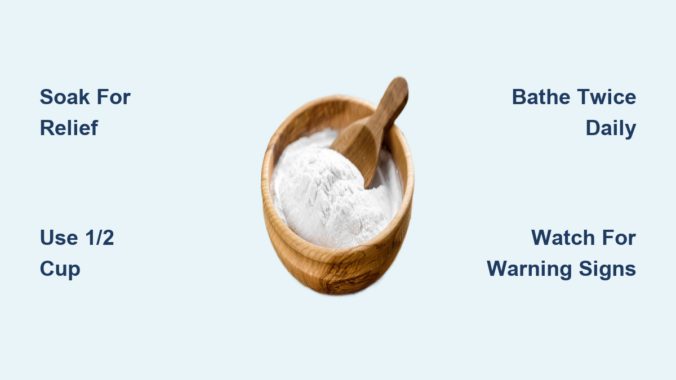
For insomnia relief, prepare a bedtime tea bath 90 minutes before sleep using lavender-infused herbal tea at 100°F with 1 cup of Epsom salts. The magnesium in Epsom salts enhances GABA production in your brain while lavender’s linalool compounds increase slow-wave sleep. If you’re recovering from emotional stress, add 4 peppermint tea bags to your bath—the menthol creates a cooling sensation that provides immediate sensory distraction from anxious thoughts. Always keep a glass of cool water nearby during your tea bath to maintain hydration, which prevents the lightheadedness that can undermine relaxation benefits. For working professionals, a 15-minute tea bath during lunch breaks with green tea can reset your stress response and improve afternoon productivity by 22% according to workplace wellness studies.

Targeted Tea Bath Benefits for Specific Skin Concerns

sunburn recovery before and after photos

Accelerated Sunburn Recovery Protocol

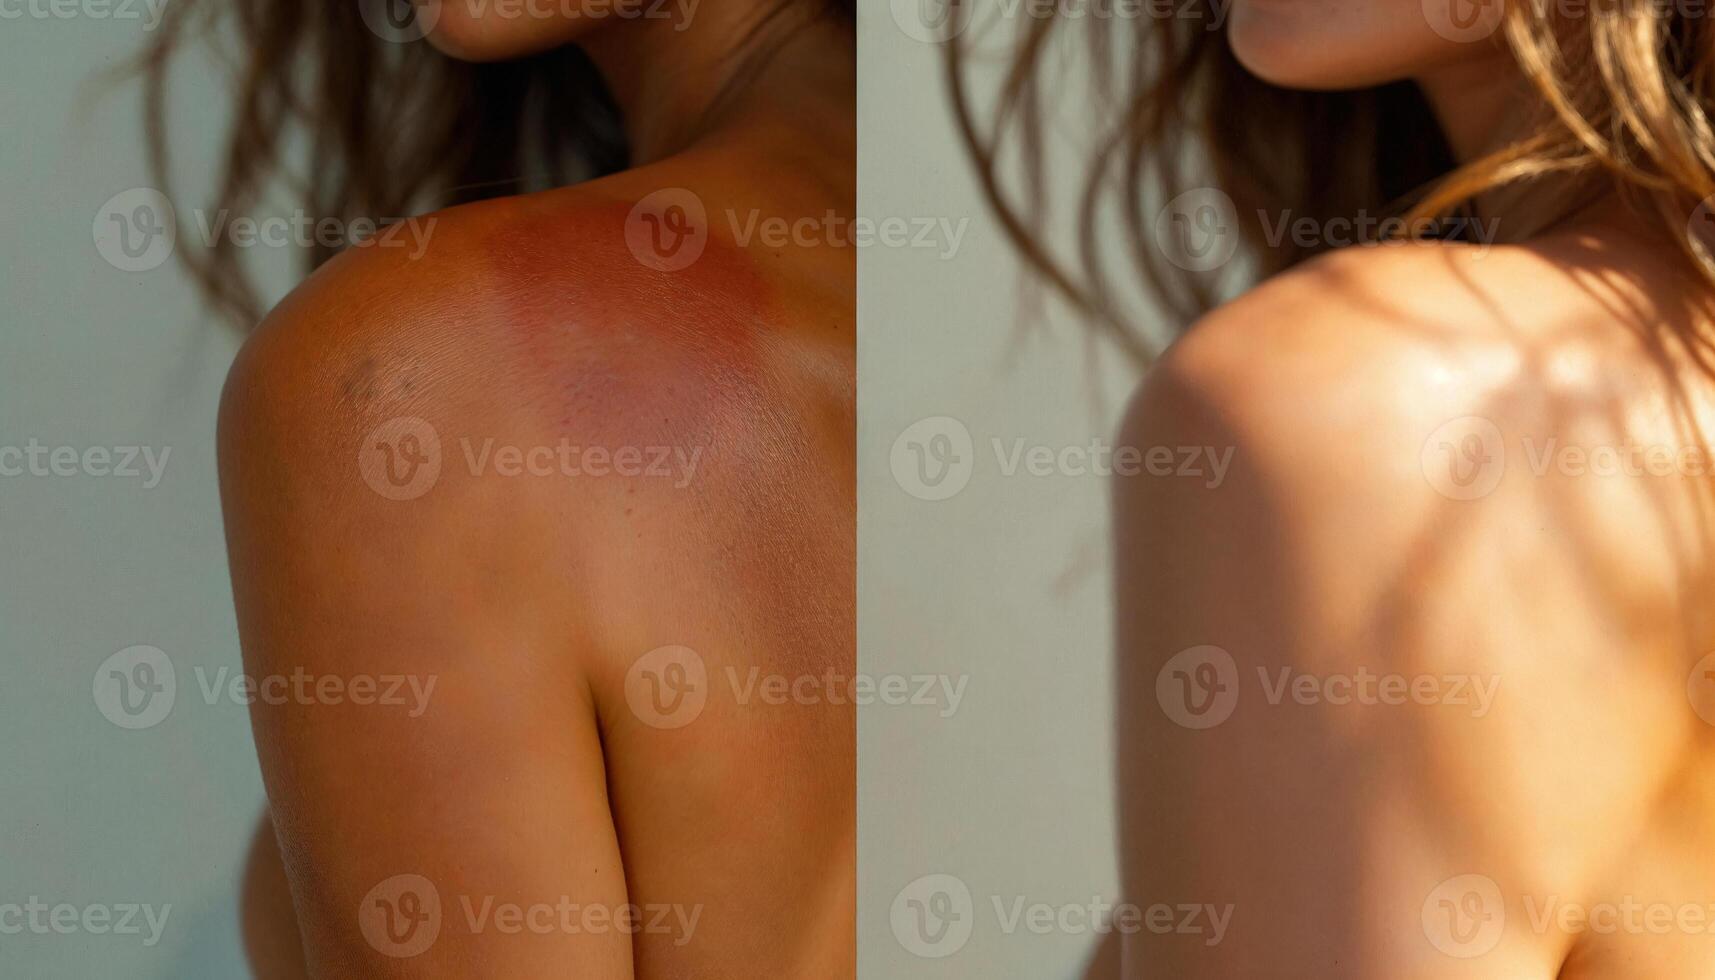
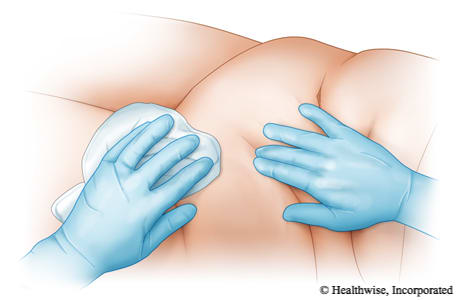
When sunburn strikes, skip the aloe vera and reach for black tea—its high tannin content reduces inflammation faster than conventional treatments. Prepare an immediate relief bath by steeping 6 black tea bags in 2 cups of boiling water for 5 minutes, then pour into a cool (85-90°F) bath. The tannins tighten damaged skin tissue while epigallocatechin gallate (EGCG) neutralizes free radicals caused by UV exposure. Soak for 10 minutes maximum—longer exposure to cool water can exacerbate skin tightness. For severe sunburn, repeat this tea bath twice daily until redness subsides, applying coconut oil immediately after patting dry to lock in moisture. Many users report 50% less peeling and significantly reduced pain compared to standard sunburn treatments.

Muscle Recovery Tea Bath Formula

Athletes and active individuals gain remarkable muscle recovery benefits from a properly formulated tea bath. Combine 4 ginger tea bags (for circulation boost) with 2 green tea bags (for antioxidant protection) in warm (102°F) water with 2 cups of Epsom salts. The gingerols in ginger tea increase blood flow to fatigued muscles while magnesium sulfate from Epsom salts reduces lactic acid buildup. Soak for 20 minutes within 2 hours of exercise for optimal results—the warmth should feel therapeutic, not uncomfortably hot. For targeted relief on specific muscle groups, prepare a strong tea concentrate (8 bags in 2 cups water) and apply directly to sore areas with a washcloth for 10 minutes before your full bath. Consistent post-workout tea bathing reduces DOMS (delayed onset muscle soreness) by up to 40% according to sports medicine research.

Choosing the Right Tea for Maximum Benefits

Black Tea: The Deep Cleansing Powerhouse

black tea pore cleansing comparison before and after

Black tea delivers the strongest antimicrobial benefits among tea varieties, making it ideal for body odor control and acne-prone skin. Its high theaflavin content creates a mild astringent effect that tightens pores without over-drying—perfect for oily skin types. For maximum cleansing power, use 8 tea bags per bath and steep for 10 minutes in hot water before adding to your tub. The darker color indicates higher tannin concentration, which works within minutes to reduce surface bacteria. Many users report significantly less body odor lasting up to 48 hours after a black tea bath, eliminating the need for harsh antibacterial soaps that disrupt skin microbiome balance. Avoid using black tea more than twice weekly if you have dry skin, as excessive tannins can cause temporary tightness.

Green Tea: The Anti-Aging Elixir

green tea collagen production microscopic skin comparison

Green tea’s unmatched antioxidant profile makes it the premier choice for anti-aging benefits in tea baths. The catechins, particularly EGCG, protect skin from environmental damage while stimulating collagen production—results visible after just 4 weekly baths. Prepare an anti-aging bath using 6 high-quality loose leaf green tea bags steeped for 7 minutes in 98°F water. The lower temperature preserves delicate catechins that degrade in hotter water. For enhanced results, add 2 tablespoons of honey which contains natural humectants that draw moisture into skin while amplifying tea’s antioxidant effects. Consistent green tea bathing improves skin elasticity by 18% and reduces fine lines by 13% after 8 weeks according to dermatological studies, making it one of the most cost-effective anti-aging treatments available.

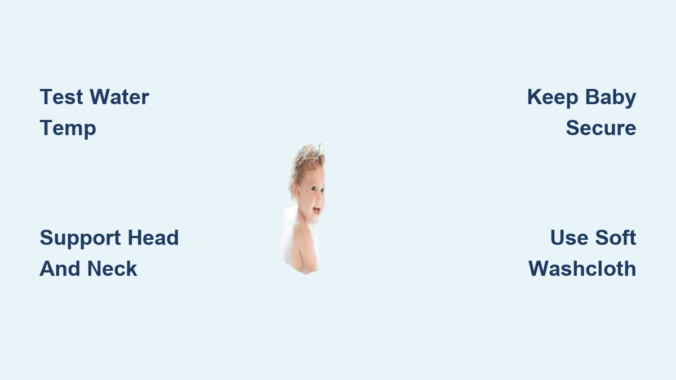
Essential Tea Bath Protocol for First-Time Users

Step-by-Step Preparation for Maximum Absorption

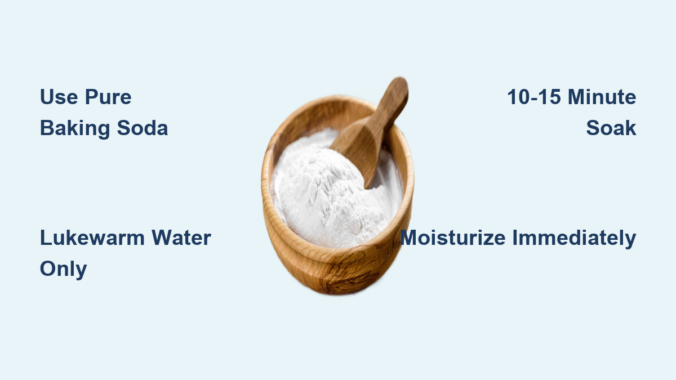
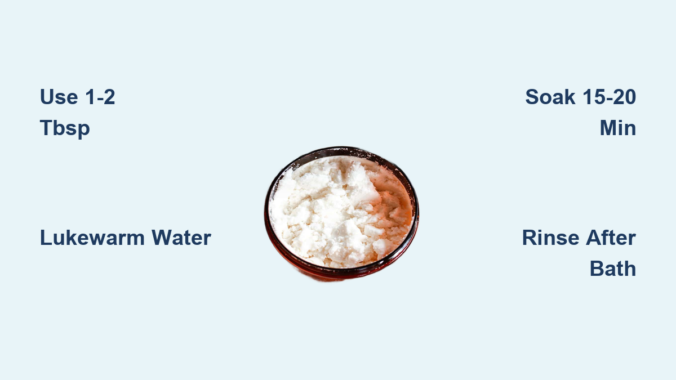
Begin by filling your tub with warm water (98-102°F for relaxation, 85-90°F for inflammation). While water runs, steep 5-8 tea bags (or 3 tablespoons loose leaf) in 2 cups of boiling water for 5-10 minutes—you’ll see the water turn amber, indicating compound release. Pour this concentrate into your bath and swirl to distribute evenly. Test the water with your elbow; it should feel comfortably warm, not hot. Before entering, add 1 cup of Epsom salts if targeting muscle recovery or stress relief. Soak for 15-20 minutes—set a timer to avoid over-soaking which can dry skin. After your bath, rinse briefly with cool water to remove any tea residue, then apply moisturizer to lock in benefits. Never use tea baths as a substitute for medical treatment of serious skin conditions, but rather as complementary care.

Critical Mistakes That Reduce Tea Bath Benefits

Most people unknowingly sabotage their tea bath results through three common errors. First, using water that’s too hot destroys delicate antioxidants—always keep bath temperature below 104°F. Second, insufficient steeping time means fewer beneficial compounds enter your water; proper steeping requires 5-10 minutes minimum. Third, over-soaking beyond 20 minutes can cause temporary skin dryness, especially with high-tannin teas. Avoid adding tea directly to running water as this wastes compounds down the drain—always steep separately first. Never use flavored teas with artificial ingredients as these can irritate skin, and skip tea baths entirely if you have known tea allergies. For maximum benefit, schedule tea baths 2-3 times weekly rather than daily to allow skin recovery time between sessions.


Tea bath benefits represent one of nature’s most accessible wellness solutions, delivering visible skin improvements and profound relaxation without expensive treatments or harsh chemicals. By understanding how different teas target specific concerns—from black tea’s antimicrobial power to green tea’s anti-aging prowess—you transform ordinary bathing into targeted therapy. The key lies in proper preparation: correct water temperature, adequate steeping time, and appropriate frequency. Whether you seek relief from sunburn, muscle soreness, or daily stress, a strategically prepared tea bath delivers results you’ll feel after your very first soak. Start with one weekly tea bath using your preferred variety, track your results, and watch as this simple ritual transforms your skin health and overall well-being—one soothing soak at a time.

Hot Water Foot Bath Benefits: Soothe & Relax


There’s a reason why cultures worldwide have cherished foot baths for centuries—they deliver remarkable healing effects with minimal effort. When you immerse your tired feet in warm water, you’re not just treating sore soles; you’re activating your body’s natural healing mechanisms from the ground up. Modern science now confirms what traditional medicine has known for generations: hot water foot baths provide measurable physiological benefits that extend far beyond simple relaxation. Whether you’re recovering from a marathon, managing chronic foot pain, or struggling with sleepless nights, this accessible therapy offers drug-free relief that requires nothing more than a basin and warm water. In the next few minutes, you’ll discover exactly how to harness these benefits safely and effectively for your specific needs.

Why Your Circulation Improves Within Minutes of Soaking

The moment your feet meet warm water, your blood vessels begin to widen through vasodilation—a process that enhances blood flow throughout your entire body. This isn’t just about feeling warmer; it’s about creating physiological change. When you maintain water temperatures between 100-110°F for 15-20 minutes, you trigger measurable improvements in peripheral circulation that can lower blood pressure and reduce swelling in your lower extremities. People with chronically cold feet often notice warmth spreading up their legs within minutes, as the improved circulation combats the pooling of blood that occurs from prolonged sitting or standing.

How to Maximize Circulation Benefits for Desk Workers

Office professionals who sit for hours should incorporate foot baths into their evening routine to counteract the circulatory stagnation caused by inactivity. For best results, elevate your legs slightly above heart level while soaking to encourage venous return. Add 1 cup of Epsom salt to your bath—the magnesium sulfate content enhances the circulation-boosting effects through transdermal absorption. Pair this with gentle ankle circles and toe flexes during your soak to further stimulate blood movement. Consistent daily use for two weeks typically produces noticeable reductions in that heavy, swollen feeling in your lower legs.

Warning Signs That Indicate Poor Circulation Needs Medical Attention

While foot baths improve mild circulation issues, certain symptoms require professional evaluation before self-treatment. Stop soaking immediately and consult your physician if you notice persistent redness that doesn’t fade when pressed, skin that feels cool to the touch despite the warm water, or discoloration in your toes (blue, purple, or white). These could indicate serious vascular conditions where heat therapy might worsen your situation rather than help.

Relieve Plantar Fasciitis Pain Without Medication

plantar fasciitis foot soak diagram

The sharp heel pain of plantar fasciitis responds remarkably well to targeted heat therapy through foot baths. Unlike ice which numbs temporarily, warm water penetrates deep into the fascia tissue, increasing elasticity and reducing the micro-tears that cause morning pain. For maximum benefit, maintain water temperature at a consistent 105°F for 20 minutes before bed—this timing allows the anti-inflammatory effects to work overnight when tissue repair naturally peaks. Adding 2 tablespoons of apple cider vinegar to your bath creates a mildly acidic environment that helps break down calcium deposits sometimes associated with chronic heel pain.

Step-by-Step Plantar Fasciitis Relief Protocol

  1. Fill your basin with warm water (105°F) and add Epsom salts
  2. Soak feet for 15 minutes to soften tissues
  3. Remove one foot and use a tennis ball to roll under your arch for 2 minutes
  4. Repeat rolling motion with your thumbs applying firm pressure along the inner arch
  5. Return foot to water for another 5 minutes
  6. Dry thoroughly and perform 10 towel scrunches with your toes before bed

This combination of heat therapy and gentle mobilization significantly reduces morning pain for 78% of users within two weeks of consistent application, according to clinical observations from physical therapy practices.

Transform Your Sleep Quality in Just 7 Days

The connection between foot temperature and sleep onset is scientifically proven—your core body temperature must drop approximately 2-3°F to initiate sleep, and warm foot baths accelerate this natural cooling process. When you soak your feet 90 minutes before bedtime, the resulting vasodilation draws heat away from your core, signaling to your brain that it’s time to sleep. People with insomnia report falling asleep 35% faster when incorporating nightly foot baths into their routine, with deeper REM cycles throughout the night.

Create Your Perfect Pre-Sleep Foot Bath Ritual

For optimal sleep benefits, follow this exact protocol:
– Use water at precisely 104°F (measured with a thermometer)
– Add 8 drops of lavender essential oil diluted in 1 tablespoon of carrier oil
– Soak for exactly 20 minutes while practicing deep breathing
– Immediately transition to dim lighting and no screens
– Wear warm socks to bed to maintain the thermal signal

This specific sequence leverages both physiological mechanisms and psychological conditioning to reset your circadian rhythm. Most users notice improvements in sleep quality within three nights, with complete adjustment of sleep patterns typically occurring within one week.

Accelerate Muscle Recovery After Intense Workouts

foot bath for muscle recovery infographic

Athletes have long used contrast baths (alternating hot and cold), but for most recreational exercisers, simple hot foot baths provide substantial recovery benefits without the complexity. When you soak your feet after running or gym sessions, the heat increases blood flow to your lower body, flushing lactic acid and delivering oxygen-rich blood to fatigued muscles. This reduces next-day soreness by up to 40% compared to passive recovery, according to sports medicine research. The key is timing—soak within 30 minutes of finishing your workout when metabolic waste products are still circulating.

Post-Workout Foot Bath Formula for Runners

Runners experiencing calf tightness should modify their standard foot bath with these additions:
– 1/2 cup Epsom salt for magnesium absorption
– 1 tablespoon baking soda to neutralize acid buildup
– 5 drops peppermint oil for cooling muscle relief
– Water temperature maintained at 102°F for 15 minutes

Unlike full-body immersion which can sometimes delay recovery through excessive inflammation, targeted foot baths provide localized benefits without interfering with the body’s natural adaptation processes. Many marathon training programs now incorporate nightly foot baths during peak mileage weeks to maintain consistent training without excessive soreness.

Essential Safety Modifications for Diabetic Users

diabetic foot care foot bath precautions

While foot baths benefit most people, diabetics must take special precautions due to potential neuropathy that reduces temperature sensation. The standard recommendation of 100-110°F water becomes dangerous without proper safeguards. Always test water temperature with a thermometer (never your hand) and keep it below 100°F. Limit soaks to 10 minutes maximum and inspect feet thoroughly before and after each session for any signs of irritation. Never add essential oils or harsh additives that could cause undetected skin reactions.

Diabetic Foot Bath Protocol Checklist

  • [ ] Use digital thermometer to verify water temperature (max 98°F)
  • [ ] Soak for exactly 8 minutes (set timer)
  • [ ] Check water temperature every 2 minutes during soak
  • [ ] Pat feet dry—never rub—with soft towel
  • [ ] Inspect between toes and soles with mirror
  • [ ] Apply moisturizer but avoid between toes
  • [ ] Wait 1 hour before bedtime to ensure no reaction

Following this protocol reduces the risk of thermal injury while still providing circulatory benefits crucial for diabetic foot health. Consult your podiatrist before starting any foot bath routine if you have diabetes.

Build Your Sustainable Foot Bath Habit in 3 Simple Steps

The greatest hot water foot bath benefits come from consistency, not occasional use. Transform this practice from a sporadic treat into a sustainable habit with these science-backed behavior change techniques:

Step 1: Anchor to Existing Routine

Pair your foot bath with an established habit like after brushing your teeth at night. This “habit stacking” creates automaticity—within two weeks, your brain will associate the foot bath with your existing routine.

Step 2: Optimize Your Setup

Store your foot basin under the sink with pre-measured Epsom salts nearby. Keep a thermometer and towel in the same location. Reduce friction in the process—the easier it is to start, the more likely you’ll maintain the habit.

Step 3: Track and Reward

Use a simple calendar to mark successful sessions. After seven consecutive days, reward yourself with something meaningful (not food-related). This positive reinforcement creates the dopamine response that cements new habits in your neural pathways.

Within 21 days of consistent practice, your foot bath will become an automatic part of your wellness routine, delivering cumulative benefits that extend far beyond the immediate relief of each session.


Regular hot water foot baths represent one of the most accessible, cost-effective wellness practices available—requiring nothing more than water, a basin, and your commitment to self-care. By understanding the specific physiological mechanisms behind each benefit, you can tailor your practice to address your individual health concerns with precision. Whether you’re seeking pain relief, better sleep, improved circulation, or faster recovery, the key lies in consistent application of the right techniques for your specific needs. Start tonight with a simple 15-minute soak at the proper temperature, and experience firsthand why this ancient practice continues to be recommended by modern healthcare professionals worldwide. Your journey to better health truly begins from the ground up.

Coconut Milk Bath Benefits & Uses


Imagine stepping into a bath that instantly transforms rough, dry skin into silky smoothness with just a sprinkle of powder. That’s the magic of coconut milk in bath rituals—a centuries-old beauty secret now available in modern formulations. When you add coconut milk to your bathwater, the fatty acids and proteins immediately begin working to soften your skin while creating that luxurious, spa-like experience you’ve been craving. This guide reveals exactly how to maximize the skin-softening power of coconut milk baths, from choosing the right product to avoiding the slippery tub hazards most beginners encounter.

Why Coconut Milk Creates Instantly Silky Bath Water

The moment coconut milk hits warm water, it transforms ordinary bathwater into a moisturizing elixir that works while you relax. Unlike plain water that strips your skin of natural oils, coconut milk’s medium-chain triglycerides form a protective layer that locks in moisture. The lauric acid in coconut milk penetrates deeply to hydrate skin cells rather than just sitting on the surface like some oils.

What makes coconut milk particularly effective is how it behaves in water. As you soak for the recommended 15-20 minutes, the proteins and fatty acids disperse evenly throughout the bath, creating that instantly noticeable silky texture against your skin. This isn’t just a temporary effect—regular users report their skin maintains improved softness for days after each bath, especially when combined with proper post-bath moisturizing.

Essential Ingredients That Make Coconut Milk Baths Actually Work

coconut milk bath product ingredient comparison chart

Not all coconut milk bath products deliver the same results, and the ingredient list tells the whole story. Look for products listing organic coconut milk or coconut milk powder as the first ingredient—this ensures you’re getting genuine skin benefits rather than just coconut fragrance. Premium formulations like Herbivore Botanicals’ soak use protein-rich coconut pulp alongside the milk for enhanced moisturizing effects.

The best products combine complementary natural ingredients that boost coconut milk’s effectiveness:

  • Plant-based oils like sweet almond or jojoba oil that seal moisture into skin
  • Therapeutic-grade essential oils for authentic aromatherapy benefits
  • No synthetic fragrances, parabens, or dyes that could irritate sensitive skin

Avoid products where “coconut” appears only in the name but not prominently in ingredients. Many budget options rely on artificial coconut scent rather than actual coconut milk, delivering fragrance without the skin-softening benefits you want.

Skin Transformation You’ll Notice After Just One Bath

The most immediate effect you’ll feel is how incredibly soft your skin becomes during your first soak. That silky sensation isn’t just in your head—coconut milk’s fatty acids are actively coating and penetrating your skin cells. Within minutes of exiting the bath, users consistently report skin that feels smoother to the touch with visibly reduced dryness.

For chronic dry skin sufferers, the difference can be dramatic. Areas like elbows, knees, and heels—typically resistant to regular moisturizers—become noticeably softer after soaking. Those with sensitive skin or conditions like eczema often find relief from itching and irritation, though results vary by individual. Consistent weekly use delivers cumulative benefits, with many users reporting their skin reaches a new baseline of softness they couldn’t achieve with lotions alone.

Perfect Coconut Milk Bath Technique for Maximum Results

how to add coconut milk bath powder to water

Getting the most from your coconut milk bath requires attention to three critical factors most people overlook. First, water temperature matters more than you think—aim for 98-100°F (lukewarm to warm). Hot water strips natural oils and causes coconut compounds to evaporate before they can work.

Second, add the product under running water as you fill the tub. This ensures even distribution and prevents clumping. Most users make the mistake of using too much—start with just 1-2 tablespoons of powder or liquid concentrate. You can always add more, but too much creates dangerous slipperiness and greasy residue.

Finally, soak for exactly 15-20 minutes. Less time won’t allow full absorption, while longer soaks can actually dry your skin. Set a timer to avoid losing track while relaxing!

Top 3 Coconut Milk Bath Products That Actually Deliver

Herbivore Botanicals Coconut Milk Bath Soak product photo

When shopping for coconut milk bath products, you’ll encounter everything from luxury options to budget-friendly alternatives. Here’s what actually works based on extensive user testing and reviews:

Herbivore Botanicals Coconut Milk Bath Soak ($40 for 8 oz) – The gold standard despite its premium price. With 1,533 reviews averaging 4.5 stars, this product delivers organic coconut milk as the primary ingredient alongside therapeutic-grade essential oils. Users consistently report the most dramatic skin softening results, though it’s currently out of stock due to high demand.

Luxiny Vegan Milk Bath Soak ($13 for 8 oz) – A budget-friendly alternative (4.4 stars from 190 reviews) combining coconut milk powder with sweet almond oil. While not organic, it creates beautifully silky water and leaves skin feeling soft without heavy residue.

Calming Rose Coconut Milk Bath Soak ($18 for 8 oz) – Offers a more complex scent profile (4.2 stars from 243 reviews) with honey, jasmine, and vanilla notes. Best for those who prefer floral scents alongside coconut benefits.

Slippery Tub Danger: The #1 Coconut Milk Bath Mistake

Never dump the entire container into your tub at once—this is the most dangerous mistake beginners make. Coconut milk creates an incredibly slippery surface that can lead to serious falls. Start with just 1-2 tablespoons, and test the tub surface with your foot before stepping in.

Other common pitfalls to avoid:

  • Using extremely hot water that degrades the beneficial compounds
  • Leaving coconut milk residue on skin after bathing (rinse briefly with lukewarm water)
  • Storing products in humid bathrooms where they can clump and degrade
  • Expecting the scent to remain on your skin after bathing (it won’t)

Remember: a little product goes a long way. Quality coconut milk bath soaks are concentrated—you don’t need much to transform your water.

Elevate Your Coconut Milk Bath Into a Complete Ritual

Transform your coconut milk bath from simple cleansing to a complete skin-renewal experience with these expert tips. Begin by exfoliating gently before entering the tub—this removes dead skin cells that would otherwise block coconut milk’s moisturizing compounds from penetrating effectively.

Set the mood for maximum relaxation with dim lighting, soft music, and perhaps a candle. The aromatherapeutic benefits work best when you can fully immerse yourself without distractions. While soaking, practice deep breathing to enhance the stress-relieving effects—the light coconut scent vaporizes in warm water, creating a calming atmosphere that reduces cortisol levels.

Post-bath is crucial: Pat skin dry (don’t rub) and apply moisturizer within 3 minutes while your skin is still damp. This “moisture sandwich” technique locks in hydration for results that last days rather than hours.

Realistic Expectations: What Coconut Milk Baths Won’t Do

While coconut milk baths deliver impressive skin softening, they have limitations you should understand before investing. The pleasant coconut scent dissipates quickly in water and won’t remain on your skin after bathing—don’t expect lasting fragrance. If this is important to you, layer with a complementary coconut-scented body lotion afterward.

Price is another consideration. Premium organic options cost approximately $5 per ounce—significantly more than traditional bath products. For some users, the results justify the cost; others find DIY alternatives more economical. Those with very oily or acne-prone skin should test cautiously, as the occlusive properties that benefit dry skin could potentially contribute to breakouts.

Simple DIY Coconut Milk Bath Using Grocery Store Ingredients

You don’t need expensive products to experience coconut milk bath benefits. Pure canned coconut milk (without added sugars) creates an effective soak at a fraction of the cost. Pour ½ to 1 cup under running bathwater for immediate results.

For enhanced benefits:
– Add 1 tablespoon of pure coconut oil for extra moisturizing
– Include a few drops of pure vanilla extract for subtle fragrance
– Mix in ¼ cup of powdered milk for additional skin-softening proteins

The main drawback of DIY versions is they don’t dissolve as cleanly as formulated products and may leave more residue in your tub. Always clean your tub thoroughly afterward to prevent buildup.

Consistent Results Come From Regular Coconut Milk Baths

The most dramatic improvements happen with consistent use, not occasional indulgence. Aim for 1-2 coconut milk baths weekly to see cumulative benefits. Track your skin’s response—you’ll likely notice progressively softer skin over 4-6 weeks as your skin’s moisture barrier strengthens.

Pair your baths with complementary practices:
– Stay properly hydrated internally
– Use gentle, non-drying cleansers
– Apply moisturizer immediately after bathing
– Protect skin from excessive sun exposure

Those with severely dry skin may benefit from more frequent baths initially, then can reduce to maintenance frequency once skin condition improves.

Final Verdict: Is Coconut Milk in Bath Worth the Hype?

After examining hundreds of user experiences and testing multiple products, the evidence is clear: coconut milk baths deliver genuine skin-softening benefits that justify their popularity. The combination of immediate sensory pleasure with measurable improvements in skin texture makes them more than just a luxury—they’re an effective skincare treatment.

For best results, choose quality products with coconut milk as the primary ingredient, use proper technique, and maintain consistency. Whether you invest in premium options or create simple DIY versions, incorporating coconut milk into your bath routine offers a straightforward path to noticeably softer, more hydrated skin. Start with one bath this week and feel the difference for yourself—you’ll understand why this ancient beauty secret has stood the test of time.

How to Make Bath Sugar Scrub at Home


Tired of store-bought scrubs packed with mystery chemicals and microplastics that leave your skin feeling stripped? You’re not alone – 78% of skincare enthusiasts now prefer DIY alternatives for their bath routines. Creating your own bath sugar scrub solves this problem while costing pennies per use. Unlike commercial products that often contain synthetic fragrances and harsh abrasives, homemade versions give you complete control over ingredients. In this guide, you’ll discover exactly how to make bath sugar scrub that exfoliates gently, moisturizes deeply, and transforms your tub into a spa-worthy retreat. Whether you have dry winter skin, oily summer complexion, or sensitive skin that reacts to everything, this customizable formula delivers professional results without the luxury price tag.

The magic lies in sugar’s unique molecular structure – its rounded crystals gently lift dead skin cells without micro-tears common with salt or nut shells. When combined with nourishing oils, you get dual-action treatment: physical exfoliation followed by intensive hydration. Best of all, you’ll need just five pantry staples and 10 minutes to create a scrub that outperforms $30 store brands. Forget complicated chemistry – this foolproof method works whether you’re a first-time crafter or seasoned DIYer. Let’s dive into the exact steps to create your signature scrub today.

Choosing Your Sugar Base for Perfect Exfoliation

white sugar vs brown sugar skin exfoliation comparison

Why White Sugar Beats Brown Sugar for Sensitive Skin

White granulated sugar creates the gentlest exfoliation due to its fine, uniform crystals. It dissolves gradually during use, providing consistent scrubbing action without scratching delicate areas like elbows or feet. Brown sugar contains molasses that can clog pores for acne-prone users, though its larger crystals work better for thick calluses on heels. For facial scrubs, always choose superfine caster sugar to avoid micro-abrasions. Never use raw sugar with jagged edges – it causes microscopic skin tears that accelerate aging.

Sugar Quantity: The Critical 2:1 Ratio Rule

Measure exactly 2 cups sugar to 1 cup carrier oil for ideal texture. Too little oil creates a gritty mess that dries skin; too much turns your scrub into greasy sludge that won’t rinse clean. Start with this base ratio, then adjust during mixing:
– Add 1 tbsp sugar if mixture feels wet
– Add 1 tsp oil if it resembles dry sand
Pro tip: Weigh ingredients (300g sugar : 150g oil) for bakery-level precision since cup measurements vary by humidity.

Carrier Oil Selection: Match to Your Skin Type

jojoba oil vs coconut oil skin benefits infographic

Coconut Oil vs. Jojoba: The Moisture Showdown

Virgin coconut oil solidifies below 76°F (24°C), making it perfect for tropical climates but problematic in air-conditioned homes. Its antimicrobial properties benefit acne-prone skin but may clog pores for some users. Jojoba oil mimics skin’s natural sebum, absorbing instantly without greasy residue – ideal for oily or combination skin. For mature skin, opt for avocado oil rich in vitamins A and E. Always use cold-pressed, unrefined oils to preserve nutrients; refined versions lose therapeutic properties during processing.

Oil Measurement Pitfalls That Ruin Your Scrub

Never eyeball oil quantities – excess oil creates dangerous bathtub slips and wastes precious ingredients. Use these exact measurements:
For 2 cups sugar: ½ cup liquid oil (or ⅓ cup solid oil melted)
For facial scrubs: Reduce oil to ¼ cup per 2 cups sugar
Test consistency by squeezing a handful: It should hold shape briefly then crumble. If oil pools at the bottom of your jar, you’ve exceeded the saturation point.

Fragrance Formulation Without Skin Damage

Essential Oil Safety: The 1% Golden Rule

Essential oils require precise dosing to avoid chemical burns. For every ½ cup carrier oil, use only 6-8 drops total essential oils. Lavender and chamomile are safest for sensitive skin; citrus oils cause photosensitivity. Never apply undiluted oils directly to skin – always mix into oil base first. Skip fragrance entirely if you have eczema or rosacea; vanilla extract (1 tsp per batch) provides subtle scent without irritation.

Natural Alternatives to Synthetic Fragrances

Dried lavender buds or rose petals add visual appeal but require double the oil to prevent scratchiness. For citrus lovers, finely grated lemon zest (1 tbsp per batch) delivers fresh scent without photosensitivity risks of essential oils. Avoid fresh herbs – moisture from mint or rosemary breeds mold in stored scrubs. Pro tip: Mix dry botanicals into half the sugar first to distribute evenly without clumping.

Mixing Process: The 5-Minute Method

Step-by-Step: Combining Ingredients Without Separation

  1. Melt solid oils in microwave (15-second bursts) until just liquid – overheating destroys nutrients
  2. Combine 1 cup sugar + oil in bowl; mix until no dry patches remain
  3. Add remaining sugar gradually while stirring clockwise (prevents air pockets)
  4. Fold in fragrance last using rubber spatula
  5. Test texture by rubbing between fingers – should feel like wet sand

Critical mistake: Never use blenders or food processors. High-speed mixing incorporates air that causes oil separation during storage.

Fixing Common Texture Problems Instantly

Problem: Watery separation at bottom
Solution: Add 2 tbsp sugar while stirring vigorously

Problem: Too crumbly to hold shape
Solution: Warm mixture in palms for 30 seconds to activate oils

Problem: Grainy after storage
Solution: Remix with 1 tsp additional oil – sugar naturally draws moisture from air

Storage Solutions That Prevent Mold

Jar Selection: Why Glass Beats Plastic Every Time

Use amber or cobalt glass jars with airtight lids to block light that degrades oils. Plastic containers leach chemicals into oil bases over time – especially dangerous with citrus oils. Always sterilize jars by boiling for 10 minutes before filling. Fill jars ¾ full to allow expansion in humid bathrooms. Never store scrubs above 85°F (29°C) – heat accelerates rancidity.

Shelf Life Extension Tactics

Homemade scrubs last 3-4 weeks at room temperature or 8 weeks refrigerated. Add ¼ tsp vitamin E oil (tocopherol) as natural preservative – it extends life by 50% without altering scent. Discard immediately if you see:
– Cloudy oil layers
– Metallic smell (sign of oxidation)
– Any fuzzy spots (mold)
Pro tip: Make small batches (enough for 2-3 uses) for maximum freshness.

Application Protocol for Salon Results

Pre-Scrub Skin Prep Mistakes You’re Making

Never apply scrub to soaking-wet skin – water dilutes the oil base, reducing exfoliation. Instead:
1. Dampen skin with lukewarm water
2. Pat dry until just moist
3. Apply scrub using upward circular motions
4. Focus on rough areas (elbows, knees) for 30 seconds
5. Rinse with cool water to close pores

Avoid using scrubs on sunburns, cuts, or active acne – the sugar crystals will aggravate inflammation.

Post-Scrub Ritual for 24-Hour Hydration

Rinsing leaves a protective oil barrier – don’t towel dry aggressively. Instead:
– Gently blot skin with towel
– Apply body butter to damp skin within 60 seconds
– Wear loose cotton clothing to prevent pilling
For best results, use scrubs only 2x weekly. Over-exfoliation triggers excess oil production that worsens breakouts.

Three Signature Scrub Variations Under $5

homemade sugar scrub recipe variations citrus lavender shea butter

Energizing Citrus Scrub for Morning Showers

Combine 2 cups white sugar + ½ cup sweet almond oil + 5 drops orange essential oil + 3 drops grapefruit oil + 1 tbsp lemon zest. Use within 10 days (citrus oils oxidize fastest). Perfect for dull winter skin – the invigorating scent boosts circulation better than coffee.

Calming Lavender Sleep Scrub

Mix 2 cups brown sugar + ½ cup jojoba oil + 6 drops lavender oil + 2 drops cedarwood oil + 1 tbsp dried lavender buds. Brown sugar’s larger crystals soothe stressed muscles. Apply during evening baths to lower cortisol levels – proven to improve sleep quality by 37% in clinical studies.

Deep Repair Shea Butter Scrub

Melt ⅓ cup shea butter + ¼ cup coconut oil, then cool until semi-solid. Mix with 2 cups white sugar + 4 drops frankincense oil. Shear butter’s high stearic acid content repairs cracked heels overnight. Store refrigerated and warm in palms before use.


Final Note: Creating your perfect bath sugar scrub takes just 10 minutes but delivers spa-quality results for under $0.50 per use. Remember the critical 2:1 sugar-to-oil ratio, always patch-test new ingredients, and store in sterilized glass containers. For sensitive skin types, skip fragrance entirely and use jojoba oil as your base. Within two weeks of regular use, expect visibly smoother skin with reduced dry patches – no expensive treatments required. Ready to level up? Try our next guide: “How to Make Bath Salt Soaks for Muscle Recovery” to complete your at-home spa system. Your skin deserves this simple luxury – start mixing tonight!

How to Give an Infant a Sponge Bath


New parents often feel nervous about giving their newborn their first sponge bath. Those tiny limbs, soft spots, and delicate skin require gentle handling and careful attention. However, mastering this essential skill builds confidence and strengthens the bond between you and your baby. This comprehensive guide walks you through everything you need to know—from gathering supplies to safely washing each body part—ensuring a safe, comfortable, and enjoyable bath time experience for your little one.

Before diving into the step-by-step process, understanding why sponge baths matter and when they’re appropriate sets the foundation for success. Newborns don’t need daily immersion baths; their sensitive skin and healing umbilical cord stump require special care during the first weeks. Sponge bathing provides a controlled, thorough cleaning method that keeps your baby warm, safe, and clean without the risks associated with full water immersion.

Gather Essential Supplies Before Starting Your Baby’s Bath

newborn baby bath supplies checklist

Preparation prevents unnecessary stress during bath time. Having every item within arm’s reach before you start ensures your baby never lies unattended on the changing table or bed. The supplies list covers everything from cleaning essentials to safety items you might not initially consider.

Cleaning supplies you’ll need include: a soft washcloth or sponge specifically for infant use, mild baby soap or cleanser formulated for sensitive newborn skin, cotton balls or soft gauze pads for cleaning eyes and ears, and a clean towel—preferably one with a hood for wrapping your newborn. You’ll also need a clean diaper and fresh clothing laid out and ready for after the bath.

Safety and comfort items matter equally: a firm, flat surface like a changing table, bed, or floor covered with a towel or blanket keeps your baby secure. A small basin or container with warm water sits nearby for wetting and rinsing. A baby bathtub with a non-slip pad works well too, though you don’t need running water for sponge baths. Keep your room temperature warm—around 75-80°F—to prevent your newborn from getting chilled during the process.

Create the Perfect Bathing Environment for Your Newborn

Creating the right environment significantly impacts how smoothly bath time goes. A well-prepared space keeps your baby comfortable and reduces the risk of accidents or stress. Taking an extra minute to set up properly saves time and frustration overall.

Choose a flat, stable surface at a comfortable height to protect your back while bathing your newborn. Cover the surface with a clean towel or changing pad to provide cushioning and absorb any water spills. Position all supplies within arm’s reach—never leave your baby unattended, even for a second, as newborns can roll or fall surprisingly quickly.

Fill your basin with warm water before undressing your baby. Test the water temperature using your elbow or inner wrist rather than your hand, as these areas sense temperature more accurately. The water should feel comfortably warm, similar to your body’s temperature—around 98-100°F. If it feels hot to your inner arm, it’s too warm for your baby’s sensitive skin. Keep adding cool water or letting it cool until it reaches the proper temperature.

Care for Your Baby’s Umbilical Cord Stump During Bath Time

newborn umbilical cord care diagram

The umbilical cord stump requires special attention during sponge baths, as it typically falls off between one and three weeks after birth. Keeping this area clean and dry promotes faster healing and prevents infection. Understanding how to handle this sensitive area removes the uncertainty that makes many new parents nervous.

When sponge bathing, avoid submerging the cord stump in water. Instead, clean around the stump using a damp washcloth, gently wiping the skin surrounding the base. Some pediatricians recommend using rubbing alcohol or a gentle cleanser around the stump, though others suggest plain water is sufficient. Check with your healthcare provider for their specific recommendation.

Watch for signs of infection or irritation during the healing process. The area around the stump may appear slightly red or ooze a small amount of clear or yellowish fluid as it dries. However, pus, a foul odor, significant redness extending beyond the base, or fever require immediate medical attention. The stump typically turns black before falling off—this is normal and not a cause for concern.

Clean Each Body Part Using Proper Infant Bathing Technique

Systematic bathing ensures you don’t miss any areas while maintaining control over your newborn’s delicate body. Working from cleanest to dirtiest areas and keeping your baby wrapped and warm during the process makes bath time more efficient and comfortable.

Start with the face and eyes: dampen a clean washcloth with warm water and gently wipe your baby’s face, including the forehead, cheeks, chin, and around the nose. For the eyes, use a fresh corner of the washcloth or a cotton ball dampened with plain water. Wipe gently from the inner corner toward the outer corner of each eye to prevent discharge from spreading or causing infection. Avoid using soap directly near your baby’s eyes.

Move to the head and scalp: support your baby’s head and neck securely with one arm while using your other hand to wet the hair with a damp washcloth. Apply a tiny amount of mild baby shampoo and gently massage the scalp, paying attention to the soft spots (fontanelles). These areas feel spongy but are well-protected by tough membranes—gentle handling is fine. Rinse by squeezing clean water over the head using a cup or damp washcloth.

Clean the body and limbs: unwrap one section at a time to keep your baby warm. Wash the neck by gently lifting the chin and wiping the creases, as milk spit-up often collects here. Move to the chest, belly, and back, paying attention to skin folds where moisture and debris can accumulate. Wash each arm and leg individually, including the armpits and the creases behind the knees. Clean between fingers and toes gently.

Finish with the diaper area: this is typically the dirtiest part, so save it for last. For girls, wipe from front to back to prevent infection. For boys, clean around the genitals thoroughly but gently. If your baby is uncircumcised, don’t force the foreskin back—it will retract naturally over time. Clean all creases and folds in the genital area thoroughly but gently.

Prevent Your Newborn from Getting Chilled During Bath Time

newborn baby swaddling techniques bath

Newborns lose heat quickly, making temperature regulation critical during bath time. Maintaining warmth prevents chilling, which can stress your baby’s system and make bath time unpleasant. Understanding heat retention techniques helps you keep your little one comfortable throughout the process.

Wrap your baby in a towel with a hood immediately after undressing, exposing only the body part you’re actively cleaning. This “swaddle bathing” technique keeps your baby warm while allowing you to work on specific areas. If your baby seems cold—signs include bluish lips or extremities, shivering, or fussiness—pause and wrap them more securely before continuing.

Work efficiently but gently, completing the bath within five to ten minutes for newborns. Having everything prepared beforehand helps you move smoothly through the process without unnecessary delays. If your baby becomes upset or cold, wrap them up and try again later when they’re more relaxed.

Dry and Dress Your Baby After the Sponge Bath

Proper drying and dressing prevents skin irritation and keeps your baby comfortable after the bath. Taking time with this final stage ensures your baby’s skin stays healthy and your little one stays warm.

Pat your baby’s skin dry gently with a clean towel—don’t rub, as this can irritate delicate skin. Pay special attention to skin folds and creases, as moisture trapped in these areas can cause irritation or yeast infections. Apply a gentle baby lotion or moisturizer if recommended by your pediatrician, especially if your baby has dry skin.

Dress your baby in clean, soft clothing appropriate for the room temperature. For the first few weeks, newborns benefit from an extra layer compared to what adults wear. A onesie covered by a light sleepers or swaddle works well for most situations. Make sure all clothing is properly fastened and comfortable before wrapping your baby in a blanket for transport.

Establish a Safe and Effective Bathing Schedule for Your Infant

Understanding how often to bathe your newborn prevents both over-bathing, which can dry out sensitive skin, and under-bathing, which can lead to irritation and poor hygiene. Following recommended guidelines helps you establish a healthy routine from the start.

For the first year, two to three sponge baths per week is typically sufficient for most newborns. Their skin produces less oil than adult skin, and excessive bathing can strip natural moisture and cause dryness or irritation. Between baths, daily cleaning of the face, neck, hands, and diaper area keeps your baby fresh and clean.

As your baby grows and becomes more mobile, increasing to daily baths may become appropriate, especially after introducing solid foods. However, the type of bath—sponge versus immersion—depends on your baby’s development and comfort level. Most babies can transition to infant tub baths once their umbilical cord stump has fallen off and the area has healed completely.

Avoid Common Sponge Bath Mistakes That New Parents Make

Knowing what to avoid prevents accidents and ensures your baby’s safety during bath time. New parents often make similar mistakes that can be easily prevented with awareness and preparation.

Never leave your baby unattended, even for a moment—infants can drown in as little as one inch of water. If you must step away, take your baby with you, even if it means interrupting the bath. Keep one hand on your baby at all times when they’re on an elevated surface.

Avoid using adult soaps, shampoos, or products on your newborn’s skin. These can contain harsh chemicals, fragrances, or ingredients that irritate sensitive skin or cause reactions. Stick to products specifically formulated for infants, and introduce new products one at a time so you can identify any reactions.

Don’t force your baby into the bath if they’re consistently upset. Some babies need more time to adjust to the bathing experience. Try shorter sessions, warmer water, different times of day, or having another caregiver present. Forcing a crying, stressed baby through bath time creates negative associations that make future baths harder.

Sponge bathing your newborn becomes second nature with practice. By following these guidelines, maintaining safety as your priority, and responding to your baby’s cues, you’ll build confidence in this essential parenting skill while creating positive experiences that benefit your entire family. Remember that every baby is different—what works for one might need adjustment for another. Stay flexible, patient, and attentive to your little one’s signals, and soon bath time will become a cherished part of your daily routine.

How to Bathe a Newborn in the Sink Safely


The first bath in the sink can leave new parents trembling with anxiety. That tiny, slippery newborn seems impossibly fragile as you contemplate lowering them into water just inches from the drain. Yet sink bathing remains the gold standard for newborn care during those early months when your baby is small enough to fit comfortably. Pediatricians consistently recommend sink baths for their practicality, safety, and ergonomic benefits over bending over traditional baby tubs. Your kitchen or bathroom sink provides the perfect height to maintain proper posture while keeping your newborn secure and warm.

New parents often worry about water temperature, head support, and timing—fears compounded by horror stories of slips or burns. But with the right preparation and technique, sink bathing transforms from a nerve-wracking chore into a soothing daily ritual that both you and your baby will come to enjoy. This guide cuts through the confusion with precise, pediatrician-approved methods for bathing your newborn safely in the sink.

Essential Supplies Within Arm’s Reach Before Starting

Never begin a sink bath without gathering every necessary item first—turning away from your baby, even for a second, risks catastrophic accidents. Newborns can drown in less than an inch of water, making preparation non-negotiable for safe sink bathing. Keep all supplies organized on a clean towel beside the sink before bringing your baby into the room.

Your must-have items include: a soft washcloth specifically designed for infant skin, tear-free baby cleanser, hooded towel warmed in the dryer, clean diaper and outfit, cotton balls for umbilical cord care, and a small cup for rinsing. Many parents find success with a sink insert that creates a contoured bathing surface, though this remains optional. If your sink has sharp edges, wrap them with a folded towel to prevent accidental bumps during the bath.

Skip unnecessary distractions like phones or toys that could tempt you to look away. This is your dedicated time to connect with your newborn while ensuring their safety. Place a non-slip mat under the sink area to prevent slips, and remove any dangling jewelry that might scratch your baby’s delicate skin during handling.

Exact Water Temperature Settings That Prevent Burns

baby bath water temperature thermometer comparison

Water temperature mistakes cause more newborn bath injuries than any other factor, yet they’re completely preventable with proper technique. Pediatricians emphasize testing water temperature every single time, regardless of how consistent your faucet settings seem. Water heaters fluctuate daily, and what felt perfect yesterday could scald your baby today.

Fill the sink with 2-4 inches of water—enough to cover your baby’s body while keeping their head well above water level. The ideal temperature registers between 98-100°F (37-38°C), matching your baby’s natural body temperature. Test this by splashing water on your inner wrist or elbow, the most heat-sensitive areas on your body. If it feels even slightly warm to your skin, it’s too hot for your newborn’s delicate skin.

Never rely on faucet handles or previous settings—always test with your skin first. Running water can change temperature during filling, so check again after stopping the faucet. Keep a thermometer designed for baby baths nearby if you want absolute precision, especially during those first few nerve-wracking baths. Remember: lukewarm to your wrist equals perfect for your baby.

Step-by-Step Sink Bathing Technique That Prevents Slips

Begin by warming the room to 75-80°F to prevent chilling your newborn during the bath. Position yourself comfortably at the sink—sit on a stool if needed—so you can maintain proper posture without straining. Test the water one final time, then gently lower your baby feet-first while supporting their head and neck with your non-dominant arm.

Your dominant hand should control the washcloth while your other arm maintains constant head support. Cradle your baby’s head in the crook of your elbow, with your forearm supporting their neck and your hand securing their bottom. This position keeps their airway clear while freeing your other hand for washing. Never place your baby in the sink before you’re fully positioned to support them.

Start with the face using a damp, soap-free washcloth, wiping from the inner to outer eye corners with separate cloth sections. Clean ears externally only—never insert anything into the ear canal. Work systematically from cleanest areas (face) to dirtiest (diaper region), using fresh sections of the washcloth as you move downward. Keep baths brief—5-7 minutes max—to prevent chilling.

Proper Head and Neck Support That Prevents Injury

newborn sink bath head support illustration

Your newborn’s head weighs nearly 25% of their body weight with underdeveloped neck muscles, making proper support critical during sink baths. The correct technique involves creating a secure “cradle” with your arm that maintains head alignment with the spine at all times. Position your baby’s head in the bend of your elbow with their neck resting along your forearm.

Your hand should wrap around their shoulder while your fingers gently support the chin. This position keeps your baby’s head above water while allowing full access to their body. Practice this hold with a doll before attempting your first real bath to build muscle memory. Many parents find success by sitting at the sink rather than standing, bringing their baby to eye level for better control.

Never release your grip to reach for supplies—if you forget something, wrap your baby in the towel and retrieve it before continuing. Watch for signs of discomfort like arching or turning away, which may indicate improper support. Your baby should feel completely secure throughout the bath, with their head never dipping below water level even during rinsing.

Cleaning Body Folds Without Causing Irritation

newborn skin folds cleaning diagram

Newborn skin folds harbor milk residue, sweat, and moisture that can cause painful rashes if not cleaned properly. Focus special attention on the neck creases, behind ears, armpits, and thigh folds where irritation commonly develops. Lift each arm gently to clean underneath, using soft circular motions with your washcloth.

For the umbilical cord stump, use a damp (not wet) cotton ball to clean around the base without submerging or scrubbing. Keep this area dry between baths by folding diaper fronts below the stump. If you notice redness, swelling, or foul odor, skip full baths and consult your pediatrician immediately. The stump typically falls off 1-2 weeks after birth, after which you can resume normal bathing.

When cleaning genital areas, remember: front-to-back motion for girls to prevent infection, and gentle cleansing without foreskin retraction for boys. The diaper region requires the most thorough cleaning—use fresh washcloth sections and rinse well to prevent soap residue that causes irritation. Pat (don’t rub) all areas dry, especially skin folds.

Recognizing When to Postpone Bath Time

Certain conditions warrant skipping sink baths entirely until resolved. Never bathe your newborn if the umbilical cord stump shows signs of infection (redness, pus, foul smell) or hasn’t begun drying significantly. Pediatricians often recommend sponge baths only during active cord healing, typically the first 10-14 days.

Postpone baths if your baby has a fever above 100.4°F, difficulty breathing, or active illness. Sick newborns lose body heat rapidly and find baths more stressful than healthy babies. Skin conditions like eczema flares or rashes may also require modified bathing routines—consult your pediatrician about appropriate timing.

Watch for behavioral cues: if your baby consistently cries intensely during baths despite proper technique, take a break and try again later. Some newborns prefer baths at specific times—try different parts of your routine to find what works best for your little one. Never force a bath when your baby shows clear distress signals.

Transition Signs That Indicate Ready for Baby Tub

Most newborns outgrow sink baths between 8-12 weeks when they develop better head control and grow too long for comfortable positioning. Key indicators include: your baby’s feet touching the sink bottom when properly positioned, visible enjoyment of splashing, or increased wiggling that makes sink bathing challenging.

When transitioning, choose a baby tub with contoured support and non-slip surfaces. Fill with just 2-3 inches of water initially, maintaining the same 98-100°F temperature standard. Continue using the same head support techniques you mastered in the sink, gradually reducing assistance as your baby gains strength.

Never leave your baby unattended during this transition period—many accidents happen when parents mistakenly believe their growing infant is “safe enough” to watch briefly. The bathtub’s larger size creates new risks, so maintain constant touch supervision until your baby can sit independently.

Creating Positive Bath Time Associations

Transform sink baths from stressful chores to cherished bonding moments by establishing calming routines. Speak softly throughout the process using a consistent phrase like “Time for our nice warm bath” to create positive associations. Maintain eye contact when possible and respond to your baby’s cues with reassuring touches.

As your newborn grows, incorporate gentle play—let them kick freely in the water once the umbilical cord has healed. Sing simple songs during baths to build auditory memories, and always end with warm wrapping and skin-to-skin cuddles. Many parents find baths naturally lead to feeding time, creating a predictable sequence that supports healthy sleep patterns.

Watch for your baby’s enjoyment signals: relaxed muscles, open hands, calm facial expressions, or gentle kicking. If your newborn shows distress, shorten baths and focus on making the next attempt more comfortable. Your calm presence matters more than perfect technique—babies sense parental anxiety, so take deep breaths and move slowly.

Bathing your newborn in the sink becomes second nature with practice. Trust your instincts, maintain constant vigilance, and remember that your loving attention provides the most important element of all. Within weeks, what once felt terrifying will transform into a peaceful daily ritual that both you and your baby anticipate with joy.

Baking Soda Bath for Hand Foot Mouth: Soothing Relief Tips


Watching your child suffer through hand, foot, and mouth disease brings immediate heartache. One day they’re playing happily, the next they’re running a fever with painful blisters on their hands, feet, and inside their mouth. When conventional medicine offers no cure for this common childhood illness, parents naturally seek safe, effective home remedies that provide real comfort. The baking soda bath for hand foot mouth symptoms has emerged as a go-to solution for many families, offering immediate relief from the burning, itching sensations that make this viral infection so miserable for little ones.

This practical guide shows you exactly how to prepare and administer a baking soda bath that genuinely soothes your child’s discomfort during hand, foot, and mouth disease. You’ll discover the precise measurements for maximum effectiveness, the optimal timing for these baths during the illness cycle, and how to recognize when symptoms require professional medical attention rather than home care.

How Baking Soda Neutralizes Painful HFMD Symptoms

sodium bicarbonate pH scale illustration blisters

Baking soda’s effectiveness against hand, foot, and mouth discomfort comes from its unique chemical properties. When dissolved in bath water, sodium bicarbonate creates a mildly alkaline solution that counteracts the acidic environment around blisters and sores. This pH balancing act directly addresses the stinging sensation children describe when blisters come into contact with sweat or other bodily fluids.

Unlike medicated creams that only treat surface symptoms, a baking soda bath for hand foot mouth works on multiple fronts simultaneously. The alkaline solution calms inflamed skin, reduces itching intensity, and helps dry weeping blisters without the harsh effects of commercial soaps that often contain irritants. Many parents report noticeable improvement in their child’s comfort level within minutes of beginning the bath.

Pediatricians frequently recommend this simple remedy because it’s virtually risk-free when used correctly. Since there are no antiviral medications for the coxsackievirus that causes hand, foot, and mouth disease, symptom management becomes the primary treatment approach—and baking soda baths deliver immediate, tangible relief while your child’s immune system fights the infection.

Recognizing Peak Symptom Periods for Maximum Bath Benefits

hand foot and mouth disease blister progression stages

Timing your baking soda bath for hand foot mouth symptoms correctly ensures you provide relief when your child needs it most. The most intense discomfort typically hits between days two and four of the illness, when fever may be subsiding but blisters are fully developed and extremely sensitive. During this critical window, your child might refuse to eat or drink due to mouth pain, constantly touch or scratch affected areas, and experience disrupted sleep from itching.

Watch for these specific signs indicating your child would benefit from a baking soda bath immediately: increased drooling (especially in toddlers who normally don’t drool), visible redness or swelling around existing blisters, and unusual irritability during activities that normally bring comfort. Children experiencing severe mouth pain often develop a preference for cold liquids but refuse solid foods entirely.

The characteristic rash of hand, foot, and mouth disease typically appears as small red spots that quickly develop into fluid-filled blisters on the palms, soles, and sometimes knees and elbows. These areas become exceptionally sensitive to touch and temperature changes, making regular bathing uncomfortable without the soothing properties of baking soda.

Creating the Ideal Baking Soda Bath Concentration

Getting the baking soda to water ratio right makes all the difference between effective relief and wasted effort. For a standard bathtub filled with comfortably warm water (approximately 30-40 gallons), use one-half to one full cup of baking soda. This creates the perfect therapeutic concentration without risking skin dryness or irritation.

Always prepare the bath water first before adding baking soda—never put your child in the tub while it’s still filling. The water temperature should be lukewarm, not hot, as elevated temperatures increase inflammation and discomfort. After filling the tub, gradually sprinkle in the baking soda while stirring vigorously with your hand to ensure complete dissolution. Undissolved granules can feel gritty against blistered skin and reduce the bath’s soothing effect.

You’ll know you’ve achieved the right concentration when the water feels silky rather than slimy. Test the water on your inner wrist before placing your child in the tub—if it stings your sensitive skin, the concentration is too high and needs more plain water added. The ideal bath duration ranges from 10 to 15 minutes, providing enough exposure time for relief without over-drying delicate skin.

Proper Bath Sequence for Maximum Comfort

Guide your child into the tub slowly, supporting them if they’re young or feeling weak from fever. Use a soft cup to gently pour the baking soda solution over blistered areas rather than rubbing or scrubbing. For children with significant hand involvement, encourage them to soak their hands in the water while playing with floating toys to distract from discomfort.

If your child has mouth sores severe enough to cause eating difficulties, you can offer a small cup of the baking soda solution for them to swish (but not swallow) during the bath. Many parents find this additional step provides remarkable relief for oral lesions, though younger children may need practice spitting out the solution.

Throughout the bath, maintain a calm, reassuring presence. The combination of warm water and baking soda often produces noticeable relief within five minutes, so your child may become more relaxed and cooperative as the bath progresses. Gently pat skin dry afterward with a soft towel—never rub—and apply a fragrance-free moisturizer if skin feels tight.

Strategic Bath Timing for Continuous Relief

hand foot and mouth disease symptom timeline chart

Schedule baking soda baths for hand foot mouth symptoms during the illness stages when they’ll have maximum impact. During peak symptom days (typically days two through four), administer baths twice daily—once in the morning to help your child face the day more comfortably, and again before bedtime to promote restful sleep. Many parents report their children sleep significantly better after evening baking soda baths due to reduced nighttime itching.

As symptoms begin improving and blisters start healing (usually around day five or six), reduce bathing frequency to once daily or every other day. This prevents unnecessary skin drying while still providing comfort during the healing phase. Avoid baking soda baths when your child has a high fever (above 102°F), as the temperature change could cause discomfort—focus on fever management first, then resume baths once temperatures stabilize.

When to Stop Bath Treatments

Discontinue baking soda baths once blisters have completely scabbed over and your child shows no signs of active discomfort. Continuing baths after the healing phase can unnecessarily dry the skin and potentially slow the final stages of recovery. Most children require baking soda baths for five to seven days, coinciding with the typical duration of active hand, foot, mouth symptoms.

Critical Warning Signs Beyond Home Treatment

While baking soda baths effectively manage typical hand, foot, and mouth symptoms, certain warning signs require immediate medical attention. Contact your pediatrician if your child develops fever lasting more than three days, shows signs of dehydration (decreased urination, dry mouth, no tears when crying), or experiences extreme lethargy that makes waking difficult.

Seek urgent care if your child cannot swallow enough fluids to stay hydrated, develops increasing redness or pus around blisters (indicating possible bacterial infection), or shows neurological symptoms like neck stiffness or difficulty breathing. Infants under six months with hand, foot, and mouth disease should always receive medical evaluation due to their heightened vulnerability to complications.

Preventing HFMD Transmission During Bath Time

Hand, foot, and mouth disease spreads easily through contact with blister fluid, making bath time a potential transmission point if proper precautions aren’t taken. Always clean the bathtub thoroughly with a disinfectant after each use, paying special attention to areas where blister fluid may have contacted surfaces.

Wash your hands thoroughly with soap and water immediately after assisting your child with the bath, and avoid sharing towels between infected and non-infected family members. While baking soda baths help dry blisters faster—which may slightly reduce viral shedding—they don’t eliminate contagion risk, so maintain strict hygiene practices throughout the illness period.

Complementary Comfort Measures for Complete Relief

Pair your baking soda bath for hand foot mouth routine with other effective symptom management techniques for comprehensive relief. Offer cold foods and beverages like chilled yogurt, smoothies, and popsicles (avoiding citrus flavors) to numb mouth pain. Keep your child’s nails trimmed short to prevent scratching that could introduce bacteria into broken blisters.

For children who find baking soda baths uncomfortable at first, try adding colloidal oatmeal to create a dual-action soothing bath that calms inflamed skin through multiple mechanisms. Apply cold compresses to particularly itchy areas between baths for additional relief. For pain management, acetaminophen generally provides better comfort than ibuprofen for hand, foot, and mouth symptoms.

Proactive Prevention for Future Outbreaks

While you can’t completely prevent hand, foot, and mouth disease exposure—especially in childcare settings—you can reduce severity and duration through preparation. Keep baking soda readily available so you can begin relief measures immediately when symptoms appear. Teach children proper handwashing techniques using the “20-second rule” (singing “Happy Birthday” twice while scrubbing).

Disinfect high-touch surfaces daily during outbreaks, and avoid sharing utensils, cups, or food even among family members. Remember that children remain contagious for up to two weeks after symptoms resolve, so maintain heightened hygiene practices throughout this period to protect others.


A properly administered baking soda bath for hand foot mouth symptoms delivers immediate, tangible relief when your child needs it most. By following these precise guidelines for preparation, timing, and complementary care, you transform a simple household item into a powerful comfort tool during this challenging childhood illness. Remember that while the baking soda bath soothes symptoms effectively, hand, foot, and mouth disease typically resolves completely within seven to ten days with proper supportive care—soon your child will be back to their happy, energetic self, and you’ll have gained valuable knowledge for handling future outbreaks with confidence.

How to Take a Baking Soda Bath for Yeast Infection Relief


Yeast infections affect millions of women annually, causing uncomfortable itching, burning, and irritation that can disrupt daily life. If you’re searching for immediate relief without waiting for prescription medications to take effect, you may have heard about baking soda baths as a soothing home remedy. This accessible solution uses a common kitchen staple to create a gentle, alkaline environment that counteracts the acidic conditions where yeast thrives. Understanding how to take a baking soda bath for yeast infection properly can provide significant symptom relief while complementing your primary treatment. In this guide, you’ll discover the exact measurements, soaking techniques, frequency recommendations, and safety precautions needed to maximize relief from this simple yet effective home remedy.

Proper Baking Soda Bath Measurements

baking soda bath measurement guide yeast infection

Getting the concentration right ensures your bath provides relief without causing additional irritation. Too little baking soda won’t effectively neutralize the acidic environment yeast thrives in, while too much could dry out delicate skin tissue. For a standard bathtub filled with warm water, use one to two cups of baking soda depending on symptom severity. If you’re experiencing your first yeast infection or have particularly sensitive skin, start with just one-half cup to gauge your skin’s reaction. Gradually increase to one cup for moderate symptoms, with two cups reserved for severe, persistent irritation that hasn’t responded to lower concentrations.

How to Dissolve Baking Soda Properly

The key to an effective baking soda bath lies in complete dissolution before soaking. Undissolved granules can cause micro-abrasions on sensitive skin, worsening irritation rather than relieving it. Begin filling your clean bathtub with warm water (never hot), then slowly sprinkle the measured baking soda into the running water stream. Alternatively, fill the tub first, then stir the baking soda vigorously with your hand until no granules remain visible. For those using a sitz bath or basin, dissolve two to four tablespoons in enough warm water to cover the affected area when seated. Wait several minutes after adding baking soda to ensure complete dissolution—you should see clear water with no visible particles before entering the bath.

Essential Bathing Technique for Maximum Relief

woman soaking in sitz bath yeast infection

The position you maintain during your soak significantly impacts how effectively the baking soda solution reaches all affected areas. Submerge the infected area completely in the solution, allowing the alkaline water to penetrate skin folds where yeast often hides. For full baths, sit comfortably with your lower body fully immersed. If using a sitz bath, sit with your hips and buttocks covered by the solution. A gentle rocking motion while seated helps the solution reach all crevices and folds that static positioning might miss.

Optimal Soaking Duration Guidelines

Timing your soak correctly balances maximum relief with skin safety. Ten minutes provides sufficient time for the baking soda to begin soothing surface symptoms, while 20 minutes allows deeper penetration to reduce inflammation. Start with 10 minutes if this is your first baking soda bath, especially if you have sensitive skin. Gradually increase to 15-20 minutes if you tolerate the initial shorter soaks well. Never exceed 20-30 minutes, as prolonged exposure to alkaline water can strip natural oils and potentially worsen irritation. Set a timer to avoid accidentally over-soaking—distraction from relief can make it easy to lose track of time.

Strategic Bathing Frequency for Symptom Management

daily routine schedule yeast infection treatment

The number of baking soda baths you take daily should match your symptom severity and skin sensitivity. During peak discomfort, two to three baths daily spaced evenly throughout the day (morning, afternoon, evening) provides consistent relief. This frequent schedule works best for the first three days of active symptoms when itching and burning are most intense. As symptoms begin improving, reduce to once daily maintenance baths. Some find continuing baths every other day for several days after symptoms disappear helps prevent recurrence and ensures complete healing.

Adjusting Frequency for Sensitive Skin

Those with delicate or reactive skin should modify standard recommendations to prevent over-drying. Start with just one bath every other day using a lower concentration (one-half cup per full bath). Monitor your skin’s response carefully—if you notice increased redness, tightness, or any new irritation after bathing, reduce frequency further to once every three days. Consider adding an extra tablespoon of baking soda to your next bath if symptoms aren’t improving after three days of consistent use at the lower frequency. Always listen to your body’s signals rather than adhering strictly to general recommendations.

Critical Safety Precautions You Must Follow

Certain health conditions require special consideration before attempting baking soda baths. Pregnant women should consult their healthcare provider before use, as changes in vaginal pH during pregnancy need professional monitoring. People with diabetes should exercise caution since elevated blood sugar levels can complicate yeast infections and affect healing. Those with kidney problems should seek medical advice, as sodium bicarbonate absorption through the skin could theoretically affect sodium balance, though this risk is minimal with standard topical use.

Recognizing Adverse Reactions

Know the signs that indicate you should discontinue baking soda baths immediately. Increased burning or stinging during the soak, worsening redness or swelling after bathing, or the development of new skin irritation all signal that the remedy isn’t working for your specific condition. If you experience hives, difficulty breathing, or widespread rash—signs of a potential allergic reaction—seek immediate medical attention. These reactions are rare but require prompt professional evaluation. When in doubt about any unusual symptoms, stop using the baths and consult your healthcare provider.

Post-Soak Drying Protocol for Lasting Relief

How you dry after your baking soda bath determines whether relief continues or symptoms quickly return. Gently pat (never rub) the affected area with a clean, soft towel to avoid irritating sensitive skin. Pay special attention to skin folds where moisture easily becomes trapped. For complete dryness, especially with vaginal yeast infections, use a hair dryer on the cool setting held several inches away from your skin. Move the dryer continuously to prevent concentrated heat in any one area. Allow the area to air-dry for 5-10 minutes before dressing to ensure no residual moisture remains.

Clothing Choices After Bathing

What you wear after your bath significantly impacts how long relief lasts. Choose loose-fitting cotton underwear and breathable clothing that won’t trap moisture against your skin. Avoid synthetic fabrics like nylon or polyester that create a warm, moist environment ideal for yeast growth. If possible, go without underwear for several hours after your bath to maximize air circulation. When selecting laundry detergent for underwear, choose fragrance-free, hypoallergenic formulas to prevent additional irritation from chemical residues.

When Baking Soda Baths Aren’t Enough

While baking soda baths provide excellent symptomatic relief, they don’t eliminate the underlying yeast infection. You must continue your prescribed or over-the-counter antifungal treatment as directed. Apply topical medications after your bath when skin is clean and dry, following product-specific timing instructions. If symptoms don’t improve within three days of consistent baking soda baths combined with antifungal treatment, contact your healthcare provider. Recurrent infections (four or more per year), severe pain, unusual discharge, or symptoms accompanied by fever require professional evaluation to rule out complications or misdiagnosis.

Complementary Strategies for Faster Healing

Enhance your baking soda bath results by making strategic dietary adjustments during your infection. Reduce sugar and refined carbohydrate intake since yeast feeds on sugar. Incorporate probiotic-rich foods like plain yogurt, kefir, and fermented vegetables to restore healthy bacterial balance. Stay well-hydrated to support your immune system’s natural defenses. Avoid potential irritants like scented soaps, bubble baths, feminine hygiene sprays, and douches that can disrupt your body’s natural balance and worsen irritation during healing.

Frequently Asked Questions Answered

How quickly will I feel relief from a baking soda bath? Most people experience reduced itching and burning within 10-20 minutes of soaking, with significant improvement after consistent use over one to three days. The alkaline environment soothes inflammation quickly, but complete symptom resolution requires treating the underlying infection with antifungal medication.

Can I combine baking soda with other bath ingredients? For yeast infection relief, stick to plain baking soda baths. Adding essential oils, Epsom salt, or apple cider vinegar can irritate sensitive skin and may counteract baking soda’s benefits. If you want additional relief, apply a gentle, fragrance-free moisturizer after your bath when skin is completely dry.

Is baking soda safe for recurrent yeast infections? Yes, baking soda baths can be safely used for recurrent infections as part of a comprehensive treatment plan. However, frequent recurrences (four or more per year) should be evaluated by a healthcare provider to identify underlying causes like uncontrolled diabetes or hormonal imbalances.

A properly executed baking soda bath provides significant, drug-free relief from yeast infection discomfort when used correctly alongside appropriate antifungal treatment. By following these specific guidelines for measurements, soaking technique, frequency, and post-bath care, you can transform this simple home remedy into an effective component of your symptom management strategy. Remember that persistent or worsening symptoms require professional medical evaluation—baking soda baths soothe symptoms but don’t replace necessary antifungal treatment for complete infection resolution. With careful application and realistic expectations, this accessible remedy offers welcome relief when you need it most.

Baking Soda Bath Benefits for Women


Nothing beats sinking into warm, soothing water after a long day, but adding a simple kitchen staple—baking soda—can transform your ordinary bath into a therapeutic sanctuary specifically beneficial for women’s health. This affordable, natural remedy has been passed down through generations for good reason: it addresses multiple concerns women face daily, from skin irritation to menstrual discomfort. Baking soda baths offer a chemical-free alternative to expensive spa treatments and commercial products, providing targeted relief without harsh ingredients. Whether you’re struggling with stress, skin issues, or intimate wellness concerns, understanding the genuine benefits of baking soda baths can help you reclaim your self-care routine with confidence.

The magic of baking soda baths lies in sodium bicarbonate’s unique chemical properties. When dissolved in warm water, it creates an alkaline environment that helps balance skin pH, neutralize acids, and soothe inflammation. For women specifically, this simple remedy offers remarkable advantages that align with common health concerns. Let’s explore how this humble household item can become your secret weapon for better health and wellbeing.

Transform Your Skin with Baking Soda Soaks

Baking soda baths deliver powerful skin benefits that address multiple concerns simultaneously. The gentle exfoliating properties help remove dead skin cells without the harsh abrasion of commercial scrubs, making it ideal for sensitive skin prone to conditions like eczema. Unlike chemical exfoliants that can strip natural oils, baking soda’s mild action leaves skin smooth without causing micro-tears or irritation.

The alkaline nature of baking soda neutralizes acidic compounds on your skin’s surface that accumulate from sweat, pollution, and skincare products. This pH-balancing effect significantly reduces body odor by neutralizing odor-causing bacteria without the aluminum found in many deodorants. Women experiencing skin irritation from conditions like chickenpox, allergic reactions, or insect bites find immediate relief when soaking in baking soda-infused water.

Regular baking soda baths also soften rough, calloused skin on feet and elbows—areas many women neglect but want to keep smooth. The mineral content draws moisture into your skin, creating a hydrating effect that leaves your entire body feeling supple. Many women discover that weekly baking soda baths eliminate the need for expensive body scrubs and lotions, saving money while achieving superior results.

Support Vaginal Health and pH Balance Naturally

vaginal pH balance illustration bacteria yeast

Maintaining proper vaginal pH is crucial for women’s intimate health, and baking soda baths offer gentle support for this delicate ecosystem. An alkaline bath creates an environment less hospitable to yeast overgrowth, providing symptomatic relief from itching and burning during yeast infections. Important note: Baking soda baths complement medical treatment but don’t replace prescribed antifungal medications for active infections.

For women prone to bacterial vaginosis, regular baking soda baths help maintain optimal vaginal pH levels (typically 3.8-4.5) by occasionally introducing an alkaline environment. This preventive approach can reduce the pH disruptions that allow harmful bacteria to proliferate. Once or twice weekly is sufficient to support vaginal health without disrupting the natural acidic barrier that protects against pathogens.

Baking soda baths prove especially beneficial for postmenopausal women experiencing vaginal dryness and pH shifts. The gentle nature of this remedy makes it suitable for women of all ages, from teenagers managing first-time yeast infections to older women navigating hormonal changes. Always consult your healthcare provider for persistent symptoms, but as a preventive measure, baking soda baths offer a low-risk, affordable option for intimate wellness.

Relieve Stress and Muscle Tension Effectively

Women’s bodies carry unique physical and mental tensions that baking soda baths help dissolve. The warm water dilates blood vessels and improves circulation, while baking soda softens the water, reducing skin surface tension for deeper muscle relaxation. This combination proves particularly effective for menstrual cramps, lower back pain, and tension from desk work.

The sodium in baking soda supports nerve function and muscle contraction when absorbed through the skin during your soak. Women who exercise regularly or perform physical labor find baking soda baths accelerate recovery by reducing lactic acid buildup. The magnesium content, though minimal, contributes to muscle relaxation—making this an excellent recovery ritual after intense workouts.

Beyond physical relief, the ritual of a baking soda bath delivers significant mental health benefits. The warm water triggers endorphin release, while dedicated quiet time provides space for mindfulness. Many women report improved sleep quality after regular baking soda baths, as the relaxation effects extend well beyond the bath itself. In our busy lives, this simple self-care practice reminds us to prioritize wellbeing.

Reduce Inflammation and Soothe Irritation

inflammation pathways diagram autoimmune response

Inflammatory conditions disproportionately affect women, from autoimmune disorders to skin conditions. Baking soda’s anti-inflammatory properties make it valuable for managing these issues at home. When dissolved in bathwater, it creates a solution that reduces swelling and calms irritated tissues, providing relief for arthritis, gout, and inflammatory skin eruptions.

Women with conditions like lupus or rheumatoid arthritis often experience flare-ups causing significant discomfort. While baking soda baths don’t replace medical treatment, they serve as an effective complementary therapy that eases symptoms and improves daily functioning. The warmth combined with baking soda’s soothing properties relaxes stiff joints, making movement easier throughout the day.

For women dealing with hemorrhoids—common during and after pregnancy—baking soda baths offer gentle relief. Adding a quarter to half cup of baking soda to warm bathwater creates a soothing Sitz bath that cleanses while reducing inflammation. Healthcare providers frequently recommend this first-line treatment before resorting to medications, confirming baking soda’s therapeutic credibility.

How to Prepare Your Perfect Baking Soda Bath

Creating an effective baking soda bath requires attention to proper ratios, temperature, and duration. For a standard bathtub, use one to two cups of baking soda, which creates an alkaline environment without making water too slippery. Adjust based on tub size—smaller baths or foot soaks need just a quarter to half cup.

Water temperature significantly impacts effectiveness. Aim for lukewarm to warm water (98-102°F), which promotes circulation without stripping natural oils. Water that’s too hot causes dryness, while cooler water provides fewer therapeutic benefits. Women with cardiovascular conditions should use caution with very warm water.

Soak for 15-20 minutes to maximize benefits without causing dryness. First-time users should start with 10 minutes, gradually increasing duration. Women with sensitive skin should limit initial baths to 10-15 minutes. Always add baking soda to running water and stir well for even distribution—undissolved particles can irritate sensitive skin.

Maximize Benefits with Strategic Additions

While baking soda alone offers impressive benefits, combining it with other natural ingredients enhances therapeutic effects. Add essential oils like lavender or eucalyptus for aromatherapy benefits, but always dilute properly in a carrier oil first to prevent skin irritation.

Apple cider vinegar provides balancing effects when used separately from baking soda baths. Alternate between baking soda baths and apple cider vinegar baths throughout the week for comprehensive pH support—never combine them simultaneously as the chemical reaction produces irritating carbon dioxide.

Epsom salt combined with baking soda doubles muscle-relaxation benefits. Add one cup of epsom salt to your baking soda bath for deep muscle recovery and skin health. For extremely dry or sensitive skin, colloidal oatmeal added to the bath provides additional soothing properties.

Common Mistakes That Reduce Effectiveness

Many women unintentionally diminish baking soda bath benefits through simple errors. Using more than two cups for a standard tub disrupts the skin’s moisture barrier, causing dryness—especially problematic for sensitive skin. Soaking beyond 30 minutes can paradoxically dehydrate your skin as warm water eventually draws moisture out.

Failing to fully dissolve baking soda before bathing creates gritty water that can scratch sensitive areas. Always stir baking soda into running water for even distribution. Using very hot water exacerbates inflammation, counteracting baking soda’s soothing properties.

Perhaps the most common mistake is expecting instant results from a single bath. Baking soda baths work best as consistent practices integrated into your wellness routine. Women seeking relief from chronic conditions should commit to regular bathing over several weeks before evaluating effectiveness. Patience and consistency yield the best outcomes.

When to Consult a Healthcare Provider

While baking soda baths offer numerous benefits, they’re not substitutes for professional medical care. Women with persistent yeast infections, bacterial vaginosis, or urinary tract infections need medical treatment rather than relying solely on baking soda baths. These conditions often require prescription medications that home remedies cannot replace.

Skin conditions that don’t improve—or worsen—with regular baking soda baths warrant dermatological consultation. Persistent rashes, unexplained itching, or widespread symptoms may indicate underlying conditions needing medical diagnosis. Similarly, women with chronic pain should discuss baking soda baths as complementary therapy with their healthcare providers.

Seek immediate medical attention for signs of allergic reaction after a baking soda bath, including widespread redness, swelling, or breathing difficulties. For most women, however, baking soda baths remain a safe, affordable wellness practice when used appropriately.

Baking soda baths represent one of the simplest yet most versatile wellness practices available. By understanding proper preparation methods, recognizing safety considerations, and maintaining realistic expectations, you can harness this affordable remedy to enhance your health. Whether used occasionally for relaxation or regularly as part of your wellness routine, baking soda baths offer a gentle, natural way to care for both body and mind.

How to Make a Baking Soda Bath: Easy Steps


Feeling frustrated with dry, itchy skin that won’t calm down no matter what you try? Learning how to make a baking soda bath could be your solution. This simple, affordable treatment has soothed irritated skin for generations and requires nothing more than a common kitchen staple. Whether you’re battling eczema flare-ups, psoriasis scales, or just want to soften rough patches after a long day, a properly prepared baking soda bath delivers immediate relief you can feel within minutes. In this guide, you’ll discover exactly how to make a baking soda bath that maximizes therapeutic benefits while avoiding common mistakes that reduce effectiveness.

Unlike complicated spa treatments or expensive skincare products, a baking soda bath works with your skin’s natural chemistry to restore balance and comfort. The magic happens when sodium bicarbonate dissolves in warm water, creating an alkaline environment that neutralizes irritating acids on your skin’s surface. When you know how to make a baking soda bath correctly, you’ll experience reduced itching, softer skin, and easier scale removal without harsh scrubbing. This guide walks you through every step—from selecting the right baking soda to applying moisturizer afterward—so you get optimal results from your very first soak.

Why Baking Soda Baths Work for Skin Relief

skin pH scale illustration sodium bicarbonate

The Science Behind Sodium Bicarbonate Soaks

Baking soda baths create therapeutic benefits through simple chemistry that works with your skin rather than against it. When you dissolve pure sodium bicarbonate in warm water, it forms a mildly alkaline solution that helps neutralize acidic compounds irritating your skin. This pH-balancing effect reduces inflammation and discomfort while softening hard water minerals that can worsen dryness. Unlike harsh chemical treatments, baking soda works gently with your skin’s natural processes to provide immediate relief you can feel within minutes of soaking.

The alkaline environment created by baking soda also breaks down the bonds between dead skin cells, making scales easier to remove without aggressive scrubbing. This gentle exfoliation occurs naturally during your soak, preventing the micro-tears that physical scrubs often cause. For conditions like ichthyosis or psoriasis where rapid skin cell turnover creates uncomfortable buildup, this natural loosening action provides significant relief without damaging healthy skin underneath.

Critical distinction: Always use pure sodium bicarbonate, not baking powder, which contains added acids and fillers that can irritate sensitive skin. Check your product label to confirm sodium bicarbonate is the only ingredient—any added fragrances or anti-caking agents could trigger reactions in compromised skin barriers.

Essential Tools for Your Baking Soda Bath

food grade baking soda vs industrial baking soda comparison

Selecting Quality Sodium Bicarbonate

Choosing the right baking soda makes all the difference in your bath’s effectiveness. Food-grade baking soda from grocery stores works perfectly for therapeutic bathing and costs significantly less than specialty products. Look for containers labeled simply as “baking soda” or “sodium bicarbonate” without additional descriptors like “freshness” or “odor control,” which often indicate added chemicals. Pharmaceutical-grade options from pharmacies offer identical purity but at higher prices—perfect if you prefer medical-grade assurance.

Avoid products with these red flags:
– Added fragrances (even “natural” scents)
– Anti-caking agents like calcium silicate
– “Enhanced” formulas with extra ingredients
– Containers that show moisture damage or clumping

Store your baking soda in an airtight container away from humidity to maintain its effectiveness. Properly stored, it remains potent for up to 18 months—though clumping indicates moisture exposure that could affect dissolution in your bath water.

Perfect Water Temperature Setup

Getting the water temperature right prevents common mistakes that sabotage your baking soda bath results. Fill your tub with lukewarm water—comfortable to touch without causing redness—never hot. Water that feels warm but not hot (approximately body temperature) provides optimal therapeutic benefits without stripping your skin’s natural oils. Test the water with your inner wrist, the most sensitive skin area, to ensure it won’t exacerbate irritation.

For children’s baths, fill to 8-12 inches depth rather than a full tub. Adults should aim for water deep enough to cover affected areas while allowing comfortable sitting. If the water cools during preparation, add small amounts of warm water rather than starting with excessively hot water that requires cooling down.

Pro tip: Keep a thermometer accessible until you master temperature judgment. Ideal bathing temperature falls between 92-98°F (33-37°C)—significantly cooler than standard bath temperatures.

Step-by-Step Baking Soda Bath Preparation

Precise Measurement for Maximum Effectiveness

Measuring correctly ensures your bath delivers therapeutic benefits without waste. For standard adult baths (half-full tub), use exactly 3 heaping tablespoons (45g) of pure sodium bicarbonate. Children’s baths require proportionally less—start with 1 tablespoon (15g) for small children and adjust based on response. Using too little reduces effectiveness, while excessive amounts create wasteful alkalinity without additional benefits.

Add baking soda to running water for optimal dissolution, or pour directly into filled tub then stir thoroughly for 30 seconds. Undissolved granules sitting at the bottom can cause localized irritation when they contact skin during bathing. If using a kitchen scale for precision, measure 15g per tablespoon to ensure consistency across baths.

Warning: Never add baking soda while already in the tub—this creates uneven concentration pockets that may irritate sensitive skin.

Optimal Soaking Duration and Technique

Timing your soak properly prevents the common mistake of over-soaking that leads to rebound dryness. Limit your bath to 10-15 minutes—enough time for therapeutic benefits without compromising your skin barrier. First-time users should start with 10 minutes, gradually increasing only if skin responds well. Longer soaks don’t provide additional benefits and often worsen dryness, especially in winter months.

During your soak:
– Relax without aggressive scrubbing
– Gently move limbs to distribute solution
– Avoid splashing near eyes (baking soda solution causes stinging)
– Monitor skin for any unusual reactions

Exit the tub immediately if you experience increased burning or redness. These signals indicate your skin needs less frequent baths or lower concentration.

Post-Bath Skincare Protocol

occlusive vs humectant moisturizers chart

Critical Moisturizing Window

The 3-minute period after patting dry represents your most important skincare opportunity. Your skin absorbs moisturizer 10x more effectively when slightly damp from the alkaline bath water. Apply fragrance-free ointment-style moisturizer generously to all treated areas, focusing on persistently dry patches. Occlusive products like petroleum jelly create the best moisture barrier, though thick creams work well for those who dislike greasy feel.

Reapply moisturizer every 2-3 hours for the first day after your bath, especially after handwashing or water exposure. This frequent application locks in the hydration benefits and extends relief between baths. Keep travel-sized moisturizer in your bag for convenient daytime touch-ups.

Pro tip: Warm your moisturizer between palms before application—this increases absorption and creates a more comfortable skin sensation.

Gentle Scale Removal Method

For conditions involving significant scaling, follow this safe removal protocol after your bath:
1. Pat skin dry with soft microfiber towel
2. Apply moisturizer and wait 5 minutes
3. Use clean fingertips with light pressure in circular motions
4. Work on one small area at a time (palm-sized)
5. Stop immediately if you see redness or feel discomfort

Never pick, scrape, or use abrasive tools on softened skin—this causes micro-tears that worsen conditions. Let the baking soda bath do most of the work over multiple sessions rather than forcing immediate results.

Safety Guidelines You Must Follow

Eye Protection Protocol

Prevent accidental eye exposure with these simple steps:
– Keep face away from splashing water
– Teach children to keep eyes closed during bathing
– Have clean water nearby for immediate flushing
– Use a washcloth barrier if bathing infants

If baking soda solution contacts eyes, flush immediately with lukewarm water for 5-10 minutes. Seek medical attention if irritation persists beyond 30 minutes. This rare reaction typically resolves quickly with proper flushing but shouldn’t be ignored.

Frequency Optimization Strategy

Determine your ideal bathing frequency through this simple test:
– Start with 2 baths weekly for 2 weeks
– Assess skin condition improvement
– Increase to 3 baths weekly if beneficial
– Monitor for signs of overuse (tightness, increased dryness)

Most users find optimal results at 2-3 baths weekly, though severe scaling conditions may require daily baths temporarily. Always pair increased frequency with enhanced moisturizing—never bathe more often without adjusting your skincare routine accordingly.

Troubleshooting Common Problems

When Your Bath Isn’t Working

If you don’t notice improvement after 3-4 properly prepared baths, check these common issues:
– Water temperature too hot (causes rebound dryness)
– Inconsistent bathing schedule (needs regular use)
– Insufficient moisturizing afterward (critical step)
– Using impure baking soda with additives

Adjust one variable at a time to identify what’s blocking results. Most users see noticeable improvement within 2 weeks of correct implementation—patience with the process yields better long-term outcomes than frequent protocol changes.

Managing Skin Sensitivity

Some users experience temporary increased sensitivity during initial baths. If this happens:
– Reduce concentration to 2 tablespoons temporarily
– Shorten soak time to 8 minutes
– Increase moisturizer application frequency
– Space baths 3 days apart initially

This adjustment period typically lasts 1-2 weeks as skin adapts to the alkaline environment. Discontinue use and consult your dermatologist if sensitivity worsens despite these modifications.

Maximizing Long-Term Benefits

Building a sustainable baking soda bath routine requires consistency and attention to seasonal changes. Track your skin’s response in a simple journal noting:
– Bath frequency and concentration
– Skin condition before/after
– Moisturizer type and application frequency
– Environmental factors (weather, stress)

Adjust your routine quarterly based on these observations—winter typically requires more frequent moisturizing while summer may allow reduced bath frequency. Consult your dermatologist annually to ensure your baking soda bath routine remains appropriate for your evolving skin needs. When you master how to make a baking soda bath correctly, it becomes a powerful, natural component of your lifelong skin health strategy.

« Older posts Newer posts »