Smart Bathroom Solutions: Reviews, Tips & Expert Maintenance Guides

Author: bathroom27 (Page 18 of 26)

Spiritual Bath Cleansing Guide: Purify Your Energy


Have you ever stepped out of the shower feeling physically clean but spiritually drained? That heavy, stuck sensation when negative energy clings to you despite regular hygiene is exactly why spiritual bath cleansing has remained a cornerstone practice across Caribbean, Latin American, and African spiritual traditions for centuries. Spiritual bath cleansing represents a targeted ritual practice that goes beyond physical cleanliness to remove curses, hexes, and energetic blockages that standard bathing can’t address. When done correctly with the right formulations, these ritual baths can reset your spiritual baseline within 20 minutes—without requiring extensive knowledge of complex spiritual systems. In this guide, you’ll discover exactly which spiritual bath products deliver proven results, how to perform an effective cleansing ritual, and common mistakes that block your bath’s effectiveness.

The market for spiritual cleansing products has grown substantially as more people seek traditional approaches to energy hygiene. Products like herb bath formulations, specialized floor washes, and spiritual colognes each serve distinct purposes in the practitioner’s repertoire. From the popular Uncrossing Herb Bath that has earned a 4.6-star rating from over 700 customers to specialized offerings like War Water for protection work, the variety allows practitioners to address specific spiritual needs with targeted formulations. Understanding the unique properties of each product category ensures you select the most appropriate tools for your spiritual goals.

Why Your Spiritual Bath Isn’t Removing Negative Energy (And How to Fix It)

Many practitioners report spiritual baths “not working” simply because they’re using them incorrectly. The most common mistake is treating spiritual bath products like regular soap rather than ritual tools requiring specific application methods.

Common Mistakes That Block Spiritual Bath Effectiveness

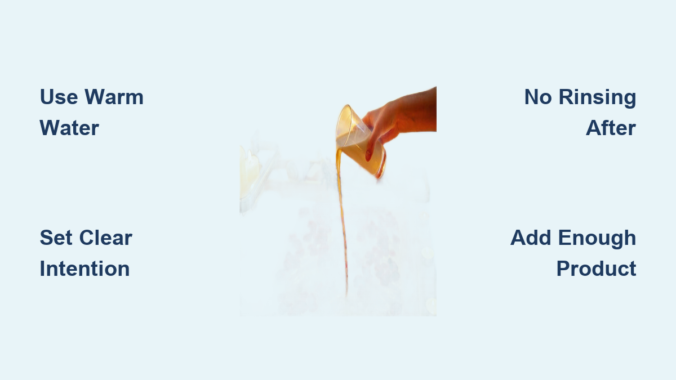
Using hot water instead of warm water destroys the delicate botanical properties in spiritual bath formulations. Adding insufficient product quantity (most require at least 2-3 tablespoons) reduces effectiveness. The biggest error? Not setting clear intentions before bathing—spiritual cleansing requires focused mental energy to direct the ritual’s purpose. Finally, rinsing off with regular soap immediately after your spiritual bath counteracts the cleansing work you’ve just performed.

How to Properly Prepare Your Bathwater for Maximum Cleansing

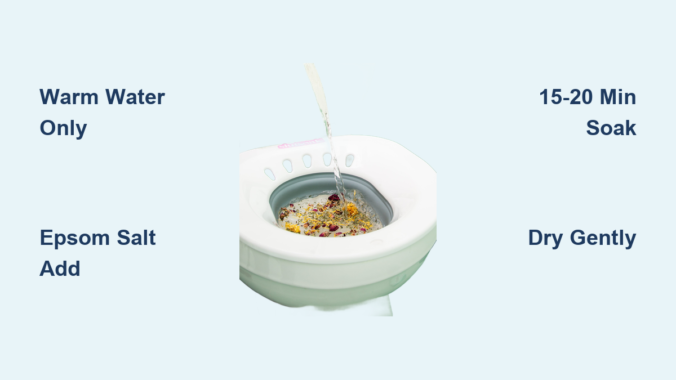
Fill your tub with warm (not hot) water and add 3-4 tablespoons of your chosen spiritual bath product. Allow the water to sit for 5 minutes while you verbally state your intention (e.g., “I release all negative energies and curses”). As you enter the bath, pour water over your head starting from the crown and moving downward—never upward—as this symbolically washes negativity away from your body. Soak for 15-20 minutes while maintaining your intention, then air dry without rinsing to preserve the spiritual residue.

Top 3 Spiritual Bath Formulas for Immediate Energy Purification

Uncrossing Herb Bath Spiritual Cleansing Body Wash packaging

Not all spiritual bath products deliver equal results. Based on customer satisfaction metrics and traditional efficacy, these three formulas consistently deliver powerful cleansing.

Uncrossing Herb Bath: Your First Line of Defense Against Curses

The Uncrossing Herb Bath Spiritual Cleansing Body Wash (4.6 stars from 723 reviews) specifically targets hex removal, reverse spell work, and jinx reversal. Priced at $12.95 for 4 ounces, this formulation combines multiple botanicals traditionally associated with spiritual cleansing in folk magic practices. Use this when you suspect curses, experience unexplained misfortune, or feel spiritually “heavy” after negative encounters.

Anamu Bath: Caribbean-Style Cleansing for Deep Spiritual Blockages

Anamu (Petiveria alliacea) holds significant importance in Caribbean and Latin American spiritual traditions for protection and uncrossing. The Anamu Bath and Floor Wash (4.4 stars) serves dual functionality as both a bath additive and floor wash. Its 8-ounce gel formulation ($12.95) works particularly well for deep spiritual blockages that standard cleansing baths don’t resolve.

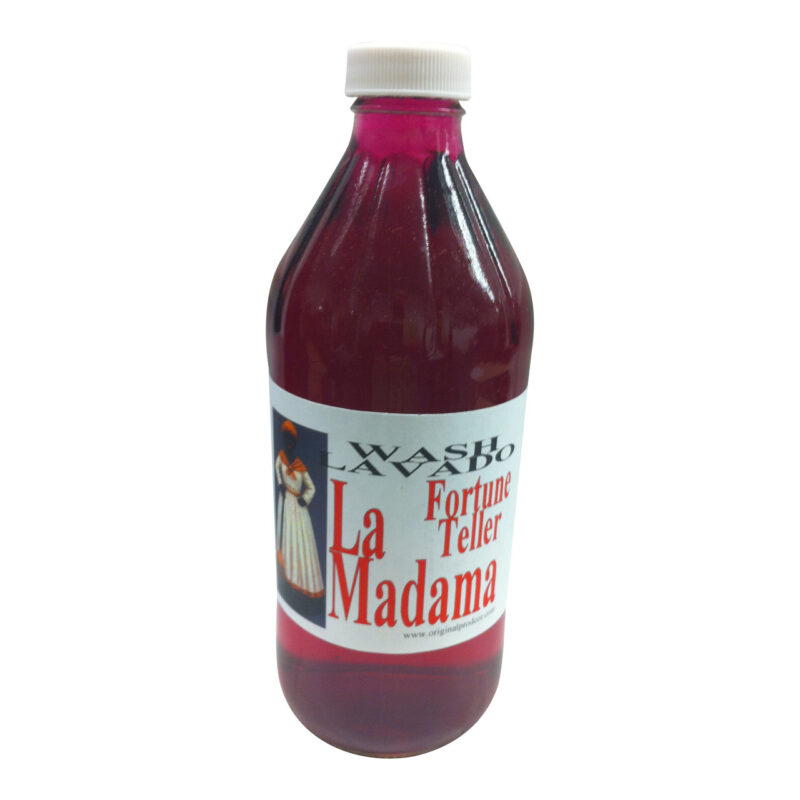
La Madama Floor Wash: Dual-Purpose Cleansing for Spaces and Self

The La Madama Floor Wash (4.4 stars from 238 reviews) offers exceptional value at $15.95 for 16 ounces. While designed as a floor wash for negative energy protection, practitioners regularly use diluted versions for personal cleansing. La Madama’s association with luck and material blessings makes this particularly effective when financial concerns accompany your spiritual heaviness.

Step-by-Step Guide to Performing an Effective Spiritual Bath Ritual

Pre-Bath Spiritual Preparation: Setting Your Intention

Begin by lighting a white candle to represent purification. Verbally state your specific intention (e.g., “I remove all negative energy from my aura”). Some practitioners write their intention on paper and burn it before bathing. This mental preparation activates the spiritual properties in your bath product.

The Exact Bathing Process for Complete Energy Cleansing

Add your spiritual bath product to warm water and let it sit for 5 minutes. As you enter the bath, pour water over your head starting from the crown moving downward—never upward. Soak for 15-20 minutes while visualizing negative energy washing away. Focus on problem areas (neck for communication issues, chest for emotional blockages). Never rinse off—air dry to preserve the protective residue.

When to Use Floor Washes vs. Body Baths for Spiritual Cleansing

La Madama Floor Wash application demonstration

How to Transform Floor Wash Products into Personal Cleansing Rituals

Dilute floor wash products like La Madama or Big Al Bath at a 1:3 ratio (one part floor wash to three parts water) for personal bathing. These larger-format products ($15.95 for 16 ounces) offer economical value for regular spiritual maintenance. Floor washes often contain more concentrated botanical blends ideal for intensive cleansing sessions.

Best Areas to Clean With Floor Wash for Maximum Protection

Focus on entry points where negative energy enters: front/back doors, windows, and stairways. Apply floor wash in a clockwise motion while stating your protection intention. For comprehensive cleansing, start at the back of your home and work toward the front door to push negative energy out.

Spiritual Cologne Protection: Your 24/7 Energy Shield

Go Away Evil Cologne bottle and application points

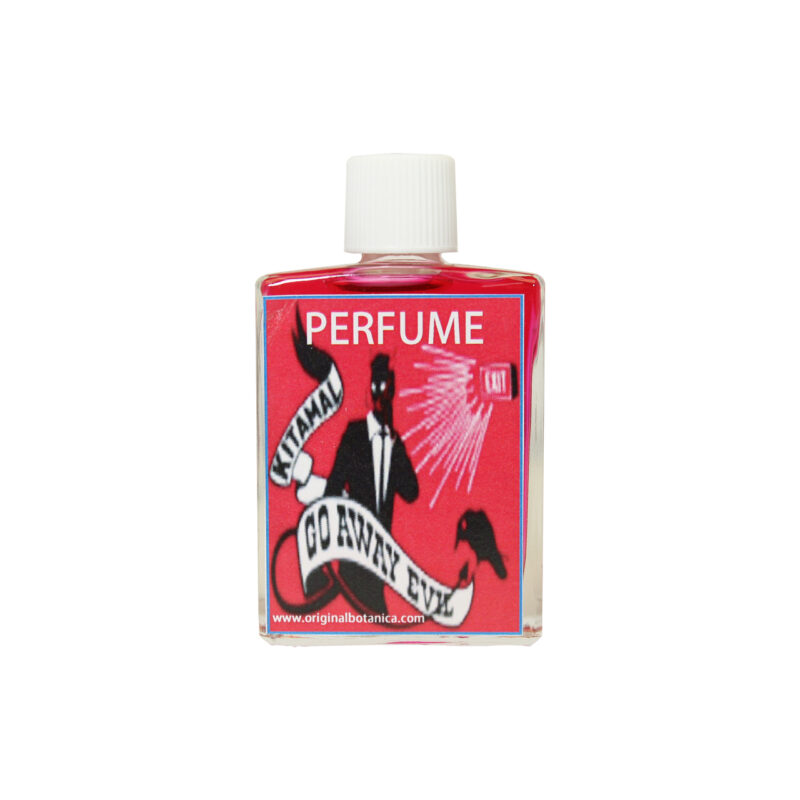
Go Away Evil Cologne: Creating an Instant Protective Barrier

The Go Away Evil Cologne (5.0 stars) offers exceptional value at $11.95 for 50 fluid ounces ($0.24 per ounce). Apply to pulse points after your spiritual bath for continuous protection. Spray in rooms needing cleansing or use to anoint candles. Its straightforward naming clearly communicates its protective purpose—ideal for practitioners seeking unambiguous spiritual defense.

War Water: Defending Against Spiritual Attacks Before They Happen

War Water Spiritual Cleansing Water (4.3 stars) specifically targets enemy work and spiritual warfare. At $11.95 for 8 ounces, this historically significant formulation in hoodoo traditions repels enemies and neutralizes hostile spiritual attacks. Use before challenging situations or when sensing targeted negativity.

Prosperity Bath Rituals: Attracting Money While Cleansing

Abundance Big Al Bath ingredients and packaging

Big Al Bath Formulas: Removing Financial Blockages in 20 Minutes

The Abundance Big Al Bath (4.5 stars) combines spiritual cleansing with prosperity attraction. Its 16-ounce liquid formulation ($15.95) addresses both removal of obstacles to prosperity and active attraction of beneficial financial energies. Use when financial concerns accompany your spiritual heaviness.

Fast Luck Cologne: Instant Money Attraction for Urgent Needs

For time-sensitive financial situations, Fast Luck Cologne provides rapid spiritual intervention. This 50-ounce cologne ($11.95) works when traditional slower workings won’t suffice—ideal before job interviews, court cases, or important meetings where immediate results are needed.

How to Choose the Right Botanicals for Your Spiritual Bath

Rue (Ruda) vs. Spearmint: Which Cleansing Herb Suits Your Needs?

Rue (Ruda) provides powerful purification and uncrossing capabilities across Mediterranean and Latin American practices. The Ruda Rue Cologne (5.0 stars) connects practitioners to centuries-old traditions for spiritual defense. Spearmint offers a gentler approach with associations for clarity and positive energy—the Spearmint Bath has achieved a perfect 5.0 rating and is suitable for regular maintenance cleansing rather than intensive uncrossing work.

Why Anamu Is Essential for Caribbean and Latin American Traditions

Anamu (Petiveria alliacea) serves as a cornerstone ingredient in Caribbean and Latin American spiritual traditions, valued for its powerful protective and uncrossing properties. Products featuring anamu connect practitioners to generations of traditional use for spiritual cleansing, protection against negative influences, and clearing of spiritual blockages. The distinctive properties of this botanical make it particularly effective for practitioners working within or drawing from these cultural traditions.

Timing Your Spiritual Bath for Maximum Results

Best Moon Phase for Banishing Negative Energy

Traditional practices suggest performing cleansing baths during specific lunar phases, with full moons ideal for general cleansing and dark moons suited for banishing work. Practitioners also recommend cleansing after exposure to negative environments, conflicts with difficult individuals, or whenever feeling spiritually “heavy” or “off.” The waxing moon phase works best for prosperity-focused baths like the Big Al formulations.

Troubleshooting Common Spiritual Bath Problems

“My Bath Isn’t Working”: 5 Reasons and Fixes

  1. Water temperature too hot – Destroys botanical properties; use warm water only
  2. Insufficient product quantity – Most require 3-4 tablespoons, not a few drops
  3. No clear intention setting – Verbally state your purpose before bathing
  4. Rinsing off afterward – Air dry to preserve the spiritual residue
  5. Using the wrong product for your need – Match product purpose to your specific situation

How to Know When You Need Multiple Cleansing Sessions

If you’re dealing with persistent negative patterns (repeated financial problems, ongoing health issues, or consistent relationship conflicts), you likely need multiple cleansing sessions. Start with weekly baths for 3-4 weeks, then switch to monthly maintenance. For severe cases like suspected curses, combine Uncrossing Herb Bath with War Water protection for comprehensive results.

Maintaining Spiritual Cleanliness Between Major Baths

Daily Protection Rituals That Take Less Than 2 Minutes

Apply spiritual cologne to pulse points each morning. Spray Go Away Evil in your workspace. Keep a small bottle of Uncrossing Herb Bath in your shower for quick weekly cleanses. These micro-rituals prevent negative energy accumulation that leads to major blockages.

Weekly Maintenance Routines to Prevent Energy Buildup

Once weekly, add 1 tablespoon of Spearmint Bath to your shower routine. Spearmint’s associations with clarity make it ideal for light maintenance cleansing between intensive uncrossing sessions. This 5.0-star rated product provides a refreshing approach to regular spiritual hygiene.

Spiritual bath cleansing offers powerful tools for maintaining spiritual clarity and protection. Start with proven products like the Uncrossing Herb Bath for general cleansing, then expand to specialized formulations as your practice develops. Remember that consistency matters more than complexity—regular spiritual hygiene prevents the need for intensive cleansing sessions. With the right products and proper technique, you can maintain spiritual cleanliness that supports every area of your life.

How to Clean Jacuzzi Jets in Bathtub


Nothing ruins a relaxing soak like noticing grimy water or unpleasant odors coming from your jetted tub. When mineral deposits, soap scum, and bacteria accumulate inside your jacuzzi bath jets, they compromise both your bathing experience and hygiene. Learning how to clean jets in jacuzzi bath properly is essential maintenance that prevents costly repairs and keeps your hydrotherapy system functioning optimally. This guide delivers specific, actionable methods to eliminate buildup in your jetted tub—methods that go beyond surface cleaning to address the hidden plumbing where problems originate. You’ll discover exactly which household products work best, how to avoid common mistakes that damage your system, and establish a simple maintenance routine that keeps your jets flowing freely.

Gather Jetted Tub Cleaning Supplies Before Starting

Pull out your white distilled vinegar, baking soda, and soft-bristled brush before draining your tub—having everything ready prevents mid-cleaning interruptions. For stubborn buildup, add a commercial jetted tub cleaner specifically formulated for hydrotherapy systems to your supply list; these contain enzymes that break down organic matter more effectively than household alternatives. Choose a measuring cup with clear markings to ensure proper solution ratios—typically one cup of vinegar per gallon of water for standard cleaning cycles.

Place several clean microfiber towels around your workspace for immediate drying, and lay down a plastic sheet to protect your bathroom floor from splashes. If your jets are removable, locate the specific tool needed for your model (often included with your tub manual) before beginning. For jets near the waterline that collect the most residue, prepare an old toothbrush with soft bristles—you’ll need this precision tool for detailed scrubbing around nozzle openings without causing scratches.

Prepare Your Jacuzzi Tub for Effective Jet Cleaning

Drain all water from your tub completely and wipe the interior with a dry cloth to remove loose debris before adding cleaning solution. Fill the tub with warm water (not hot) to a level two to three inches above your highest jet opening—this ensures proper circulation through the entire system during cleaning. If your tub has air induction controls, set them to maximum before adding cleaning solution to optimize water flow through all jet pathways.

Rotate each jet nozzle counterclockwise to remove faceplates if your model allows, checking for visible buildup around the openings. Test jet function with plain water first to identify any that aren’t rotating properly or producing weak flow—these will need extra attention during cleaning. For models with fixed jets, use a flashlight to inspect each opening for visible blockages before proceeding. Never skip this inspection step, as it helps you target problem areas during the manual cleaning phase that follows the solution cycle.

Run Effective Vinegar Cleaning Cycle for Jet Tubing

Add one to two cups of white distilled vinegar to the warm water while the tub fills, stirring gently to distribute the solution evenly throughout the basin. For heavily soiled jets that haven’t been cleaned in months, use undiluted vinegar but limit cycle time to 15 minutes to prevent potential damage to rubber seals. Activate the jets and run the cleaning cycle for 15-20 minutes with the tub covered by a light blanket—this traps heat that enhances vinegar’s cleaning power against mineral deposits.

Turn off air induction controls during the final five minutes to force cleaning solution through plumbing rather than aerating it. Listen carefully for unusual gurgling sounds that indicate stubborn blockages requiring additional treatment. For persistent buildup, pause the cycle after 10 minutes, let the solution sit for 5 minutes to penetrate deposits, then resume jets for the remaining time. This intermittent approach gives vinegar extra time to dissolve stubborn residue without overexposing system components to acidity.

Manually Scrub Each Jet Nozzle for Complete Cleaning

jacuzzi jet nozzle cleaning brush technique

Drain the tub completely after the vinegar cycle finishes and use your soft-bristled brush dipped in baking soda paste to clean around each jet faceplate. Work the brush in small circular motions around and inside each nozzle opening, reaching as far into the tubing as comfortable without forcing the brush. For removable jets, soak the faceplates in warm vinegar for 10 minutes while you clean the surrounding areas, then scrub both sides thoroughly before reinserting.

Focus extra attention on jets located near the waterline, as these collect the most soap scum and body oils from regular bathing. Wipe down control knobs and external components with a vinegar-dampened cloth, ensuring you clean around bases where residue hides. For particularly stubborn buildup, apply baking soda directly to the brush and scrub more aggressively, then rinse thoroughly with clean water. Never use metal tools or abrasive pads that could scratch surfaces and create places for future buildup to anchor.

Flush and Dry Jet System Completely

Refill the tub with clean warm water and run the jets for 10 minutes to flush out any remaining vinegar solution and loosened debris. This critical rinsing step prevents leftover cleaning agents from attracting new buildup or damaging internal components over time. Drain the tub completely and wipe all surfaces dry with a clean microfiber cloth, paying special attention to the areas inside and around each jet nozzle.

Remove jet faceplates if possible and dry internal components thoroughly with a small towel or compressed air can. Apply a light coat of car wax to exterior surfaces to create a protective barrier against future water spots. Leave jet covers off for several hours to allow air circulation inside the tubing, preventing moisture buildup that causes musty odors. Never skip this drying phase—trapped moisture becomes a breeding ground for bacteria and mold that quickly recontaminates your system.

Establish Monthly Maintenance Routine for Clean Jets

jacuzzi maintenance schedule checklist

Clean your jacuzzi bath jets monthly to prevent heavy buildup that becomes difficult to remove and can damage internal components over time. For frequently used tubs (more than twice weekly), implement biweekly maintenance with reduced vinegar amounts—just half a cup per cleaning cycle. Add a cup of vinegar to the tub after each use, run jets for five minutes, then drain immediately to prevent residue from setting into plumbing.

Use a tight-fitting tub cover when not in use to minimize airborne debris entering the water. Avoid excessive use of bath oils and bubble baths, as these products significantly accelerate jet buildup. Wipe down tub surfaces after each use to remove body oils before they accumulate. Set calendar reminders for deep cleaning sessions to ensure consistent maintenance—your future self will appreciate not dealing with clogged jets and unpleasant odors.

Prevent Recurring Jet Problems with Smart Practices

Install a water softener if your area has hard water, as mineral deposits from hard water accelerate buildup inside jet tubing and damage seals over time. Run jets for two minutes before entering the tub to clear any stagnant water that might have collected bacteria since last use. Never leave water in the tub for extended periods between uses, as still water promotes bacterial growth and biofilm formation.

Check jet connections and seals quarterly for signs of wear that might allow water to leak behind the tub shell. Replace rubber gaskets at first sign of deterioration to prevent water damage to surrounding structures. Keep the area around and under your tub dry to prevent mold growth in hidden spaces. Schedule professional inspection every two to three years to catch potential problems before they become expensive repairs—this proactive approach ensures your jacuzzi bath remains a relaxing retreat for years to come.

Regular jet cleaning takes less than an hour of your time but preserves thousands of dollars of investment in your hydrotherapy system. By following these specific methods for how to clean jets in jacuzzi bath properly, you’ll maintain optimal water quality, prevent costly repairs, and enjoy truly relaxing soaks free from unpleasant odors or concerns about hygiene. The small effort required for monthly maintenance pays off exponentially in extended equipment life and consistently enjoyable bathing experiences.

How to Clean Jacuzzi Bath: Quick Steps


Your jetted bathtub delivers luxurious, spa-like relaxation right in your bathroom, but without proper care, that investment can quickly become a breeding ground for bacteria and mineral buildup. Unlike standard tubs, jacuzzi bath cleaning requires specialized attention to the internal plumbing and jet mechanisms that create your soothing hydrotherapy experience. Over time, soap residue, body oils, and mineral deposits accumulate inside the closed-loop system, causing clogged jets, reduced water pressure, and potentially unsanitary conditions. This guide reveals exactly how to maintain your jetted tub so it continues delivering clean, powerful jets for years to come—without expensive professional servicing or premature replacement.

Why Your Jetted Tub Needs Specialized Cleaning

Jetted bathtubs create unique maintenance challenges because their internal plumbing systems circulate water through hidden pipes and jet mechanisms. When you activate your jets, water flows through a closed-loop system that includes pumps, pipes, and nozzles—all of which collect residue with every use. The combination of warm water, body oils, soap scum, and dead skin cells creates the perfect environment for biofilm formation inside your plumbing.

Ignoring regular jacuzzi bath cleaning leads to serious consequences: mineral deposits from hard water gradually calcify on jet nozzles, reducing spray pressure until jets stop working entirely. The biofilm that develops inside pipes becomes a breeding ground for bacteria including Aeromonas and Pseudomonas, organisms that can cause skin infections or respiratory issues. One homeowner discovered this the hard way after skipping maintenance for six months—her once-powerful jets produced only weak streams, and a foul odor emerged when she finally ran the system.

How Often Should You Clean Your Jetted Tub?

Jacuzzi’s manufacturer recommends monthly cleaning for standard maintenance, but your usage pattern determines the ideal schedule. Households using their tubs frequently (3+ times weekly) should clean every 2-3 weeks, while occasional users might extend to 6-8 weeks between sessions. The most practical approach many experienced owners use is cleaning “about every four to six uses” regardless of calendar time.

Watch for these warning signs that indicate immediate cleaning is needed:
– Reduced water pressure from jets
– Visible discoloration in water during jet operation
– Unpleasant odors when jets are activated
– Visible buildup around jet nozzles
– Gurgling or unusual sounds from the pump

Jacuzzi Systems Cleaner: The Manufacturer-Recommended Solution

Jacuzzi T627000 Systems Cleaner kit packaging

When it comes to jacuzzi bath cleaning, the official Jacuzzi Systems Cleaner represents the gold standard developed by the pioneers of whirlpool technology. This two-step system specifically targets the unique buildup inside jetted tubs without damaging sensitive components.

What Makes This Cleaner Different?

The Jacuzzi Systems Cleaner (Part Number: T627000) comes as 10 complete cleaning sessions—five packets of Step 1 solution and five of Step 2—packaged in a compact 6.26 x 4.88 x 3.23 inch container. Priced at $28.26, this equates to approximately $2.83 per cleaning session, a small investment compared to potential repair costs from neglected maintenance.

With 251 customer reviews averaging 4.6 out of 5 stars (85% perfect five-star ratings), users consistently praise its effectiveness where alternatives failed. One long-term user reported using the product successfully for twelve years, noting it “does the best and most thorough job” compared to other brands they tried. The cleaner’s two-step process ensures both deep cleaning and thorough rinsing of all internal components.

How to Use the Jacuzzi Systems Cleaner Properly

Follow this exact sequence for maximum effectiveness during your jacuzzi bath cleaning session:

  1. Close the drain and fill your tub with warm water (not hot) to a level that completely covers all jet openings
  2. Add one Step 1 packet to the water and allow it to dissolve completely
  3. Activate all jets and run for 10-15 minutes to circulate the solution throughout the entire system
  4. Drain the tub completely—expect discolored water confirming removed buildup
  5. Refill with clean warm water to cover jets
  6. Add one Step 2 packet and run jets for another 10-15 minutes
  7. Drain completely and wipe down surfaces with a soft cloth

Pro Tip: After the final drain, run the jets for 2-3 minutes with no water to help expel any remaining residue from the lines. Some users report needing to “dunk your arm in to get the plug unplugged to drain,” but this minor inconvenience ensures complete system flushing.

Top 4 Alternative Jetted Tub Cleaners Worth Considering

SpaKleen jetted tub cleaner vs ACTIVE jetted tub cleaner vs CLYND jetted tub cleaner vs Bio Ouster jetted tub cleaner comparison

While the Jacuzzi brand cleaner delivers manufacturer-backed results, several quality alternatives offer effective jacuzzi bath cleaning at lower price points.

SpaKleen Jetted Tub Cleaner

With 1,875 reviews averaging 4.5 stars, SpaKleen provides 10 cleanings for $19.50 ($1.95 per session). This USA-made formula works with all jetted tub brands and features a fast-action formula that dissolves quickly. Many users appreciate its septic-safe composition and report results nearly matching the Jacuzzi brand at a lower cost.

ACTIVE Jetted Tub Cleaner Bathtub Tabs

These convenient pre-measured tablets (4.5 stars from 361 reviews) cost $17.96 for 12 tablets—approximately $1.50 per cleaning. The professional-grade formula removes scale and residue effectively while being septic safe. Amazon’s Choice designation and tablet format make this a popular option for those who prefer no measuring.

CLYND Jetted Tub Cleaner

Earning the highest rating among alternatives (4.7 stars from 53 reviews), CLYND offers 24 tablets for $18.99 ($0.79 per tablet). This heavy-duty formula contains no harsh chemicals while remaining septic safe. Its Compact by Design certification indicates sustainable packaging, appealing to eco-conscious users.

Bio Ouster Jetted Tub Cleaner Kit

Priced at $21.99 with 4.4 stars from 898 reviews, this kit includes a microfiber towel with the cleaning solution. The professional-grade formula effectively removes bacterial buildup and works with all jetted systems. Made in the USA, it provides a mid-range option for those seeking thorough cleaning without the premium Jacuzzi price.

Prevent Buildup Between Deep Cleaning Sessions

Monthly deep cleaning prevents major problems, but daily habits extend time between thorough sessions and keep your jets performing optimally.

Post-Use Maintenance Routine

After every bath, follow these simple steps to reduce buildup:
– Wipe down visible surfaces with a soft cloth to remove soap film and oils
– Run clean water through the jets for 2-3 minutes to flush loose residue
– Leave the drain open until the tub is completely dry
– Never use regular household cleaners—they leave residue that promotes bacterial growth

Hard Water Solutions

If you live in a hard water area, consider these additional measures:
– Install a water softener for your entire home
– Use distilled water for your cleaning sessions
– Increase cleaning frequency to every 2-3 weeks
– Add a vinegar rinse cycle monthly to dissolve mineral deposits

Troubleshooting Common Jetted Tub Problems

Even with regular jacuzzi bath cleaning, issues may arise. Here’s how to diagnose and fix them:

Weak Jet Pressure

Cause: Mineral deposits or biofilm restricting water flow
Fix: Run a deep cleaning cycle, then inspect individual jets for visible blockage. Use a soft toothbrush to gently clean nozzle openings if needed.

Unpleasant Odors

Cause: Bacterial growth in stagnant water
Fix: Perform immediate deep cleaning, then ensure complete draining after each use. Leave drain open between uses to allow air circulation.

Gurgling Noises

Cause: Air trapped in lines or partial blockages
Fix: Run jets with clean water for 15 minutes to clear air pockets. If persistent, perform deep cleaning and check for clogs.

Final Maintenance Checklist for Long-Lasting Performance

Protect your investment with these essential jacuzzi bath cleaning practices:

  • Schedule monthly cleanings using either the Jacuzzi Systems Cleaner or a quality alternative
  • Never skip the rinse cycle—incomplete rinsing leaves residue that attracts more buildup
  • Run jets at full power during cleaning to ensure solution reaches all internal passages
  • Keep a cleaning log to track sessions and identify usage patterns
  • Drain completely after every use to prevent stagnant water conditions
  • Wipe down surfaces regularly to prevent soap scum accumulation

The modest investment of $0.80-$2.83 per cleaning session preserves your jetted tub’s performance and prevents costly repairs down the line. By following this maintenance routine, you’ll enjoy powerful, clean jets that deliver the luxurious hydrotherapy experience you deserve—without worrying about hidden contamination in your relaxation sanctuary. Your jacuzzi bath cleaning routine shouldn’t feel like a chore; with the right products and schedule, it becomes a simple habit that protects your investment and ensures years of worry-free soaking.

How to Use Jacuzzi Whirlpool Bath: Easy Steps


There’s nothing quite like sinking into your Jacuzzi whirlpool bath after a long day—the warm water enveloping your body as powerful jets target tired muscles. Yet many new owners hesitate to use their investment properly, worried they’ll damage the sophisticated system or miss out on key features. Knowing exactly how to use jacuzzi whirlpool bath equipment transforms uncertainty into confidence, ensuring you maximize therapeutic benefits while protecting your investment. This guide delivers precise, model-specific instructions for operating any Jacuzzi system, from basic Swirlpool models to advanced J-Shiatsu configurations.

Jacuzzi offers multiple bath system categories, each with unique operation methods. The Swirlpool line provides classic hydrotherapy with reliable jet performance, while the J-Quiet series incorporates noise-reducing pump technology. The J-Shiatsu systems simulate traditional massage techniques with adjustable intensity settings, and Lounge models feature ergonomic reclined seating for full-body immersion. Regardless of your model, these comprehensive instructions will help you master how to use jacuzzi whirlpool bath features correctly for optimal relaxation and longevity.

Prepare Your Bath for Proper Operation

Before filling your Jacuzzi, take 2 minutes to prepare for a safe, effective session. Remove all bath mats, loofahs, or other items stored in the tub, then inspect the surface for debris that could clog the system. Check that your drain stopper lifts and lowers smoothly—this prevents water from becoming trapped after your session. If your model has removable intake screens or filters (common in Aura and Aquasoul series), verify they’re clean and properly seated; clogged screens reduce jet performance by up to 70%.

Critical safety check: Examine your control interface to ensure all buttons respond properly. Pneumatic systems require firm presses, while electronic panels need light touches. If your bath has been idle for days, especially in cooler weather, don’t panic if jets make unusual sounds during initial activation—this typically resolves within 60 seconds as the pump primes. Gathering towels and bath products before filling lets you focus entirely on relaxation once the water reaches your ideal temperature.

Fill to the Correct Water Level and Temperature

Filling your Jacuzzi properly establishes the foundation for an effective hydrotherapy session. Most models perform best when filled to a level that fully covers the highest jet openings while leaving 2-3 inches of clearance at the top rim. Overfilling stresses seals and creates messy overflow, while underfilling causes the pump to draw air instead of water—potentially damaging the system over time. Consult your specific model manual, as water level requirements vary between collections like the Sharp series (compact models) versus the larger Aquasoul Double.

Water temperature requires careful attention for safe, comfortable use. Jacuzzi recommends 98-104°F (37-40°C) for most users, but your ideal temperature depends on personal preference and session duration. Water above 104°F carries risks of dizziness and cardiovascular stress, particularly during longer sessions. Test temperature with your elbow or wrist before entering—these areas sense heat more accurately than hands. If your model includes built-in heating (like many Skylounge® series), you can maintain temperature throughout extended use; otherwise, start slightly cooler than your target since water cools during use.

Activate the Jet System Without Damaging Components

Starting your Jacuzzi’s jet system correctly protects the pump motor and ensures years of reliable operation. Always begin by activating the pump on its lowest setting, allowing water to flow through the system before increasing intensity. Most models offer multiple speed settings controlled through pneumatic buttons, electronic panels, or rotary dials depending on your configuration. Starting low gives the pump time to prime fully and lets you assess jet action before committing to full intensity.

Once the pump runs smoothly, gradually increase jet intensity to your preferred level. Rotate individual jet faces or use adjustable nozzles to direct massaging streams where you need them most. If you own a J-Shiatsu system, explore the pre-programmed massage cycles that simulate professional techniques. Many users find starting with moderate intensity and gradually increasing provides the most satisfying experience as muscles relax and become more receptive to deeper pressure over time. Never jump straight to maximum intensity—this strains both your muscles and the pump system.

Target Specific Muscle Groups with Jet Adjustments

Jacuzzi whirlpool bath jet placement diagram

Mastering jet adjustment transforms your Jacuzzi from a simple warm bath into targeted therapy. Back jets positioned along tub walls deliver the most intense massage, ideal for relieving shoulder, lower back, and hip tension after physical activity. Foot and calf jets provide gentler stimulation that promotes circulation without overwhelming sensitive muscles, perfect for evening relaxation. Experiment with intensity settings to find your comfort zone—more intense doesn’t always mean better, as extended high-intensity exposure can cause muscle soreness rather than relief.

Many Jacuzzi models allow independent control of different jet banks, letting you activate only the jets you need while conserving energy and reducing noise. The J-Quiet series excels here with vibration-minimizing technology. If your model includes air injection systems alongside water jets (common in Design Series models), these create a gentler, effervescent sensation that provides light stimulation without deep pressure. For optimal results, spend 5 minutes on each major muscle group during your session.

Limit Session Duration for Maximum Therapeutic Benefit

Proper session timing ensures therapeutic benefits without health complications from extended hot water exposure. Standard hydrotherapy sessions of 15-30 minutes provide meaningful muscle relief while keeping core body temperature safe. Higher water temperatures require shorter sessions, as your body absorbs heat more rapidly. Similarly, higher jet intensities increase blood circulation and metabolic activity, generating additional body heat during your session.

Listen to your body’s signals throughout your bath. Dizziness, lightheadedness, or nausea indicate you’ve stayed too long or the temperature exceeds your tolerance. Pregnant individuals, those with cardiovascular conditions, and diabetics should consult healthcare providers about appropriate session limits before using their whirlpool bath. Never consume alcohol before or during hydrotherapy sessions—this significantly increases heat-related risks. For optimal results, most users find 20-minute sessions at moderate temperatures provide substantial relief without requiring constant monitoring of warning signs.

Implement Essential Safety Protocols During Use

Jacuzzi GFCI safety check

Jacuzzi whirlpool baths incorporate multiple safety features, but understanding these and additional precautions ensures your experience remains safe. GFCI (Ground Fault Circuit Interrupter) protection prevents shock hazards by cutting power if electrical leakage occurs—test this monthly to verify functionality. Never bypass GFCI protection, and contact a qualified electrician immediately if your system trips during normal operation.

Water temperature requires ongoing attention throughout each session. Test again before adding hot water, and consider lowering jet intensity when adding hot water to avoid dangerous splashing. Enter and exit your Jacuzzi carefully—wet surfaces create serious slip hazards. Many models include textured surfaces in critical areas, but adding an external bath mat provides additional protection. Children should never use whirlpool baths without direct adult supervision, and elderly users may benefit from handrails when entering and exiting.

Drain and Clean Immediately After Each Session

Proper post-use maintenance protects your investment and ensures hygiene for every session. Begin by running the jets with clear water for 2-3 minutes after each use, which flushes residual bath products, oils, and debris from internal plumbing. Some models include automatic purge cycles that activate when draining—these draw air through the system to clear remaining water from pipes and prevent stagnation. If your model lacks this feature, manually run pumps briefly after draining to remove standing water.

After purging, drain completely and wipe all surfaces dry with a soft cloth to prevent water spots. Use non-abrasive cleaners designed for acrylic or your bath’s specific surface material—avoid harsh chemicals that damage seals and finishes. Pay special attention to jet faces and control interfaces where residue accumulates most readily. For models with removable jet faces (like many Aura series), periodic manual cleaning provides more thorough maintenance than surface cleaning alone.

Follow Model-Specific Maintenance Schedules

Beyond daily cleaning, regular maintenance keeps your Jacuzzi operating at peak performance. Weekly maintenance includes surface cleaning with appropriate products, inspection of visible jets, and running filtration systems if equipped. Monthly deep cleaning targets internal plumbing using manufacturer-recommended solutions that dissolve buildup without damaging components. Never use standard household cleaners in jet cleaning—they deteriorate rubber seals and leave harmful residues.

Quarterly maintenance addresses components that wear over time. Inspect all seals and gaskets for cracking or drying, replacing damaged components before they fail. Check that all control functions respond properly and that pump operation sounds smooth. Annual professional inspection provides comprehensive evaluation of internal plumbing, electrical safety, and overall system condition. Many Jacuzzi owners schedule annual service in early autumn to prepare for heavy winter use when relaxation needs peak.

Troubleshoot Common Operational Issues

Understanding common problems saves time and frustration when issues arise. Reduced jet performance typically indicates clogged intake screens, insufficient water level, or air in the pump system. Check that water covers all jet openings and that intake screens are clean. If jets sputter, the pump likely contains air—activate on low speed for several minutes to purge air before increasing intensity.

Unusual pump sounds require investigation. Grinding noises often indicate debris in the impeller chamber—remove the intake screen and check for obstructions. Whining sounds may signal bearing wear, suggesting professional service is needed. Temperature issues often relate to settings or heater malfunctions—verify settings are correct and that the heater indicator shows active heating. Control interface problems typically stem from electrical issues or moisture—check power supply and ensure controls are clean and dry. Persistent problems require professional diagnosis.

How to Make a Sitz Bath in Tub: Easy Steps


Struggling with hemorrhoids, postpartum discomfort, or anal fissures? Learning how to make a sitz bath in tub could be your ticket to relief. This targeted therapy involves soaking only your hips and buttocks in warm water to boost blood flow and accelerate healing in sensitive pelvic tissues. Unlike a full bath, a sitz bath focuses precisely where you need it most—on the perineal area where nerves and blood vessels converge near the surface. Most people experience noticeable improvement within days when following proper sitz bath techniques. In this guide, you’ll discover exactly how to prepare, perform, and maximize your sitz bath sessions for optimal results—using just your standard bathtub and common household items.

Transform Your Bathtub into a Healing Station Today

Creating an effective sitz bath requires transforming your ordinary bathtub into a therapeutic healing environment. Start by thoroughly cleaning your tub with a mild, non-abrasive cleaner to remove any soap residue or bacteria that could irritate sensitive tissues. Pay special attention to the drain area and corners where grime accumulates. After cleaning, rinse multiple times to eliminate all traces of cleaning products—your goal is a completely neutral environment for your delicate pelvic area.

Fill your tub with just enough warm water to submerge your hips and buttocks—typically 4-6 inches (10-15 cm) deep, or about one-quarter to one-third of your tub’s capacity. This shallow depth conserves water while ensuring proper coverage. For most adults, this amount creates the perfect therapeutic zone without unnecessary water waste. If you have mobility concerns, consider placing a non-slip mat in the tub before filling to prevent accidents when entering.

Perfect Your Water Temperature in 60 Seconds

The right water temperature makes or breaks your sitz bath experience. Your ideal range sits between 100-105°F (38-41°C)—warm enough to boost circulation but cool enough to prevent burns. Never test with your hand; instead, use your elbow or inner wrist, which have sensitivity closer to your treatment area. The water should feel comfortably warm, allowing you to sit for 15-20 minutes without discomfort.

If you’re unsure about temperature accuracy, invest in an inexpensive bath thermometer—it pays for itself in preventing painful mistakes. For those with diabetes or reduced temperature sensitivity, consult your doctor before starting sitz bath therapy. Remember: water above 110°F can worsen inflammation and cause tissue damage, while water that’s too cool won’t deliver therapeutic benefits.

Choose the Right Additives for Your Specific Condition

Epsom salt baking soda apple cider vinegar chamomile tea sitz bath

Enhance your sitz bath’s effectiveness by selecting additives tailored to your condition:

  • For hemorrhoids: Add 2 cups Epsom salt to reduce swelling and improve circulation
  • For itching or yeast infections: Mix in 4-5 tablespoons baking soda to restore pH balance
  • For vaginal irritation: Use 1 cup raw apple cider vinegar for its natural antibacterial properties
  • For general soothing: Steep 2-3 chamomile tea bags in hot water, then add to your bath

Always dissolve additives completely before entering the tub. If using essential oils like tea tree or lavender, dilute 5-10 drops in a carrier oil first to prevent skin irritation. Avoid harsh soaps, bubble baths, or heavily scented products—they’ll do more harm than good for sensitive tissues.

Execute Your Sitz Bath with Precision

Position Yourself Correctly for Maximum Benefit

How you sit in your tub dramatically affects your sitz bath’s effectiveness. Carefully lower yourself into the water backward, supporting your weight with both hands on the tub edges to prevent slipping. Once seated, ensure your hips and buttocks are fully submerged with water reaching your lower abdomen. Adjust your position until you feel complete coverage of the affected area without water rising too high on your torso.

Lean back against the tub wall for support if needed, but maintain enough upright posture to keep water at the proper level. During your soak, gently splash water over problem areas to ensure complete coverage. Some people find rocking side-to-side helps water reach all tissues effectively. If you feel lightheaded at any point, exit immediately and consult your doctor before your next session.

Time Your Session for Optimal Healing

Set a timer for exactly 15-20 minutes—this duration provides maximum therapeutic benefit without risking skin irritation from prolonged moisture exposure. Shorter sessions rarely deliver full relief, while longer soaks can cause tissue breakdown. Many people find it helpful to schedule sitz baths after bowel movements when pain and discomfort peak.

As you soak, focus on deep breathing to enhance relaxation and blood flow. This mindful approach amplifies your body’s natural healing response. When the timer sounds, exit slowly and deliberately—warm water can cause dizziness, especially if you have low blood pressure. Never rush this critical transition phase.

Dry and Care for Treated Areas Properly

Pat dry perineal area after sitz bath

Avoid Post-Bath Mistakes That Undermine Your Results

Your healing journey continues after you leave the tub. Gently pat the treated area dry with a clean, soft towel—never rub, as friction can damage delicate healing tissues. For hard-to-reach areas or skin folds, use a hair dryer on cool setting held at least 12 inches away. Complete dryness prevents moisture-related irritation and infection.

If your doctor recommended a protective ointment, apply a thin layer now using clean fingertips. Products containing zinc oxide or petroleum jelly create a healing barrier without trapping moisture. Immediately afterward, slip into loose, breathable cotton underwear and pants—tight clothing traps heat and moisture, counteracting your bath’s benefits. Some people find going commando for an hour post-bath speeds healing when privacy allows.

Follow This Daily Sitz Bath Schedule

Adjust Frequency Based on Your Healing Progress

Most people benefit from 2-3 sitz baths daily during acute flare-ups or initial recovery phases. Postpartum women often start with this frequency within 24-48 hours after delivery. As symptoms improve, gradually reduce to once daily, then every other day. Chronic condition sufferers typically maintain 1-3 weekly baths for ongoing prevention.

Track your symptoms in a simple notebook to identify patterns. Note what additives work best, optimal timing relative to bowel movements, and any triggers to avoid. This personalized data helps you refine your routine faster than generic advice ever could. Remember: consistency matters more than perfection—better to do shorter, regular baths than occasional marathon sessions.

Dodge These 5 Costly Sitz Bath Errors

Sitz bath mistakes infographic

Water Temperature Mismanagement

Using water that’s too hot represents the most dangerous sitz bath mistake. That “pleasantly hot” sensation often exceeds safe limits, potentially causing burns on sensitive tissues. Always test with your elbow, not your hand, and when in doubt, choose cooler water—you can always add warmth but can’t undo damage.

Ignoring Equipment Hygiene

Failing to clean your tub or portable basin after each use breeds bacteria that can infect healing tissues. Wash thoroughly with mild soap and hot water, then dry completely before storage. For standard bathtubs, give them an extra rinse cycle before your next session to remove any residual soap.

Overlooking Warning Signs

If your symptoms worsen after starting sitz baths, or if you develop fever, unusual discharge, or increased pain, stop immediately and consult your doctor. Sitz baths support healing but don’t replace medical treatment for serious conditions.

Using Harsh Additives

Bubble baths, heavily scented soaps, and undiluted essential oils can irritate sensitive areas. Stick to plain water or doctor-recommended additives in proper concentrations. When trying new ingredients, test on a small skin patch first.

Rushing the Process

Skipping proper preparation or cutting sessions short sabotages results. Allow 30 minutes total for setup, soaking, and post-bath care—this investment pays off in faster healing and reduced discomfort.

Know When Professional Help Outweighs Home Treatment

While learning how to make a sitz bath in tub solves many issues, certain red flags demand medical attention. If symptoms persist beyond 1-2 weeks of consistent sitz baths, schedule a doctor’s visit—your condition may require prescription treatment. Heavy or persistent rectal bleeding, fever above 100.4°F, or sudden symptom worsening all warrant immediate consultation. Always discuss sitz bath therapy with your healthcare provider before starting, especially if you have diabetes, heart conditions, or take blood thinners.

Creating an effective sitz bath requires minimal equipment but delivers maximum relief when done correctly. By mastering water temperature control, selecting condition-specific additives, and following proper post-bath care, you’ll transform your standard bathtub into a powerful healing station. Remember: consistent 15-20 minute sessions with appropriate frequency yield better results than occasional marathon soaks. Start today with plain warm water, then gradually incorporate targeted additives as your comfort level increases. With this simple, drug-free therapy, you’re taking an important step toward reclaiming your comfort and quality of life.

Wet Room Bath Ideas for Small Spaces 2026


Nothing transforms a bathroom quite like a well-designed wet room. These seamless, open-concept bathing spaces have revolutionized bathroom design by merging shower areas with the rest of the room in a single, cohesive layout. If you’ve noticed water pooling near your shower door or feel cramped in your current bathroom, a wet room solution could be your answer. Over 65% of homeowners who convert to wet rooms report significantly improved daily bathroom experiences, citing easier cleaning and a more luxurious feel. This guide delivers actionable wet room bath ideas that solve common problems while creating stunning spaces you’ll love for years.

Why Your Small Bathroom Needs a Curbless Wet Room Design

Curbless wet room designs eliminate the traditional shower threshold, creating smooth transitions that make compact bathrooms feel larger and more accessible. Unlike conventional shower enclosures that eat up valuable square footage with doors and frames, curbless designs maximize every inch of space while providing universal access for all ages and abilities.

The secret to successful curbless wet rooms lies in precise floor gradient calculations. Professional installers create a subtle 2% slope toward the drain—just enough to direct water flow without being noticeable underfoot. This engineering detail prevents water from spreading into dry areas while maintaining the seamless aesthetic that defines modern wet rooms.

For optimal performance in small spaces, pair your curbless design with a linear drain along one wall instead of a center drain. This strategic placement allows for more flexible shower positioning and creates clean sightlines that enhance the perception of space. Choose a drain finish that complements your fixtures—matte black for contemporary spaces or brushed brass for warmer aesthetics.

Tile Selection Secrets for Wet Room Durability and Style

porcelain tile large format wet room

Your tile choice dramatically impacts both the longevity and visual impact of your wet room. Porcelain tiles have become the gold standard for wet areas due to their near-zero water absorption rate and exceptional durability. Large-format porcelain panels measuring 24×48 inches or larger minimize grout lines, reducing maintenance while creating that coveted seamless look.

Natural stone brings undeniable luxury but requires careful consideration. Marble offers timeless elegance with its distinctive veining, but needs regular sealing to prevent staining. For higher-traffic wet rooms, consider porcelain tiles that mimic natural stone—modern manufacturing creates incredibly realistic alternatives that withstand daily use without maintenance headaches.

Don’t overlook the slip resistance factor when selecting wet room tiles. Look for tiles rated R10 or higher on the anti-slip scale, especially for floor applications. Textured finishes, mosaic patterns, and matte surfaces all provide better traction than perfectly smooth options. Test samples by wetting them and walking on them before committing to your selection.

Smart Tile Layout Techniques for Visual Impact

Strategic tile placement can transform your wet room from ordinary to extraordinary. Consider these professional techniques:

  • Directional patterns: Lay rectangular tiles vertically to create the illusion of higher ceilings
  • Accent bands: Use contrasting mosaic tiles at shoulder height to break up large wall areas
  • Floor inlays: Create subtle geometric patterns with darker tiles to define the shower zone
  • Waterfall effect: Continue wall tiles down onto the floor for seamless visual flow

Space-Maximizing Wet Room Layouts for Compact Bathrooms

small wet room layout corner shower

When square footage is limited, every element in your wet room must serve multiple purposes. Corner shower configurations make brilliant use of often-wasted space while leaving the room’s center clear for movement. Quadrant-shaped enclosures with curved glass panels soften the visual impact and prevent the room from feeling cramped.

Wall-mounted fixtures provide immediate space savings in small wet rooms. Floating toilets eliminate bulky cisterns, while wall-hung vanities create visual breathing room beneath. The space-saving benefits extend beyond aesthetics—these installations also make floor cleaning significantly easier, reducing maintenance time by up to 40%.

Partial glass partitions offer the perfect compromise between water containment and spatial openness. Instead of enclosing the entire shower area, install a single frameless panel that blocks splash zones while preserving sightlines. This solution works particularly well when positioned to protect the vanity area from direct spray.

Lighting Strategies That Elevate Wet Room Ambiance

Proper lighting transforms functional wet rooms into atmospheric retreats. Recessed LED downlights with IP65+ ratings provide essential task lighting while withstanding steam and moisture. Arrange these fixtures in a grid pattern rather than clustering them over the shower to ensure even illumination throughout the space.

Backlit mirrors serve dual purposes as both functional grooming tools and atmospheric elements. LED strips concealed behind mirror frames create shadow-free illumination perfect for makeup application, while some premium models offer color temperature adjustment from energizing cool tones to relaxing warm hues. The reflected light also makes the space feel significantly larger.

For evening relaxation, incorporate subtle ambient lighting at multiple levels. Consider these options:

  • Floor-level cove lighting that washes walls with soft glow
  • Recessed niche lighting to highlight decorative tiles
  • Towel warmer lighting that creates warm focal points
  • Color-changing LED strips under floating vanities

Color Psychology in Wet Room Design

Your color choices directly impact how you experience your wet room daily. Neutral palettes featuring whites, creams, and soft grays maximize light reflection and create serene backdrops that never feel dated. These timeless schemes work particularly well in north-facing bathrooms with limited natural light.

Dark color schemes introduce dramatic sophistication to wet rooms with ample square footage and good ventilation. Charcoal floors paired with matte black fixtures create moody, spa-like atmospheres, but require careful balancing with lighter elements to prevent the space from feeling oppressive. Reserve dark schemes for master bathrooms rather than small guest facilities.

Green-infused palettes connect wet rooms to biophilic design principles, bringing organic warmth to otherwise sleek spaces. Consider these approaches:

  • Sage green accent tiles paired with natural wood elements
  • Moss-colored mosaic bands that mimic forest floors
  • Living walls featuring humidity-loving ferns and orchids
  • Stone textures with subtle green veining for natural variation

Essential Fixtures for Luxury Wet Room Experiences

rainfall shower head thermostatic mixer wet room

Your shower system defines the wet room experience more than any other element. Thermostatic mixers ensure consistent temperature control regardless of other water usage in your home—a critical safety feature for households with children. Digital shower systems with programmable settings take personalization further, remembering individual preferences for true luxury.

Rainfall shower heads have become the signature feature of premium wet rooms. For authentic spa-like experiences, select heads with at least 10 inches diameter positioned at ceiling height. Pair your rainfall fixture with a handheld wand on a slide bar for flexible cleaning and practical use—this combination delivers both luxury and functionality.

Fixture finishes significantly impact your wet room’s personality. While chrome remains popular for its versatility, consider these trending alternatives:

  • Brushed brass for warm, inviting spaces
  • Matte black for contemporary contrast
  • Satin nickel for subtle sophistication
  • Polished gold for statement luxury

Waterproofing Fundamentals Every Homeowner Should Know

Linear drains represent one of the most important wet room innovations, replacing traditional center drains with sleek channel systems along walls. These elongated drains handle high water volumes efficiently while enabling the subtle floor gradients necessary for curbless designs. Choose stainless steel models with removable grates for easy maintenance.

The waterproofing membrane forms your wet room’s invisible foundation—compromise here leads to catastrophic failures. Modern liquid-applied membranes create seamless barriers that accommodate building movement without cracking. Professional installation is non-negotiable; waterproofing failures cause structural damage that far exceeds initial installation costs.

Annual sealant maintenance prevents expensive water damage in wet rooms. Silicone seals around fixtures, glass panels, and floor-wall junctions should be inspected for signs of mould, cracking, or separation. Replace failing seals immediately—waiting allows moisture to penetrate substrates where damage becomes invisible and extensive.

Personal Touches That Make Your Wet Room Unique

Freestanding bathtubs transform functional wet rooms into luxurious personal retreats, serving as dramatic focal points in larger designs. Position your tub away from walls for 360-degree visual appeal, and select materials that complement your overall scheme—stone resin for contemporary spaces or cast iron for traditional charm.

Strategic plant placement brings life to wet rooms without compromising functionality. Ferns, orchids, and air plants thrive in humid environments, adding organic elements that soften hard surfaces. Place plants on floating shelves away from direct shower spray, and ensure adequate ventilation to prevent excess moisture damage.

Custom cabinetry reflects your personal style while maximizing storage. Consider locally made or bespoke pieces for unique wet room bath ideas that standard fixtures can’t achieve. Quality materials and craftsmanship ensure longevity in the demanding wet room environment—invest in solid wood cores with marine-grade finishes.

Smart Maintenance Practices for Long-Lasting Wet Rooms

Effective ventilation prevents moisture damage and mold growth in wet rooms. Extractor fans rated for bathroom use should run continuously or with humidity sensors that activate automatically. Proper ventilation reduces maintenance time by preventing limescale buildup and mold formation.

Daily squeegeeing of glass surfaces prevents hard water staining and limescale accumulation. Keep a dedicated squeegee mounted near the shower exit for quick use after each session. This simple 30-second habit extends the time between deep cleaning sessions by months.

Weekly cleaning routines maintain your wet room’s appearance without damaging surfaces. Use pH-neutral cleaners specifically formulated for bathroom surfaces—avoid vinegar-based solutions that can degrade grout and stone sealants over time. Focus on high-moisture areas where mold tends to begin forming.

Professional inspections every 18-24 months catch potential issues before they become major problems. Certified wet room specialists can identify early signs of waterproofing failure, drainage issues, or fixture wear that homeowners often miss. This preventative maintenance extends your wet room’s lifespan by 5-7 years on average.


Wet room bath ideas offer remarkable versatility for homeowners seeking modern, functional bathroom spaces. From compact corner solutions to expansive luxury designs, the right wet room transforms daily routines into everyday indulgence. Prioritize quality waterproofing, thoughtful drainage, and materials that balance aesthetics with durability to create spaces that perform beautifully for years. Whether you prefer sleek minimalism or spa-like opulence, these design principles ensure your wet room delivers both style and substance in equal measure. Start planning your transformation today—your perfect bathroom experience awaits.

Eczema Bath Tips for Babies 2026


Watching your infant scratch relentlessly at raw, inflamed patches of skin can leave even the most patient parent feeling helpless. If your baby struggles with eczema, you’ve likely tried countless creams and ointments with mixed results. What many parents don’t realize is that a surprisingly effective treatment recommended by pediatric dermatologists involves something you probably already have under your sink: diluted bleach. This eczema bath baby treatment has transformed how doctors manage severe flare-ups and stubborn bacterial infections that complicate infant eczema. While the idea of bathing your delicate baby in bleach may seem counterintuitive, when properly diluted, this simple therapy can provide dramatic relief where other treatments have failed.

Bleach bath therapy isn’t just another home remedy—it’s a scientifically supported treatment that targets one of the primary drivers of severe eczema: bacterial overgrowth. When your baby’s skin barrier becomes compromised by eczema, it creates the perfect environment for Staphylococcus bacteria to thrive, worsening inflammation and triggering relentless itching. By incorporating properly diluted bleach baths into your baby’s skincare routine, you can break this vicious cycle and potentially reduce your reliance on prescription medications. This guide provides everything you need to know about safely implementing this powerful eczema bath baby treatment, from preparation to frequency, so you can make informed decisions about your child’s care.

Why Your Baby’s Eczema Needs Bleach Baths More Than You Think

Bleach baths work by creating an environment where harmful bacteria cannot survive, directly addressing one of the root causes of persistent eczema flare-ups in infants. When your baby’s skin barrier becomes compromised by eczema, it allows Staphylococcus aureus bacteria to colonize the affected areas, triggering inflammation that worsens the condition. This creates a vicious cycle: damaged skin invites bacterial growth, which causes more inflammation, which further damages the skin barrier. The diluted bleach solution disrupts this cycle by significantly reducing bacterial populations on your baby’s skin without harming their delicate tissue when properly prepared.

How Bleach Baths Reduce Eczema Flare Frequency

Clinical evidence shows that regular bleach bath therapy can decrease both the frequency and severity of eczema outbreaks in infants. By reducing the bacterial load on your baby’s skin, these baths allow damaged tissue to heal more effectively during treatment periods. Many parents report noticeable improvement within just a few weeks of consistent use—less redness, reduced oozing, and significantly decreased scratching. This isn’t just cosmetic improvement; studies confirm that infants receiving regular bleach baths require fewer courses of topical steroids and antibiotic treatments compared to those using standard skincare alone.

The Antibiotic Alternative Parents Are Missing

One of the most compelling benefits of bleach bath therapy is its potential to reduce your baby’s exposure to antibiotics. Both topical and oral antibiotics carry risks of side effects and contribute to antibiotic resistance—a growing public health concern. When bacteria become resistant to antibiotics, treating serious infections becomes much more difficult. By incorporating bleach baths into your eczema management plan, you may significantly decrease your baby’s need for antibiotic treatments while still effectively controlling bacterial overgrowth. This approach supports your baby’s natural healing processes without introducing additional medications that could disrupt their developing microbiome.

Prepare Your Baby’s Eczema Bath with Perfect Dilution

bleach bath dilution ratio baby eczema

Creating a therapeutic bleach bath requires precise attention to dilution ratios to ensure maximum safety while maintaining effectiveness. The goal is to achieve a concentration similar to what you’d find in a public swimming pool—just enough to combat bacteria without irritating your baby’s sensitive skin. Getting this balance right is non-negotiable for both safety and therapeutic benefit, so follow these steps carefully for every bath session.

Fill Tub with Correct Water Temperature First

Begin by filling your bathtub with lukewarm water to a depth appropriate for your baby’s size—typically 2-3 inches deep for infants. Water temperature is critical; anything warmer than lukewarm can strip natural oils from your baby’s compromised skin barrier and trigger additional inflammation. Test the water with your inner wrist or elbow before placing your baby in the tub—it should feel neutral, neither warm nor cool. Hot water is a common trigger for eczema flares, so err on the cooler side if you’re unsure.

Measure and Mix Bleach Solution Precisely

Once your tub contains properly temperatured water, add liquid household bleach using the precise ratio of approximately one capful (about ¼ cup) of bleach for each quarter-tubful of water. For a standard infant bath (about 5 gallons of water), this translates to roughly ½ teaspoon of bleach. The solution should have a faint chlorine odor similar to a swimming pool—this serves as your visual indicator that you’ve achieved proper dilution. Never eyeball the amount; use actual measuring spoons for accuracy. Stir the water thoroughly for at least one minute to ensure even distribution and prevent concentrated pockets of bleach.

Administer Baby Eczema Bath in 3 Critical Steps

With your properly diluted bleach bath prepared, follow these three essential steps to ensure your baby receives maximum therapeutic benefit while remaining comfortable and safe throughout the treatment.

Step 1: Limit Soak Time to 10-15 Minutes

Allow your baby to soak in the solution for precisely 10-15 minutes. This duration provides sufficient contact time for the bleach to exert its antibacterial effects without prolonged exposure that could potentially dry out or irritate sensitive skin. If your baby hasn’t taken baths of this length before, start with 5-7 minutes and gradually increase by 1-2 minutes per session as they become accustomed to the routine. Set a timer—you might lose track while comforting your baby, and exceeding the recommended time increases irritation risk.

Step 2: Gentle Application Without Rubbing

During the soak, gently splash water over your baby’s body to ensure the solution contacts all affected skin areas. Never scrub or rub the skin, as this mechanical irritation can further damage the compromised skin barrier and trigger additional inflammation. If your baby has particularly severe patches, you can use a soft washcloth to lightly dab the solution onto affected areas, but avoid any vigorous cleaning motions that might cause micro-tears in fragile skin.

Step 3: Immediate Moisturizing After Bath

After the soak, gently lift your baby from the tub and immediately pat their skin dry with a soft towel—never rub. Within three minutes of exiting the bath, apply your baby’s prescribed moisturizer or emollient to lock in moisture while the skin is still damp. This step is crucial for maintaining the skin barrier between treatments. Use a thick, fragrance-free ointment rather than a lotion for best results, applying liberally to all areas, not just those visibly affected by eczema.

Avoid These 3 Dangerous Bleach Bath Mistakes

bleach bath safety mistakes eczema baby

While bleach baths are generally safe when properly prepared, certain errors can cause serious harm to your baby’s delicate skin. Understanding and avoiding these common mistakes protects your infant while still allowing them to benefit from this therapeutic treatment.

Mistake 1: Using Undiluted Bleach Directly on Skin

Never, under any circumstances, apply undiluted bleach directly to your baby’s skin. Even brief contact with concentrated bleach causes severe chemical burns, intense pain, and significant tissue damage requiring emergency medical treatment. Always verify your dilution ratio before each bath and never skip the mixing step. Keep the bleach bottle well out of reach when preparing the bath to prevent accidental spills or grabs.

Mistake 2: Ignoring Signs of Skin Irritation

Monitor your baby constantly during the entire bleach bath for any signs of discomfort, increased redness, or adverse reactions. If your baby suddenly becomes fussy, develops new redness, or seems to experience increased itching during the bath, immediately end the treatment and rinse thoroughly with clean lukewarm water. Some babies may have heightened sensitivity that makes bleach baths inappropriate—this isn’t failure, it’s important information for your pediatrician.

Mistake 3: Bathing Too Frequently

More is not better with bleach bath therapy. Excessive frequency (more than 2-3 times weekly) can disrupt your baby’s natural skin barrier and cause irritation. Most pediatric dermatologists recommend starting with twice-weekly treatments and adjusting based on your baby’s response. Never increase frequency without consulting your healthcare provider, as overuse negates the benefits and can actually worsen eczema symptoms.

When to Stop Bleach Baths and Call Your Pediatrician Immediately

eczema infection signs baby

While bleach baths are generally safe for most infants with eczema, certain situations require immediate discontinuation of treatment and consultation with your pediatrician. Recognizing these critical warning signs protects your baby from potential complications.

Signs of Allergic Reaction or Severe Irritation

Discontinue bleach bath therapy immediately if your baby develops hives, widespread redness beyond existing eczema patches, swelling, or difficulty breathing during or after a bath. These symptoms indicate a possible allergic reaction requiring medical evaluation. Similarly, if your baby’s skin becomes significantly more irritated, painful, or develops blisters following a bleach bath, stop the treatment and contact your pediatrician before proceeding.

Evidence of Active Skin Infection

If your baby’s eczema shows signs of active infection—including pus-filled blisters, honey-colored crusting, increased warmth in affected areas, or fever—you need medical evaluation before continuing bleach baths. While bleach baths help prevent infections, they’re not sufficient treatment for active, spreading infections that may require oral antibiotics. Your pediatrician can determine whether to continue bleach baths alongside other treatments or temporarily suspend them while addressing the acute infection.

No Improvement After 4 Weeks of Consistent Use

If you’ve followed proper bleach bath protocol consistently for four weeks without noticeable improvement in your baby’s eczema symptoms, schedule a follow-up with your pediatrician. This lack of response may indicate that another underlying condition is contributing to your baby’s skin issues, or that a different treatment approach would be more effective. Don’t continue an ineffective treatment out of hope—it’s better to adjust your strategy with professional guidance.

Toddler Detox Bath: Safe & Natural Tips


Watching your toddler struggle with speech delays or cognitive challenges can leave you feeling powerless. You’ve tried speech therapy, occupational therapy, and countless other interventions with frustratingly limited results. More parents are discovering that toddler detox baths offer a gentle, natural approach to supporting their child’s development by addressing potential heavy metal accumulation through the skin. These simple baths use three all-natural ingredients—bentonite clay, aluminum-free baking soda, and Epsom salt—to create an alkaline environment that may help draw toxins from your child’s developing body without requiring oral supplements or invasive procedures.

Unlike harsh detox methods designed for adults, toddler detox baths provide a non-threatening, even enjoyable experience for children who often look forward to their special bath time. The warm water combined with mineral-rich ingredients creates a soothing ritual that supports your child’s natural detoxification pathways while potentially improving cognitive function and speech development. This guide delivers everything you need to know about implementing safe, effective toddler detox baths in your home—including precise ingredient ratios, safety precautions, realistic timelines for results, and proven strategies to maximize benefits based on real parent experiences.

How Bentonite Clay Draws Heavy Metals from Toddler Skin

bentonite clay molecular structure diagram heavy metal binding

Bentonite healing clay serves as the powerhouse ingredient in toddler detox baths due to its unique molecular structure and electrical properties that make it exceptionally effective at binding to heavy metals. This natural clay carries a strong negative electrical charge that actively attracts positively charged toxins like lead, mercury, and aluminum through the skin’s pores during bathing. As your child soaks, the clay particles surround and trap these harmful substances, preventing them from being reabsorbed into the body—a process known as adsorption rather than absorption.

Why Aluminum-Free Baking Soda Is Non-Negotiable

Never substitute regular baking soda in your toddler detox bath, as aluminum-containing versions could introduce additional toxins you’re trying to eliminate. Aluminum-free baking soda creates the essential alkaline environment that enhances the detoxification process while providing soothing skin benefits. This critical ingredient:

  • Neutralizes acidic compounds on the skin’s surface
  • Helps open pores for more effective toxin removal
  • Prevents skin irritation that could occur with clay alone
  • Works synergistically with bentonite to increase heavy metal binding

The alkaline bathwater created by baking soda mimics the body’s natural pH balance during detoxification, allowing for more efficient release of stored toxins through the skin—the body’s largest elimination organ.

Epsom Salt’s Dual Role in Cognitive Support

Epsom salt contributes far more than just mineral content to your toddler detox bath—it actively supports neurological function during the detox process. As your child soaks, magnesium sulfate penetrates through the skin, delivering two essential minerals directly into the bloodstream:

  • Magnesium supports over 300 enzymatic processes related to brain function and neural communication
  • Sulfate aids liver detoxification pathways that process heavy metals mobilized during bathing

Unlike oral magnesium supplements that many toddlers refuse, the bath delivery method ensures consistent absorption without resistance or digestive upset—making it particularly valuable for children with sensory issues or feeding difficulties.

Step-by-Step: Creating Your First Toddler Detox Bath

Preparing an effective toddler detox bath requires precise measurements and timing to maximize benefits while keeping your child comfortable and safe throughout the experience. Begin by filling your tub with warm (not hot) water at approximately 98-100°F—perfect for sensitive toddler skin. The water should feel pleasantly warm to your inner wrist, similar to a regular bath temperature.

Exact Measurements for Optimal Results

Use precisely one-quarter cup (60 grams) of your detox powder mixture per standard toddler bath—neither more nor less will deliver optimal results. Too little won’t provide sufficient active ingredients, while too much can cause skin dryness or irritation. For reference, this means a 4.2-pound bag delivers approximately 16-20 baths depending on your tub size and your child’s age.

Critical Mixing Technique Most Parents Miss

Stir the powder into running water as the tub fills rather than adding it to standing water—this prevents clumping and ensures even distribution throughout the bath. Use your hand or a clean spoon to vigorously mix the ingredients for at least 30 seconds after adding the powder. Proper mixing creates the uniform milky consistency that maximizes skin contact with active ingredients.

Toddler Detox Bath Safety: Critical Steps Before Soaking

Always consult your pediatrician before starting detox baths, especially if your child has autism, sensory processing disorder, or other developmental conditions. While the ingredients are natural, the detoxification process can be powerful, and children with compromised systems may require modified approaches. Your healthcare provider can help determine if detox baths align with your child’s overall treatment plan and any medications they’re taking.

Essential Patch Testing Protocol

Conduct a patch test 24 hours before the first full bath by applying a small amount of mixed bathwater to your child’s inner forearm. Watch for any signs of redness, irritation, or unusual behavior over the next day. If your child shows sensitivity, consider reducing the powder amount by half for the first few baths before working up to the full dose.

Immediate Discontinuation Warning Signs

Stop using toddler detox baths immediately and contact your healthcare provider if you notice any of these reactions:
– Skin redness or irritation that persists after bathing
– Unusual fatigue or lethargy following baths
– Changes in bowel movements or digestion
– Increased irritability or behavioral regression

Real Parent Results: Speech Delays and Cognitive Improvements

toddler developmental milestones chart before and after

Parents of children with autism consistently report the most dramatic improvements from regular toddler detox baths. One mother documented her nearly five-year-old’s transformation from nonverbal to conversational after combining detox baths with dietary changes that eliminated artificial dyes. “After three months of twice-weekly baths, he started speaking in full sentences and was enrolled in kindergarten within six months,” she shared in a verified review.

Timeline for Noticeable Changes

Most parents report subtle improvements within 3-4 weeks of consistent use, with more significant changes emerging after 2-3 months. Look for these early indicators that the detox bath is working:
– Improved eye contact during interactions
– Increased attempts at verbal communication
– Better sleep patterns and reduced nighttime waking
– More willingness to engage in learning activities

Maximize Results with These 3 Proven Strategies

toddler healthy diet chart artificial dye free processed food free

Combine detox baths with dietary modifications for amplified effects—parents who eliminated artificial dyes, processed foods, and sugar while using detox baths reported faster, more pronounced improvements in speech and cognition. The dual approach reduces incoming toxins while supporting the body’s ability to eliminate stored metals.

Optimal Bathing Frequency for Developmental Support

Aim for 2-3 detox baths per week for children with significant developmental delays, spacing them at least 48 hours apart to allow the body time to process mobilized toxins. For maintenance once improvements begin, reduce to once weekly. Some parents find their children respond best to evening baths that promote deeper sleep—critical for brain development and healing.

Family-Wide Detoxification Rituals That Work

Create a positive association by making detox baths a special family ritual. One parent reported her autistic son now requests “clay time” specifically, transforming what could be a challenging experience into something he eagerly anticipates. Adults can use the same formula for their own detox baths, creating bonding time while supporting the whole family’s toxin elimination.

Toddler Detox Bath FAQs: Age Limits and Effectiveness

How young can toddlers safely use detox baths? Most parents begin between 18-24 months when children can sit securely in the tub without swallowing water. For younger infants, consult your pediatrician first—some practitioners recommend waiting until at least 12 months.

Can detox baths replace speech therapy? Absolutely not. These baths should complement—not replace—evidence-based therapies. Think of them as supporting your child’s biological foundation so they can get more benefit from therapeutic interventions.

How long until heavy metals leave the body? Heavy metal detoxification occurs gradually over months, not days. Consistent use for 3-6 months typically yields the most noticeable developmental improvements according to parent reports.

Why Parents Are Using Toddler Detox Baths for the Whole Family

The same 4.2-pound bag that serves your toddler can provide detox baths for the entire family, making it surprisingly economical. Parents report benefits including reduced stress, better sleep, and improved skin conditions when they join their children in the detox ritual. One mother noted, “I started using the baths for myself too and was shocked at how much better I felt—less brain fog, more energy—which helped me be a better mom to my special needs child.”

Create a sustainable routine by scheduling family detox baths on the same evenings each week. This consistency helps your toddler anticipate and enjoy the experience while ensuring regular exposure to the detoxifying ingredients. The warm, mineral-rich water creates a calming sensory experience that many children with developmental challenges find soothing—turning what could feel like a medical intervention into a cherished family ritual.

How to Bathe a 3 Month Old Baby: Safe Tips


Bathing your three-month-old baby can feel intimidating at first. Those tiny limbs seem fragile, and your newborn who just arrived home from the hospital now weighs more and moves more than before. Many parents feel uncertain about proper technique, water temperature, how long the bath should last, or whether they’re doing everything correctly. The good news is that bathing a three-month-old becomes straightforward once you understand the essential safety principles, preparation steps, and gentle handling techniques that pediatricians recommend.

This guide walks you through everything you need to know to give your three-month-old a safe, comfortable, and enjoyable bath experience—from gathering supplies before you start to the final gentle towel dry. Whether you’re a first-time parent or caring for a baby again after years, these practical steps will build your confidence and keep your little one safe during each bath time.

Gather Everything Before Starting

Preparation is the most important aspect of bathing a three-month-old. Babies can slip unexpectedly, and leaving your baby unattended—even for seconds—to grab a forgotten item creates serious safety hazards. Before you begin, ensure every supply sits within arm’s reach of the bathing area.

Essential supplies for a three-month-old bath include: a baby bathtub or clean sink with warm water, baby wash or gentle cleanser formulated for infant skin, a soft washcloth, baby shampoo if your little one has hair, clean diapers and clothing, a soft hooded towel, cotton balls or gauze pads for cleaning around the eyes, and a diaper cream or moisturizer if needed. Having these items ready before you start keeps your attention fully on your baby throughout the bath.

Consider setting up a designated bathing station on a changing table or flat, safe surface near the sink or bathtub. Keep the room warm—babies lose body heat quickly when wet, and a chilly environment can make bath time stressful rather than enjoyable. A room temperature between 75 and 80 degrees Fahrenheit helps your baby stay comfortable.

Set Up the Bathing Area Safely

baby bathtub setup safety newborn

The surface where you place your baby during bath time requires careful attention. If using a baby bathtub, ensure it sits securely on a stable countertop, the edge of a regular bathtub, or a specialized bath stand designed for infant tubs. Never place the tub on an elevated surface where it could fall, and never leave your baby unattended in any amount of water.

For three-month-olds, the traditional baby bathtub works well because it supports the baby’s body while allowing you to keep one hand on your little one at all times. Some parents prefer using a clean kitchen sink, which provides a convenient height and often has a faucet that allows for easy temperature adjustments. If using a sink, remove any dishes or food residue first and line the bottom with a soft towel or non-slip bath mat to prevent sliding.

Fill the tub with warm water—around 100 degrees Fahrenheit or roughly 38 degrees Celsius. Test the water temperature by dipping your elbow or inner wrist into the tub, as these areas sense temperature more accurately than your hands. The water should feel warm but not hot, similar to the temperature you’d find comfortable for a warm compress. Aim for a water depth of about two to four inches, enough to cover your baby’s legs and bottom without covering the face.

Master Proper Holding Technique

Supporting your three-month-old correctly during bath time requires understanding how to keep their head, neck, and body stable while you clean them. At this age, babies lack the muscle control to hold their heads upright, so your hands provide all the necessary support.

The cradle hold works best for most parents during infant baths. Place your baby’s head and neck along your forearm, with your hand supporting their bottom and legs. Your fingers should wrap gently around the baby’s upper arm on the far side, creating a secure cradle that keeps the head above water while your other hand does the washing. This position feels natural once you practice it a few times and allows you to control the baby’s movement while keeping their face dry.

Keep a firm but gentle grip throughout the bath. Babies are surprisingly strong and can suddenly kick or twist, potentially slipping from your hands. Maintain constant physical contact with your baby from the moment you lower them into the water until you lift them out and wrap them in a towel. If you must briefly step away—though this isn’t recommended—ask another adult to hold the baby while you attend to something, even if it means cutting the bath short.

What to Do If Your Baby Cries During Bath Time

If your three-month-old becomes upset during bath time, stay calm and assess the situation. Check if the water temperature has cooled, if your grip feels insecure to them, or if light is bothering their sensitive eyes. Gently talking or singing can soothe many babies, as can maintaining eye contact and showing a calm expression. If crying persists despite your efforts, don’t force the bath—wrap your baby in a towel and try again later. Some babies simply need time to adjust to the bathing experience.

Wash Your Baby Effectively

baby bath washing technique skin folds

With your baby securely supported, begin the bath by using a soft washcloth dampened with warm water to gently wipe their face. Pay special attention to the eye corners, using a clean corner of the cloth for each eye to prevent spreading any discharge or crust. Clean around the nose and mouth, being very gentle around the delicate nostrils and lips.

Move to the body next, using a small amount of baby wash on the washcloth or directly in the bathwater. Clean all skin folds thoroughly—behind the ears, around the neck, under the arms, between the fingers and toes, and in the genital area. Three-month-olds often have folds of skin that can collect milk residue, drool, or dead skin, so these areas need particular attention. Use gentle circular motions and avoid scrubbing, which can irritate sensitive infant skin.

For the hair, if your baby has any, use a tiny amount of baby shampoo and gently massage the scalp with your fingertips or a soft brush designed for infants. Rinse carefully using a cup of clean warm water poured slowly over the head, always using your free hand to shield the baby’s eyes and forehead from the running water. Keep the bath brief—five to ten minutes is sufficient for a three-month-old. Prolonged exposure to warm water can dry out their skin and make them uncomfortably cold.

Keep Bath Time Comfortable Throughout

Temperature regulation matters significantly for three-month-olds, who can’t yet shiver effectively to generate body heat. Monitor your baby throughout the bath for signs of discomfort or cold. If you notice trembling, bluish lips, or fussiness that wasn’t present at the start, the water may be cooling too quickly or the room temperature may be too low.

Keep adding small amounts of warm water as needed to maintain a comfortable temperature, but be careful not to make the water too hot. Never add hot water directly to a baby in the tub—always mix it in a separate container first and test it thoroughly. The safest approach is to prepare the bath at the correct temperature from the start and keep the session short enough that reheating isn’t necessary.

Watch your baby’s cues to determine their tolerance for bath time. Some three-month-olds love the warm water and relaxed feeling, while others find the experience overstimulating. If your baby becomes fussy or cries throughout the bath, keep sessions brief and try different times of day to find when your baby is most relaxed. Some babies bath best in the morning when they’re alert, while others prefer evening baths as part of a calming bedtime routine.

Complete the Bath and Dry Thoroughly

drying baby after bath towel wrap newborn

When the bath concludes, lift your baby out of the water immediately using the secure cradle hold, supporting the head and neck at all times. Place them on a soft, dry towel spread out on a flat, safe surface like a changing table or bed. Don’t wait to dry—babies lose heat quickly once removed from the warm water.

Pat your baby’s skin dry gently rather than rubbing, paying special attention to all skin folds where moisture can collect. Leaving these areas damp can lead to irritation or yeast infections in the folds. Once the skin is mostly dry, apply baby moisturizer if your baby’s skin tends to be dry, though many three-month-olds don’t need lotion after every bath.

Dress your baby promptly in clean, warm clothing. At this age, babies can’t regulate their body temperature well, so layering works better than heavy single garments. A onesie topped with a light shirt and pants, plus socks, typically provides appropriate warmth. If your baby has cradle cap or dry skin on the scalp, you can gently brush the affected areas after the bath while the skin is softened.

Avoid Common Bath Time Mistakes

New parents sometimes make innocent mistakes that create unnecessary risks during bath time. Understanding these common errors helps you avoid them and keep your baby safe.

Never leave your baby unattended in the bath, even for a moment. Babies can drown in just inches of water, and drowning happens silently without the dramatic splashing many people expect. If you must answer the phone or door, take your baby with you wrapped in a towel—never rely on a sibling or other child to supervise.

Avoid using adult soaps, shampoos, or bubble baths on your three-month-old. These products contain fragrances, dyes, and chemicals that can irritate infant skin and cause rashes or dryness. Stick to products specifically formulated for babies, and even then, test new products on a small patch of skin before using them all over.

Don’t fill the tub too deeply. Water above your baby’s chest increases the risk of accidental drowning and makes temperature regulation more difficult. Two to four inches provides enough water for effective cleaning while keeping your baby’s face safely above water level.

Finally, resist the temptation to use bath seats or rings designed to hold babies upright. These products give parents a false sense of security and have been linked to drownings when babies slip or the devices tip over. Your hands remain the safest support for your three-month-old throughout every bath.

Make Bath Time Enjoyable for Baby

Beyond safety, bath time offers valuable bonding opportunities and can become something your three-month-old genuinely enjoys. Talk to your baby calmly throughout the bath, describing what you’re doing and using a gentle, reassuring tone. Your voice provides comfort and helps your baby associate bath time with positive experiences.

Introduce bath toys gradually—though three-month-olds aren’t yet ready for elaborate play, they often enjoy watching a soft rubber duck float or feeling the water splash from a cup. Some babies love having their feet kicked in the water, which you can gently demonstrate while maintaining control of their body. These positive associations make future baths easier and turn routine hygiene into an anticipated activity.

Pay attention to what specifically your baby enjoys and adapt your approach accordingly. Some babies prefer being more submerged with warm water covering their chest, while others feel more secure with less water coverage. Some love having their hair washed, while others find it startling at first. By tuning into your baby’s preferences and responses, you can customize bath time to create the most pleasant experience for your little one.

How to Make a Milk Bath at Home


Your bathroom fills with the comforting scent of warm milk as you sink into the tub—imagine silky-smooth skin without harsh chemicals. Milk baths have been cherished since Cleopatra’s era for their gentle exfoliation and moisture-locking properties. Whether you’re soothing sunburn, calming eczema flare-ups, or just craving deep hydration, making a milk bath takes under 10 minutes with pantry staples. Forget expensive spa treatments; this guide reveals exactly how to make milk bath blends that transform dry, irritated skin into a supple, glowing canvas using ingredients already in your kitchen. You’ll learn precise ratios to prevent clogging drains, pro tips for maximizing benefits, and critical safety steps most DIY tutorials skip.

Essential Ingredients for Maximum Skin Benefits

Skip store-bought kits with questionable additives. Real milk bath magic happens with three core components working together: lactic acid for exfoliation, fats for moisture barrier repair, and proteins for skin strengthening.

Choosing Your Milk Base: Cow, Goat, or Powder?

Cow milk (whole or buttermilk) delivers instant lactic acid for gentle exfoliation but spoils fastest. Goat milk contains smaller fat molecules that penetrate deeper—ideal for eczema or psoriasis. For longest shelf life, dry milk powder (1 cup per bath) avoids refrigeration needs while providing identical benefits. Never use skim milk; fat content is essential for skin barrier support.

Must-Have Additives for Targeted Results

  • Oatmeal (colloidal): Grind ½ cup rolled oats into fine powder to calm itching from rashes or insect bites
  • Raw honey: 2 tablespoons boosts moisture retention and adds antibacterial properties
  • Carrier oils: 10 drops almond or jojoba oil prevents post-soak tightness (skip if acne-prone)
  • Dried rose petals: Purely aesthetic—adds luxury but zero skin benefits

⚠️ Critical Warning: Avoid essential oils like citrus or cinnamon—they become phototoxic when diluted in bathwater and cause chemical burns. Stick to skin-safe additives only.

Preparing Your Tub: 3 Non-Negotiable Safety Steps

bathroom slip prevention mat placement

Most milk bath guides ignore how slippery ingredients make surfaces. Skip these steps, and you risk serious falls or clogged pipes.

Drain Protection First—Before Adding Water

Place a fine-mesh strainer over your tub’s drain opening. Milk solids and oatmeal will inevitably wash down, causing expensive plumbing backups within days. Test this before running water—strainers shift when submerged.

Water Temperature Rules for Skin Safety

Fill your tub with warm (not hot) water at 98-102°F (37-39°C). Hot water:
– Denatures milk proteins, reducing effectiveness
– Opens pores excessively, worsening irritation
– Causes rapid cooling that shocks sensitive skin
Use a bath thermometer—guessing leads to scalding or ineffective baths.

Surface Prep to Prevent Slips

Wipe tub edges with vinegar-water solution (1:3 ratio) to remove soap scum. Milk creates invisible slick films on previously soapy surfaces. Place a non-slip mat under where you’ll sit—never over milky water where it floats away.

Step-by-Step Milk Bath Recipe (5 Minutes Total)

Follow this exact sequence to avoid clumping or uneven distribution. Timing matters—add ingredients while water flows for perfect dispersion.

Mixing Your Base Solution

  1. Start warm water flow at medium pressure
  2. Whisk 1 cup dry milk powder into 2 cups cool water in a bowl until smooth (prevents lumps)
  3. Slowly pour mixture under running water while swirling tub with hand
  4. Add ½ cup ground oatmeal and 2 tbsp honey, continuing to swirl for 30 seconds

💡 Pro Tip: For goat milk baths, use 1 cup reconstituted goat milk (powder + water) + ½ cup dry cow milk powder. The dual-protein blend prevents rapid spoilage while boosting efficacy.

Final Additions for Skin-Specific Needs

  • For dry/sunburned skin: Stir in 1 tbsp coconut oil after turning off water (oil floats if added too early)
  • For sensitive/rosacea skin: Omit oils—add ¼ cup cooled chamomile tea instead
  • For dull skin: Mix in 1 tsp ground almonds for light physical exfoliation

Soaking Protocol: Timing and Technique

How long you soak determines results—too short yields no benefits, too long strips natural oils.

Optimal Duration by Skin Type

Skin Condition Max Soak Time Critical Signs to Exit
Eczema/Psoriasis 15 minutes Skin feels tight or starts itching
Sunburn 10 minutes Water cools below 95°F (35°C)
Normal/Dry Skin 20 minutes Fingertips prune deeply

Never exceed 20 minutes. Lactic acid continues working after you exit the tub—prolonged exposure causes over-exfoliation.

Post-Soak Routine for Lasting Results

  1. Rinse quickly with lukewarm shower spray (cold water closes pores too fast)
  2. Pat dry—never rub—with 100% cotton towel
  3. Apply moisturizer within 3 minutes while skin is damp
  4. Clean tub immediately with vinegar spray to prevent milky film buildup

Troubleshooting Common Milk Bath Failures

clogged bathroom drain oatmeal milk bath

Even with perfect recipes, issues arise. Fix these fast before they ruin your results.

Why Your Skin Feels Sticky After Soaking

This means honey wasn’t fully dissolved. Solution: Always mix honey with 1 tbsp warm water first until liquid, then add to bath. If already sticky, rinse with diluted apple cider vinegar (1 part vinegar to 4 water).

Milky Residue Clogging Your Drain

Oatmeal or undissolved powder is the culprit. Solution: Run hot water for 2 minutes before removing drain strainer. If clogged, pour ½ cup baking soda followed by 1 cup boiling vinegar—wait 15 minutes before flushing.

No Noticeable Skin Improvement?

You’re likely using skim milk or expired powder. Solution: Whole-fat dairy is non-negotiable—fat carries nutrients into skin. Test powder freshness: mix 1 tsp with water; clumps mean it’s rancid.

Cost Comparison: DIY vs. Store-Bought

Lush bath milky vs diy milk bath cost comparison chart

Save 73% with homemade versions while avoiding synthetic preservatives.

Product Cost Per Bath Key Downsides
DIY Milk Bath $1.20 Requires 5-minute prep
Lush “Bath Milky” $4.50 Contains synthetic fragrances
Dr. Teal’s Milk Bath $3.80 Uses sodium lauryl sulfate

Based on average U.S. grocery prices for organic ingredients

Preserving Leftover Mixes Safely

Never store wet mixtures—they breed bacteria in hours. Instead:

  1. Blend dry ingredients only: 2 cups milk powder + 1 cup oat flour + ¼ cup cornstarch
  2. Store in airtight glass jar away from light
  3. Shelf life: 3 months (discard if clumps form)
  4. Per bath: Use 1½ cups dry mix + 2 tbsp honey added at tub

When to Avoid Milk Baths Entirely

These situations require doctor consultation first:

  • Open wounds or severe burns (milk proteins can trap bacteria)
  • Dairy allergies (even topical use risks reactions)
  • Active fungal infections (moisture feeds yeast)
  • Immediately after chemical peels (over-exfoliation risk)

🌿 Eco Note: Reuse bathwater for watering non-edible plants—diluted milk nourishes soil but harms vegetables.

Final Tips for Spa-Worthy Results Every Time

Maximize your milk bath investment with these tested refinements. Always test new additives on your inner wrist 24 hours before full immersion. For extra luxury, light unscented soy candles—essential oil diffusers create dangerous inhalation risks near steam. Store dry mixes with bay leaves to deter pantry moths. And never skip the post-soak moisturizer; milk baths work best as part of a complete routine.

Transform your next soak into a skin-renewing ritual with these precise methods. Within 3 baths, you’ll notice fewer flakes, calmer redness, and that coveted “just-stepped-out-of-the-spa” glow—all for pennies per use. Ready to customize further? Try our oatmeal honey variation for sensitive skin or explore rose petal upgrades for special occasions. Your softest skin awaits.

« Older posts Newer posts »