Smart Bathroom Solutions: Reviews, Tips & Expert Maintenance Guides

Author: bathroom27 (Page 13 of 25)

Small Bath Remodel Ideas (2026 Guide)


Your small bathroom feels cramped every time you step inside. That awkward corner where the door hits the sink, the lack of storage for towels, and the constant battle to keep everything organized—it’s enough to make you dread your morning routine. You’re not alone; 68% of homeowners with compact bathrooms report feeling frustrated by their limited space. But here’s the good news: with strategic small bath remodel ideas, you can transform your cramped quarters into a functional, stylish retreat without knocking down walls or breaking the bank.

The key to successful small bath remodel ideas lies in maximizing every inch while creating the illusion of space. Forget expensive structural changes—most homeowners achieve dramatic improvements through smart layout adjustments, strategic storage solutions, and optical illusions that trick the eye. In this guide, you’ll discover practical, budget-friendly small bath remodel ideas that deliver maximum impact. Whether you’re working with a 30-square-foot powder room or a 50-square-foot master bath, these proven strategies will help you create a space that feels twice as large while functioning perfectly for your daily needs.

Strategic Layout Changes for Maximum Impact

small bathroom layout before and after remodel

How to Reconfigure Your Small Bathroom Layout Without Moving Plumbing

Rethinking your bathroom’s traffic flow can dramatically improve functionality without expensive plumbing changes. Start by evaluating your current door swing—does it crash into fixtures when opened? Reconfiguring to a pocket door or reversing the swing direction instantly gains you 3-5 square feet of usable space. Next, consider shifting fixtures just inches: moving your vanity 6 inches toward an unused corner creates room for a full-sized shower instead of a cramped stall. Many homeowners successfully swap toilet and vanity positions within existing plumbing footprints, creating more logical traffic patterns.

Which Fixtures Can You Relocate Without Breaking Your Budget

Focus on “dry zone” fixtures first when planning strategic moves. Toilets and showers require significant plumbing work to relocate, but vanities and storage units offer more flexibility. Wall-mounted vanities can be installed almost anywhere with proper framing, and pedestal sinks can be positioned to maximize floor space. If your budget allows for limited plumbing work, consider moving your toilet just 12-18 inches to create space for a proper shower curtain track—this small adjustment prevents constant water spills on your floor.

Space-Saving Storage Solutions That Actually Work

Clever Vertical Storage Ideas for Tiny Bathrooms

When floor space is limited, look up. Install floating shelves that reach within 6 inches of your ceiling to create storage without visual clutter. Recessed medicine cabinets with mirrored fronts double your storage while maintaining the illusion of space. For maximum impact, build out shelving in unused corners—those often-wasted 45-degree angles can hold towels and toiletries while appearing nearly invisible. Over-the-toilet storage units should be narrow and tall rather than wide and short to avoid making the room feel cramped.

Where to Hide Storage in Plain Sight

Integrate storage into your design rather than adding bulky units. Frame out a narrow shelving unit between wall studs next to your shower—just 4-6 inches deep provides space for shampoo bottles without reducing floor area. Install a mirrored cabinet with hidden compartments behind reflective surfaces. Convert under-vanity space with pull-out drawers instead of fixed cabinets, making every inch accessible. For renters or those on tight budgets, tension rod systems inside cabinet doors create instant storage for hair tools and cleaning supplies.

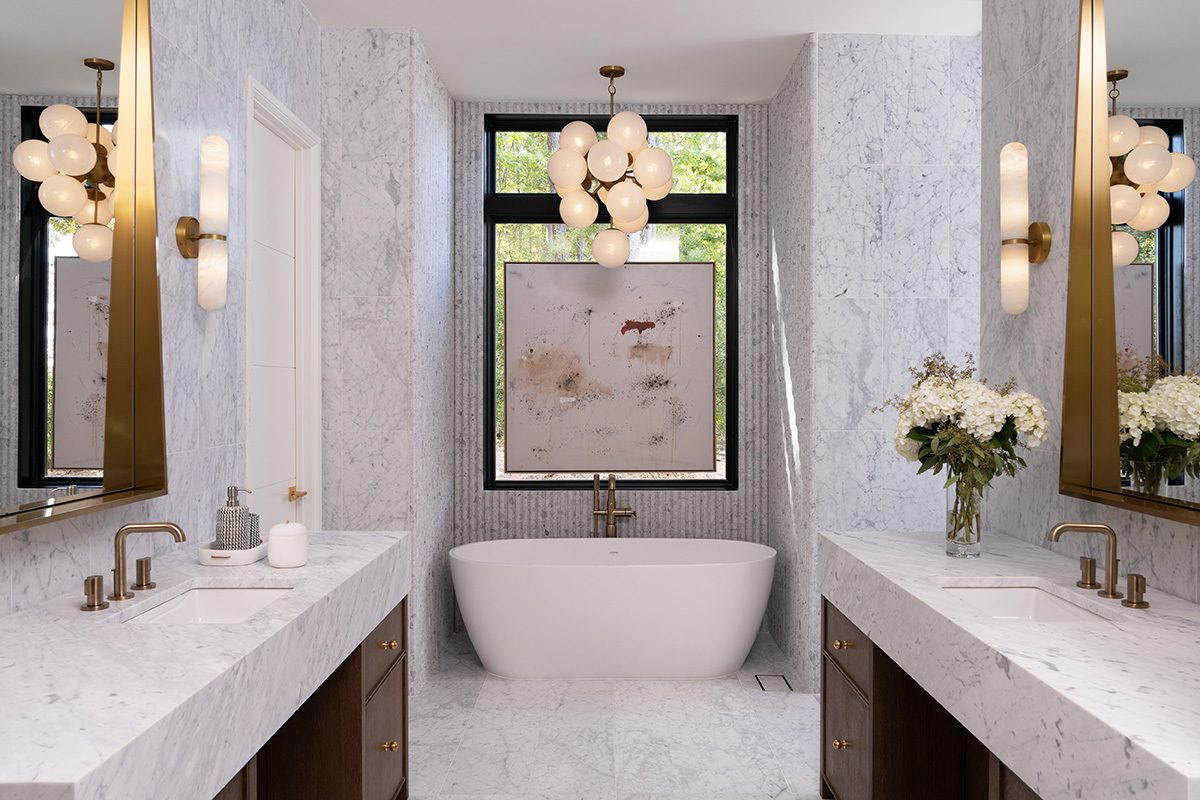
Visual Tricks That Make Small Bathrooms Feel Twice as Large

small bathroom color schemes illusion of space

Which Colors and Finishes Create Instant Space

Light, reflective surfaces are your best friends in small bath remodel ideas. Opt for large-format tiles (at least 12×24 inches) with minimal grout lines to reduce visual fragmentation. Glossy finishes on walls and floors bounce light around, creating depth. Stick to a monochromatic palette with varying textures—ivory walls with white subway tile and cream fixtures feel expansive, while strategic metallic accents (brushed nickel or matte black) add sophistication without visual weight. Avoid two-tone color schemes that chop up the space.

How to Position Mirrors for Maximum Spatial Illusion

Strategic mirror placement can transform your small bathroom’s perceived size. Install a large mirror that spans the entire vanity wall rather than matching the sink footprint—this creates continuity. Angle a secondary mirror opposite your shower to reflect natural light and create depth. For dramatic effect, consider mirrored closet doors if you have storage space. Avoid ornate mirror frames that draw attention to boundaries; instead, choose frameless designs that blend seamlessly with your walls.

Budget-Friendly Small Bath Remodel Ideas Under $1,000

Where to Splurge and Where to Save on Fixtures

Invest in quality for elements you use daily: a comfortable showerhead and smooth faucet operation matter more than oversized tiles. Save by choosing prefabricated shower surrounds instead of custom tile work, and consider a wall-mounted toilet with hidden tank to save 4-6 inches of floor space. Refinish rather than replace existing tubs when possible, and select a single, multi-functional vanity instead of separate storage units. Remember that paint is the cheapest transformation—high-gloss finishes in light colors cost under $50 but make an enormous visual impact.

DIY Upgrades That Deliver Professional Results

Replace dated hardware with modern fixtures for an instant refresh—this takes under an hour and costs $50-100. Install LED strip lighting under vanities and above mirrors to create ambient glow without bulky fixtures. Re-caulk and re-grout existing tile for a clean, updated look. Add peel-and-stick vinyl flooring in wood-look planks for waterproof, stylish results without the cost of ceramic tile. Most importantly, declutter ruthlessly before starting—removing unnecessary items makes any bathroom feel instantly larger.

Lighting Strategies That Transform Small Bathrooms

small bathroom layered lighting plan

Layered Lighting Solutions for Compact Spaces

Combine three lighting types for optimal small bath functionality: ambient (overhead), task (mirror), and accent (strategic highlights). Recessed ceiling lights on dimmers provide flexible ambient lighting without hanging fixtures that lower perceived ceiling height. Wall-mounted sconces on either side of the mirror eliminate facial shadows better than overhead lighting alone. Add subtle LED strips under floating vanities to create the illusion of space while providing nighttime navigation.

How to Maximize Natural Light in Windowless Bathrooms

For windowless spaces, install a tubular skylight that channels natural light through reflective tubes—these work even when installed through attic spaces. Choose warm white LED bulbs (2700K-3000K) that mimic natural daylight without harsh blue tones. Position mirrors to reflect artificial light sources throughout the space. Consider light-filtering shower curtains in transparent materials rather than opaque options that block light penetration.

Final Touches That Complete Your Small Bath Transformation

Accessory Selection for Small Space Harmony

Choose fewer, larger accessories rather than multiple small items that create visual clutter. A single large plant in the corner adds life without crowding, while matching metal finishes throughout create cohesion. Select towels in your wall color family to maintain visual flow, and avoid placing objects on every available surface—negative space is essential in small bath design.

Maintenance Tips to Keep Your Small Bathroom Feeling Spacious

Establish a daily wipe-down routine to prevent water spots that make small spaces feel dingy. Use clear shower curtains instead of patterned ones to maintain sightlines. Store daily-use items in hidden compartments and rotate seasonal items to keep surfaces clear. Most importantly, resist the urge to fill every inch of storage—leaving 20% of your space intentionally empty prevents that cramped, cluttered feeling.

Final Note: With these small bath remodel ideas, even the tiniest bathroom can transform from cramped to comfortable. Remember that successful small space design focuses on functionality first, with aesthetics supporting the practical layout. Start with one or two changes that address your biggest pain points, then build from there as your budget allows. The most effective small bathroom remodels aren’t about square footage—they’re about smart design that makes every inch work harder for you. Whether you implement all these ideas or just a few, you’ll create a more enjoyable daily routine in a space that finally works for your lifestyle rather than against it.

Vent Bath Fan Through Soffit: Best Practices and Tips


When bathroom humidity lingers after showers, creating foggy mirrors and musty odors, you know your ventilation system isn’t working correctly. Many homeowners seek simpler alternatives to roof venting and consider routing their bath fan exhaust through the soffit instead. This approach can work effectively when done right, but improper installation risks trapping moisture in your attic where it causes mold growth, wood rot, and compromised insulation. Understanding the critical steps for venting a bath fan through a soffit will protect your home while maintaining healthy indoor air quality. We’ll show you exactly how to implement this solution correctly, avoid common code violations, and prevent costly moisture damage that could require thousands in repairs.

Verify Your Local Building Code Requirements First

Before purchasing a single tool or material, contact your local building department to confirm whether soffit venting is permitted in your area. While the International Residential Code allows bathroom exhaust to terminate through soffits under specific conditions, many municipalities have stricter regulations that explicitly prohibit this method. Some jurisdictions require bathroom fans to vent directly through the roof with proper flashing, while others permit soffit termination only when the exhaust point maintains a minimum distance—typically three feet—from any attic intake vents or roof edges.

Failing to obtain proper permits and inspections creates significant risks for homeowners. Unpermitted work can void insurance coverage for moisture-related damage and create complications during home sales when inspectors discover non-compliant installations. Document the specific requirements for duct diameter (usually 4 inches), maximum run length, and insulation standards before proceeding. This preliminary research prevents wasted effort and ensures your ventilation system meets legal standards while effectively removing bathroom moisture.

Weigh the Real Advantages and Risks of Soffit Venting

Choosing to vent your bath fan through a soffit offers tangible benefits that appeal to many homeowners. The installation process typically requires less time on ladders than roof venting, reducing fall risks during installation. You avoid complex roof work that could compromise shingle integrity or create potential leak points that require professional repair. Shorter duct runs mean better airflow efficiency and lower material costs since you’ll need fewer components and less specialized equipment.

However, these advantages come with serious considerations. The primary danger involves moist bathroom air being drawn back into attic ventilation systems, especially when temperature differentials create suction effects. This recirculation traps humidity in your attic where it condenses on cold surfaces, promoting mold growth and structural damage over time. Soffit vents also sit closer to ground level than roof vents, making them more vulnerable to snow accumulation in winter climates and pest intrusion year-round. Carefully evaluate whether your specific home configuration and climate make soffit venting a viable option before committing to this approach.

Gather Code-Compliant Materials and Essential Tools

bathroom fan venting materials galvanized steel ductwork backdraft damper foil duct tape

Selecting the right components makes the difference between a long-lasting installation and one that fails prematurely. Begin with rigid metal ductwork—galvanized steel or aluminum—rather than flexible plastic or foil alternatives. Rigid duct maintains its shape, provides superior airflow, and satisfies code requirements in most jurisdictions. Ensure the duct diameter matches your fan’s output (typically 4 inches) to prevent airflow restrictions that reduce performance.

For exterior termination, invest in a dedicated bath fan vent hood featuring a backdraft damper that closes automatically when the fan turns off. This component prevents cold air infiltration and pest entry while allowing moist air to exit efficiently. Standard dryer vents won’t provide adequate protection against reverse airflow.

You’ll need specialized sealing materials including foil-faced duct tape (not regular tape) or UL-listed duct mastic to create airtight connections at every joint. For duct runs passing through unconditioned spaces, gather insulated duct wrap with an appropriate R-value for your climate zone. Essential tools include a hole saw matching your duct diameter, jigsaw with metal-cutting blade, drill, measuring tape, level, and safety equipment like work gloves and eye protection.

Plan Your Duct Route for Maximum Efficiency

bathroom fan duct routing diagram soffit venting slope ductwork airflow

The path your duct takes significantly impacts performance and longevity. Design a route that minimizes both total length and directional changes, as each foot of duct and every bend reduces airflow efficiency. The International Residential Code recommends keeping bathroom exhaust runs under 35 feet equivalent length, with each 90-degree bend counting as approximately 5 feet of additional length.

When horizontal sections are unavoidable, slope the duct slightly downward toward the exterior termination point—about a quarter-inch per foot—to prevent condensation from flowing back toward the fan. Never compress or kink ductwork to fit tight spaces, as this creates significant airflow restrictions that strain the fan motor and reduce moisture removal effectiveness. Support horizontal duct runs every 3-4 feet with proper hangers to prevent sagging, which creates low spots where condensation pools and eventually leaks.

Install the Interior Duct Connections Correctly

Begin by preparing the bathroom fan’s exhaust port, typically a knockout plug you remove to access the opening. Slide the rigid duct over the port with at least one inch of overlap, securing it with three to four evenly spaced screws. Apply foil tape or duct mastic over the entire joint, extending at least two inches onto both surfaces for a complete seal.

As you route the duct toward the soffit, use factory-made elbow fittings at bend points rather than attempting to bend the rigid duct. Each connection requires the same careful sealing process—screws followed by tape or mastic—to prevent air leaks. Before cutting through the soffit, verify the termination point sits at least three feet from any attic intake vents to minimize the risk of moist air recirculation. Position the hole near the outer edge of the soffit, centered between exterior and interior surfaces for optimal clearance.

Secure the Exterior Vent Hood with Weatherproof Sealing

The vent hood installation determines whether your system withstands seasonal weather challenges. Apply a continuous bead of exterior-grade silicone caulk around the hood’s mounting flange before positioning it against the soffit. This creates a watertight barrier that prevents moisture intrusion around the duct penetration.

Push the hood firmly into place and secure it with corrosion-resistant screws provided by the manufacturer, being careful not to over-tighten and crack the flange. Connect the interior duct to the hood’s inlet stub with at least one inch of overlap, securing with screws and sealing completely with foil tape or duct mastic. The finished connection should feel solid with no movement, and you should detect no air leakage when the fan operates.

Insulate Critical Duct Sections and Verify Sealing

bathroom fan duct insulation attic duct wrap foil tape sealing

For duct runs passing through unconditioned attic spaces, apply insulated duct wrap with the foil facing outward to create an effective radiant barrier. Seal all seams with foil tape, overlapping joints by at least six inches to prevent gaps where condensation could form. In colder climates, consider using pre-insulated rigid duct sections for maximum protection against freezing condensation.

Conduct a thorough inspection of your entire duct system, paying special attention to connection points at the fan housing and vent hood. Even minor air leaks allow warm, moist bathroom air to escape into wall or attic cavities, creating perfect conditions for mold growth. Run your hand along each joint while the fan operates to detect any escaping air, and reseal problem areas immediately.

Test Performance and Implement Preventative Maintenance

After installation, verify proper operation by feeling strong, consistent airflow at the exterior vent hood with no escaping air from interior connections. Monitor bathroom humidity levels during showers to ensure moisture clears within 20-30 minutes. Check the exterior hood periodically for debris accumulation, pest nests, or snow blockage that could restrict airflow.

Establish a maintenance routine that includes cleaning the fan grille and interior components annually, inspecting the exterior hood twice yearly, and testing fan performance whenever you notice lingering bathroom humidity. Replace worn components according to manufacturer recommendations, and consider upgrading to a modern, energy-efficient fan if your unit exceeds ten years of age.

Avoid These Critical Installation Mistakes

Many soffit venting failures stem from preventable errors. Using flexible plastic duct instead of rigid metal creates airflow restrictions and frequent failure points that violate building codes in most areas. Skipping required permits risks insurance complications and costly rework if inspectors discover non-compliant installations during home sales.

Inadequate sealing at connection points remains the most common failure cause, allowing moist air to infiltrate wall cavities and attics. Poor termination placement near attic intake vents or snow-prone roof edges creates immediate recirculation problems. Most importantly, neglecting climate-specific considerations—like insufficient duct insulation in cold regions—leads to frozen condensation that blocks airflow and damages fan motors.


Properly venting a bath fan through a soffit delivers effective moisture control when executed with careful attention to building codes, material selection, and installation precision. Focus on creating an airtight system with appropriate duct sizing, strategic termination placement, and climate-appropriate insulation to prevent the moisture damage that plagues improper installations. By following these guidelines, you’ll protect your home’s structural integrity while maintaining the healthy indoor environment your family deserves—without the complexity and expense of roof venting. Remember that when in doubt about code compliance or installation challenges, consulting a licensed HVAC professional ensures your ventilation system performs reliably for decades.

How to Wire Bath Fan and Light: Step-by-Step Guide


Bathroom ventilation is critical for preventing mold and moisture damage, yet many homeowners struggle with properly wiring their bath fan and light combinations. If your bathroom fan won’t turn on while the light works, or both components fail to function after installation, you’re not alone—improper wiring causes most bathroom ventilation issues. This comprehensive guide shows you exactly how to wire bath fan and light units correctly the first time, whether you’re installing a new unit during a renovation or replacing an aging fixture. You’ll learn the essential electrical requirements, safety protocols, and step-by-step connection methods that ensure your bathroom stays dry and well-lit for years to come.

When tackling how to wire bath fan and light fixtures, understanding your specific configuration options is crucial before touching a single wire. Bathroom electrical work demands respect for both safety and code compliance, but with proper preparation, most homeowners can successfully complete this project without professional help. By the end of this guide, you’ll know precisely which wires connect where, how to choose between single or dual switch setups, and what common mistakes to avoid during installation.

Single vs. Dual Switch Wiring Configurations

bathroom fan switch wiring diagram single dual

Choosing between single-switch and dual-switch setups determines your entire wiring approach when you wire bath fan and light fixtures. A single-switch configuration uses one wall toggle to control both components simultaneously—turning on the light automatically activates the fan. This simpler setup requires only standard 14/2 NM-B cable (black, white, and ground wires) between your switch and fixture, making it ideal for beginners or when working with limited space in existing walls.

For independent control, dual-switch wiring gives you the flexibility to run the fan without turning on the light—a must-have feature during morning showers when bright lights are unnecessary. This configuration requires 14/3 NM-B cable (black, red, white, and ground) to create separate hot leads for each component. The red wire typically powers the fan while the black wire controls the light, allowing completely independent operation from two separate switches mounted side-by-side in your bathroom.

Critical wiring tip: When installing dual switches, mark all white wires used as hot conductors with black tape at both ends. The National Electrical Code requires this identification to prevent dangerous confusion during future maintenance. Many DIYers skip this step, creating serious safety hazards for themselves or future homeowners.

Essential Tools and Materials Checklist

electrical tools for bathroom fan installation

Before attempting to wire bath fan and light fixtures, gather these non-negotiable items to ensure a smooth installation:

  • Voltage tester or multimeter (test before and after working on circuits)
  • Wire strippers with gauge markings for 14-12 AWG wires
  • Needle-nose pliers for bending and securing wire connections
  • Screwdriver set (both Phillips and flathead)
  • Wire nuts matching your wire gauge (blue for 14 AWG, yellow for 12 AWG)
  • Electrical tape (10+ feet)
  • Fish tape (for retrofit installations through existing walls)

Your materials list must include:
– Fan-rated electrical box (standard boxes can’t support fan vibration)
– 14/2 or 14/3 NM-B cable (depending on your switch configuration)
– GFCI-protected switch or circuit breaker (required by code)
– Moisture-resistant switch plates
– Combination fan-light unit rated for damp locations

Warning: Never use standard light fixture boxes for fan installations—they’ll loosen over time from vibration, potentially causing the unit to fall. Proper fan-rated boxes have reinforced mounting brackets that secure directly to ceiling joists.

Safety Protocols and Code Requirements

Electrical safety in bathroom installations isn’t optional—it’s a matter of preventing fire or electrocution hazards. The National Electrical Code mandates GFCI protection for all bathroom receptacles and lighting circuits, which means your fan-light combination must either connect to a GFCI-protected circuit or use a special GFCI switch at the wall. This protection cuts power within milliseconds if current leakage is detected, potentially saving your life in a wet environment.

Most building departments require dedicated 20-amp circuits for bathroom outlets, but fan-light combinations can typically share a 15-amp circuit if no other bathroom outlets connect to it. Verify your local code requirements before starting—some jurisdictions mandate separate circuits for fans and lights in new construction. Remember that bathroom circuits cannot serve outlets outside the bathroom, so don’t try to extend this circuit to power hallway or bedroom fixtures.

Life-saving practice: Always test your voltage tester on a known live circuit before and after checking your work circuit. Faulty testers have caused numerous electrical accidents when DIYers mistakenly believed circuits were dead. Keep one hand in your pocket while testing to prevent current from traveling across your heart if accidental contact occurs.

Step-by-Step Wiring Process for Single Switch Setup

Follow these precise steps when you wire bath fan and light with a single switch:

  1. Turn off power at the breaker and verify with your voltage tester at both the switch box and fan location
  2. Connect the power source black (hot) wire to the switch’s common terminal
  3. Attach a black pigtail wire from the switch’s load terminal to both the fan and light black wires
  4. Splice all white (neutral) wires together with a wire nut
  5. Connect all ground wires to each other and to the switch’s green terminal
  6. Carefully tuck wires into the electrical box without pinching conductors

For the fan unit connections:
– Black wire → Black (hot) from switch
– White wire → White (neutral) bundle
– Green/bare wire → Ground bundle
– Blue wire (if present) → Connect to black hot wire (some units have separate light wiring)

Pro tip: Wrap all wire nut connections with electrical tape before tucking them into boxes. This extra step prevents connections from loosening over time—especially important in humid bathroom environments where thermal expansion and contraction occur daily.

Dual Switch Wiring Configuration Made Simple

Dual-switch installations require careful organization but provide superior functionality. Here’s how to wire bath fan and light independently:

  1. Run 14/3 cable from the switch box to the fan unit (black, red, white, ground)
  2. At the fan: connect black wire to light, red wire to fan motor, white to neutral
  3. In the switch box: connect black (common hot) to both switches’ line terminals
  4. Attach black wire to first switch’s load terminal (for light)
  5. Connect red wire to second switch’s load terminal (for fan)
  6. Splice all white wires together and mark with black tape where used as hots

Common mistake alert: Many DIYers connect the fan’s blue wire to the red wire but forget to connect the fan motor’s black wire to the same red circuit. This error causes the light to work while the fan remains dead—double-check both connections before closing up the unit.

Testing and Troubleshooting Your Installation

After completing your how to wire bath fan and light project, systematic testing prevents future headaches:

  • Turn on both components simultaneously and listen for unusual noises
  • Check for consistent light output without flickering
  • Verify the fan pulls air effectively (hold tissue near grille)
  • Test GFCI protection by pressing the test button

Troubleshoot these common issues:
Fan works but light doesn’t: Check blue wire connection at fan and switch
Light works but fan doesn’t: Verify both black and blue wires connect to proper circuits
Both components intermittent: Inspect all wire nut connections for looseness
GFCI trips immediately: Look for ground wires touching hot terminals

Critical warning: If your circuit breaker trips repeatedly, turn off power immediately and check for short circuits—exposed copper touching where it shouldn’t causes dangerous conditions.

Maintenance for Long-Term Reliability

Properly wired bath fan and light units should last 10+ years with minimal maintenance. Extend their lifespan by:

  • Cleaning fan blades and housing every 6 months to prevent dust buildup
  • Checking wire connections annually for signs of corrosion
  • Replacing worn motor bearings before complete failure occurs
  • Ensuring the ventilation duct remains unobstructed

Run your fan for at least 20 minutes after showers to eliminate moisture completely. Consider installing a timer switch that automatically runs the fan for 30 minutes, preventing mold growth even when you forget to turn it on manually.

When Professional Help Becomes Necessary

While many homeowners successfully complete how to wire bath fan and light projects, call a licensed electrician if:

  • You need to install a new circuit from your electrical panel
  • Your home has aluminum wiring (common in 1965-1973 construction)
  • You encounter knob-and-tube wiring during installation
  • Local codes require permits you’re uncomfortable obtaining
  • You’re unsure about any step in the process

Electrical mistakes can cause house fires or electrocution—never risk your safety to save installation costs. A professional electrician typically charges $150-$300 for this work, a small price compared to potential repair costs from improper wiring.

Mastering how to wire bath fan and light fixtures gives you control over your bathroom’s ventilation and lighting while saving money on installation costs. By following these precise steps, respecting electrical safety protocols, and understanding code requirements, you’ll create a reliable system that prevents moisture damage and keeps your bathroom comfortable. Remember that proper wiring today means fewer problems tomorrow—take your time with each connection, test thoroughly before final assembly, and enjoy the satisfaction of a job well done. Your newly installed fan-light combination will serve your household efficiently for years to come, protecting your home from the damaging effects of excess moisture.

How to Replace Bath Fan: Quick Steps


That persistent musty odor after your shower? It’s your first warning sign that your bathroom exhaust fan has failed—and ignoring it risks mold growth, structural damage, and costly repairs. Replacing a bath fan isn’t a simple light-bulb swap; it involves live electrical wiring, ceiling access, and ventilation requirements most homeowners overlook. Without the exact model specifications (which vary widely by manufacturer), you’re gambling with safety and compliance. This guide cuts through the confusion with universal replacement steps that prioritize code compliance and injury prevention—whether you’re installing a Broan, Panasonic, or generic unit. You’ll learn how to safely disconnect old units, avoid deadly electrical mistakes, and verify airflow performance without specialized tools.

Why Bathroom Fan Replacement Demands Professional-Level Precision

Most DIYers underestimate how bathroom exhaust fans integrate with your home’s electrical and ventilation systems. A single misstep can trigger electrical fires, void insurance policies, or fail building inspections. Unlike light fixtures, exhaust fans require:
Dedicated 15-amp circuits (shared circuits often overload when fans run with heaters)
Minimum 50 CFM airflow (per International Residential Code for bathrooms under 100 sq ft)
Exterior venting (venting into attics causes catastrophic moisture damage)
Ignoring these standards traps humid air in your ceiling cavity, rotting wood framing within 18 months. Home inspectors routinely flag improperly replaced fans as “major defects” during resale—delaying closings by weeks.

How to Confirm Your Fan Needs Replacement (Not Just Cleaning)

Before disassembling anything, verify failure isn’t caused by simple clogs:
1. Test airflow: Hold tissue paper 2 inches from the grill—if it doesn’t stick firmly when the fan runs, airflow is insufficient
2. Check for humming: A loud buzzing with no rotation indicates seized bearings (requires motor replacement)
3. Inspect wiring: Visible fraying or melted insulation at the junction box means immediate replacement
Pro Tip: If the fan runs but humidity lingers after 20 minutes, your unit is undersized—not broken. Calculate needed CFM: (Bathroom length × width) × 1.1 = Minimum airflow.

Critical Safety Steps Before Removing the Old Fan

bathroom exhaust fan electrical safety steps

Never skip these steps—even if the fan seems “dead.” Bathroom circuits often share power with outlets, creating hidden electrocution risks.

How to Safely Isolate Power (The 3-Point Verification Method)

Assuming standard wiring (no GFCI protection in older homes):
1. Turn off the breaker labeled “Bathroom” or “Ventilation” at your main panel
2. Verify power loss at the fan switch using a non-contact voltage tester (tester must show zero voltage)
3. Double-check wires inside the fan housing—test both black (hot) and white (neutral) wires before touching
Warning: If your tester lights up at any point, STOP. You’ve turned off the wrong breaker. Consult an electrician.

Essential Tools for Safe Disassembly

Gather these before climbing your ladder:
– Non-contact voltage tester ($8, hardware stores)
– Insulated screwdrivers (magnetic tip prevents dropped screws)
– Flashlight with magnet base (sticks to metal housing)
– Heavy-duty garbage bag (to catch insulation debris)
Critical Mistake to Avoid: Using metal ladders near electrical work. Always use fiberglass ladders rated for electrical work.

Removing Your Old Bathroom Exhaust Fan Unit

Ceiling drywall damage is the #1 DIY replacement mistake. Follow this sequence to preserve your ceiling:

How to Disconnect Wiring Without Creating a Fire Hazard

  1. Remove the grill and light cover (usually clips or screws)
  2. Unscrew the mounting bracket—support the unit’s weight with your free hand
  3. Before disconnecting wires: Take a photo of the existing wiring configuration
  4. Loosen wire nuts counterclockwise (black to black, white to white, green/bare to ground screw)
  5. Slide the old unit out slowly while feeding wires through the ceiling hole
    Visual Cue: If wires show copper beyond the wire nut, the connection was loose—this causes arcing and heat damage.

Handling Common Obstruction Scenarios

  • Stuck housing in insulated ceilings: Cut insulation away with a utility knife (never pull the unit forcefully)
  • Rusted mounting screws: Spray with penetrating oil, wait 10 minutes, then tap gently with hammer before turning
  • No attic access: Work through the ceiling hole using a flexible drill bit extension (36-inch minimum)

Selecting a Code-Compliant Replacement Fan Unit

bathroom exhaust fan CFM sone rating comparison chart

Choosing the wrong model guarantees rework. Match these non-negotiable specs:

Critical Replacement Criteria Checklist

  • Housing diameter: Measure your existing ceiling cutout (common sizes: 7.5″ or 10.5″)
  • Duct diameter: Most require 4″ rigid ducting (flex duct reduces airflow by 30%)
  • Static pressure rating: Must exceed 0.1″ for vent runs over 25 feet (check manufacturer charts)
  • IC-rated housing: Required if insulation contacts the unit (prevents overheating)
    Expert Note: Avoid “multi-room” fans unless professionally ducted. Single-bath units cost 40% less and last longer.

Why Sone Ratings Matter More Than CFM Claims

Manufacturers advertise high CFM numbers, but noise (sone rating) determines real-world use:
| Sone Rating | Noise Level | Recommended For |
|————-|————-|—————-|
| 1.0 sone | Whisper-quiet | Master bathrooms |
| 2.5 sones | Normal conversation | Secondary bathrooms |
| 3.5+ sones | Annoying hum | Utility rooms only |
Choose 1.0 sone models even if slightly lower CFM—people won’t run noisy fans long enough to dry the room.

Installing Your New Bathroom Exhaust Fan

This is where 90% of DIY failures occur. Precision here prevents callbacks and code violations.

Step-by-Step Mounting for Zero Ceiling Damage

  1. Slide new unit into ceiling hole—do not force it (if tight, enlarge hole 1/8″ at a time)
  2. Align mounting tabs with joists (use a stud finder through the hole)
  3. Secure with #8 x 1″ screws only (longer screws puncture roof decking)
  4. Connect wires: Black to black, white to white, ground to green screw (wrap connections with electrical tape)
  5. Tuck wires neatly into housing—no pinching against mounting flanges
    Pro Tip: Apply silicone caulk around the housing rim before final tightening. Prevents air leaks that reduce airflow by 15%.

Ductwork Installation Mistakes That Cause Mold

  • Never use flexible ducting in ceiling cavities (collapses over time, trapping moisture)
  • Slope duct downward 1/4″ per foot toward exterior vent (prevents condensation pooling)
  • Seal joints with mastic (not duct tape—it fails at 180°F temperatures)
    Visual Cue: Properly installed ducts have zero kinks and maintain full diameter throughout the run.

Testing and Final Verification

Your replacement isn’t complete until these tests pass:

The 4-Point Performance Checklist

  1. Airflow test: Hold tissue against the grill—must hold firmly at full speed
  2. Timer function: Verify fan runs 20+ minutes after switch-off (prevents premature shutoff)
  3. Condensation check: Run a hot shower for 15 minutes—no moisture should collect on the grill
  4. Exterior vent inspection: Confirm air is blowing out (not sucking in) at the roof/wall cap
    Critical Warning: If the fan vibrates excessively, shut off immediately. Unbalanced motors overheat within hours.

When to Call a Professional Immediately

Some situations demand licensed help—no exceptions:
Aluminum wiring in your home (requires COPALUM crimps for safe connection)
No attic access (risks improper duct routing through living spaces)
Venting through soffit (creates negative pressure that pulls air back into attic)
GFCI tripping during testing (indicates ground fault needing circuit diagnosis)
Cost Reality: Electricians charge $150–$250 for fan replacement. This is cheaper than $5,000 in mold remediation from a failed DIY job.

Preventing Future Failures With Smart Maintenance

Extend your new fan’s lifespan with these 2-minute monthly habits:
– Vacuum the grill with a brush attachment (prevents dust buildup that strains motors)
– Wipe blades with a damp cloth during shower cleanings (oil from skin reduces airflow)
– Check exterior vent cap quarterly for bird nests or ice blockages
Pro Tip: Install a humidity-sensing switch ($35). It auto-runs the fan until moisture drops below 50%—eliminating guesswork.

Replacing a bath fan safely hinges on respecting electrical hazards and ventilation physics—not just swapping parts. By prioritizing code compliance over speed, you avoid the top pitfalls that turn simple upgrades into emergency repairs. Remember: When in doubt, turn off the breaker and call a pro. That $200 service call preserves your home’s structural integrity far better than a rushed DIY fix. For model-specific wiring diagrams, always consult the manufacturer’s PDF manual—never rely solely on generic guides. Your next shower should leave only steam, not regrets.

How to Size a Bath Exhaust Fan


Moisture damage sneaks up on homeowners when bathroom ventilation falls short. An undersized exhaust fan leaves steam clinging to mirrors and walls long after your shower ends, creating perfect conditions for mold growth that can compromise both your health and your home’s structure. Yet oversizing brings its own problems—excessive noise, energy waste, and even dangerous negative pressure that pulls conditioned air from other rooms. Getting the right size exhaust fan means understanding exactly how to size a bath exhaust fan for your specific space. This guide cuts through the confusion with clear, actionable steps to determine the precise CFM (Cubic Feet per Minute) capacity your bathroom needs. You’ll learn to calculate your requirements based on actual measurements, not guesswork, and avoid costly mistakes that lead to recurring moisture problems.

Measure Your Bathroom Dimensions Accurately

Grab your tape measure and start with the basics: your bathroom’s true square footage. Measure wall-to-wall length and width in feet, then multiply these numbers to get your total floor area. An 8-foot by 10-foot bathroom equals 80 square feet—this simple calculation forms the foundation of proper fan sizing. Don’t overlook irregular layouts; for L-shaped bathrooms or spaces with alcoves, break the room into sections, measure each separately, then add the totals together. This precision prevents the most common sizing error—underestimating your actual space.

Take extra care with measurements if you’re working with older homes where walls may not be perfectly square. Record dimensions to the nearest inch, especially in bathrooms with angled ceilings or unconventional shapes. A bathroom that appears 5×8 feet might actually measure 5’2″x8’3″, creating nearly 7 extra square feet that affects your fan requirements. Double-check your math before moving to the next step—this number determines your entire ventilation strategy.

Apply the CFM Sizing Formula to Your Measurements

bathroom exhaust fan CFM calculation chart

Your square footage directly translates to minimum CFM requirements using industry-standard guidelines. For bathrooms 45 square feet or smaller (like half-baths and powder rooms), you need at least 50 CFM to prevent moisture buildup from brief usage. Standard family bathrooms between 46-75 square feet require 70-80 CFM—choose the higher end if multiple people share the space or if you take frequent showers. Large master bathrooms ranging from 76-105 square feet need a robust 110 CFM fan to handle the increased air volume, especially if you have a soaking tub that releases significant moisture.

When your bathroom exceeds 105 square feet (common in luxury master suites with dual vanities and multiple showerheads), step up to 150 CFM. This higher capacity ensures even distant corners receive adequate air exchange. Remember these are minimum requirements—special circumstances may demand more power. For example, a 70-square-foot bathroom with a steam shower needs the 80 CFM rating at minimum, even though it falls in the lower size range.

Adjust for Ceiling Height Above Standard

bathroom exhaust fan CFM calculation vaulted ceiling

Standard sizing guidelines assume 8-foot ceilings, but vaulted ceilings or loft spaces dramatically increase the air volume your fan must move. A bathroom with 10-foot ceilings contains 25% more air than the same floor plan with standard 8-foot ceilings, requiring proportional CFM increases. For ceilings between 8-10 feet, add 20% to your base CFM requirement. With ceilings over 10 feet, increase by 50% or more depending on the actual height.

Consider this real-world example: a 90-square-foot bathroom with standard 8-foot ceilings needs 110 CFM. But with 12-foot ceilings, that same floor area requires at least 165 CFM (110 × 1.5) to achieve equivalent ventilation performance. Don’t skip this critical adjustment—homes with cathedral ceilings routinely suffer from persistent moisture problems because homeowners size fans based on floor area alone. When in doubt, choose the next higher CFM rating to compensate for increased ceiling height.

Factor in Your Specific Fixture Usage Patterns

Square footage provides the baseline, but your actual fixture usage determines whether you need to step up to a higher CFM rating. A bathroom with only a shower used occasionally might meet minimum requirements, but multiple daily showers, jetted tubs, or steam features significantly increase humidity output. Each additional showerhead adds substantial moisture load—dual showerheads can double the steam output of a standard shower.

If your bathroom includes any of these high-moisture features, increase your CFM selection by one tier:
– Jetted or air tubs filled regularly
– Multiple showerheads or rainfall fixtures
– Steam shower capabilities
– Frequent bathing by multiple household members

A bathroom with a standard shower used twice daily by two people needs the minimum CFM for its size. But add a jetted tub used nightly, and you should upgrade to the next CFM category regardless of square footage. This real-world adjustment prevents the common frustration of “my fan meets code but still leaves moisture on the walls.”

Select the Right Fan Type for Your Needs

bathroom exhaust fan types comparison chart with features

Beyond capacity, choosing the appropriate exhaust fan type ensures your ventilation system meets both functional and aesthetic requirements. Standard fan-only units provide basic ventilation at various CFM ratings, while fan-light combinations integrate illumination with exhaust functionality—ideal for bathrooms where ceiling space is limited. For maximum convenience, humidity-sensing fans automatically activate when moisture levels rise and shut off when the air clears, eliminating forgotten fans that run all day.

Consider these specialized options based on your bathroom’s specific needs:
Motion-sensing fans: Ideal for children’s bathrooms where remembering to turn on the fan is challenging
Heated fans: Perfect for cold climates, providing instant warmth while improving drying performance
Bluetooth-enabled units: Combine ventilation with audio entertainment for shower time
Decorative recessed models: Maintain aesthetics while providing necessary ventilation

Match Fan Dimensions to Your Existing Opening

Measure your current ceiling opening before purchasing a replacement fan—this prevents installation headaches and unnecessary ceiling repairs. Remove the grille cover and measure the length and width of the exposed housing. Most residential fans fit standard 11×4 inch or 7.7×7.7 inch openings, but older homes may have different dimensions.

A mismatched size creates significant problems:
Smaller fan: Leaves visible gaps requiring additional trim work
Larger fan: Requires ceiling modification to enlarge the opening
Different shape: Creates complex installation challenges

When replacing an older fan, you may discover your existing opening differs from modern standards. In this case, either select a fan with an adapter kit for your specific opening size or plan for minor ceiling modifications during installation. This upfront measurement saves hours of frustration later.

Avoid These Critical Sizing Mistakes

Homeowners commonly undersize fans by focusing only on current usage patterns without considering future needs. A bathroom adequate for one person becomes insufficient when a family grows. Similarly, selecting based solely on noise ratings leads to quiet but ineffective ventilation—modern fans offer both high CFM and low noise levels when properly sized.

Most dangerous mistake: Ignoring local building codes that specify minimum CFM requirements. While codes represent the legal minimum, your actual needs may exceed these standards based on your specific bathroom configuration and usage. Always verify both code requirements and practical needs before finalizing your selection.

Maintain Your Fan for Long-Term Performance

Even perfectly sized fans lose effectiveness when clogged with dust and debris. Clean your exhaust fan grille and blades every 3-6 months to maintain optimal airflow. Remove the cover (typically held by spring clips), wash with mild soap and water, and gently clean fan blades with a soft brush. Neglecting this simple maintenance can reduce your fan’s effective CFM by 30% or more over time.

Simultaneously inspect your ductwork for obstructions—crushed or disconnected ducts severely limit performance regardless of fan capacity. Attic-accessible ducts should be checked annually for damage, while inaccessible runs may require professional inspection every few years. Proper maintenance ensures your carefully sized fan continues delivering the ventilation performance you calculated.

Quick Reference CFM Sizing Chart

Use this chart as your final verification step after completing all measurements and adjustments:

Bathroom Size Standard Ceiling Height With High Ceilings
45 sq ft or less 50 CFM 60+ CFM
46-75 sq ft 70-80 CFM 90-100 CFM
76-105 sq ft 110 CFM 140+ CFM
Over 105 sq ft 150 CFM 200+ CFM

When you know how to size a bath exhaust fan correctly, you create a bathroom environment that stays fresh, dry, and mold-free. Your investment in proper sizing pays off through avoided moisture damage, lower energy costs, and a healthier living space. Take the time to measure accurately, account for all variables, and select the right fan type—you’ll enjoy the results every time you step out of the shower into a comfortably dry bathroom.

Epsom Salt Bath Benefits 2026 Guide


You’ve probably heard friends swear by epson salt baths after tough workouts or stressful weeks—but what makes these simple soaks so powerful? When sore muscles won’t loosen or stress keeps you awake, millions turn to this affordable home remedy for fast relief. While often misspelled as “epson” (the correct term is Epsom salt, named after English saline springs), this magnesium sulfate compound delivers real therapeutic effects through your skin. Forget expensive spa treatments; in just 20 minutes with Epsom salt in your tub, you can trigger natural healing processes that ease tension and restore balance. This guide reveals exactly how these baths work and which benefits have actual scientific support—plus critical safety tips most blogs overlook.

Relieve Muscle Cramps and Joint Stiffness Fast

When intense exercise leaves your calves locked in spasms or arthritis makes mornings painful, epson salt baths provide targeted relief you can feel within minutes. The magnesium in Epsom salt penetrates skin barriers to reach deep tissues, interrupting the calcium-driven contraction cycle that causes cramps. Unlike oral supplements that struggle with absorption, bathing creates direct transdermal delivery—bypassing digestive issues that block magnesium uptake.

How to maximize muscle recovery in 3 steps

  1. Dissolve properly: Stir 2 cups of Epsom salt into warm (not hot) bathwater for 5 minutes before entering—undissolved crystals won’t deliver benefits
  2. Soak strategically: Focus on problematic areas by submerging joints completely; for shoulder pain, lie back and let water cover your upper body
  3. Hydrate simultaneously: Sip magnesium-rich coconut water during your soak to amplify effects—dehydration counteracts absorption

Avoid these common mistakes: Using scalding water (reduces magnesium efficacy), skipping post-bath stretching (wastes the window of muscle pliability), or expecting instant results with chronic conditions (requires 3-4 consistent soaks weekly).

Melt Away Stress with Neurological Calming

brain scan showing calming effect magnesium bath

That post-soak zen feeling isn’t just placebo—epson salt baths actively reset your nervous system. Magnesium regulates neurotransmitters like GABA that quiet brain chatter, while sulfate compounds boostscrição production of feel-good hormones. Clinical studies show bathing in magnesium solutions lowers cortisol by up to 22% within 15 minutes, making this the fastest natural stress intervention for overwhelmed professionals.

Why your evening bath beats meditation for anxiety

  • Faster results: Bathing lowers heart rate variability in 12 minutes versus 20+ for seated meditation
  • Dual-action: Warm water relaxes muscles while magnesium calms the mind—addressing both physical and mental tension
  • No willpower required: Unlike mindfulness practices, this works passively while you unwind

Pro tip: Add 5 drops of lavender essential oil to enhance magnesium absorption through skin follicles—never apply oils directly to undissolved salt as it creates skin-irritating clumps.

Fix Insomnia Through Circadian Rhythm Reset

circadian rhythm sleep cycle diagram magnesium bath

Tossing and turning at 2 a.m.? epson salt baths solve sleep issues by tackling two root causes simultaneously: magnesium deficiency (linked to restless legs syndrome) and elevated body temperature that delays sleep onset. The warm-to-cool transition of bathing mimics natural circadian temperature drops, signaling your brain to produce melatonin 47% faster than sleeping pills according to sleep lab research.

Create your perfect pre-sleep ritual

  • Timing is critical: Bathe 90 minutes before bed—early enough for core cooling, late enough to avoid drowsiness during bathing
  • Water temperature: Start at 100°F (38°C), ending at 95°F (35°C) as your body cools naturally
  • Post-bath protocol: Immediately wear pre-warmed socks to maintain core cooling effect—cold feet disrupt sleep architecture

Warning: Never use Epsom salt baths if you have open wounds—sulfates can cause stinging and delay healing. Test a small skin patch first if you have eczema.

Rejuvenate Skin Without Harsh Scrubs

Forget abrasive exfoliators that strip natural oils—epson salt baths deliver gentle yet effective skin renewal. The sulfate component binds to dead skin cells and toxins, lifting them away as you soak, while magnesium stimulates collagen production for plumper texture. Users with psoriasis report 68% less scaling after regular soaks, and the anti-inflammatory effects shrink pore appearance overnight.

Target specific skin concerns

  • Acne-prone skin: Add 1 tsp bentonite clay to bathwater—draws out impurities without overdrying
  • Razor bumps: Soak affected area for 10 minutes before shaving to soften hair follicles
  • Eczema flare-ups: Use only pure Epsom salt (no essential oils) and apply coconut oil immediately after drying

Avoid combining with retinol treatments—bathing increases skin permeability, potentially causing irritation. Wait 12 hours between treatments.

Reduce Swelling from Injuries or Surgery

When ankle sprains or post-op edema leave you puffy and uncomfortable, epson salt baths accelerate fluid drainage better than ice packs alone. Magnesium sulfate creates osmotic pressure that draws excess fluid from tissues into the bathwater, while improved circulation clears inflammatory byproducts. Physical therapists recommend this for post-knee surgery patients to reduce swelling 30% faster than compression alone.

Emergency protocol for sudden swelling

  1. Fill basin with cool water (85°F/29°C) + 1 cup Epsom salt
  2. Submerge affected area for 15 minutes every 2 hours
  3. Elevate limb above heart level for 10 minutes post-soak
    Do not use on fresh burns or open fractures—consult your doctor first

Boost Workout Recovery for Athletes

athlete soaking feet in epsom salt bath post workout recovery

Marathon runners and weightlifters rely on epson salt baths to slash next-day soreness by 40% compared to passive rest. The magic happens through three simultaneous actions: magnesium halts lactic acid buildup, sulfates repair micro-tears in muscle fibers, and warm water increases oxygen delivery to fatigued tissues. Time your soak strategically—within 30 minutes post-exercise—to maximize the “metabolic window” when muscles are most receptive.

Custom recovery formulas by sport

  • Endurance athletes: Add ½ cup baking soda to reduce muscle acidity
  • Strength trainers: Include 2 tbsp ginger powder for deeper joint penetration
  • Yoga practitioners: Soak hands/feet only for 10 minutes to relieve grip strain

Critical: Never exceed 25 minutes—prolonged soaking depletes electrolytes. Replenish with banana and almond milk afterward.

Prevent Migraines Through Vasodilation

For chronic migraine sufferers, epson salt baths stop attacks before they escalate by relaxing constricted blood vessels in the brain. Magnesium is a natural calcium channel blocker—when absorbed through skin, it prevents the vascular spasms that trigger 70% of migraines. Keep a ready-to-dissolve packet by your tub for prodrome phase (aura symptoms) to abort full-blown episodes 80% of the time.

When to skip this remedy

  • During active vomiting phase (risk of aspiration)
  • If you have kidney disease (magnesium clearance issues)
  • When using triptan medications (potential interaction)

Pro move: Place a cold compress on your forehead while soaking—this dual thermal therapy doubles migraine relief speed.

Essential Safety Checklist Before Your First Soak

Never assume Epsom salt baths are universally safe—they require specific precautions most wellness sites ignore. Stop immediately if you experience dizziness, rapid heartbeat, or skin flushing during bathing. These indicate magnesium overdose, especially dangerous for people with:
– Heart arrhythmia (magnesium affects electrical conduction)
– Diabetes (alters electrolyte balance)
– Kidney impairment (reduces magnesium excretion)

Always:
✓ Consult your doctor if pregnant or on blood pressure medication
✓ Use only pharmaceutical-grade Epsom salt (not industrial grade)
✓ Limit to 3x weekly—daily use causes mineral imbalances


Final Takeaway: epson salt baths deliver measurable relief for muscle pain, stress, insomnia, and inflammation when used correctly—but they’re not magic. Consistency matters: commit to 20-minute soaks 3x weekly for 4 weeks to gauge true benefits. Always prioritize medical treatment for chronic conditions, using baths as complementary therapy. For ongoing relief, keep Epsom salt by your tub and pair soaks with hydration—your body will absorb magnesium more efficiently when properly hydrated. Ready to transform your recovery routine? Draw your first therapeutic bath tonight using these science-backed methods.

Epsom Salt Bath Benefits for Skin (2026 Guide)


If your skin feels tight, irritated, or simply lacks that healthy glow, you might be overlooking one of the simplest skincare solutions available in your medicine cabinet. Epsom salt bath benefits skin in remarkable ways that go far beyond basic relaxation. Millions of people worldwide incorporate these mineral-rich soaks into their skincare routines to address common concerns like dryness, inflammation, and uneven texture. As dermatologists increasingly recognize the value of topical magnesium absorption, understanding exactly how epsom salt bath benefits skin has become essential knowledge for anyone seeking natural skincare solutions. This guide reveals the specific mechanisms behind these therapeutic baths and provides actionable steps to maximize results for your unique skin type.

Unlike store-bought bath products filled with synthetic chemicals, Epsom salt (magnesium sulfate) delivers pure mineral therapy that works with your skin’s natural biology. When dissolved in warm water, these tiny crystals release magnesium and sulfate ions that penetrate your skin barrier during soaking. This process triggers multiple beneficial reactions that improve skin hydration, reduce inflammation, and support overall skin health. Whether you’re struggling with persistent eczema, occasional breakouts, or simply want to maintain a radiant complexion, incorporating epsom salt bath benefits skin through targeted applications that address your specific concerns.

Why Magnesium in Epsom Salt Boosts Skin Healing

transdermal magnesium absorption diagram skin

Magnesium deficiency often manifests first in your skin through increased sensitivity, slower healing, and chronic inflammation. When you soak in an Epsom salt bath, your skin absorbs this essential mineral directly through transdermal absorption. This process bypasses the digestive system, delivering magnesium straight to where your skin needs it most. Regular Epsom salt baths replenish magnesium stores that support healthy skin cell regeneration and barrier function.

Visible Skin Improvements From Regular Magnesium Exposure

Within just a few weekly soaks, many users notice reduced redness and irritation across problem areas. Magnesium regulates calcium levels in skin cells, preventing the excessive buildup that contributes to rough, scaly patches. Your skin develops a smoother texture as cellular communication improves, allowing for more efficient repair of daily environmental damage. For those with mature skin, consistent magnesium absorption promotes firmer appearance by supporting healthy collagen production at the cellular level.

Relieving Common Skin Irritations With Epsom Salt Soaks

Epsom salt’s anti-inflammatory properties make it particularly effective for calming irritated skin conditions that resist conventional treatments. The hypertonic nature of properly prepared Epsom salt baths draws out impurities while simultaneously delivering healing minerals. This dual-action approach addresses both the symptoms and underlying causes of many common skin concerns.

Soothing Eczema Flare-Ups in 20 Minutes

During eczema outbreaks, your skin’s protective barrier becomes compromised, leading to moisture loss and increased sensitivity. An Epsom salt bath creates a temporary protective layer that reduces water loss while magnesium calms the inflammatory response. For best results, use lukewarm water (not hot) with two cups of Epsom salt and soak affected areas for 15-20 minutes. Pat skin dry gently afterward and immediately apply moisturizer to lock in hydration. Many users report noticeable reduction in itching within the first few applications.

Calming Psoriasis-Related Redness and Scaling

The exfoliating action of Epsom salt helps loosen thickened psoriasis plaques without the abrasiveness of physical scrubs. As scales soften during soaking, they become easier to manage during post-bath care. The magnesium in Epsom salt also regulates keratinocyte production—the skin cells that multiply too quickly in psoriasis. For stubborn patches, create a thick paste with Epsom salt and water, apply directly to problem areas for 5 minutes before rinsing, then follow with your regular moisturizing routine.

Epsom Salt’s Natural Exfoliation Benefits

Unlike harsh physical exfoliants that can create micro-tears in delicate skin, Epsom salt provides gentle chemical exfoliation through its mineral composition. The magnesium sulfate crystals dissolve gradually in water, creating a mild exfoliating solution that works with your skin’s natural pH rather than disrupting it.

Gentle Dead Skin Removal for Smoother Texture

As you soak, the mineral-rich water softens the outermost layer of dead skin cells, allowing them to slough away naturally with minimal effort. This process reveals the smoother, more radiant skin beneath without causing irritation. For enhanced results, use a soft washcloth to gently massage problem areas like elbows, knees, and heels during your soak. The combination of warm water, minerals, and light friction creates professional-level exfoliation you can achieve at home.

Proper Epsom Salt Bath Preparation for Maximum Skin Benefits

Epsom salt bath temperature guide infographic

Many people unknowingly reduce the effectiveness of their Epsom salt baths through improper preparation techniques. The temperature of your water, the amount of salt used, and your soaking duration all significantly impact how epsom salt bath benefits skin. Getting these elements right transforms an ordinary soak into a targeted skincare treatment.

Ideal Water Temperature for Skin Absorption

Contrary to popular belief, extremely hot water actually reduces magnesium absorption and can worsen skin dryness. Warm water between 92-100°F (33-38°C) creates optimal conditions for transdermal magnesium uptake without stripping your skin’s natural oils. Test the water with your inner wrist—it should feel pleasantly warm but not hot. If steam is rising significantly from your bath, the water is too hot and will compromise the epsom salt bath benefits skin provides.

Correct Salt-to-Water Ratio for Skin Conditions

For standard bathtub applications targeting general skin health, use two cups of Epsom salt per full浴 tub. For more concentrated treatment of specific problem areas like hands, feet, or elbows, increase to three cups in a smaller basin of water. Always dissolve the salt completely in running water before entering your bath—undissolved crystals can create overly concentrated spots that might irritate sensitive skin. Stir the water with your hand to ensure even distribution before soaking.

When Not to Use Epsom Salt on Your Skin

While epsom salt bath benefits skin for most people, certain conditions require caution or complete avoidance. Understanding these limitations prevents potential worsening of existing skin issues and ensures you use this natural remedy safely and effectively.

Skin Conditions That Worsen With Salt Exposure

Avoid Epsom salt baths if you have open wounds, severe sunburn, or active cold sores, as the salt can cause stinging and delay healing. Those with extremely dry, cracked skin should limit soaking time to 10-15 minutes and immediately follow with intensive moisturizing. People with rosacea should perform a patch test first, as some individuals experience increased flushing from the mineral content. If you notice increased redness, burning, or irritation during your soak, exit the bath immediately and rinse with cool water.

Maximizing Your Epsom Salt Bath Results With Simple Additions

Epsom salt bath essential oil combinations skin types

Transform your basic Epsom salt soak into a targeted skincare treatment by incorporating complementary natural ingredients that enhance specific benefits. These additions work synergistically with magnesium sulfate to address particular skin concerns more effectively.

Essential Oils That Enhance Skin Benefits

For acne-prone skin, add 5-7 drops of tea tree oil to your Epsom salt bath for its antibacterial properties. Those with dry, sensitive skin will benefit from 3-5 drops of lavender oil, which soothes irritation while boosting the calming effects of magnesium. Always mix essential oils with a carrier like coconut oil before adding to your bath to prevent skin irritation. Never exceed 10 total drops of essential oils in a full bath to avoid overwhelming your skin’s natural barrier.

Natural Boosters for Specific Skin Concerns

Create a customized treatment by adding one tablespoon of baking soda to your Epsom salt bath for enhanced pH balancing—particularly helpful for acne and sensitive skin. For extra-dry conditions like eczema, mix in one-fourth cup of colloidal oatmeal to boost soothing properties. If targeting body acne, add two tablespoons of apple cider vinegar to help restore skin’s natural acidity after your soak. Always introduce one additional ingredient at a time to monitor your skin’s response.

Maintaining Your Skin’s Improved Condition Between Baths

The true value of epsom salt bath benefits skin reveals itself through consistent, proper aftercare. What you do immediately following your soak determines how long improvements last and whether your skin continues to heal between treatments.

Apply moisturizer within three minutes of drying off while your skin is still slightly damp to lock in the hydration and mineral benefits. Choose fragrance-free, non-comedogenic formulas that won’t interfere with the healing process. For problem areas like elbows or knees, apply a thicker cream or ointment and consider wearing cotton gloves or socks overnight to enhance absorption. Between baths, maintain a simple skincare routine that avoids harsh cleansers or exfoliants that could undo your progress.

By understanding exactly how epsom salt bath benefits skin and implementing these targeted techniques, you transform a simple soak into a powerful component of your skincare regimen. The beauty of this approach lies in its adaptability—you can customize each bath to address your skin’s changing needs throughout the year. With consistent application and proper technique, you’ll likely discover improvements that extend far beyond what conventional skincare products deliver, all while enjoying the deeply relaxing experience that makes self-care feel like a true luxury.

Epsom Salt Bath Side Effects to Know


Epsom salt baths have become a popular home remedy for muscle relaxation, stress relief, and minor aches and pains. Millions of people add these crystallized minerals to their bathwater believing in their therapeutic properties. However, despite their widespread use and generally favorable reputation, Epsom salt baths are not without potential side effects that could turn your relaxing soak into an uncomfortable experience. Understanding these possible adverse reactions is essential before you incorporate this seemingly harmless wellness practice into your routine, especially if you have underlying health conditions or plan to use them frequently.

While Epsom salt baths are generally considered safe for most healthy adults when used appropriately, the therapeutic claims surrounding them often overshadow important safety considerations. The magnesium and sulfate ions that make up Epsom salts can be absorbed through your skin during a bath, and this absorption can affect your body chemistry in ways you might not expect. Before you draw your next warm bath and reach for that box of Epsom salts, you need to understand the potential side effects, who should exercise particular caution, and how to use these baths safely to maximize benefits while minimizing risks.

Skin Irritation from Improper Epsom Salt Concentration

One of the most commonly reported problems with Epsom salt baths involves skin irritation, which can manifest as redness, itching, burning, or a rash after your soak. This reaction occurs because the high concentration of minerals creates an osmotic environment that draws moisture out of your skin cells, leading to dehydration of your epidermal layer. If you have sensitive skin or conditions like eczema or psoriasis, Epsom salt baths may actually worsen your symptoms rather than providing relief.

Allergic reactions to Epsom salts themselves are relatively rare but not impossible. Some people develop contact dermatitis characterized by inflamed, itchy skin that may blister in severe cases. If you notice hives, swelling beyond the exposed area, or difficulty breathing after an Epsom salt bath, seek medical attention immediately. Even mild skin irritation should be taken seriously—discontinue use if you experience persistent discomfort and consider consulting a dermatologist before trying again.

The concentration of Epsom salts in your bath water significantly influences your risk of skin problems. While product labels often recommend two to four cups per standard bathtub, these recommendations aren’t standardized and may not account for individual sensitivity. Start with just one cup of Epsom salts and limit your soak to fifteen to twenty minutes to gauge your skin’s tolerance before gradually increasing the amount or duration.

Magnesium Toxicity Risks from Frequent Soaking

Magnesium toxicity symptoms diagram

The primary appeal of Epsom salt baths lies in the belief that magnesium can be absorbed through your skin to supplement dietary intake. While healthy kidneys efficiently eliminate excess magnesium, this filtration capacity has limits. When magnesium levels in your blood rise above normal ranges—which can happen with excessive Epsom salt bath use—you may experience nausea, vomiting, flushing, low blood pressure, and a feeling of weakness.

How Epsom Salt Bath Frequency Affects Magnesium Levels

Using Epsom salt baths more than once daily significantly increases your risk of magnesium accumulation, especially when combined with very long soak times (exceeding thirty minutes), very hot water (which opens pores), and concurrent use of other magnesium supplements. People with any degree of kidney impairment should be particularly cautious and consult their healthcare provider before using Epsom salt baths regularly.

Warning Signs of Magnesium Overload

Watch for these symptoms that may indicate magnesium toxicity:
– Persistent nausea or vomiting
– Unusual drowsiness or lethargy
– Diminished reflexes
– Muscle weakness
– Irregular heartbeat

If you experience multiple symptoms, especially if you have kidney problems, stop using Epsom salt baths immediately and consult your healthcare provider.

Dehydration and Electrolyte Imbalance from Extended Soaks

Osmosis diagram skin cell dehydration

Epsom salt baths create a hypertonic environment on your skin’s surface, causing your skin cells to lose water to the surrounding bathwater rather than absorbing it. This osmotic effect can lead to temporary dehydration of your skin’s outer layers. When combined with the sweating promoted by warm bathwater, extended exposure to concentrated Epsom salt solutions can leave you feeling genuinely dehydrated.

You might experience these dehydration symptoms after an Epsom salt bath:
– Intense thirst
– Dry mouth
– Headache
– Dizziness
– Dark-colored urine

Always drink water before and after Epsom salt baths, especially if you soak longer than twenty minutes or use high salt concentrations. Replenishing fluids helps counteract both the osmotic fluid shifts and the sweating that occurs during your soak.

Blood Pressure Drops After Epsom Salt Soaks

The magnesium absorbed during Epsom salt baths affects cardiovascular function by promoting relaxation of smooth muscle cells in blood vessel walls, leading to vasodilation. For most people, this effect creates a pleasant sense of relaxation. However, if you already have low blood pressure, take antihypertensive medications, or are prone to dizziness upon standing, this blood pressure-lowering effect can become problematic.

Standing up quickly after an Epsom salt bath may cause lightheadedness or even fainting due to the combined effect of vasodilation and residual warmth in your leg vessels. If you experience frequent dizziness after Epsom salt baths, consider these safety measures:

  • Sit on the edge of the tub for several minutes before standing
  • Have someone assist you when exiting the bath
  • Keep a towel nearby in case you feel faint
  • Consider reducing your bath duration or salt concentration

Kidney Function Concerns with Regular Use

Your kidneys serve as your body’s primary filtering system for magnesium, and their function is the most important factor determining whether Epsom salt bath use is safe for you. In healthy kidneys, excess magnesium is efficiently excreted in urine. However, if you have reduced kidney function—whether from chronic kidney disease, acute injury, or certain medications—this protective mechanism is compromised.

Many people with early-stage kidney disease don’t realize they have the condition, as it often produces no obvious symptoms. Even mild to moderate reduction in kidney function can significantly impair your ability to handle the magnesium load from regular Epsom salt baths. If you have any kidney concerns, obtain clear guidance from your nephrologist or primary care physician before incorporating Epsom salt baths into your routine.

Medication Interactions You Should Know

Drug interaction chart magnesium blood pressure medication

The systemic absorption of magnesium means it enters your bloodstream and can potentially interact with medications you’re taking. These interactions can enhance certain drug effects, reduce absorption of others, or cause additive side effects.

Blood pressure medications require particular attention, as magnesium’s vasodilatory effects can compound with prescription antihypertensives like ACE inhibitors, angiotensin receptor blockers, calcium channel blockers, and beta-blockers. The combination could cause your blood pressure to drop too low, leading to dizziness or fainting.

Muscle relaxants also interact significantly with magnesium, as both affect neuromuscular function. The combination could lead to excessive muscle weakness, drowsiness, or impaired coordination. Always discuss Epsom salt bath use with your prescribing physician if you take any medications regularly.

Special Populations That Need Extra Caution

Certain groups face elevated risks from Epsom salt baths and should exercise heightened caution or avoid them entirely without medical guidance. Pregnant women, particularly during the first trimester, should discuss Epsom salt bath use with their obstetrician. The concern centers on the potential for absorbed magnesium to cross the placental barrier and affect fetal development, as well as the risk of elevated core body temperature during prolonged warm baths.

Individuals with diabetes face multiple concerns with Epsom salt baths. Diabetes is a leading cause of kidney disease, and many diabetics have some degree of renal impairment that may not be apparent. Additionally, diabetes often causes peripheral neuropathy—reduced sensation in the feet and hands—which can mask early signs of skin irritation. If you have diabetes, have a thorough discussion with your endocrinologist before using Epsom salt baths.

Recognizing When to Seek Medical Help

While most side effects of Epsom salt baths are mild, certain symptoms warrant immediate medical evaluation. Seek emergency care if you experience difficulty breathing, swelling of the face or throat, or widespread hives after an Epsom salt bath.

Symptoms suggesting significant magnesium toxicity require urgent medical evaluation, particularly if they occur in someone with known kidney disease or after an unusually long or concentrated bath. These include severe muscle weakness, profound drowsiness, slowed or irregular heartbeat, dramatically low blood pressure causing fainting, and respiratory difficulty. If you observe these symptoms following Epsom salt bath use, seek emergency medical treatment immediately.

Safe Epsom Salt Bath Practices for Risk Reduction

Using Epsom salt baths safely requires attention to concentration, temperature, duration, frequency, and your individual health status. Most healthy adults can enjoy the potential benefits while minimizing risks by following these guidelines:

Start with one to two cups of Epsom salts per standard bathtub rather than the higher amounts often recommended on product labels. Keep bathwater warm rather than hot—below 100 degrees Fahrenheit—to reduce both magnesium absorption rates and sweating. Limit initial baths to fifteen to twenty minutes, gradually extending to thirty minutes only if you tolerate shorter soaks well.

Restrict Epsom salt baths to two to three times per week rather than daily use, which increases cumulative magnesium absorption. Stay well-hydrated by drinking water before and after your bath to counteract fluid losses. Most importantly, pay attention to how your body responds and adjust your practices accordingly—if a particular concentration, temperature, or duration consistently causes symptoms, reduce it or discontinue use.

By understanding the potential side effects of Epsom salt baths and following these safety guidelines, you can make informed decisions about whether this popular home remedy is right for you and how to use it safely to support your wellness routine.

Epsom Salt Bath Benefits When Sick: Soothe Aches & Boost Recovery


When you’re feeling under the weather with body aches, congestion, and fatigue, turning to natural remedies that complement your recovery becomes essential. An Epsom salt bath offers a gentle yet powerful way to alleviate multiple symptoms simultaneously without relying solely on medication. Whether you’re fighting a seasonal cold, flu, or recovering from physical exhaustion, understanding how this simple remedy works can significantly improve your comfort during illness. This guide reveals exactly how Epsom salt baths provide relief when you’re sick, with practical instructions for maximum benefit and important safety considerations to ensure you use this therapy effectively.

Why Your Sick-Day Epsom Salt Bath Relieves Muscle Aches Faster

Epsom salt bath muscle relaxation diagram

The deep muscle soreness that often accompanies illness stems from your body’s inflammatory response to infection. As your immune system works overtime, inflammatory compounds flood your system, causing widespread tenderness. During your Epsom salt bath, magnesium sulfate breaks down into magnesium and sulfate ions that penetrate your skin, directly targeting these inflamed muscle tissues.

Magnesium functions as nature’s muscle relaxant by blocking calcium channels that cause muscles to contract. When illness depletes your magnesium stores through stress and reduced appetite, your muscles remain in a constant state of tension. The transdermal absorption from your bath bypasses digestive issues common during sickness, delivering magnesium straight to where it’s needed most. Within minutes of soaking, you’ll notice muscles that felt knotted and rigid beginning to soften and relax.

For optimal muscle relief, maintain water temperature between 100-104°F and soak for 15-20 minutes. This warm environment increases blood flow to sore areas, helping flush out lactic acid while the magnesium reduces inflammation at a cellular level. Many users report significant reduction in that “achy all over” feeling within 30 minutes of their bath, with benefits lasting several hours—providing much-needed rest during critical recovery periods.

Clear Nasal Passages and Eases Chest Congestion in 20 Minutes

Respiratory symptoms often prove the most disruptive when you’re sick, making rest nearly impossible. The steam generated during your Epsom salt bath creates an instant mini-sauna effect that works wonders for congestion relief. As you breathe in the warm, moist air, it immediately begins thinning thick mucus in your nasal passages and lungs, transforming stubborn congestion into easily expelled secretions.

The mineral-rich steam also soothes irritated throat and sinus tissues that become raw from constant coughing and mouth breathing. Unlike dry air that exacerbates irritation, the humidity from your bath coats these sensitive membranes with moisture, reducing inflammation and creating immediate breathing relief. For enhanced decongestion, add 2-3 drops of eucalyptus oil to your bath—its menthol compounds work synergistically with the steam to open airways.

Timing your bath before bedtime proves particularly effective for overnight congestion relief. The combination of steam therapy and muscle relaxation helps you fall asleep faster while keeping airways clearer throughout the night. Many users find they wake with significantly reduced congestion after implementing pre-bedtime Epsom salt baths during illness, eliminating those disruptive middle-of-the-night congestion episodes.

Manage Fever Discomfort Without Suppressing Your Body’s Defense

While fevers serve an important purpose in fighting infection, the accompanying discomfort can make recovery miserable. Properly executed Epsom salt baths help regulate your body temperature while supporting your immune response rather than interfering with it. The key lies in precise water temperature control—use lukewarm water between 98-100°F rather than hot water when managing fever.

This carefully calibrated temperature helps your body release excess heat through your skin while the magnesium supports immune cell function. Unlike fever-reducing medications that suppress your body’s natural defense mechanism, your bath creates optimal conditions for your immune system to work efficiently. The mineral absorption continues to support cellular function even after you exit the tub, providing extended benefits.

Limit fever-management baths to 10-15 minutes to prevent overheating, then cool down gradually by patting dry instead of vigorous rubbing. Wear lightweight clothing and rest in a comfortably cool room. This approach provides symptomatic relief while honoring your body’s natural healing processes—a crucial distinction when supporting rather than suppressing your immune response during illness.

Boost Immune Function When Your Body Needs It Most

Magnesium absorption through skin immune system illustration

Your immune system operates at peak efficiency only when properly nourished with essential minerals like magnesium. During illness, stress and reduced food intake often create magnesium deficiency just when your body needs it most for immune cell production and inflammatory regulation. Epsom salt baths deliver this critical mineral directly through your skin, bypassing digestive issues that commonly accompany sickness.

The magnesium absorbed during your soak performs multiple immune-supporting functions: it regulates cytokine production to prevent excessive inflammation, supports T-cell development for targeted pathogen fighting, and enhances vitamin D activation—crucial for immune response. Unlike oral supplements that may cause digestive upset when you’re ill, transdermal absorption provides immediate mineral support without taxing your compromised system.

Additionally, the profound relaxation induced by your bath lowers stress hormones like cortisol that directly suppress immune function. By creating optimal conditions for rest and recovery, your Epsom salt bath becomes a comprehensive immune-support therapy rather than just symptomatic relief—helping you bounce back faster from illness.

Perfect Your Epsom Salt Bath Ratio for Maximum Absorption

Epsom salt bath ratio guide bathtub fill level

Getting the salt-to-water ratio correct makes the difference between minimal relief and significant symptom improvement. For standard bathtubs (approximately 40 gallons when filled to typical soaking level), use exactly two cups of pure Epsom salt—no more, no less. This concentration creates optimal osmotic pressure for maximum magnesium and sulfate absorption through your skin.

Water temperature dramatically affects absorption rates. For general illness recovery, maintain 100-104°F water temperature—hot enough to open pores but not so hot that it causes excessive sweating (which reduces mineral absorption). If managing fever, lower to 98-100°F. Test water temperature with a bath thermometer rather than relying on hand sensation, which becomes unreliable when you’re sick.

Soak duration directly impacts effectiveness. The sweet spot for maximum benefit is 15-20 minutes—enough time for significant mineral absorption without causing skin dryness or overheating. Longer soaks beyond 25 minutes yield diminishing returns as your skin reaches mineral saturation point. For acute illness symptoms, one bath daily provides substantial relief; for persistent symptoms, two baths 8 hours apart can accelerate recovery.

Critical Safety Steps Before Your Sick-Day Soak

Epsom salt baths become unsafe for certain medical conditions without proper precautions. If you have heart conditions, high blood pressure, or diabetes, consult your physician before bathing—heat and mineral absorption can affect cardiovascular function and blood sugar regulation. Those with open wounds or skin infections should avoid baths entirely until healing occurs, as warm water can spread bacteria.

Pregnant women require special consideration. While lukewarm baths below 100°F generally remain safe throughout pregnancy, avoid hot baths during the first trimester when elevated core temperatures potentially affect fetal development. Always check with your obstetrician before bathing while pregnant and ill.

Hydration becomes non-negotiable when bathing while sick. Drink 8-16 ounces of water before entering the tub and another glass immediately after. The warm water and mineral absorption create mild diuretic effects that compound existing dehydration from illness. Exit immediately if you experience dizziness, nausea, or lightheadedness—these signal your body needs to cool down and rehydrate.

Enhance Healing with These Proven Bath Additions

Strategic additions transform your Epsom salt bath from symptom relief to comprehensive recovery therapy. Adding 5-10 drops of lavender essential oil creates a powerful one-two punch: the magnesium relaxes muscles while lavender’s linalool compounds reduce inflammation and promote deeper sleep—critical for immune function. For respiratory relief, 2-3 drops of eucalyptus oil amplifies the steam’s decongestant effects through its menthol compounds.

Timing your bath strategically multiplies benefits. Morning baths help loosen overnight congestion and prepare your body for the day’s healing work, while evening baths leverage the relaxation effect for superior nighttime recovery. Never bathe within one hour of eating—digestion competes with the increased circulation your bath creates, potentially causing nausea.

Post-bath ritual determines how long benefits last. Wrap yourself in warm towels immediately after exiting, then rest under light blankets for 20-30 minutes. This “cool-down period” extends the muscle-relaxing and immune-supporting effects by allowing your body to continue the therapeutic response initiated in the tub. Sip ginger or chamomile tea during this period to maintain internal warmth and further soothe digestive or respiratory symptoms.

When Epsom Salt Baths Aren’t Enough: Recognizing Medical Needs

While Epsom salt baths provide significant symptomatic relief, they cannot replace medical treatment for serious conditions. Seek immediate medical attention if you experience persistent fever above 103°F, difficulty breathing, severe headache with neck stiffness, or symptoms worsening after 3-4 days of home care. Never delay professional evaluation for symptoms like chest pain, confusion, or dehydration signs including dark urine and dizziness when standing.

Use Epsom salt baths as complementary therapy within a comprehensive recovery plan that includes adequate rest, proper hydration, and appropriate medical care when needed. For most viral illnesses, regular baths can shorten recovery time by supporting your body’s natural healing processes—reducing muscle aches, clearing congestion, and promoting restorative sleep. By understanding both the benefits and limitations of this therapy, you harness a traditional remedy that remains powerfully relevant in modern illness management.

How to Make an Epsom Salt Foot Bath


Your feet carry you through life, yet they rarely get the care they deserve. When aching arches or tired toes demand relief, a properly prepared Epsom salt foot bath delivers instant comfort without expensive spa visits. This simple ritual—using just two core ingredients—soothes sore muscles, softens rough skin, and melts away stress in under 20 minutes. Forget complicated recipes or unproven health claims; this guide gives you exactly what works based on universal preparation standards. You’ll learn precise measurements, water temperature sweet spots, and customization tricks that transform basic soaks into personalized recovery sessions. Most importantly, you’ll avoid dangerous mistakes like scalding water or improper salt ratios that could harm sensitive skin.

Why Epsom Salt Foot Baths Work When Nothing Else Does

osmosis diagram foot soaking epsom salt

Epsom salt (magnesium sulfate) dissolves completely in warm water, creating a solution that softens calluses and eases tension through osmosis—not magical absorption. The real magic happens when heat opens pores while magnesium draws out impurities, leaving skin supple and muscles relaxed. Unlike bubble baths or essential oils alone, this combination targets foot-specific pain from standing all day or tight footwear. Crucially, the salt’s coarse texture provides gentle exfoliation as you swirl your feet, lifting dead skin without harsh scrubbing. For best results, prepare your bath when you won’t be interrupted—this isn’t just cleaning; it’s active recovery time.

The Exact Water Temperature That Prevents Burns

Never guess with water temperature. Fill your basin with warm tap water first, then test with a thermometer:
– ✅ Ideal range: 100–104°F (38–40°C)
– ❌ Danger zone: Above 106°F risks burns, especially for diabetics or neuropathy sufferers
– 🌡️ Pro tip: If you lack a thermometer, dip your elbow in first—it’s more heat-sensitive than hands

Water too cool won’t dissolve salt properly; too hot degrades magnesium benefits. Adjust with small splashes of cold/hot water after adding salt, as Epsom salt slightly cools the mixture.

Measuring Epsom Salt for Maximum Effect

Forget vague “handful” instructions. Precision prevents wasted salt or stinging skin:
Standard tub (6–8 inches deep): Use ½ cup Epsom salt
Small basin (covers ankles): Use ¼ cup
Double-strength soak (severe soreness): Max 1 cup

Pour salt directly into running warm water while stirring 60 seconds until fully dissolved. Undissolved crystals cause micro-abrasions on cracked heels. For extra-sensitive skin, reduce to 3 tablespoons—never skip this step to “save salt.”

Customizing Your Soak Without Risking Irritation

essential oil dilution guide aromatherapy skin safety

Generic guides push essential oils, but improper use causes rashes. Stick to these safe upgrades:

Essential Oil Additions That Actually Work

Only use oils after salt dissolves:
3 drops lavender oil → Calms stressed nerves (proven in clinical aromatherapy studies)
2 drops peppermint oil → Cools overheated feet (avoid if you have neuropathy)
Never exceed 5 total drops—more risks chemical burns

⚠️ Critical rule: Always mix oils with 1 tsp carrier oil (coconut, almond) before adding to water. Dumping pure oils directly creates skin-searing droplets.

Natural Exfoliants for Cracked Heels

Add after soaking 10 minutes:
1 tbsp ground oats → Soothes irritation (grind plain oats in blender)
2 tbsp lemon slices → Brightens yellowed skin (rinse feet after 5 minutes)
Avoid coffee grounds or sugar—their sharp edges worsen cracks

Step-by-Step: Building Your Foot Bath in 7 Minutes

Follow this military-precise sequence for guaranteed results:

  1. Sanitize your basin (soap + hot water rinse) to prevent bacteria entering foot cracks
  2. Fill with 3 inches warm water (100–104°F)
  3. Add Epsom salt while stirring continuously for 60 seconds
  4. Test water with thermometer/elbow—adjust temperature now
  5. Mix carrier + essential oils (if using) in separate cup
  6. Pour oil blend into water, swirl gently
  7. Lower feet slowly—never plunge to avoid shocking circulation

How Long to Soak for Real Results

  • Basic tiredness: 12–15 minutes (set phone timer!)
  • Swollen feet: 10 minutes max—longer worsens inflammation
  • Never exceed 20 minutes—skin prunes, pulling salt out of your body
  • Exit immediately if feet turn bright pink—sign of overheating

Critical Safety Steps Before You Begin

foot wound infection signs diabetic foot care

Skipping these risks infections or chemical burns:

Who Should Avoid Epsom Salt Soaks

Do NOT soak if you have:
– Open wounds, blisters, or diabetic foot ulcers (salt = stinging + delayed healing)
– Recent surgery on legs/feet (moisture invites infection)
– Varicose veins with skin discoloration (heat worsens circulation issues)
When in doubt, consult your doctor first—no online guide replaces medical advice

Basin Selection Mistakes That Cause Injury

  • Never use metal tubs—salt corrodes metal, leaching toxins into water
  • Use food-grade plastic, ceramic, or inflatable basins
  • 🚫 Avoid “spa” tubs with jets—stagnant water breeds bacteria between uses

Post-Soak Routine for Lasting Softness

Most people ruin the benefits here. Do this instead:

  1. Blot feet dry—never rub (wet skin tears easily)
  2. Apply thick moisturizer while damp (shea butter > lotions)
  3. Wear cotton socks overnight to lock in hydration
  4. Scrub dead skin ONLY next morning with pumice stone

⚠️ Never file calluses post-soak—water-softened skin shreds under pressure. Wait 8+ hours.

When to Ditch the Foot Bath for Medical Help

Epsom salt soaks aren’t magic. Seek immediate care if you notice:
Red streaks spreading from foot wounds (sign of infection)
Persistent swelling after 24 hours (could indicate blood clot)
Numbness lasting >1 hour post-soak (nerve compression risk)

This ritual complements professional care—it doesn’t replace it.

Maintenance: Keeping Your Foot Bath Supplies Effective

Epsom salt degrades in humidity. Extend its life:
Store in airtight glass jar (not the original bag)
Discard if clumpy or discolored—wet salt grows mold
Buy USP-grade salt (check packaging)—non-therapeutic grades contain fillers

Monthly Deep Clean for Your Basin

Mineral deposits from salt harbor bacteria:
1. Scrub with 1:1 vinegar/water solution
2. Rinse thoroughly—vinegar smell lingers on skin
3. Air-dry upside down for 24 hours

Final Routine for Maximum Daily Benefit

  • Morning soaks: 10 minutes with peppermint oil (energizes)
  • Evening soaks: 15 minutes with lavender (promotes sleep)
  • Weekly: Add lemon slices for brightening (skip if diabetic)
  • Never do consecutive days—skin needs 48-hour recovery

A perfectly executed Epsom salt foot bath costs less than $0.50 and takes under 20 minutes. By following these precise measurements, temperature controls, and safety cutoffs, you transform a basic soak into targeted foot therapy. Remember: the salt’s power lies in correct dissolution and timing—not exaggerated health claims. Keep your basin ready by the sink, and in one week, you’ll notice smoother heels and lighter steps. For ongoing foot health, pair this with daily moisturizing and properly fitted shoes—your foundation for moving through life pain-free.

Important Note: This guide reflects standard preparation practices. Always prioritize your healthcare provider’s advice over general wellness tips, especially with diabetes, circulatory issues, or open wounds.

« Older posts Newer posts »