That annoying drip from your bath faucet has finally become too much to ignore. Whether you’re replacing an outdated fixture, repairing a leak, or renovating your bathroom, knowing how to take a bath faucet off properly can save you hundreds in plumber fees. The process varies based on your faucet type—deck-mounted, wall-mounted, or freestanding—but with the right approach, most homeowners can tackle this project successfully. This guide walks you through every step of removing your bath faucet, from identifying your specific configuration to handling stubborn complications like rusted fasteners and mineral deposits.
Before you grab your tools, understand that proper preparation prevents 90% of faucet removal problems. You’ll need to identify your faucet type, gather specialized tools, and shut off water supplies correctly. Rushing into removal without proper planning often leads to flooded bathrooms, damaged fixtures, or stripped fasteners that complicate the project. By the end of this guide, you’ll have the confidence and knowledge to remove any bath faucet safely and efficiently.
Gather Essential Tools Before Starting
Attempting to take a bath faucet off without the right tools guarantees frustration and potential damage. An adjustable wrench serves as your primary tool for supply line connections and mounting nuts, while a basin wrench reaches those impossible-to-access mounting nuts under sinks or behind tubs. Don’t skip the screwdrivers—both flathead and Phillips varieties handle decorative caps and handle screws on most faucet designs.
Critical tools you’ll need:
– Penetrating oil like WD-40 for rusted fasteners
– Rubber-coated pliers for gripping without scratching
– A hair dryer to soften hardened plumber’s putty
– Safety glasses and rubber gloves for protection
– Bucket and clean cloths for water spills
For particularly stubborn fixtures, upgrade your toolkit with a pipe wrench for superior grip and a nut splitter for completely seized fasteners. Keep Teflon tape on hand if you’re reinstalling immediately—this prevents leaks on reconnected threaded fittings. Without these essentials, you’ll likely face stripped screws, damaged finishes, or worse—unexpected water damage from improperly disconnected lines.
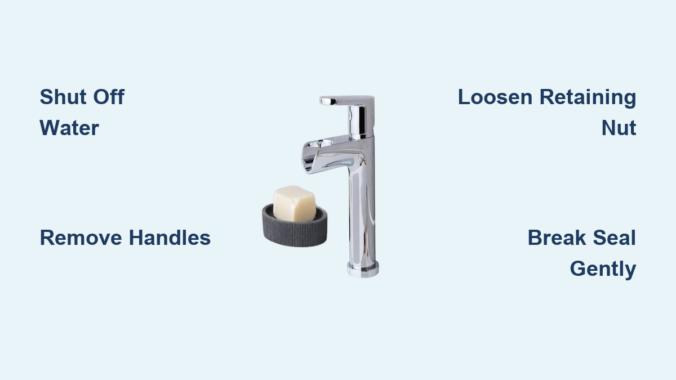
Shut Off Water Supply Properly

Never skip this critical step when you take a bath faucet off—failing to shut off water completely causes catastrophic flooding. Locate shutoff valves beneath the sink or behind the access panel near your tub; these small oval handles turn clockwise to close. If your bathroom lacks individual shutoffs (common in older homes), shut off your main water supply near the meter.
After closing valves, open faucet handles fully to release pressure and drain remaining water into your bucket. Verify the water is truly off by attempting to run the faucet—any flow means faulty valves requiring replacement before proceeding. For wall-mounted faucets, check behind access panels for hidden shutoffs; if none exist, you’ll need to drain the entire system by opening the lowest faucet in your home.
Prepare Your Work Area Thoroughly
Clearing and protecting your workspace prevents damage and makes faucet removal significantly easier. Remove all items from the tub, shower area, and nearby surfaces—cosmetic bottles and soap dishes only obstruct access to mounting hardware. Lay towels or a drop cloth around the work area to catch debris and absorb water spills.
Position a portable work light to illuminate confined spaces where small fasteners hide. Remove the drain stopper and place a rag inside to prevent screws from falling into plumbing. Clear nearby cabinets to create space for tools and removed components. Keep a small container or magnetic tray handy to organize screws as you remove them—this prevents loss and simplifies reinstallation.
Remove a Deck-Mounted Faucet Correctly
Deck-mounted faucets attach directly to the bathtub rim and represent the most common configuration. Begin by removing decorative caps labeled “H” and “C” using a flathead screwdriver—pry gently to avoid scratching the finish. Beneath each cap, you’ll find a screw securing the handle to the valve stem; remove these to detach the handles.
With handles removed, locate the retaining nut holding the faucet body to the mounting surface. Use your basin wrench to loosen this nut counterclockwise while supporting the faucet body. If the faucet resists removal, work a putty knife around the base perimeter to break any hardened plumber’s putty seal. Apply gentle, even pressure when lifting—forcing one side up first can crack your bathtub surface.
Handle Rusted or Seized Fasteners Effectively
Corrosion and mineral deposits frequently complicate faucet removal, especially in hard water areas. When fasteners refuse to turn, apply penetrating oil generously and allow it to work for several hours—or overnight for severe cases. Heat from a hair dryer expands metal slightly, breaking rust bonds when applied before turning fasteners.
For extremely stubborn bolts, a nut splitter removes damaged fasteners without destroying surrounding components. As a last resort, drilling out the fastener center with an easy-out tool extracts the remaining metal, though this damages the fastener irreparably. Pro tip: Always apply penetrating oil multiple times for maximum effectiveness—rust takes time to loosen.
Deal with Stripped or Damaged Screws
Stripped screw heads occur frequently during faucet removal due to corrosion or previous improper repairs. When a screwdriver slips, a screw extractor provides the most reliable removal method—these tools thread into damaged screw heads using counterclockwise motion. Without extractors, place a flathead screwdriver in the slot and tap firmly with a hammer to seat it deeper.
For completely rounded screw heads, grip the edge firmly with pliers and turn counterclockwise. When all methods fail, drill through the screw head completely to remove the faucet component while leaving the screw body embedded. This approach preserves surrounding components for future cleaning and reuse.
Break Stubborn Faucet Body Bonds

Faucet bodies bond to mounting surfaces through hardened plumber’s putty, cured silicone, or mineral deposits. Carefully work a thin putty knife around the perimeter while keeping the blade flat against the surface to avoid scratches. Apply heat from a hair dryer while working around the perimeter—softened materials release their grip more easily.
Gentle tapping around the faucet base with a rubber mallet breaks mineral deposit bonds without damaging finishes. For silicone-sealed connections, carefully run a utility knife around the perimeter to cut through the cured bond. Take your time with this process—rushing increases risks of scratches or chips to your bathtub surface.
Clean and Prepare for Installation
After successful removal, inspect the mounting surface for putty residue, silicone, or mineral deposits. Use a plastic scraper to remove bulk material without scratching porcelain or acrylic surfaces. Treat mineral deposits with white vinegar applied generously and left to sit for 15-20 minutes before scrubbing with a nylon brush.
If leaving plumbing exposed during renovations, properly cap supply lines to prevent water damage and pest entry. Compression cap fittings screw onto threaded pipe ends for reliable temporary sealing. For copper lines, soldered caps create permanent closures but require professional skills. Clean the area thoroughly and allow it to dry completely before installing your new fixture.
Recognize When to Call a Professional
While many faucet removals are DIY-friendly, certain situations warrant professional help. Multi-valve systems with body sprays or complex diverter mechanisms require specialized knowledge. Integrated digital controls, thermostatic mixing valves, or smart faucet technology should be handled by professionals to prevent electronic damage.
Signs of significant water damage, structural rot, or soft flooring around your tub indicate problems beyond simple faucet removal. If your bathtub shows movement, cracking, or separation from walls, structural assessment takes priority. Professional plumber rates typically range from $45 to $150 per hour—factor this cost against your time and tool investment before proceeding.
Prioritize Safety Throughout the Process
Bathrooms present electrical hazards requiring careful attention during faucet removal. Never work on plumbing when standing in water—dry the area thoroughly first. Keep electrical tools away from water sources at all times, and consider shutting off power to nearby circuits if working close to outlets.
Use proper body mechanics to prevent muscle strain—position yourself comfortably before applying force to stubborn fasteners. Take frequent breaks during extended projects and use knee pads when working on hard surfaces. Wear safety glasses and rubber gloves when handling penetrating oils and cleaning chemicals—always work in well-ventilated areas and follow label instructions carefully.
Successfully removing a bath faucet requires patience, the right tools, and understanding your specific configuration. By following these systematic steps—gathering tools, shutting off water, preparing your area, and applying appropriate techniques—you can complete this project while avoiding common pitfalls. When complications arise beyond your comfort level, professional assistance ensures the job gets done correctly without causing additional damage to your plumbing or fixtures. With your old faucet removed, you’re now ready to install your new fixture and enjoy a beautifully updated bathroom.
Leave a Reply