Your memory foam bath mat has become stiff, developed an unpleasant odor, or simply looks dingy after months of daily use. You know it needs cleaning, but you’re hesitating—memory foam is delicate, and one wrong move could ruin your comfortable mat forever. Unlike regular bath mats that can handle aggressive washing, memory foam requires special care to maintain its supportive cushioning and shape. In this guide, you’ll discover the proper techniques to clean your memory foam bath mat safely while preserving its longevity, whether you’re dealing with surface stains, embedded odors, or general wear.
Why Memory Foam Bath Mats Need Special Washing Care
Memory foam bath mats contain a unique open-cell structure that provides exceptional comfort but makes them vulnerable to damage during cleaning. Unlike standard bath mats, these specialized mats can lose their shape, break down internally, or develop mildew if washed incorrectly. The porous nature that makes memory foam so comfortable also allows it to absorb moisture deeply, creating perfect conditions for mold growth if not dried properly. Most manufacturers warn that improper washing techniques can permanently compromise the mat’s supportive qualities, leaving you with a flat, lumpy, or disintegrating bath mat that’s uncomfortable and potentially unsafe.
What Happens When You Machine Wash Memory Foam Incorrectly
When you toss your memory foam bath mat into the washing machine without precautions, several damaging processes occur simultaneously. The agitation forces water deep into the foam’s cellular structure, where it becomes trapped. High spin cycles create excessive pressure that compresses the foam beyond its recovery point, causing permanent deformation. Hot water causes the memory foam polymers to break down, accelerating deterioration. Most critically, incomplete drying allows moisture to remain trapped for days, creating the perfect breeding ground for mold and mildew that can’t be seen on the surface but produces persistent odors.
Signs Your Memory Foam Mat Needs Cleaning
Watch for these specific indicators that your memory foam bath mat requires attention: a musty smell that lingers even after the bathroom dries, visible discoloration around high-traffic areas, reduced cushioning in spots where you typically stand, or a sticky or slimy texture when wet. Unlike regular bath mats, memory foam won’t show obvious dirt on the surface—instead, it absorbs contaminants internally where they multiply. If water pools on the surface instead of being absorbed, this indicates the foam’s cellular structure has become clogged with soap scum and body oils, significantly reducing its functionality.
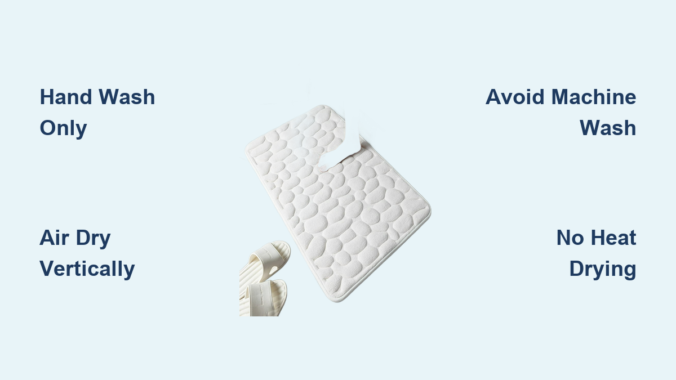
Step-by-Step Hand Washing Procedure for Memory Foam Mats

Preparing Your Cleaning Solution Safely
Mix one tablespoon of mild liquid detergent with two cups of cool water in a spray bottle—never use hot water as it damages memory foam’s structure. Avoid bleach, vinegar, or harsh chemicals that break down the foam’s polymer chains. Add a quarter cup of baking soda only if addressing odors, as its gentle abrasiveness helps lift trapped particles without scratching the foam’s delicate surface. Shake gently to combine, creating a solution that cleans effectively while preserving the mat’s integrity. Test this mixture on an inconspicuous corner first to ensure no discoloration occurs before proceeding with full cleaning.
Proper Surface Cleaning Technique
Spray the cleaning solution evenly across the top surface, focusing on visibly soiled areas but avoiding oversaturation. Use a soft-bristled brush (like an old toothbrush) to gently work the solution into stained areas using circular motions—never scrub aggressively as this damages the foam’s cell structure. For stubborn spots, apply a paste of baking soda and water, let it sit for 5-10 minutes, then gently brush again. Work systematically from one end to the other, rewetting your brush as needed but keeping the mat only damp, not soaking wet. This surface-only approach cleans effectively without forcing water deep into the foam where it can’t escape.
Drying Methods That Prevent Mold and Maintain Shape
Air Drying Positioning for Maximum Effectiveness
After cleaning, gently press out excess moisture with a clean, dry towel—never wring or twist the mat as this causes permanent deformation. Position the mat vertically against a wall in a well-ventilated area, alternating sides every few hours to ensure even drying. Never lay flat on the floor during drying, as trapped moisture between the mat and surface creates mold hotspots. Place a fan nearby (not directly on the mat) to circulate air without forcing moisture deeper into the foam. The mat should feel completely dry to the touch on both sides and through the thickness before returning to bathroom use—this typically takes 24-48 hours depending on humidity.
What NOT to Do When Drying Memory Foam
Avoid these common drying mistakes that ruin memory foam bath mats: never use a clothes dryer as heat melts the foam’s structure; don’t place in direct sunlight which degrades the polymers; skip using a hairdryer or heat gun which creates uneven drying and hot spots; and never return the mat to the bathroom prematurely when it still feels cool or slightly damp inside. Memory foam dries from the outside in, so surface dryness doesn’t indicate complete dryness internally. Rushing this process is the #1 cause of premature mat failure and persistent odors.
Preventative Maintenance Between Deep Cleans
Daily Care Routine for Longevity
Implement this simple daily practice to extend time between deep cleans: after each shower, flip your memory foam bath mat to expose the bottom side to air for 10-15 minutes while the bathroom ventilates. This prevents moisture buildup in the cellular structure where mold begins. Weekly, remove the mat completely and stand it vertically for several hours to ensure thorough air circulation through both sides. For high-humidity environments, place a moisture-absorbing product like silica gel packs underneath the mat during non-use hours to draw out residual dampness that would otherwise linger.
Spot Cleaning Protocol for Immediate Spills
Address spills immediately with this targeted approach: blot (never rub) liquid spills with a dry towel to absorb surface moisture. For soap scum buildup around the edges, mix equal parts cool water and mild dish soap in a spray bottle, mist affected areas lightly, then wipe with a soft cloth using gentle pressure. For hair dye or cosmetic stains, apply a small amount of rubbing alcohol to a cotton swab and dab the stain—alcohol evaporates quickly without adding moisture. Always follow spot cleaning with ventilation time to ensure no residual moisture remains trapped in the foam structure.
When to Replace Rather Than Wash Your Memory Foam Mat
Irreversible Damage Indicators
Recognize these permanent damage signs that mean replacement is necessary: persistent foul odors after multiple proper cleanings indicate deep mold colonization; visible black or green spots that won’t clean indicate surface mold penetration; complete loss of cushioning where the mat feels hard or lumpy throughout; or physical disintegration where foam particles come off when touched. Memory foam has a typical lifespan of 1-2 years with proper care—beyond this, the cellular structure naturally degrades regardless of cleaning efforts. Continuing to use a compromised mat creates slipping hazards and exposes you to potentially harmful mold spores.
Proper Disposal Methods for Old Memory Foam Mats
When replacement becomes necessary, dispose of your memory foam bath mat responsibly. Check with local recycling centers as some accept memory foam products for repurposing into carpet underlay or other products. Never burn memory foam as it releases toxic fumes when incinerated. If landfill disposal is your only option, cut the mat into smaller pieces to reduce space in waste facilities. Consider donating lightly used mats to animal shelters which often need comfortable bedding for kennels—many welcome clean, gently used memory foam products.
Regular maintenance of your memory foam bath mat significantly extends its life while preserving that luxurious comfort you love. By following these specific washing techniques tailored to memory foam’s unique properties, you’ll avoid the common pitfalls that lead to premature replacement. Remember that gentle surface cleaning, thorough air drying, and preventative daily care make the difference between a mat that lasts years versus one that deteriorates within months. For best results, incorporate the weekly flipping routine and monthly deep cleaning schedule outlined here to keep your bath mat fresh, hygienic, and supportive. When you notice the first signs of wear or odor, address them immediately using these targeted methods before problems become irreversible. Your feet—and your bathroom—will thank you for the extra care.
Leave a Reply