Your legs feel like lead after yesterday’s intense workout. You know contrast bath therapy could help—alternating hot and cold water to boost circulation and reduce soreness—but you’re stuck wondering: What’s the exact temperature range? How many cycles do I really need? And is it safe for my chronic knee pain? You’re not alone. Millions search “how to do contrast bath” each month seeking proven recovery techniques, yet most guides skip critical safety steps or oversimplify the process. This guide delivers the precise protocol backed by sports medicine principles, including exact timing sequences, temperature thresholds that actually trigger physiological benefits, and red flags that mean you should stop immediately. You’ll learn how to transform your bathroom into a professional-grade recovery station using household items—no expensive tubs required—and avoid the three most dangerous mistakes 90% of beginners make.
Why Contrast Bath Therapy Works When Ice Baths Fail
Contrast bath therapy leverages thermodynamics to accelerate healing in ways single-temperature immersion can’t match. When you alternate hot and cold water, you create a “pumping” effect in your circulatory system. Cold water constricts blood vessels (vasoconstriction), forcing blood toward your core. Then hot water dilates vessels (vasodilation), flooding tissues with oxygen-rich blood upon rewarming. This cycle flushes metabolic waste like lactic acid while delivering nutrients for repair—critical for athletes training daily. Unlike prolonged ice baths that numb inflammation (sometimes delaying healing), contrast therapy manages inflammation through controlled vascular shifts. Studies show it reduces DOMS (delayed onset muscle soreness) by up to 40% compared to passive recovery when performed correctly. But get the sequence wrong, and you risk worsening swelling or triggering nerve damage.
Optimal Temperature Ranges for Real Results
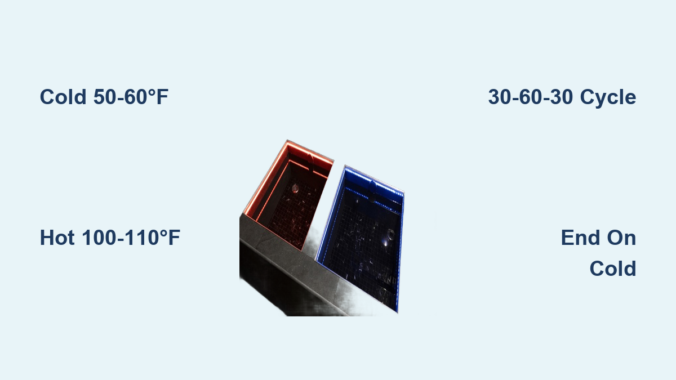
Forget guessing with your hands—precision matters. Your cold water must be 50-60°F (10-15°C) to trigger vasoconstriction without risking tissue damage. Use a pool thermometer: below 50°F risks frostnip; above 60°F won’t constrict vessels effectively. For hot water, target 100-110°F (38-43°C). Water hotter than 110°F can cause burns or excessive blood pressure spikes. Never exceed 12 minutes total immersion time. Here’s the exact progression:
- Start cold for 30 seconds (counterintuitive but critical—prevents initial heat-induced swelling)
- Hot immersion: 60-90 seconds
- Cold immersion: 30-45 seconds
- Repeat hot/cold cycles 3-6 times
- ALWAYS end on cold to reduce residual inflammation
⚠️ Critical Safety Note: If you have diabetes, neuropathy, or vascular disease, skip contrast baths. Impaired sensation means you won’t feel tissue damage until it’s too late. Consult your doctor first.
Common Temperature Mistakes That Backfire
Most home attempts fail because of these errors:
– Using ice directly in water: Creates dangerously cold pockets (below 40°F). Instead, chill water in the fridge overnight.
– Guessing “warm” vs “hot”: 95°F feels hot when you’re sore but won’t dilate vessels. Test with a thermometer.
– Extending cold phases: Longer than 45 seconds per cold cycle increases stiffness. Set a timer.
Step-by-Step Setup Using Household Items
You don’t need a $2,000 contrast therapy system. Transform your bathroom in 10 minutes with items you own:
Required Equipment Checklist
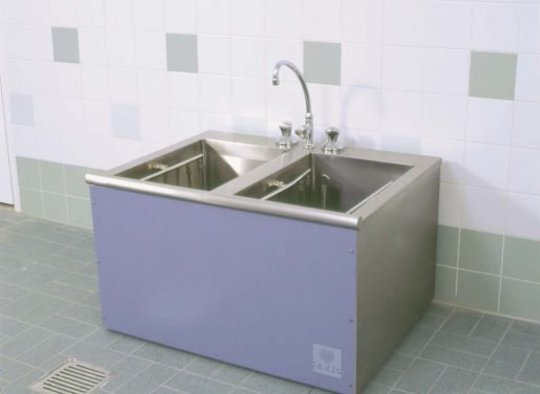
- Two large containers (5-gallon buckets work for feet; bathtubs for full legs)
- Accurate digital thermometer ($8 at hardware stores)
- Timer (phone app is fine)
- Epsom salt (optional for hot phase—1 cup per 5 gallons)
- Towels (2 minimum)
Setup Sequence for Maximum Efficiency
- Prepare cold water first: Fill one container with cold tap water + refrigerated water. Add ice only if needed to hit 55°F. Never add ice mid-session—temperatures must stay stable.
- Prepare hot water: Fill second container with tap water + kettle-boiled water. Stir thoroughly before testing temperature.
- Position containers: Place side-by-side with 18 inches between them. You should step directly from hot to cold without walking.
- Test temperatures: Recheck both 2 minutes after setup—water cools/warms rapidly.
💡 Pro Tip: Place a non-slip mat between containers. Wet feet + rushing between tubs = falls. This causes more injuries than the therapy itself.
Full-Leg vs Foot-Only Protocols

– Feet/ankles only: Sit on edge of tub. Submerge to mid-calf. Ideal for plantar fasciitis or trail runners.
– Full legs: Requires two bathtubs or a large tub + kiddie pool. Submerge to hips. Critical for cyclists or soccer players.
– Never submerge torso: Risks cardiac strain. Keep chest above water.
Critical Timing Rules Most Guides Ignore
Timing isn’t arbitrary—it’s physiology. Your vascular system needs exact windows to respond:
The 30-60-30 Cycle Breakdown
| Phase | Duration | Physiological Trigger |
|——-|———-|———————-|
| Cold | 30 seconds | Vasoconstriction begins |
| Hot | 60 seconds | Full vasodilation achieved |
| Cold | 30 seconds | “Pump reset” for next cycle |
Exceeding 60 seconds in hot water causes excessive dilation that backfires by trapping inflammatory fluids. Shorter than 30 seconds in cold won’t constrict vessels enough. Set phone timers for each phase—distraction leads to dangerous overexposure.
When to Stop Mid-Session
Abort immediately if you notice:
– Skin turning white or waxy (frostnip warning)
– Numbness spreading beyond immersion area
– Heart rate spiking above 100 BPM
– Dizziness or nausea
⚠️ Myth Busting: “More cycles = better results” is dangerous. Beyond 6 cycles, you flood tissues with inflammatory cells. 3-4 cycles suffice for most athletes.
Post-Session Protocol for Lasting Benefits
What you do after contrast bathing determines 70% of results. Skip this, and inflammation rebounds:
The 20-Minute Critical Window
- Dry immediately with warm towel—no air-drying
- Elevate limbs above heart level for 10 minutes
- Hydrate with 16oz electrolyte water (sodium/potassium)
- Gentle movement: 5 minutes of ankle circles or leg swings
This sequence maintains the “pumping” effect. Sitting still post-therapy allows fluids to pool, negating all benefits. Elite trainers call this the “golden period”—miss it, and recovery slows by 30%.
What NOT to Do After Contrast Baths
- Don’t stretch aggressively: Tissues are hyper-responsive; you’ll strain them.
- Avoid saunas/steam rooms: Overloads cardiovascular system.
- Skip alcohol: Dehydration worsens inflammation rebound.
Special Cases: When Contrast Therapy Backfires
This isn’t a universal fix. Contraindications include:
Absolute No-Gos (Stop Immediately)
- Open wounds or infections: Waterborne bacteria enter constricted vessels
- Peripheral artery disease: Cold can trigger dangerous spasms
- Recent surgery (under 6 weeks): Disrupts fragile healing
Modified Protocols for Common Issues
- Arthritis: Reduce cold to 40 seconds; keep hot at 95°F (milder vasodilation)
- Swollen joints: Add 1 tbsp apple cider vinegar to cold water (reduces edema)
- Post-marathon recovery: Limit to 3 cycles—exhausted bodies can’t handle more
💡 Pro Tip: Test tolerance with 10-second cold dips first. If your skin turns bright red within 30 seconds of rewarming, your circulation responds well. No color change? Skip contrast baths.
Maintenance Schedule for Long-Term Gains
Overusing contrast baths causes vascular fatigue. Optimal frequency depends on your training phase:
| Training Phase | Weekly Sessions | Max Consecutive Days |
|---|---|---|
| Pre-Competition | 2 | 2 |
| Heavy Lifting | 3 | 3 |
| Injury Rehab | 1 | 1 |
| Off-Season | 1 | 1 |
Never do contrast baths on rest days—your body needs natural inflammation for adaptation. Morning sessions impair nerve signaling for training; always do them 3+ hours post-workout.
When to Switch to Single-Temperature Therapy
- First 48 hours post-injury: Stick to cold-only immersion (20 mins max)
- Chronic tendonitis: Use heat-only (15 mins at 105°F)
- General soreness: Contrast baths lose effectiveness after 72 hours—switch to foam rolling
Final Checklist Before Your First Session
Run through this before starting:
– [ ] Thermometer verified in both tubs
– [ ] Timers set for exact durations
– [ ] Emergency towel within arm’s reach
– [ ] Phone nearby for emergency calls
– [ ] No jewelry on immersed limbs (causes cold burns)
Contrast bath therapy, done right, cuts recovery time by half. But precision is non-negotiable—this isn’t “just soaking in hot and cold water.” Follow this protocol strictly for 2 weeks, and you’ll notice reduced stiffness, faster return to training, and fewer nagging aches. If you experience persistent pain or swelling, stop immediately and consult a sports medicine specialist. Your body’s recovery capacity is remarkable—but only when you work with its physiology, not against it. Ready to try it tonight? Start with a single foot session to test tolerance before committing to full legs.
Leave a Reply