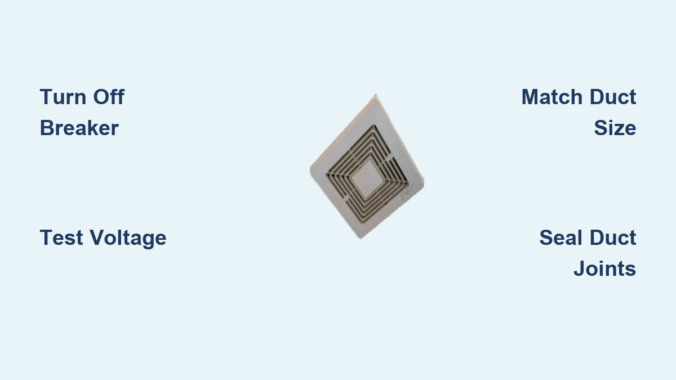
That persistent musty odor after your shower? It’s your first warning sign that your bathroom exhaust fan has failed—and ignoring it risks mold growth, structural damage, and costly repairs. Replacing a bath fan isn’t a simple light-bulb swap; it involves live electrical wiring, ceiling access, and ventilation requirements most homeowners overlook. Without the exact model specifications (which vary widely by manufacturer), you’re gambling with safety and compliance. This guide cuts through the confusion with universal replacement steps that prioritize code compliance and injury prevention—whether you’re installing a Broan, Panasonic, or generic unit. You’ll learn how to safely disconnect old units, avoid deadly electrical mistakes, and verify airflow performance without specialized tools.
Why Bathroom Fan Replacement Demands Professional-Level Precision
Most DIYers underestimate how bathroom exhaust fans integrate with your home’s electrical and ventilation systems. A single misstep can trigger electrical fires, void insurance policies, or fail building inspections. Unlike light fixtures, exhaust fans require:
– Dedicated 15-amp circuits (shared circuits often overload when fans run with heaters)
– Minimum 50 CFM airflow (per International Residential Code for bathrooms under 100 sq ft)
– Exterior venting (venting into attics causes catastrophic moisture damage)
Ignoring these standards traps humid air in your ceiling cavity, rotting wood framing within 18 months. Home inspectors routinely flag improperly replaced fans as “major defects” during resale—delaying closings by weeks.
How to Confirm Your Fan Needs Replacement (Not Just Cleaning)
Before disassembling anything, verify failure isn’t caused by simple clogs:
1. Test airflow: Hold tissue paper 2 inches from the grill—if it doesn’t stick firmly when the fan runs, airflow is insufficient
2. Check for humming: A loud buzzing with no rotation indicates seized bearings (requires motor replacement)
3. Inspect wiring: Visible fraying or melted insulation at the junction box means immediate replacement
Pro Tip: If the fan runs but humidity lingers after 20 minutes, your unit is undersized—not broken. Calculate needed CFM: (Bathroom length × width) × 1.1 = Minimum airflow.
Critical Safety Steps Before Removing the Old Fan

Never skip these steps—even if the fan seems “dead.” Bathroom circuits often share power with outlets, creating hidden electrocution risks.
How to Safely Isolate Power (The 3-Point Verification Method)
Assuming standard wiring (no GFCI protection in older homes):
1. Turn off the breaker labeled “Bathroom” or “Ventilation” at your main panel
2. Verify power loss at the fan switch using a non-contact voltage tester (tester must show zero voltage)
3. Double-check wires inside the fan housing—test both black (hot) and white (neutral) wires before touching
Warning: If your tester lights up at any point, STOP. You’ve turned off the wrong breaker. Consult an electrician.
Essential Tools for Safe Disassembly
Gather these before climbing your ladder:
– Non-contact voltage tester ($8, hardware stores)
– Insulated screwdrivers (magnetic tip prevents dropped screws)
– Flashlight with magnet base (sticks to metal housing)
– Heavy-duty garbage bag (to catch insulation debris)
Critical Mistake to Avoid: Using metal ladders near electrical work. Always use fiberglass ladders rated for electrical work.
Removing Your Old Bathroom Exhaust Fan Unit
Ceiling drywall damage is the #1 DIY replacement mistake. Follow this sequence to preserve your ceiling:
How to Disconnect Wiring Without Creating a Fire Hazard
- Remove the grill and light cover (usually clips or screws)
- Unscrew the mounting bracket—support the unit’s weight with your free hand
- Before disconnecting wires: Take a photo of the existing wiring configuration
- Loosen wire nuts counterclockwise (black to black, white to white, green/bare to ground screw)
- Slide the old unit out slowly while feeding wires through the ceiling hole
Visual Cue: If wires show copper beyond the wire nut, the connection was loose—this causes arcing and heat damage.
Handling Common Obstruction Scenarios
- Stuck housing in insulated ceilings: Cut insulation away with a utility knife (never pull the unit forcefully)
- Rusted mounting screws: Spray with penetrating oil, wait 10 minutes, then tap gently with hammer before turning
- No attic access: Work through the ceiling hole using a flexible drill bit extension (36-inch minimum)
Selecting a Code-Compliant Replacement Fan Unit

Choosing the wrong model guarantees rework. Match these non-negotiable specs:
Critical Replacement Criteria Checklist
- Housing diameter: Measure your existing ceiling cutout (common sizes: 7.5″ or 10.5″)
- Duct diameter: Most require 4″ rigid ducting (flex duct reduces airflow by 30%)
- Static pressure rating: Must exceed 0.1″ for vent runs over 25 feet (check manufacturer charts)
- IC-rated housing: Required if insulation contacts the unit (prevents overheating)
Expert Note: Avoid “multi-room” fans unless professionally ducted. Single-bath units cost 40% less and last longer.
Why Sone Ratings Matter More Than CFM Claims
Manufacturers advertise high CFM numbers, but noise (sone rating) determines real-world use:
| Sone Rating | Noise Level | Recommended For |
|————-|————-|—————-|
| 1.0 sone | Whisper-quiet | Master bathrooms |
| 2.5 sones | Normal conversation | Secondary bathrooms |
| 3.5+ sones | Annoying hum | Utility rooms only |
Choose 1.0 sone models even if slightly lower CFM—people won’t run noisy fans long enough to dry the room.
Installing Your New Bathroom Exhaust Fan
This is where 90% of DIY failures occur. Precision here prevents callbacks and code violations.
Step-by-Step Mounting for Zero Ceiling Damage
- Slide new unit into ceiling hole—do not force it (if tight, enlarge hole 1/8″ at a time)
- Align mounting tabs with joists (use a stud finder through the hole)
- Secure with #8 x 1″ screws only (longer screws puncture roof decking)
- Connect wires: Black to black, white to white, ground to green screw (wrap connections with electrical tape)
- Tuck wires neatly into housing—no pinching against mounting flanges
Pro Tip: Apply silicone caulk around the housing rim before final tightening. Prevents air leaks that reduce airflow by 15%.
Ductwork Installation Mistakes That Cause Mold
- Never use flexible ducting in ceiling cavities (collapses over time, trapping moisture)
- Slope duct downward 1/4″ per foot toward exterior vent (prevents condensation pooling)
- Seal joints with mastic (not duct tape—it fails at 180°F temperatures)
Visual Cue: Properly installed ducts have zero kinks and maintain full diameter throughout the run.
Testing and Final Verification
Your replacement isn’t complete until these tests pass:
The 4-Point Performance Checklist
- Airflow test: Hold tissue against the grill—must hold firmly at full speed
- Timer function: Verify fan runs 20+ minutes after switch-off (prevents premature shutoff)
- Condensation check: Run a hot shower for 15 minutes—no moisture should collect on the grill
- Exterior vent inspection: Confirm air is blowing out (not sucking in) at the roof/wall cap
Critical Warning: If the fan vibrates excessively, shut off immediately. Unbalanced motors overheat within hours.
When to Call a Professional Immediately
Some situations demand licensed help—no exceptions:
– Aluminum wiring in your home (requires COPALUM crimps for safe connection)
– No attic access (risks improper duct routing through living spaces)
– Venting through soffit (creates negative pressure that pulls air back into attic)
– GFCI tripping during testing (indicates ground fault needing circuit diagnosis)
Cost Reality: Electricians charge $150–$250 for fan replacement. This is cheaper than $5,000 in mold remediation from a failed DIY job.
Preventing Future Failures With Smart Maintenance
Extend your new fan’s lifespan with these 2-minute monthly habits:
– Vacuum the grill with a brush attachment (prevents dust buildup that strains motors)
– Wipe blades with a damp cloth during shower cleanings (oil from skin reduces airflow)
– Check exterior vent cap quarterly for bird nests or ice blockages
Pro Tip: Install a humidity-sensing switch ($35). It auto-runs the fan until moisture drops below 50%—eliminating guesswork.
Replacing a bath fan safely hinges on respecting electrical hazards and ventilation physics—not just swapping parts. By prioritizing code compliance over speed, you avoid the top pitfalls that turn simple upgrades into emergency repairs. Remember: When in doubt, turn off the breaker and call a pro. That $200 service call preserves your home’s structural integrity far better than a rushed DIY fix. For model-specific wiring diagrams, always consult the manufacturer’s PDF manual—never rely solely on generic guides. Your next shower should leave only steam, not regrets.
Leave a Reply