Water slowly trickling out of your bathtub while you’re trying to enjoy a relaxing soak is incredibly frustrating. When your push bath plug isn’t working correctly, you’re left either constantly adding hot water or standing in ankle-deep soapy water because the plug failed to engage. The good news is that most push bath plug problems have straightforward causes you can diagnose and fix yourself in under an hour—no plumber required. This guide provides step-by-step solutions to common push bath plug issues, helping you restore proper drainage functionality and reclaim your bathing experience without unnecessary expense.
Why Your Push Bath Plug Suddenly Won’t Stay Sealed
When your push bath plug won’t create a watertight seal, water drains steadily during your bath, forcing you to constantly monitor and refill. This problem usually stems from three specific issues that prevent proper sealing.
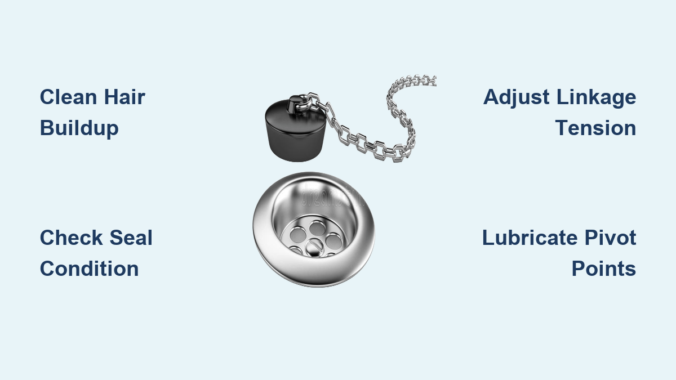
Check for hair and debris buildup around the plunger. Hair inevitably wraps around the lift rod and collects at the base of the plunger, preventing it from seating fully in the drain opening. Remove the overflow plate (typically held by two screws) and use needle-nose pliers to pull out visible hair. For stubborn buildup, wrap a wire coat hanger with duct tape (sticky side out) and fish it through the overflow pipe to catch hair further down.
Inspect the plunger seal’s condition. Lift the plunger out of the drain and examine the rubber or silicone seal. If it’s cracked, flattened, or shows signs of deterioration, it won’t create a proper seal regardless of how well the mechanism functions. Pro tip: Run your finger around the drain opening to feel for mineral deposits that might be preventing a tight fit—these can be scraped away with an old credit card.
Adjust the linkage tension if the plunger doesn’t seat fully. With the overflow plate removed, have someone push down on the drain cover while you observe the plunger. If it stops short of fully engaging, the linkage needs adjustment. Most systems have a small set screw on the vertical lift rod—loosen this, lower the plunger slightly, then retighten. Test the seal by running water before reassembling.
Why Your Push Bath Plug Won’t Open When Pressed
Nothing’s more frustrating than finishing your bath only to find the plug stubbornly refuses to release, leaving you standing in cold water. This common push bath plug not working issue typically has three specific causes.
The linkage has become disconnected from the plunger. With the overflow plate removed, push the drain cover down while watching the horizontal arm inside the overflow pipe. If the arm moves but the plunger doesn’t, the connection has come loose. Reattach by pushing the plunger fully down, then guiding the horizontal arm’s hook over the plunger’s lift rod until it clicks into place. You should feel resistance when pressing the drain cover.
Mineral deposits have seized the mechanism. Hard water leaves calcium and lime deposits that bind moving parts. Spray white vinegar directly into the overflow opening and let it sit for 15 minutes to dissolve buildup, then work the mechanism repeatedly. For severe cases, remove the plunger assembly and soak it in vinegar overnight—this dissolves calcification without damaging metal components like harsh chemicals might.
The lift rod has become bent or twisted. Straighten a bent lift rod by grasping it firmly with pliers and gently bending it back to vertical alignment. If it’s severely kinked, replace it—most hardware stores carry universal lift rods for $5-10. When reinstalling, ensure the rod moves freely through its full range without catching on pipe edges.
Quick Diagnostic Test for Push Plug Problems

Before committing to repairs, perform this three-step diagnostic check to pinpoint exactly why your push bath plug isn’t working:
The push test: Press down firmly on the drain cover. If it feels loose or spongy rather than offering firm resistance, the linkage has likely disconnected. If it feels solid but won’t pop back up, mineral buildup is probably binding the mechanism.
The visual inspection: Remove the overflow plate and shine a flashlight into the overflow pipe. Look for visible hair clogs, disconnected rods, or corroded pivot points. You should see the horizontal linkage arm connected to a vertical rod that extends down to the plunger.
The manual operation test: With the overflow plate removed, use needle-nose pliers to manually move the horizontal linkage arm up and down. The plunger should move smoothly through its full range. If it sticks at any point, that’s where your problem lies—clean that specific area thoroughly before reassembling.
Fixing a Sticky Push Bath Plug Mechanism
When your push bath plug works but feels stiff or unresponsive, it’s time for targeted maintenance that addresses the specific sticking point.
Lubricate pivot points with silicone grease. Most push plug mechanisms have two critical pivot points: where the horizontal arm connects to the vertical lift rod, and where the arm attaches to the overflow plate bracket. Apply a pea-sized amount of silicone-based lubricant (never petroleum-based, which degrades rubber) to each pivot point, then work the mechanism 10-15 times to distribute the lubricant. Wipe away excess to prevent attracting more debris.
Clean mineral deposits from the plunger shaft. Remove the plunger by unscrewing it from the lift rod (it typically twists counterclockwise). Soak the plunger assembly in white vinegar for 30 minutes, then use an old toothbrush to scrub away stubborn deposits. Pay special attention to the shaft where it slides through the drain flange—this is a common sticking point.
Adjust the plunger height for optimal performance. Most systems allow you to raise or lower the plunger’s resting position. Loosen the retaining nut on the lift rod and slide it up or down slightly—lowering the plunger improves sealing but may make it harder to open, while raising it makes operation easier but might compromise the seal. Find the sweet spot through trial and adjustment.
Replacing a Worn Plunger Seal Without Replacing the Entire Mechanism
:max_bytes(150000):strip_icc()/remove-tub-stopper-clear-a-drain-2718786-hero-425b2598739f43718b6905767d2616d8.jpg)
A deteriorated plunger seal is the most common reason a push bath plug won’t seal properly, but you don’t need to replace the entire assembly—just this inexpensive component.
Remove the old plunger: With the overflow plate off, twist the plunger counterclockwise while pulling up—it’s usually threaded onto the lift rod. If it’s stuck, wrap it with rubber gloves for better grip or use channel-lock pliers with a cloth barrier to prevent damage.
Select the correct replacement: Take your old plunger to the hardware store—don’t rely on memory. Plungers vary by diameter (typically 1.25-1.5 inches) and connection type (threaded, clipped, or slotted). Universal kits cost $8-15 and include multiple seal sizes.
Install and test properly: Screw the new plunger onto the lift rod by hand until snug (don’t overtighten), then test the mechanism before reassembling. Fill the tub partially and check for leaks around the drain—properly installed, the new seal should hold water with no visible seepage.
Preventing Future Push Bath Plug Failures
Once you’ve fixed your push bath plug not working issue, implement these maintenance habits to prevent recurrence and extend your mechanism’s lifespan.
Monthly hair removal: After each bath, use a bent wire or specialized drain hook to pull hair from the overflow opening before it travels down the pipe. Once monthly, remove the overflow plate and pull out visible hair from the linkage assembly—this takes just two minutes but prevents 80% of future problems.
Quarterly deep cleaning: Every three months, remove the plunger assembly and soak it in vinegar for 30 minutes to dissolve mineral buildup. Re-lubricate pivot points with silicone grease—this simple maintenance prevents the binding that causes most push plug failures.
Annual component inspection: Once a year, remove the entire mechanism to inspect for wear. Check the plunger seal for cracks, the lift rod for bending, and all connections for looseness. Replace any worn parts immediately before they fail completely during use.
When to Call a Professional for Push Bath Plug Repairs
While most push bath plug issues are DIY-friendly, certain situations warrant professional help to avoid causing further damage.
Persistent leaks around the drain flange indicate the tub’s seal has failed—this requires removing the tub surround and re-caulking, which most homeowners aren’t equipped to handle properly. Water stains on the ceiling below confirm this problem.
Severe corrosion inside the overflow pipe that prevents component removal means the entire assembly may need replacement. Attempting to force corroded parts can damage the overflow pipe, creating a much larger repair job.
Non-standard mechanisms in older or imported tubs often require specialized knowledge. If you’ve tried standard fixes without success, a plumber can identify your specific mechanism type and source compatible replacement parts.
Restoring your push bath plug to proper working order doesn’t require professional skills or expensive tools—just systematic troubleshooting and attention to detail. By understanding the simple mechanics behind how these systems work and following the targeted solutions outlined here, you can resolve most push bath plug not working issues in under an hour. Implementing the preventative maintenance routine will keep your drainage system functioning reliably for years, saving you from future frustration and unnecessary plumbing bills. Remember that most push plug problems stem from preventable buildup or minor component wear—address these promptly, and you’ll enjoy trouble-free baths for the life of your tub.
Leave a Reply