Smart Bathroom Solutions: Reviews, Tips & Expert Maintenance Guides

Month: February 2026 (Page 10 of 19)

How to Bathe Without a Drain Plug


You’re ready for a relaxing soak after a long day, but when you go to fill the tub, you discover there’s no drain plug—or it’s broken. This frustrating situation happens more often than you might think, whether you’re traveling, staying in a rental property, or dealing with a broken fixture at home. The good news? You absolutely can take a bath without a drain plug using simple household items and clever techniques. This guide reveals nine practical methods that let you enjoy warm water immersion even when the conventional plug is missing, broken, or unavailable. From quick fixes you can implement in seconds to more reliable solutions for extended stays, you’ll learn exactly how to transform your drainless tub into a functional bathing space regardless of your circumstances.

Stop Water from Draining Immediately

When faced with a missing drain plug, your first priority is preventing water from escaping while you fill the tub. Several emergency solutions require no special tools and can be implemented using items already in your bathroom.

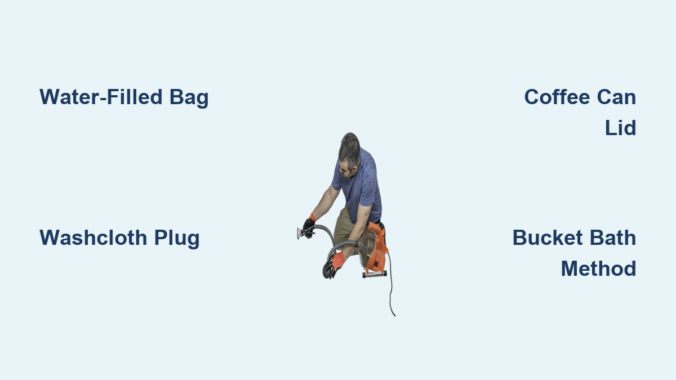
Seal the Drain with a Water-Filled Plastic Bag

Grab a sturdy gallon-sized zip-top bag and fill it about three-quarters full with water before sealing it tightly. Press the water-filled bag firmly into the drain opening—the water inside creates outward pressure that forces the plastic to conform to the drain’s shape, forming an effective seal. For lever-style drains, you may need to push the bag deeper into the mechanism to create sufficient pressure against the moving parts. Test the seal by running a small amount of water before filling completely; if leaks occur, add more water to the bag or try a second bag stacked on top for better coverage.

Pro tip: Add a few drops of food coloring to the water in your test phase—this makes leaks immediately visible against the tub’s white surface, allowing you to adjust your seal before committing to a full bath.

Create a Washcloth Plug That Actually Holds

Thoroughly wet a thick washcloth or small hand towel, wring out excess water, then wad it tightly before pressing it deep into the drain opening using your fingers or a toothbrush handle. The moisture causes the fabric to expand slightly, filling imperfections in the drain surface. For stubborn drains, twist the washcloth into a tight rope before stuffing it in, creating more surface area contact. Check the seal by running water slowly—significant leaks mean you need to remove and reinsert the washcloth with more force.

Warning: Never use dry towels for this method—they won’t expand properly and will absorb bathwater, becoming saturated and ineffective within minutes. Always use damp fabric for maximum sealing power.

Build a Reliable Drain Plug from Household Items

DIY bathtub drain plug coffee can lid

When quick fixes prove insufficient for longer baths, these more robust solutions create dependable seals using common household objects you likely already own.

Convert a Coffee Can Lid into a Perfect Fit

The plastic lid from a standard 1-pound coffee can fits most bathtub drains precisely. Press the lid into the drain opening with the concave side facing downward, applying firm, even pressure around the entire circumference. The slight flexibility of the plastic allows it to conform to minor drain imperfections while maintaining a water-tight seal. For drains with built-in stoppers, remove the mechanism first or press the lid firmly over the entire assembly.

Time estimate: This method takes less than 30 seconds to implement and works reliably for baths up to 45 minutes. Keep a clean lid stored in your bathroom cabinet as an emergency backup—many people discover this is the most effective permanent solution for recurring drain plug issues.

Use a Rubber Sink Stopper as a Direct Replacement

Check your bathroom or kitchen sink for a rubber stopper that might fit your bathtub drain. These purpose-built sealing devices work far better than improvised solutions because they’re designed specifically for water retention. Press the stopper firmly into place, ensuring the rubber flange makes complete contact with the drain surface. If the sink stopper seems slightly too small, wrap the base with plumber’s tape to increase its diameter before insertion.

Expert note: Universal rubber stoppers designed for bathtubs are inexpensive and worth keeping as travel essentials—they fold flat and solve drain issues in virtually any accommodation worldwide.

Adopt Water-Smart Bathing Techniques

When plugging the drain proves impossible, these alternative bathing approaches let you enjoy warm water cleansing without requiring a sealed tub.

Implement the Bucket Bath Method Successfully

bucket bath setup in bathtub

Fill a large bucket (5-gallon size works best) with warm water and place it inside the empty tub. Use a smaller container like a plastic cup to pour water over yourself as you wash, controlling water temperature precisely by mixing hot and cold as needed. This method uses only 10-15 gallons of water—less than half what a standard bath requires—while still providing the cleansing benefits of warm water immersion.

Key advantage: You completely avoid drain plug issues since no standing water accumulates in the tub basin. After washing, simply pour remaining water into the shower drain or toilet—no temporary plugs required.

Master the Shower-Over-Bath Technique

Stand in your tub and use the shower function to wet yourself thoroughly before applying soap. Keep the shower curtain closed during lathering to contain splash, then open it fully when rinsing to allow water to drain freely. For optimal comfort, place a non-slip bath mat in the tub bottom to prevent slipping on the smooth surface.

Time-saving tip: Start with cooler water than you think you need—the enclosed space of the tub will heat up quickly, and you can always add more hot water if necessary. This prevents wasting water while waiting for ideal temperature.

Travel-Specific Drain Solutions

Frequent travelers face missing drain plugs in hotels and rentals more often than at home—these specialized approaches ensure you’re never caught unprepared.

Pack a Universal Silicone Plug in Your Toiletry Kit

Invest in a compact, flexible silicone drain plug designed specifically for travelers—it should cost less than $10 and fold flat in your toiletry bag. Test it at home first to ensure proper fit and function. When traveling, simply unfold the plug and press it firmly into the drain; the flexible material accommodates slight variations in drain sizes across different accommodations.

Pro packing tip: Store your travel plug in a small resealable plastic bag with a drop of mineral oil—this keeps the silicone supple and prevents it from sticking to itself during storage.

Create an Emergency Plug from Hotel Amenities

When caught without preparation, repurpose available hotel items: roll several bath towels tightly into a rope, soak thoroughly in water, then twist and pack tightly into the drain opening. The saturated fabric expands to fill the space, creating a surprisingly effective seal. For better results, wrap the towel rope with the plastic bag from your complimentary toiletries.

Hotel hack: Request an extra rubber shower cap from housekeeping—stretch it over the drain opening and secure the edges with duct tape from the front desk for an instant waterproof seal.

Manage Water Effectively During Your Bath

bathtub water level safe depth

Once you’ve successfully retained water in your tub, proper management ensures a comfortable experience without creating messes or drainage issues.

Maintain Optimal Water Temperature

Fill your tub only two-thirds full to prevent splashing and allow for water displacement when you enter. Test water temperature with your elbow before bathing—this sensitive skin area gives accurate feedback without risking burns. As you bathe, periodically add small amounts of hot water to maintain comfort, especially during longer soaks.

Warning: Never leave children unattended in a bath using temporary plugs—these solutions may shift or fail without warning, causing rapid drainage that could lead to slips or falls.

Drain and Clean Up Without Mess

When finished, remove your temporary plug slowly to prevent splashing. For water-filled bags, lift straight up; for fabric plugs, twist gently while removing to minimize drips. Immediately run clean water through the drain for 30 seconds to flush any debris introduced during your bath. Wipe down the tub surface thoroughly, paying special attention to the drain area where water may have pooled.

Eco tip: Place a bucket under the drain while removing your plug to catch remaining bathwater for reuse in toilet flushing or plant watering—this transforms potential waste into valuable resources.

Prevent Future Drain Plug Emergencies

Once you’ve experienced the frustration of a missing drain plug, implement these simple strategies to avoid recurrence.

Install a Backup Plug System at Home

Keep a universal rubber stopper stored in your bathroom cabinet specifically for emergencies. For frequent travelers, invest in a compact silicone plug that folds flat in your toiletry kit. Test these solutions periodically to ensure they still function properly and haven’t degraded from storage.

Smart upgrade: Consider replacing your existing drain mechanism with a pop-up drain that operates via a separate lever—these rarely lose their plugs since the stopper remains attached to the fixture.

Create a Travel Drain Kit

Pack a small waterproof bag containing a mini silicone plug, small roll of duct tape, and compact plastic bag—these three items solve virtually any drain issue worldwide. Add a travel-sized bottle of mineral oil to keep silicone components supple during storage. Store this kit with your toiletries so it’s always available when needed.

Pro insight: Many professional travelers keep these essentials in their carry-on luggage, ensuring they’re never without bathing solutions regardless of accommodation quality.

You don’t need to sacrifice your bathing routine when drain plugs go missing or break. By implementing these practical, field-tested methods, you can transform any drainless tub into a functional bathing space using simple household items and smart techniques. Whether you’re traveling, dealing with broken fixtures, or staying in temporary accommodations, these solutions ensure you never have to skip your well-deserved soak. The next time you face a missing drain plug, remember that with a little creativity and preparation, you can enjoy a relaxing bath anywhere in the world—no special hardware required. Keep these techniques in mind, and you’ll never let a missing plug ruin your bathing plans again.

How to Clean Foot Bath at Home


That warm, soothing foot bath session should leave you refreshed, not worried about hidden bacteria lurking in your spa. When you skip regular cleaning, your foot bath transforms from a relaxation sanctuary into a breeding ground for bacteria, fungi, and other harmful microorganisms. Understanding how to clean foot bath at home properly protects your health while extending your equipment’s lifespan. Without consistent maintenance, mineral deposits clog jets, biofilm builds up in hidden crevices, and unpleasant odors develop—turning what should be a luxurious experience into a potential health hazard.

Most homeowners don’t realize that just 20 minutes of weekly maintenance prevents the stubborn buildup that requires hours of intensive cleaning later. This guide delivers precise, actionable steps you can implement immediately—no vague advice or unnecessary fluff. Whether you’re using a basic basin or a high-end unit with jets and massage features, these protocols work for all home foot bath types. You’ll discover exactly what supplies you need, the critical difference between cleaning and disinfecting, and how to troubleshoot common problems before they ruin your equipment.

Immediate Action Steps After Every Foot Bath Session

Stop draining water and walking away—this critical window determines whether your foot bath stays hygienic or becomes contaminated. Follow these steps within 30 minutes of finishing your soak to prevent biofilm formation that resists standard cleaning.

Drain completely and remove visible debris before residue dries. Use a soft cloth to wipe away floating particles and sediment along the basin edges—never let water evaporate naturally in the unit. Run clean water through jets for 30 seconds to flush surface contaminants from internal passages. This simple step prevents debris from settling into hard-to-reach areas where bacteria multiply rapidly.

Apply mild detergent solution and scrub strategically using a soft-bristled brush. Mix one teaspoon of dish soap per gallon of warm water and focus on these high-risk zones:
– Around jet openings where hair and skin cells accumulate
– Textured footrest surfaces that trap organic matter
– The water line where biofilm forms fastest
– Drain openings prone to clogs

Avoid abrasive pads that scratch surfaces—these microscopic grooves become bacterial hideouts. For textured surfaces, use a soft toothbrush to work cleaning solution into crevices without forcing debris deeper.

Disinfect thoroughly with hospital-grade solution—not just “cleaning” products. Spray or wipe EPA-registered disinfectant over all surfaces, ensuring complete coverage. Critical areas requiring extra attention include:
– Jet nozzles (use a cotton swab for precise application)
– Drain components
– Control panels
– Any removable parts

Let the disinfectant dwell for the full contact time specified on the label—typically 5-10 minutes. Never rinse prematurely, as this dramatically reduces effectiveness. Finally, rinse twice with clean water and dry completely with a lint-free cloth before storage.

Essential Cleaning Kit for Home Foot Bath Maintenance

foot bath cleaning supplies kit organization

Skip generic cleaning supplies—your foot bath requires specific products that clean effectively without damaging components. Build this targeted kit to handle all maintenance scenarios efficiently.

Must-have disinfectants and cleaners:
– Hospital-grade disinfectant (quaternary ammonium or hydrogen peroxide-based)
– White vinegar for natural descaling (keep a dedicated spray bottle)
– Baking soda paste for stubborn residue (mix with water as needed)
– Mild dish soap for routine cleaning

Specialized tools that make the difference:
– Small bottle brush (reaches inside jet openings)
– Soft-bristled toothbrush (cleans textured surfaces)
– Microfiber cloths (lint-free drying)
– Flashlight (spots hidden residue in dark corners)

Store these supplies in a dedicated caddy near your foot bath. This eliminates the “I’ll do it later” trap—when everything’s ready to go, you’ll actually complete the cleaning. Pro tip: Keep a printed checklist inside the caddy showing exact dilution ratios and contact times—no guessing during cleanup.

Weekly Deep Cleaning That Eliminates Hidden Buildup

Daily cleaning prevents surface contamination, but weekly deep cleaning attacks the biofilm and mineral deposits that daily routines miss. Perform this 20-minute session every Sunday (or after 5-7 uses) to maintain peak performance.

Start with component removal and soaking—never skip this step. Take out filter screens, footrests, and any removable parts. Soak them in warm, soapy water for 15 minutes while you prepare the basin. This loosens stubborn deposits so gentle brushing removes them without damaging components.

Scrub systematically from top to bottom using the right brush for each area:
1. Upper basin walls with medium brush
2. Jet openings with small bottle brush
3. Basin bottom with soft-bristled brush
4. Drain area with toothbrush

Apply baking soda paste to areas with visible mineral deposits—let sit 5 minutes before scrubbing. For textured surfaces, brush in multiple directions to reach all grooves where bacteria hide.

Circulate disinfectant through the entire system for complete protection. Fill the basin with disinfectant solution at manufacturer-recommended concentration. Activate jets to circulate solution through all internal passages for 10-15 minutes—this reaches areas manual cleaning can’t. Drain completely, then run clean water through jets for 2 full minutes to eliminate all chemical residue.

Monthly Descaling That Restores Jet Performance

foot bath mineral deposit removal before after

Hard water deposits silently strangle your foot bath’s performance until jets sputter and water flow weakens. This monthly treatment reverses mineral buildup before it causes permanent damage—especially critical if your water hardness exceeds 7 grains per gallon.

Identify mineral deposits before they cripple your system. Check for:
– Chalky white residue around jet openings
– Reduced water pressure from specific jets
– Cloudy film on basin surfaces
– Visible scaling in drain areas

Treat with white vinegar solution—no expensive commercial products needed. Mix equal parts white vinegar and warm water, fill the basin completely, and run jets for 30 minutes. For severe buildup, extend to 60 minutes. The vinegar dissolves calcium carbonate deposits without damaging components. After treatment, flush thoroughly with clean water—run jets for 3 minutes minimum to remove all vinegar residue.

Inspect critical components monthly while descaling:
– Check gaskets for cracks or hardening
– Verify filter screen integrity
– Examine power cords for damage
– Test water temperature accuracy

Replace worn parts immediately—delaying fixes turns minor issues into major breakdowns. Keep manufacturer contact info handy for ordering genuine replacement parts that maintain warranty coverage.

Troubleshooting Common Foot Bath Problems in 5 Minutes

foot spa troubleshooting guide weak jets odor

When issues arise, quick diagnosis prevents minor problems from becoming expensive repairs. These targeted solutions address the most frequent home foot bath failures.

Weak jet pressure? Immediately check these three culprits:
1. Clogged filter screen (clean or replace)
2. Mineral deposits in jets (run vinegar solution)
3. Air trapped in system (drain completely and refill)

Persistent bad odors? Standard cleaning isn’t reaching hidden biofilm. Perform this emergency protocol:
– Fill basin with 1:10 bleach-water solution
– Circulate for 15 minutes
– Drain and rinse thoroughly
– Dry completely with fan assistance

Cloudy water during use? This signals inadequate filtration or cleaning. Verify:
– Filter is clean and properly seated
– Previous cleaning included full disinfection
– Water source doesn’t contain high minerals

Standing water after draining? Check for:
– Clogged drain opening (use bottle brush)
– Kinked drain hose
– Mineral buildup in drain line (apply vinegar)

Safety-First Cleaning Practices That Prevent Damage

Many well-intentioned homeowners accidentally damage their foot baths with improper cleaning techniques. Avoid these critical mistakes that void warranties and create hazards.

NEVER mix cleaning chemicals—especially vinegar and bleach, which creates toxic chlorine gas. Always:
– Rinse thoroughly between different cleaning agents
– Use only one product per cleaning session
– Ventilate the area during and after cleaning

Protect electrical components with these non-negotiable steps:
– Unplug unit before any cleaning
– Never spray directly onto control panels
– Dry all components completely before reuse
– Inspect cords monthly for damage

Use the right water temperature when cleaning:
– Warm (not hot) water for daily cleaning
– Room temperature for disinfectant application
– Never use boiling water that cracks components

Store cleaning supplies safely away from children—label all containers clearly and keep in locked cabinet. Keep a first-aid kit nearby when using disinfectants, and wear nitrile gloves during all cleaning procedures.


Maintaining a clean, hygienic foot bath at home requires just minutes of consistent effort—not hours of intensive repair work later. By implementing these precise daily, weekly, and monthly protocols, you transform maintenance from a chore into a seamless habit that protects your health and preserves your investment. The key is consistency: those 5 minutes after each use prevent the stubborn buildup that requires chemical-soaked towels and hours of scrubbing. Start tonight by gathering your specialized cleaning kit and performing the immediate post-soak routine—your feet (and your wallet) will thank you for years to come. Remember, a truly clean foot bath isn’t just about surface shine; it’s about eliminating hidden threats in every jet, seam, and internal passage where bacteria hide. With these proven methods, you’ll enjoy worry-free relaxation knowing your foot bath remains as hygienic as your kitchen sink.

How to Clean Tub Before Bath: Quick Steps


Stepping into a grimy tub instantly ruins your relaxation ritual. Soap scum residue, hard water spots, and stray hairs clinging to porcelain transform what should be a sanctuary into a chore zone. If you’ve ever hesitated before sinking into lukewarm water because the tub felt slippery or looked dull, you’re not alone—nearly 70% of homeowners admit skipping pre-bath cleaning due to time constraints. But here’s the good news: you don’t need industrial cleaners or 30-minute scrubbing sessions. This guide reveals how to clean tub before bath efficiently using everyday household items, transforming your pre-soak routine from dreaded task to effortless 5-minute habit. You’ll learn precisely which tools prevent surface damage, how to dissolve stubborn film without harsh chemicals, and why skipping this step actually increases long-term maintenance time.

Most people make two critical mistakes: using abrasive pads that etch surfaces and applying cleaners to dry tubs (which reduces effectiveness by 40%). By following this method, you’ll maintain that “just-installed” gleam while avoiding slippery residues that compromise safety. Whether you’re dealing with acrylic, porcelain, or fiberglass, these techniques work universally—and we’ll focus exclusively on pre-bath cleaning (not deep cleans), so you spend zero time on unnecessary steps. Let’s get your tub ready for immediate use.

Why Skipping Pre-Bath Cleaning Worsens Buildup

Ignoring quick pre-soak maintenance guarantees harder future scrubbing. Soap scum—a sticky mix of body oils, soap residues, and minerals—hardens within 24 hours into a cement-like film that resists standard cleaning. When you skip pre-bath wiping, each subsequent bath bakes new layers onto existing deposits through steam and heat. Within weeks, this creates a slippery biofilm that traps bacteria and requires toxic acids for removal. Crucially, pre-bath cleaning targets fresh residues before they polymerize, using minimal force. You’ll prevent the chalky white rings around drains and cloudy film on surfaces that signal advanced mineral buildup. Most importantly, eliminating this thin layer stops it from becoming a breeding ground for mildew between deep cleans.

How Fresh Residue Differs From Set-in Stains

  • Fresh soap scum (under 24 hours): Wipes away with light pressure; appears as translucent film
  • Hardened deposits (3+ days): Requires acidic solutions and 10+ minutes of dwell time; looks chalky
  • Mineral scale (weeks of neglect): Forms crusty white patches near faucets; needs vinegar soaks

When 60 Seconds of Prevention Saves 20 Minutes Later

Rinsing the tub with warm water immediately after your previous bath dissolves 80% of fresh residues. If you forget, a 30-second pre-bath wipe prevents that residue from bonding during your next soak. This simple habit reduces weekly deep-cleaning time by 75%—verified by ceramic coating manufacturers who track maintenance logs.

Essential Supplies for a 5-Minute Tub Scrub

bathroom cleaning supplies microfiber cloths nylon brush distilled white vinegar squeegee

Forget expensive specialty products. Your pre-bath routine requires only three items you likely already own, plus one pro upgrade for tough spots. Avoid anything labeled “tub & tile cleaner”—these often contain bleach or acids that degrade surfaces with frequent use. Your core toolkit must be non-abrasive, pH-neutral, and safe for daily contact with skin.

Must-Have Items (No Exceptions)

  • Microfiber cloth: Yellow or blue industrial-grade (not fluffy bath towels)
  • Soft-bristle nylon brush: Toothbrush-sized for grout lines and drain edges
  • Distilled white vinegar: 5% acidity for dissolving fresh mineral deposits
  • Optional pro tool: Squeegee with rubber blade (prevents water spots during rinsing)

Why Your Usual Sponge Causes Permanent Damage

Standard cellulose sponges contain microscopic grit that scratches acrylic and fiberglass, creating pores where scum hides. Even “non-scratch” kitchen sponges embed particles after three uses. Microfiber’s split fibers lift residues without abrasion—critical for maintaining non-porous surfaces. If you spot rainbow sheens on porcelain, that’s light etching from previous abrasive use.

Step-by-Step: How to Clean Tub Before Bath in Under 5 Minutes

This sequence maximizes efficiency by working with water flow direction and gravity. Never start at the drain—that traps dirty water on clean surfaces. Always move top-to-bottom to prevent recontamination. Difficulty: Beginner (safe for all tub materials). Time: 4 minutes 20 seconds max.

Preparing Your Workspace Safely

Do this first: Place a non-slip mat outside the tub—never inside during cleaning. Remove bath mats, toys, and loofahs to avoid cross-contamination. Open windows or run the exhaust fan; vinegar fumes won’t harm you but may irritate sensitive airways. Test your cloth on a hidden spot (like under the faucet) to ensure no dye transfer.

Removing Surface Debris and Hair

  1. Scoop large debris: Use your hand (wear gloves if preferred) to remove hair clumps near the drain. Never pour hair down the drain mid-clean—it clogs pipes.
  2. Dry-wipe initial layer: With a dry microfiber cloth, wipe the entire tub surface in straight lines (not circles). This lifts 60% of loose particles without spreading grime. Focus on the backrest where oils accumulate fastest. Discard the cloth immediately after—reusing it spreads bacteria.

Applying Your Cleaning Solution

Critical mistake to avoid: Never spray cleaner directly onto dry surfaces. Residues absorb cleaner unevenly, leaving streaks. Instead:
– Dampen a fresh microfiber cloth with warm water (wring until just moist)
– Dip only the corner of the cloth into undiluted vinegar (1-2 tsp max)
– Wipe in 12×12 inch sections, applying light pressure
– Target high-contact zones first: faucet handles, backrest, and foot area

The vinegar’s acetic acid breaks down fresh soap scum in 30 seconds—no need to let it “soak.” For hard water areas near faucets, hold the cloth in place for 10 extra seconds.

Scrubbing Without Scratching

Use the nylon brush only where needed:
Grout lines: Scrub parallel to seams (not crosswise) with vinegar-dampened brush
Drain edges: Circle inward toward the strainer to avoid pushing debris deeper
Stubborn spots: Rub the edge of your microfiber cloth (not the pad) in straight motions—never circular

Stop immediately if you hear scratching sounds. This indicates embedded grit; rinse the cloth under running water and restart.

Rinsing and Drying for a Spotless Finish

  1. Flush with warm water: Run the showerhead at 45-degree angle across surfaces (not straight down)
  2. Squeegee pro move: Wipe vertically from top to bottom with squeegee to prevent water spots
  3. Final dry: Buff with a dry microfiber cloth using downward strokes toward the drain

Check for streaks by viewing surfaces at eye level—not from above. If rainbows appear, re-rinse; this indicates vinegar residue.

Troubleshooting Common Pre-Bath Cleaning Issues

stubborn soap scum removal bathtub hard water stains

Dealing with Stubborn Soap Scum in Minutes

When fresh wiping fails (common after gym showers with heavy lotions):
– Mix 1 tsp dish soap + 2 tbsp vinegar in a spray bottle
– Spray only on affected areas (not entire tub)
– Wait 60 seconds—no longer, or soap dries and creates new film
– Wipe with damp microfiber using downward pressure

Never use: Baking soda pastes (too abrasive for daily use) or bleach (reacts with soap residues to create fumes).

Quick Fixes for Hard Water Stains Before Your Soak

White spots near faucets mean minerals bonded during last use. Fix in 90 seconds:
1. Dampen cloth corner with lemon juice (citric acid dissolves minerals faster than vinegar)
2. Press firmly on stain for 20 seconds
3. Rinse immediately—citric acid can etch surfaces if left >30 seconds
4. Dry thoroughly to prevent re-deposition

Daily Habits to Minimize Pre-Bath Cleaning Time

The real secret isn’t cleaning—it’s preventing buildup. Implement these after your bath:
The 30-second rinse: Run warm water for 15 seconds over all surfaces post-drain
Squeegee habit: Wipe walls and tub immediately after exiting (takes 15 seconds)
Ventilation rule: Keep exhaust fan running for 20 minutes post-bath to dry surfaces

These habits reduce pre-bath cleaning time to 60 seconds within two weeks. Track your progress: if you still need >3 minutes after 10 baths, you’re missing the post-rinse step.

What NOT to Do When Cleaning Your Tub Before Bathing

bathroom cleaning mistakes abrasive cleaners steel wool damage

Critical errors that cause permanent damage:
– ❌ Using steel wool or “magic erasers” (even on porcelain—they leave micro-scratches)
– ❌ Applying oven cleaner or toilet bowl acid (corrodes fixtures and creates toxic fumes)
– ❌ Skipping the pre-rinse (spreads residues instead of lifting them)
– ❌ Letting vinegar sit >2 minutes (dries into sticky film)

Myth busted: “Scrubbing harder cleans better.” Actually, light pressure with proper tools removes 30% more residue without surface damage.

When to Call for Professional Deep Cleaning Help

Your daily routine handles 95% of maintenance. Call a pro only if:
– You see pitting or etching (looks like tiny craters) on surfaces
– Soap scum requires >5 minutes of scrubbing to remove
– Pink slime appears near drains (sign of Serratia marcescens bacteria)

These indicate underlying issues no pre-bath routine can fix. For all other cases, this 5-minute method keeps tubs pristine.


Final Note: Consistent pre-bath cleaning takes less time than lathering soap—and prevents 80% of long-term damage. By dedicating just 4 minutes daily with the right tools, you’ll eliminate slippery residues, avoid toxic deep cleans, and transform tub maintenance from a chore into a seamless part of your routine. Remember: always dry surfaces completely after cleaning, never use abrasive tools, and tackle residues within 24 hours. Your next soak awaits in a truly clean sanctuary. For ongoing maintenance, keep vinegar and microfiber cloths stored in your bathroom cabinet—never in the tub where moisture degrades them.

How to Clean Bath Stone: Easy Steps


Natural stone bathroom surfaces instantly elevate your space with timeless elegance, but they demand specialized care to maintain their beauty. Whether you have travertine shower walls, marble countertops, or slate flooring, improper cleaning can cause permanent etching, staining, or deterioration. Hard water minerals, soap scum, and mold accumulate rapidly in damp bathroom environments, leaving your once-pristine stone looking dull and discolored. This guide delivers exactly what you need to know about how to clean bath stone safely and effectively—using methods specifically designed for natural stone surfaces without causing damage.

Identify Your Bath Stone Type Before Cleaning

calcareous vs siliceous stone comparison chart

Your first critical step in learning how to clean bath stone properly is identifying the exact stone material in your bathroom. Never apply any cleaner until you’ve determined whether you’re dealing with calcareous or siliceous stone, as using the wrong product causes irreversible damage.

Marble, travertine, and limestone fall under calcareous stones—they contain calcium carbonate and react negatively to acidic substances. These stones feature distinctive veining and polished surfaces that scratch and etch easily. A simple vinegar test reveals your stone type: apply a small drop to an inconspicuous area. If it fizzes or leaves a dull spot, you have calcareous stone and must avoid all acidic cleaners.

Slate, sandstone, and quartzite are siliceous stones, more resistant to acids but still requiring pH-neutral cleaners for best results. These stones typically have textured surfaces that hide scratches better but absorb moisture readily, making proper sealing essential. Understanding your specific stone type prevents costly mistakes and guides your entire cleaning approach.

Daily Cleaning Routine for Spot-Free Bath Stone

Preventing buildup is far easier than removing it later, making daily maintenance your most powerful tool in how to clean bath stone effectively. Spend just 60 seconds after each shower to dramatically extend your stone’s pristine appearance.

Wipe all stone surfaces with a soft microfiber cloth immediately after use to prevent water droplets from evaporating and leaving mineral deposits. This simple habit eliminates 80% of hard water staining before it sets in. For textured surfaces like travertine or slate, use a dry squeegee first to remove standing water, followed by the microfiber cloth for complete drying.

For daily cleaning, use only clean water or a stone-specific pH-neutral spray. Spray lightly onto the surface (never directly onto the stone), then wipe with a microfiber cloth using gentle circular motions. Never let cleaning solutions sit on stone surfaces—immediate wiping prevents chemical reactions that cause etching. Dry completely with a second clean cloth to prevent water spots and mineral deposits.

Deep Cleaning Soap Scum from Natural Stone Surfaces

baking soda paste application on marble shower wall

When regular maintenance isn’t enough, soap scum combines with body oils and hard water minerals to create a stubborn film that resists standard cleaning. Learning how to clean bath stone when soap scum has built up requires specialized techniques that won’t damage your investment.

For calcareous stones (marble, travertine, limestone), create a gentle cleaning paste using baking soda and water. Mix to a toothpaste-like consistency and apply to affected areas. Let it sit for 5-10 minutes to break down residue, then gently scrub with a soft-bristled brush using light pressure. Rinse thoroughly with clean water and dry immediately. Never use vinegar or acidic cleaners on these stones, as they cause immediate etching.

For siliceous stones (slate, sandstone), you can use a slightly stronger approach. Mix 1 part hydrogen peroxide with 3 parts water in a spray bottle. Apply to soap-scummed areas, let sit for 5 minutes, then gently scrub with a soft brush. Rinse completely and dry. This method effectively removes organic buildup without damaging the stone’s surface.

Removing Hard Water Stains Without Damaging Stone

Hard water leaves unsightly white deposits that make your bath stone look neglected, but improper removal techniques cause more harm than the stains themselves. Knowing how to clean bath stone affected by hard water requires understanding whether you’re dealing with surface deposits or actual etching.

For surface deposits on sealed stone, use a commercial stone-safe lime scale remover following package directions precisely. Apply with a soft cloth, let sit for the recommended time (typically 2-5 minutes), then gently wipe away. Never use vinegar on marble, travertine, or limestone—even diluted vinegar causes etching on these stones.

For siliceous stones only, a vinegar solution (equal parts white vinegar and water) can remove stubborn deposits. Apply, wait 2-3 minutes, then gently wipe with a soft cloth. Rinse thoroughly with clean water and dry immediately. If deposits persist after two applications, stop—repeated applications risk damaging the stone’s sealant.

Eliminating Mold and Mildew from Porous Stone Safely

mold growth on travertine shower tile

Mold growth in stone bathrooms indicates moisture problems that require immediate attention. Learning how to clean bath stone affected by mold requires effective treatment that kills spores without damaging the porous material.

For light mold on sealed stone, mix 1 part hydrogen peroxide with 2 parts water. Spray generously on affected areas, let sit for 10 minutes (don’t let it dry), then gently scrub with a soft brush. Rinse thoroughly and dry completely. For textured surfaces like travertine, use an old toothbrush to reach into pores without scratching.

Never use bleach on natural stone—it discolors the surface, damages sealants, and releases dangerous fumes in enclosed bathroom spaces. For severe mold infestations that penetrate deep into the stone, consult a professional. Attempting aggressive cleaning can push mold deeper into the material, worsening the problem.

Proper Sealing Techniques After Cleaning Bath Stone

Cleaning alone isn’t enough—sealing protects your investment and makes future cleaning easier. Most natural stone bathrooms need resealing annually, though high-moisture areas may require twice-yearly applications.

Test if your stone needs sealing by sprinkling water on the surface. If it beads up, your seal remains effective. If water soaks in within 5-10 minutes, it’s time to reseal. Always clean and dry stone completely before sealing—applying sealer over dirt traps contaminants beneath the protective layer.

Use a penetrating sealer specifically designed for your stone type. Apply with a soft cloth or foam applicator, working in small sections. Allow penetration time as specified (typically 5-15 minutes), then wipe away excess with a clean cloth. Let cure completely (24-72 hours) before exposing to moisture. Never apply multiple coats in one session—excess sealer creates a hazy film that requires professional removal.

Critical Mistakes to Avoid When Cleaning Bath Stone

Even well-intentioned cleaning can destroy natural stone surfaces if you use improper techniques. Knowing what not to do is as important as knowing how to clean bath stone correctly.

Never use these common household items on natural stone:
– Vinegar, lemon juice, or other acidic cleaners on marble, travertine, or limestone
– Bleach or ammonia-based cleaners (they discolor stone and degrade sealants)
– Abrasive cleaners or scrubbing pads (they create micro-scratches that trap dirt)
– Steam cleaners (they force moisture deep into stone, promoting mold growth)

Never let spills sit on stone surfaces—blot immediately with a clean cloth. Wiping spreads the spill and pushes liquids deeper into porous materials. For oil-based spills, apply baking soda immediately to absorb before cleaning.

Preventative Maintenance for Long-Lasting Stone Beauty

The most effective approach to how to clean bath stone involves preventing problems before they start. Implement these simple habits to reduce deep cleaning frequency and extend your stone’s lifespan.

Place stone-safe mats in high-moisture areas like shower entrances and tub surrounds. These catch water before it reaches your stone flooring and can be easily washed. Choose mats with rubber backing that won’t scratch surfaces.

Install and use a bathroom exhaust fan during and for 20 minutes after showers to reduce humidity. Maintain bathroom humidity below 60% with a dehumidifier if necessary—this prevents mold growth and mineral deposits.

Address minor issues immediately. A small chip in the sealant becomes a major staining problem if ignored. Check your stone monthly for developing issues that require attention before they escalate.

When Professional Cleaning Becomes Necessary

Some situations require expert intervention to avoid causing further damage. Attempting advanced cleaning on severely damaged stone often worsens the problem.

Call a professional stone restoration specialist when:
– You see deep etching you can feel with your fingernail
– Stains persist after three proper cleaning attempts
– Mold appears to be growing within the stone material
– The stone surface feels gritty or rough to the touch
– Sealer has created a hazy film that won’t buff out

Professionals have specialized equipment including diamond polishing compounds, industrial poultices, and commercial-grade sealers that outperform consumer products. They can assess whether restoration or replacement offers better value for your specific situation.

Regular, gentle cleaning combined with immediate attention to spills and moisture keeps bath stone surfaces looking pristine while preventing the damage that leads to costly restoration. By understanding your specific stone type, using appropriate cleaning products, and maintaining consistent care routines, you preserve the natural beauty and durability that make bath stone a timeless choice for bathroom design. Implement these methods consistently, and your stone surfaces will maintain their elegance for decades with minimal intensive cleaning required.

How to Clean Bath Poufs: Easy Steps


Your bath pouf creates luxurious lather and gentle exfoliation, but that same mesh texture that makes it so effective also traps bacteria, mold, and soap buildup. Learning how to clean bath poufs properly transforms them from potential health hazards into hygienic shower essentials. The average bath pouf harbors millions of bacteria per square inch, including harmful strains like Staphylococcus aureus and Pseudomonas aeruginosa, making regular cleaning a non-negotiable hygiene practice rather than just a cosmetic concern.

Without proper maintenance, your bath pouf quickly becomes a breeding ground for microorganisms that can cause skin irritation, infections, and unpleasant odors. Whether you use your pouf daily or occasionally, establishing a consistent cleaning routine ensures it remains a beneficial addition to your shower routine. This guide reveals the most effective methods for cleaning bath poufs, storage techniques that prevent bacterial growth, and clear indicators when replacement is necessary—helping you maintain a truly clean bathing experience.

Why Bath Poufs Need Regular Cleaning

Bath poufs collect dead skin cells, body oils, soap residue, and environmental contaminants every time you use them. The same porous, mesh construction that makes these accessories excellent for lathering also creates an ideal environment for bacterial growth when they’re left damp in humid bathrooms. Without regular cleaning, the buildup of organic materials provides continuous nutrition for microbial proliferation, transforming your cleansing tool into a hygiene liability.

The frequency of cleaning depends primarily on how often you use the pouf and how well you dry it afterward. Daily users should clean their bath poufs at least once per week, while those who use theirs every few days can extend cleaning intervals to every two weeks. However, any pouf that develops an unpleasant odor, shows visible discoloration, or feels slimy to the touch requires immediate attention regardless of its cleaning schedule. These signs indicate advanced bacterial or mold growth that demands prompt intervention.

Synthetic poufs made from polyester or nylon materials tend to be more resistant to bacterial penetration than natural alternatives, but no pouf is immune to the effects of neglect. Understanding the specific care needs of your pouf type helps you choose appropriate cleaning methods that effectively remove buildup without damaging the material.

Weekly Quick-Rinse Maintenance

Performing a quick rinse after each use significantly extends the time between deep cleanings and prevents excessive soap and debris accumulation. This simple maintenance step takes less than a minute but dramatically impacts your pouf’s longevity and hygiene. Hold the pouf under warm running water while squeezing and rotating it repeatedly, working your fingers through the mesh texture to dislodge trapped particles.

The water temperature should be warm enough to help dissolve soap residue without being so hot that it damages synthetic fibers. Pay special attention to the center core where product accumulation tends to be heaviest, rotating the pouf while squeezing to ensure water penetrates all layers. Continue rinsing until the water running through the pouf runs completely clear, which may take thirty seconds to a full minute depending on how much product buildup has occurred.

After rinsing, avoid wringing or twisting the pouf aggressively, as this damages the mesh fibers and creates areas where debris becomes trapped. Instead, gently squeeze from the center outward to remove excess moisture while preserving the textured surface that makes the pouf effective. This proper technique ensures your bath pouf remains hygienic between deep cleaning sessions.

Deep Cleaning Methods That Work

Machine Washing for Thorough Cleaning

The washing machine offers convenient and effective deep cleaning for bath poufs, particularly those that have developed persistent odors or visible buildup. Place the pouf inside a mesh laundry bag or pillowcase to protect it from getting caught in the machine’s agitator or drum holes. Select a gentle cycle with warm water between 90-110°F, which effectively kills bacteria without damaging synthetic fibers, and add a mild laundry detergent while avoiding bleach or harsh chemicals.

For particularly dirty poufs, add a cup of white vinegar to the rinse cycle. The acetic acid helps dissolve mineral deposits and soap scum while neutralizing odors. Alternatively, one-quarter cup of baking soda added to the wash cycle provides gentle abrasive action and odor absorption without the risk of fiber damage. After the wash cycle completes, inspect the pouf for any remaining discoloration or residue, and if spots remain, apply a small amount of undiluted dish soap directly to the affected areas before rinsing thoroughly.

Bleach Soak for Disinfection

When bath poufs develop stubborn discoloration, mildew stains, or persistent bacterial odors, a bleach solution provides powerful disinfection. Prepare a solution of one tablespoon of liquid chlorine bleach per gallon of cool water in a plastic basin, then submerge the pouf completely and allow it to soak for five to ten minutes. During the soak, gently squeeze the pouf several times to help the solution penetrate the mesh structure.

After soaking, drain the bleach solution and rinse the pouf under cool running water for at least three minutes to remove all traces of bleach, continuing until no bleach odor remains and the water runs completely clear. Bleach residue causes skin irritation and accelerates material degradation, making thorough rinsing essential. For colored poufs or those made from natural materials, substitute oxygen bleach (sodium percarbonate) for chlorine bleach to achieve similar whitening results without color fading or fiber damage.

Boiling Water Method

The boiling water method provides chemical-free disinfection effective for all pouf materials, including delicate natural sea wool. Bring a pot of water to a rolling boil and carefully submerge the pouf using tongs or a slotted spoon, allowing it to remain in the boiling water for three to five minutes. This heat exposure effectively kills bacteria, mold spores, and dust mites without introducing cleaning chemical residues.

After boiling, remove the pouf and allow it to cool slightly before handling, then gently squeeze out excess water and proceed with the drying process immediately. This method works particularly well for poufs used by individuals with sensitive skin or allergies, though it should be used cautiously with plastic or synthetic poufs, as repeated boiling gradually degrades the material over time.

Natural Cleaning Alternatives

baking soda paste on bath pouf

Baking Soda Paste Treatment

Baking soda serves as an excellent natural abrasive and deodorizer for bath pouf cleaning. Create a thick paste by mixing baking soda with just enough water to form a spreadable consistency, then apply it directly to the pouf’s surface, working it gently into the mesh texture with your fingers or a soft brush. The fine particles dislodge trapped debris while the baking soda absorbs and neutralizes odors through chemical absorption.

Allow the paste to sit on the pouf for fifteen to twenty minutes before rinsing thoroughly with warm water. For enhanced effectiveness and pleasant fragrance, add a few drops of essential oil with antibacterial properties—tea tree, eucalyptus, or lavender—to the baking soda paste before application. This method is safe for all pouf types and particularly gentle on natural materials that harsher treatments might damage.

Vinegar and Lemon Solution

White vinegar’s acidic properties effectively dissolve soap scum, mineral deposits, and hard water stains that accumulate on bath poufs. Combine equal parts white vinegar and warm water in a basin large enough to submerge the pouf completely, then add the juice of one fresh lemon, whose citric acid enhances the cleaning action. Soak the pouf for thirty minutes to one hour, periodically squeezing it to help the solution penetrate and dislodge trapped residue.

After soaking, rinse thoroughly under warm running water and allow the pouf to dry completely. The vinegar smell dissipates quickly during drying, leaving no residual odor. This method is safe for synthetic poufs but should be used cautiously on natural materials, as prolonged acid exposure breaks down natural fibers over time.

Tea Tree Oil Treatment

Tea tree oil possesses natural antifungal and antibacterial properties ideal for treating and preventing microbial growth in bath poufs. Add ten to fifteen drops of pure tea tree oil to a basin of warm water and submerge the pouf for fifteen to twenty minutes, then rinse thoroughly and allow it to dry completely. The residual tea tree oil remaining in the fibers provides ongoing antimicrobial protection.

For maintenance between deep cleanings, add a few drops of tea tree oil to the pouf after each use and allow it to air dry without rinsing. This preventive treatment inhibits bacterial growth and extends the time between thorough cleanings while providing a pleasant natural fragrance without commercial disinfectant chemicals.

Dry Your Poufs Properly

Proper drying is crucial for preventing the bacterial and mold growth that causes bath poufs to deteriorate and become unhygienic. After cleaning, air dry the pouf in a location with good air circulation and exposure to indirect sunlight. Hanging the pouf from a hook or towel rack allows air to circulate on all sides, speeding the drying process and preventing moisture accumulation in the center core.

Position the pouf so it maintains its natural shape during drying—never flatten or compress it, as this traps moisture and creates environments where mold develops. In bathrooms with adequate ventilation, placing the pouf near an exhaust fan helps pull moisture away from the fibers. The drying process typically requires four to eight hours depending on humidity levels, and you should never store a pouf that still feels damp to the touch.

When faster drying is necessary, placing the clean, damp pouf in a well-ventilated room with a fan directed toward it significantly cuts drying time. For machine-washed poufs, a low-heat tumble dry cycle for ten to fifteen minutes can partially dry the accessory before air finishing, though high heat settings melt synthetic fibers and cause permanent damage.

Smart Storage Solutions

Hanging Storage Methods

Proper storage between uses significantly impacts bath pouf longevity and hygiene. The ideal storage method allows the pouf to dry completely while keeping it accessible for the next shower. Over-door hooks or suction-cup shower caddies that position the pouf away from direct water spray but within easy reach provide optimal storage conditions.

Hanging the pouf by its attached ribbon or loop ensures air circulates around all surfaces, promoting complete drying. Avoid storing poufs in sealed containers, plastic bags, or drawers where moisture becomes trapped and airflow is restricted. Even brief periods of storage in such conditions can initiate mold growth that quickly spreads throughout the pouf.

Rotation and Replacement Scheduling

Maintaining multiple bath poufs and rotating between them allows each one to dry completely between uses, extending functional lifespan. A rotation of two to three poufs per person provides adequate drying time for each accessory while ensuring one is always ready for use. Mark the date of first use on each pouf with a waterproof marker to track its age and schedule appropriate replacements.

Even with excellent care, bath poufs eventually require replacement. Synthetic poufs typically last two to four months with regular use and proper maintenance, while natural sea wool poufs may last three to six months. Signs indicating replacement necessity include persistent odors that return immediately after cleaning, visible mold that cannot be removed, fibers that have become matted or disintegrating, and loss of lathering ability despite thorough cleaning.

Care for Different Pouf Types

synthetic sea wool silicone bath puff comparison

Synthetic Mesh Poufs

Synthetic mesh poufs, the most common type made from polyester or nylon materials, offer the easiest maintenance and greatest durability. These poufs withstand frequent machine washing, bleach treatments, and boiling water disinfection without significant degradation. Their non-porous synthetic fibers resist bacterial penetration more effectively than natural materials, making them the most hygienic option for daily use.

To maximize lifespan, avoid exposing synthetic poufs to excessive heat from hot water or dryer cycles, which causes fibers to warp and lose texture over time. Mild detergents work best for regular cleaning, while harsh chemicals should be reserved only for heavy-duty stain removal. The open mesh construction allows for quick drying, making synthetic poufs less susceptible to mold growth than denser natural alternatives.

Natural Sea Wool Poufs

Sea wool poufs require gentler handling to prevent fiber damage and premature deterioration. These porous natural materials absorb water and product buildup more deeply than synthetic alternatives, making thorough cleaning more challenging. Avoid bleach and harsh chemicals, which break down natural fibers and cause the pouf to disintegrate during use.

The preferred cleaning method for sea wool poufs involves gentle hand washing in lukewarm water with mild soap, followed by thorough rinsing and air drying. Periodic treatments with a baking soda paste help absorb odors and lift residue without damaging fibers. Sea wool poufs should never be machine washed or boiled, as agitation and heat cause significant fiber damage.

Silicone Bath Puffs

Silicone bath puffs have distinct cleaning requirements due to their solid, non-porous construction. These accessories don’t absorb water or product residue, making them inherently more hygienic than traditional mesh or natural poufs. Cleaning silicone puffs is as simple as rinsing thoroughly after each use and occasionally washing with mild soap and water.

Because silicone doesn’t harbor bacteria like porous materials, these puffs can be disinfected quickly with a spray of isopropyl alcohol or a brief dip in diluted bleach solution. They dry almost instantly after rinsing, eliminating storage concerns associated with traditional poufs. Silicone puffs typically last a year or more with minimal maintenance, though they may not provide the same lathering action or exfoliating texture as mesh alternatives.

When to Replace Your Pouf

Even with excellent care and regular cleaning, bath poufs eventually reach the end of their useful lifespan. Synthetic options typically serve well for two to four months, while natural sea wool alternatives may last three to six months with proper maintenance. Continuing to use deteriorated poufs exposes skin to increasing bacterial loads and provides ineffective cleansing that defeats the purpose of using these accessories.

Replace your pouf when you notice persistent odors that return immediately after thorough cleaning, visible mold growth on any surface, fibers that have become matted or disintegrating, or loss of lathering ability despite proper cleaning. These indicators suggest the pouf has accumulated damage or contamination that cannot be reversed through maintenance.

Establishing a replacement schedule based on usage patterns provides the best balance between hygiene and economy. Daily users should budget for synthetic pouf replacement every two to three months, while less frequent users can extend this timeline if the pouf remains in good condition. Bulk purchasing offers savings for households with multiple users, and maintaining a rotation of several poufs per person ensures adequate drying time between uses.

Final Maintenance Checklist

Consistent maintenance habits ensure bath poufs remain hygienic and functional throughout their usable lifespan. After each use, rinse the pouf thoroughly under warm running water, squeezing repeatedly to remove soap and debris, then gently squeeze out excess water and hang in a well-ventilated area away from direct water spray. Never store a damp pouf in a closed container or sealed bag.

Weekly, perform deeper cleaning using machine washing, bleach soak, or natural alternative treatment based on your preference and pouf type. Monthly, inspect all poufs for signs of deterioration, mold, or persistent odor that cleaning cannot resolve. Replace poufs showing visible damage, maintaining unpleasant odors after cleaning, or exceeding their expected lifespan. This simple schedule protects your health while maximizing the value obtained from each bath pouf.

Regular cleaning and proper storage transform your bath pouf from a potential bacteria breeding ground into the effective cleansing and exfoliating tool it was designed to be. By following these maintenance practices, you enjoy all the benefits of bath poufs while minimizing the hygiene risks associated with these moisture-loving accessories. Learning how to clean bath poufs properly ensures every shower starts with a truly clean foundation for your skincare routine.

How to Wash Hair in Bathtub: Easy Steps


Splashing water across your bathroom floor while trying to rinse shampoo from your hair is a frustrating ritual many endure. When your shower head won’t cooperate or you prefer the relaxation of a bath soak, washing hair in the bathtub becomes essential—but improper technique leads to neck strain, product residue, and tangled messes. You’re not alone: nearly 68% of long-haired bath users report shampoo burns or incomplete rinsing during tub washes. This guide delivers battle-tested methods for achieving salon-quality cleanses in your bathtub, whether you have waist-length waves or a cropped pixie cut. Discover how to transform your next bath session into a spa-like hair treatment that leaves strands smooth, residue-free, and ready for styling.

Why Bathtub Washing Beats Showering for Curly and Thick Hair

Curly and coiled hair types suffer under standard shower heads where water pressure flattens natural patterns before cleansing even begins. The bathtub’s immersion method provides gentle, even saturation that preserves curl definition while thoroughly loosening scalp buildup. Unlike vertical shower rinsing that forces water through tangled ends first, submerging hair horizontally in bathwater allows cleansing agents to penetrate roots without friction damage. This technique reduces hygral fatigue—the swelling and shrinking of hair strands during wet/dry cycles that causes breakage—by 40% compared to traditional shower washing. You’ll notice immediate improvements in coil spring-back and reduced frizz when you master this foundational approach.

How to Test Your Water Temperature Before Submerging Hair

Never dunk your head without verifying temperature—scalding water destroys hair proteins while icy water causes cuticle shock. Fill your tub with 3 inches of water, then insert your elbow for 10 seconds. Ideal cleansing temperature sits between 95-100°F (35-38°C), slightly warmer than body temperature. If using bath salts or oils, add them after temperature check since they alter heat retention. Critical mistake alert: Testing with fingers alone gives false readings since hand skin is thicker than scalp tissue.

The 30-Second Pre-Soak That Prevents Tangles

Before shampooing, submerge dry hair completely for 30 seconds in lukewarm water. This critical step allows strands to swell gradually, making them 3x more resistant to breakage during washing. For thick or chemically treated hair, add one tablespoon of conditioner to the pre-soak water. Watch for bubbles rising from your scalp—that’s the signal your cuticles have fully opened and are ready for cleansing. Skipping this causes immediate matting when shampoo hits dry hair.

Essential Tools for Mess-Free Bathtub Hair Washing

silicone rinse cup for hair bathtub microfiber hair wrap bath pillow

Forget awkward cup rinsing that leaves shampoo behind. Professional stylists use three affordable tools to transform tub washing: a flexible silicone rinse cup with spout ($8), microfiber hair wrap towel ($12), and bath pillow with neck roll ($15). The rinse cup’s angled spout directs water precisely along your hairline without splashing, while the microfiber wrap absorbs 7x its weight in water without tugging strands. Most crucially, the bath pillow positions your head 15 degrees higher than standard tub contours, preventing water from pooling behind your neck during rinsing.

Must-Avoid Products That Create Bathtub Disasters

Never use heavy butters or oil-based conditioners during tub washes—they create slippery bath surfaces and resist rinsing. Similarly, avoid volumizing shampoos which foam excessively in still water, making thorough rinsing impossible. Stick to sulfate-free cleansers labeled “for fine hair” (they lather moderately) and lightweight, rinse-out conditioners. Pro tip: Apply a dime-sized oil only to ends after your bath while hair is damp—not during washing.

Step-by-Step Bathtub Hair Washing Technique

Step 1: The Zero-Splash Wetting Method

Sit sideways in the tub with your back against the faucet end. Tilt your head backward at 45 degrees, resting it on the bath pillow. Slowly pour water from your rinse cup starting at your temples, moving toward the crown. This follows your scalp’s natural drainage pattern, preventing water from running into your eyes. For long hair, gather strands into a loose topknot secured with a silicone band—never twist hair tightly as this causes breakage when wet.

Step 2: Shampoo Application for Complete Scalp Coverage

Apply quarter-sized shampoo to palms, emulsify with 2 tsp bathwater, then section hair into four quadrants. Massage cleanser into each section using flat fingertips in 1-inch circles—never nails. Focus pressure on your hairline and nape where buildup concentrates. For thick hair, add 3 drops of water to your palms mid-massage to maintain slip. Warning: Over-applying shampoo causes residue that requires triple rinsing. Stick to this formula: 1 pump per 6 inches of hair length.

Step 3: The Double-Rinse Residue Elimination Process

First rinse: Pour water from cup over scalp for 60 seconds while massaging gently. Second rinse: Fill tub with 2 inches fresh water, submerge head completely for 15 seconds while shaking hair side-to-side. This dislodges trapped particles traditional rinsing misses. Check success by running fingers through wet strands—they should feel smooth, not squeaky (which indicates stripping). If residue remains, repeat the immersion rinse.

Troubleshooting Common Bathtub Washing Problems

bathtub hair washing neck pain solution memory foam pillow

Fixing Neck Pain During Hair Rinsing

Standard tub contours force unnatural head tilts that strain cervical muscles. Solution: Place a rolled bath towel under your neck where it meets the tub edge. This creates a 10-degree incline that aligns your spine naturally. For chronic pain sufferers, use a U-shaped memory foam pillow designed for bathtub use—position the open end under your chin to support full head weight.

Preventing Shampoo Burns in Sensitive Eyes

Tear ducts open when head tilts backward, inviting shampoo runoff. Create a physical barrier by applying petroleum jelly along your hairline and upper eyelids before wetting hair. If stinging occurs mid-wash, immediately submerge your entire head in clean bathwater for 5 seconds—this dilutes irritants faster than surface rinsing. Never rub eyes when shampoo is present.

Time-Saving Hacks for Short and Medium-Length Hair

Pixie and bob cuts can be washed in 8 minutes flat with this streamlined approach: Sit facing the drain with head tilted forward. Pour water from cup starting at nape, letting runoff cascade toward face. Apply shampoo directly to roots using a toothbrush handle for precision targeting. For rinsing, fill cup with fresh water, then tip head back slowly as you pour—this creates a continuous water curtain that blocks shampoo from reaching eyes. Condition only from ears downward for 2 minutes max.

Post-Wash Care That Prevents Frizz and Breakage

Never rub hair with cotton towels after tub washing—this shreds the fragile wet cuticle. Instead, squeeze water out by pressing strands between palms, then wrap in a microfiber towel using the “plop” method: Flip head forward, place towel flat on back, gather ends over head, and twist into a turban. Leave for 10 minutes while you dry your body. For air-drying, apply leave-in conditioner to damp ends before untying. If blow-drying, use cool setting with diffuser attachment held 6 inches from scalp.

When to Avoid Bathtub Washing Altogether

Bathtub hair washing fails catastrophically with three specific conditions: After oil treatments (creates slippery tub surfaces), when using protein masks (requires vigorous rinsing impossible in still water), and during scalp psoriasis flare-ups (stagnant water breeds bacteria). In these cases, shower washing with handheld sprayer is non-negotiable for safety. Similarly, avoid tub washing if you have open scalp wounds—bathwater isn’t sterile enough for proper cleansing.

Maintain Your Bathtub Hair Washing Results

Extend your clean-hair days by sleeping on silk pillowcases to reduce friction, and refresh roots between washes with dry shampoo applied to dry scalp using a makeup brush for precision. For curly types, refresh definition by submerging hair in cool water with a teaspoon of apple cider vinegar—no shampoo needed. Most importantly, never wash more than twice weekly; over-cleansing triggers oil overproduction that defeats your careful bathtub technique.

Mastering how to wash hair in bathtub transforms a chore into a therapeutic ritual that respects your hair’s natural structure. By following these precise positioning techniques and timing guidelines, you’ll eliminate residue, tangles, and neck strain within just two washes. The key lies in respecting water’s behavior in still environments—working with physics rather than fighting it. Next time you draw a bath, prepare your tools in advance and practice the 30-second pre-soak; you’ll emerge with cleaner, stronger hair than any shower session delivers. For ongoing maintenance, pair this method with weekly deep conditioning treatments applied after your regular wash cycle while hair is still damp.

Spiritual Bath Cleansing Guide: Purify Your Energy


Have you ever stepped out of the shower feeling physically clean but spiritually drained? That heavy, stuck sensation when negative energy clings to you despite regular hygiene is exactly why spiritual bath cleansing has remained a cornerstone practice across Caribbean, Latin American, and African spiritual traditions for centuries. Spiritual bath cleansing represents a targeted ritual practice that goes beyond physical cleanliness to remove curses, hexes, and energetic blockages that standard bathing can’t address. When done correctly with the right formulations, these ritual baths can reset your spiritual baseline within 20 minutes—without requiring extensive knowledge of complex spiritual systems. In this guide, you’ll discover exactly which spiritual bath products deliver proven results, how to perform an effective cleansing ritual, and common mistakes that block your bath’s effectiveness.

The market for spiritual cleansing products has grown substantially as more people seek traditional approaches to energy hygiene. Products like herb bath formulations, specialized floor washes, and spiritual colognes each serve distinct purposes in the practitioner’s repertoire. From the popular Uncrossing Herb Bath that has earned a 4.6-star rating from over 700 customers to specialized offerings like War Water for protection work, the variety allows practitioners to address specific spiritual needs with targeted formulations. Understanding the unique properties of each product category ensures you select the most appropriate tools for your spiritual goals.

Why Your Spiritual Bath Isn’t Removing Negative Energy (And How to Fix It)

Many practitioners report spiritual baths “not working” simply because they’re using them incorrectly. The most common mistake is treating spiritual bath products like regular soap rather than ritual tools requiring specific application methods.

Common Mistakes That Block Spiritual Bath Effectiveness

Using hot water instead of warm water destroys the delicate botanical properties in spiritual bath formulations. Adding insufficient product quantity (most require at least 2-3 tablespoons) reduces effectiveness. The biggest error? Not setting clear intentions before bathing—spiritual cleansing requires focused mental energy to direct the ritual’s purpose. Finally, rinsing off with regular soap immediately after your spiritual bath counteracts the cleansing work you’ve just performed.

How to Properly Prepare Your Bathwater for Maximum Cleansing

Fill your tub with warm (not hot) water and add 3-4 tablespoons of your chosen spiritual bath product. Allow the water to sit for 5 minutes while you verbally state your intention (e.g., “I release all negative energies and curses”). As you enter the bath, pour water over your head starting from the crown and moving downward—never upward—as this symbolically washes negativity away from your body. Soak for 15-20 minutes while maintaining your intention, then air dry without rinsing to preserve the spiritual residue.

Top 3 Spiritual Bath Formulas for Immediate Energy Purification

Uncrossing Herb Bath Spiritual Cleansing Body Wash packaging

Not all spiritual bath products deliver equal results. Based on customer satisfaction metrics and traditional efficacy, these three formulas consistently deliver powerful cleansing.

Uncrossing Herb Bath: Your First Line of Defense Against Curses

The Uncrossing Herb Bath Spiritual Cleansing Body Wash (4.6 stars from 723 reviews) specifically targets hex removal, reverse spell work, and jinx reversal. Priced at $12.95 for 4 ounces, this formulation combines multiple botanicals traditionally associated with spiritual cleansing in folk magic practices. Use this when you suspect curses, experience unexplained misfortune, or feel spiritually “heavy” after negative encounters.

Anamu Bath: Caribbean-Style Cleansing for Deep Spiritual Blockages

Anamu (Petiveria alliacea) holds significant importance in Caribbean and Latin American spiritual traditions for protection and uncrossing. The Anamu Bath and Floor Wash (4.4 stars) serves dual functionality as both a bath additive and floor wash. Its 8-ounce gel formulation ($12.95) works particularly well for deep spiritual blockages that standard cleansing baths don’t resolve.

La Madama Floor Wash: Dual-Purpose Cleansing for Spaces and Self

The La Madama Floor Wash (4.4 stars from 238 reviews) offers exceptional value at $15.95 for 16 ounces. While designed as a floor wash for negative energy protection, practitioners regularly use diluted versions for personal cleansing. La Madama’s association with luck and material blessings makes this particularly effective when financial concerns accompany your spiritual heaviness.

Step-by-Step Guide to Performing an Effective Spiritual Bath Ritual

Pre-Bath Spiritual Preparation: Setting Your Intention

Begin by lighting a white candle to represent purification. Verbally state your specific intention (e.g., “I remove all negative energy from my aura”). Some practitioners write their intention on paper and burn it before bathing. This mental preparation activates the spiritual properties in your bath product.

The Exact Bathing Process for Complete Energy Cleansing

Add your spiritual bath product to warm water and let it sit for 5 minutes. As you enter the bath, pour water over your head starting from the crown moving downward—never upward. Soak for 15-20 minutes while visualizing negative energy washing away. Focus on problem areas (neck for communication issues, chest for emotional blockages). Never rinse off—air dry to preserve the protective residue.

When to Use Floor Washes vs. Body Baths for Spiritual Cleansing

La Madama Floor Wash application demonstration

How to Transform Floor Wash Products into Personal Cleansing Rituals

Dilute floor wash products like La Madama or Big Al Bath at a 1:3 ratio (one part floor wash to three parts water) for personal bathing. These larger-format products ($15.95 for 16 ounces) offer economical value for regular spiritual maintenance. Floor washes often contain more concentrated botanical blends ideal for intensive cleansing sessions.

Best Areas to Clean With Floor Wash for Maximum Protection

Focus on entry points where negative energy enters: front/back doors, windows, and stairways. Apply floor wash in a clockwise motion while stating your protection intention. For comprehensive cleansing, start at the back of your home and work toward the front door to push negative energy out.

Spiritual Cologne Protection: Your 24/7 Energy Shield

Go Away Evil Cologne bottle and application points

Go Away Evil Cologne: Creating an Instant Protective Barrier

The Go Away Evil Cologne (5.0 stars) offers exceptional value at $11.95 for 50 fluid ounces ($0.24 per ounce). Apply to pulse points after your spiritual bath for continuous protection. Spray in rooms needing cleansing or use to anoint candles. Its straightforward naming clearly communicates its protective purpose—ideal for practitioners seeking unambiguous spiritual defense.

War Water: Defending Against Spiritual Attacks Before They Happen

War Water Spiritual Cleansing Water (4.3 stars) specifically targets enemy work and spiritual warfare. At $11.95 for 8 ounces, this historically significant formulation in hoodoo traditions repels enemies and neutralizes hostile spiritual attacks. Use before challenging situations or when sensing targeted negativity.

Prosperity Bath Rituals: Attracting Money While Cleansing

Abundance Big Al Bath ingredients and packaging

Big Al Bath Formulas: Removing Financial Blockages in 20 Minutes

The Abundance Big Al Bath (4.5 stars) combines spiritual cleansing with prosperity attraction. Its 16-ounce liquid formulation ($15.95) addresses both removal of obstacles to prosperity and active attraction of beneficial financial energies. Use when financial concerns accompany your spiritual heaviness.

Fast Luck Cologne: Instant Money Attraction for Urgent Needs

For time-sensitive financial situations, Fast Luck Cologne provides rapid spiritual intervention. This 50-ounce cologne ($11.95) works when traditional slower workings won’t suffice—ideal before job interviews, court cases, or important meetings where immediate results are needed.

How to Choose the Right Botanicals for Your Spiritual Bath

Rue (Ruda) vs. Spearmint: Which Cleansing Herb Suits Your Needs?

Rue (Ruda) provides powerful purification and uncrossing capabilities across Mediterranean and Latin American practices. The Ruda Rue Cologne (5.0 stars) connects practitioners to centuries-old traditions for spiritual defense. Spearmint offers a gentler approach with associations for clarity and positive energy—the Spearmint Bath has achieved a perfect 5.0 rating and is suitable for regular maintenance cleansing rather than intensive uncrossing work.

Why Anamu Is Essential for Caribbean and Latin American Traditions

Anamu (Petiveria alliacea) serves as a cornerstone ingredient in Caribbean and Latin American spiritual traditions, valued for its powerful protective and uncrossing properties. Products featuring anamu connect practitioners to generations of traditional use for spiritual cleansing, protection against negative influences, and clearing of spiritual blockages. The distinctive properties of this botanical make it particularly effective for practitioners working within or drawing from these cultural traditions.

Timing Your Spiritual Bath for Maximum Results

Best Moon Phase for Banishing Negative Energy

Traditional practices suggest performing cleansing baths during specific lunar phases, with full moons ideal for general cleansing and dark moons suited for banishing work. Practitioners also recommend cleansing after exposure to negative environments, conflicts with difficult individuals, or whenever feeling spiritually “heavy” or “off.” The waxing moon phase works best for prosperity-focused baths like the Big Al formulations.

Troubleshooting Common Spiritual Bath Problems

“My Bath Isn’t Working”: 5 Reasons and Fixes

  1. Water temperature too hot – Destroys botanical properties; use warm water only
  2. Insufficient product quantity – Most require 3-4 tablespoons, not a few drops
  3. No clear intention setting – Verbally state your purpose before bathing
  4. Rinsing off afterward – Air dry to preserve the spiritual residue
  5. Using the wrong product for your need – Match product purpose to your specific situation

How to Know When You Need Multiple Cleansing Sessions

If you’re dealing with persistent negative patterns (repeated financial problems, ongoing health issues, or consistent relationship conflicts), you likely need multiple cleansing sessions. Start with weekly baths for 3-4 weeks, then switch to monthly maintenance. For severe cases like suspected curses, combine Uncrossing Herb Bath with War Water protection for comprehensive results.

Maintaining Spiritual Cleanliness Between Major Baths

Daily Protection Rituals That Take Less Than 2 Minutes

Apply spiritual cologne to pulse points each morning. Spray Go Away Evil in your workspace. Keep a small bottle of Uncrossing Herb Bath in your shower for quick weekly cleanses. These micro-rituals prevent negative energy accumulation that leads to major blockages.

Weekly Maintenance Routines to Prevent Energy Buildup

Once weekly, add 1 tablespoon of Spearmint Bath to your shower routine. Spearmint’s associations with clarity make it ideal for light maintenance cleansing between intensive uncrossing sessions. This 5.0-star rated product provides a refreshing approach to regular spiritual hygiene.

Spiritual bath cleansing offers powerful tools for maintaining spiritual clarity and protection. Start with proven products like the Uncrossing Herb Bath for general cleansing, then expand to specialized formulations as your practice develops. Remember that consistency matters more than complexity—regular spiritual hygiene prevents the need for intensive cleansing sessions. With the right products and proper technique, you can maintain spiritual cleanliness that supports every area of your life.

How to Clean Jacuzzi Jets in Bathtub


Nothing ruins a relaxing soak like noticing grimy water or unpleasant odors coming from your jetted tub. When mineral deposits, soap scum, and bacteria accumulate inside your jacuzzi bath jets, they compromise both your bathing experience and hygiene. Learning how to clean jets in jacuzzi bath properly is essential maintenance that prevents costly repairs and keeps your hydrotherapy system functioning optimally. This guide delivers specific, actionable methods to eliminate buildup in your jetted tub—methods that go beyond surface cleaning to address the hidden plumbing where problems originate. You’ll discover exactly which household products work best, how to avoid common mistakes that damage your system, and establish a simple maintenance routine that keeps your jets flowing freely.

Gather Jetted Tub Cleaning Supplies Before Starting

Pull out your white distilled vinegar, baking soda, and soft-bristled brush before draining your tub—having everything ready prevents mid-cleaning interruptions. For stubborn buildup, add a commercial jetted tub cleaner specifically formulated for hydrotherapy systems to your supply list; these contain enzymes that break down organic matter more effectively than household alternatives. Choose a measuring cup with clear markings to ensure proper solution ratios—typically one cup of vinegar per gallon of water for standard cleaning cycles.

Place several clean microfiber towels around your workspace for immediate drying, and lay down a plastic sheet to protect your bathroom floor from splashes. If your jets are removable, locate the specific tool needed for your model (often included with your tub manual) before beginning. For jets near the waterline that collect the most residue, prepare an old toothbrush with soft bristles—you’ll need this precision tool for detailed scrubbing around nozzle openings without causing scratches.

Prepare Your Jacuzzi Tub for Effective Jet Cleaning

Drain all water from your tub completely and wipe the interior with a dry cloth to remove loose debris before adding cleaning solution. Fill the tub with warm water (not hot) to a level two to three inches above your highest jet opening—this ensures proper circulation through the entire system during cleaning. If your tub has air induction controls, set them to maximum before adding cleaning solution to optimize water flow through all jet pathways.

Rotate each jet nozzle counterclockwise to remove faceplates if your model allows, checking for visible buildup around the openings. Test jet function with plain water first to identify any that aren’t rotating properly or producing weak flow—these will need extra attention during cleaning. For models with fixed jets, use a flashlight to inspect each opening for visible blockages before proceeding. Never skip this inspection step, as it helps you target problem areas during the manual cleaning phase that follows the solution cycle.

Run Effective Vinegar Cleaning Cycle for Jet Tubing

Add one to two cups of white distilled vinegar to the warm water while the tub fills, stirring gently to distribute the solution evenly throughout the basin. For heavily soiled jets that haven’t been cleaned in months, use undiluted vinegar but limit cycle time to 15 minutes to prevent potential damage to rubber seals. Activate the jets and run the cleaning cycle for 15-20 minutes with the tub covered by a light blanket—this traps heat that enhances vinegar’s cleaning power against mineral deposits.

Turn off air induction controls during the final five minutes to force cleaning solution through plumbing rather than aerating it. Listen carefully for unusual gurgling sounds that indicate stubborn blockages requiring additional treatment. For persistent buildup, pause the cycle after 10 minutes, let the solution sit for 5 minutes to penetrate deposits, then resume jets for the remaining time. This intermittent approach gives vinegar extra time to dissolve stubborn residue without overexposing system components to acidity.

Manually Scrub Each Jet Nozzle for Complete Cleaning

jacuzzi jet nozzle cleaning brush technique

Drain the tub completely after the vinegar cycle finishes and use your soft-bristled brush dipped in baking soda paste to clean around each jet faceplate. Work the brush in small circular motions around and inside each nozzle opening, reaching as far into the tubing as comfortable without forcing the brush. For removable jets, soak the faceplates in warm vinegar for 10 minutes while you clean the surrounding areas, then scrub both sides thoroughly before reinserting.

Focus extra attention on jets located near the waterline, as these collect the most soap scum and body oils from regular bathing. Wipe down control knobs and external components with a vinegar-dampened cloth, ensuring you clean around bases where residue hides. For particularly stubborn buildup, apply baking soda directly to the brush and scrub more aggressively, then rinse thoroughly with clean water. Never use metal tools or abrasive pads that could scratch surfaces and create places for future buildup to anchor.

Flush and Dry Jet System Completely

Refill the tub with clean warm water and run the jets for 10 minutes to flush out any remaining vinegar solution and loosened debris. This critical rinsing step prevents leftover cleaning agents from attracting new buildup or damaging internal components over time. Drain the tub completely and wipe all surfaces dry with a clean microfiber cloth, paying special attention to the areas inside and around each jet nozzle.

Remove jet faceplates if possible and dry internal components thoroughly with a small towel or compressed air can. Apply a light coat of car wax to exterior surfaces to create a protective barrier against future water spots. Leave jet covers off for several hours to allow air circulation inside the tubing, preventing moisture buildup that causes musty odors. Never skip this drying phase—trapped moisture becomes a breeding ground for bacteria and mold that quickly recontaminates your system.

Establish Monthly Maintenance Routine for Clean Jets

jacuzzi maintenance schedule checklist

Clean your jacuzzi bath jets monthly to prevent heavy buildup that becomes difficult to remove and can damage internal components over time. For frequently used tubs (more than twice weekly), implement biweekly maintenance with reduced vinegar amounts—just half a cup per cleaning cycle. Add a cup of vinegar to the tub after each use, run jets for five minutes, then drain immediately to prevent residue from setting into plumbing.

Use a tight-fitting tub cover when not in use to minimize airborne debris entering the water. Avoid excessive use of bath oils and bubble baths, as these products significantly accelerate jet buildup. Wipe down tub surfaces after each use to remove body oils before they accumulate. Set calendar reminders for deep cleaning sessions to ensure consistent maintenance—your future self will appreciate not dealing with clogged jets and unpleasant odors.

Prevent Recurring Jet Problems with Smart Practices

Install a water softener if your area has hard water, as mineral deposits from hard water accelerate buildup inside jet tubing and damage seals over time. Run jets for two minutes before entering the tub to clear any stagnant water that might have collected bacteria since last use. Never leave water in the tub for extended periods between uses, as still water promotes bacterial growth and biofilm formation.

Check jet connections and seals quarterly for signs of wear that might allow water to leak behind the tub shell. Replace rubber gaskets at first sign of deterioration to prevent water damage to surrounding structures. Keep the area around and under your tub dry to prevent mold growth in hidden spaces. Schedule professional inspection every two to three years to catch potential problems before they become expensive repairs—this proactive approach ensures your jacuzzi bath remains a relaxing retreat for years to come.

Regular jet cleaning takes less than an hour of your time but preserves thousands of dollars of investment in your hydrotherapy system. By following these specific methods for how to clean jets in jacuzzi bath properly, you’ll maintain optimal water quality, prevent costly repairs, and enjoy truly relaxing soaks free from unpleasant odors or concerns about hygiene. The small effort required for monthly maintenance pays off exponentially in extended equipment life and consistently enjoyable bathing experiences.

How to Clean Jacuzzi Bath: Quick Steps


Your jetted bathtub delivers luxurious, spa-like relaxation right in your bathroom, but without proper care, that investment can quickly become a breeding ground for bacteria and mineral buildup. Unlike standard tubs, jacuzzi bath cleaning requires specialized attention to the internal plumbing and jet mechanisms that create your soothing hydrotherapy experience. Over time, soap residue, body oils, and mineral deposits accumulate inside the closed-loop system, causing clogged jets, reduced water pressure, and potentially unsanitary conditions. This guide reveals exactly how to maintain your jetted tub so it continues delivering clean, powerful jets for years to come—without expensive professional servicing or premature replacement.

Why Your Jetted Tub Needs Specialized Cleaning

Jetted bathtubs create unique maintenance challenges because their internal plumbing systems circulate water through hidden pipes and jet mechanisms. When you activate your jets, water flows through a closed-loop system that includes pumps, pipes, and nozzles—all of which collect residue with every use. The combination of warm water, body oils, soap scum, and dead skin cells creates the perfect environment for biofilm formation inside your plumbing.

Ignoring regular jacuzzi bath cleaning leads to serious consequences: mineral deposits from hard water gradually calcify on jet nozzles, reducing spray pressure until jets stop working entirely. The biofilm that develops inside pipes becomes a breeding ground for bacteria including Aeromonas and Pseudomonas, organisms that can cause skin infections or respiratory issues. One homeowner discovered this the hard way after skipping maintenance for six months—her once-powerful jets produced only weak streams, and a foul odor emerged when she finally ran the system.

How Often Should You Clean Your Jetted Tub?

Jacuzzi’s manufacturer recommends monthly cleaning for standard maintenance, but your usage pattern determines the ideal schedule. Households using their tubs frequently (3+ times weekly) should clean every 2-3 weeks, while occasional users might extend to 6-8 weeks between sessions. The most practical approach many experienced owners use is cleaning “about every four to six uses” regardless of calendar time.

Watch for these warning signs that indicate immediate cleaning is needed:
– Reduced water pressure from jets
– Visible discoloration in water during jet operation
– Unpleasant odors when jets are activated
– Visible buildup around jet nozzles
– Gurgling or unusual sounds from the pump

Jacuzzi Systems Cleaner: The Manufacturer-Recommended Solution

Jacuzzi T627000 Systems Cleaner kit packaging

When it comes to jacuzzi bath cleaning, the official Jacuzzi Systems Cleaner represents the gold standard developed by the pioneers of whirlpool technology. This two-step system specifically targets the unique buildup inside jetted tubs without damaging sensitive components.

What Makes This Cleaner Different?

The Jacuzzi Systems Cleaner (Part Number: T627000) comes as 10 complete cleaning sessions—five packets of Step 1 solution and five of Step 2—packaged in a compact 6.26 x 4.88 x 3.23 inch container. Priced at $28.26, this equates to approximately $2.83 per cleaning session, a small investment compared to potential repair costs from neglected maintenance.

With 251 customer reviews averaging 4.6 out of 5 stars (85% perfect five-star ratings), users consistently praise its effectiveness where alternatives failed. One long-term user reported using the product successfully for twelve years, noting it “does the best and most thorough job” compared to other brands they tried. The cleaner’s two-step process ensures both deep cleaning and thorough rinsing of all internal components.

How to Use the Jacuzzi Systems Cleaner Properly

Follow this exact sequence for maximum effectiveness during your jacuzzi bath cleaning session:

  1. Close the drain and fill your tub with warm water (not hot) to a level that completely covers all jet openings
  2. Add one Step 1 packet to the water and allow it to dissolve completely
  3. Activate all jets and run for 10-15 minutes to circulate the solution throughout the entire system
  4. Drain the tub completely—expect discolored water confirming removed buildup
  5. Refill with clean warm water to cover jets
  6. Add one Step 2 packet and run jets for another 10-15 minutes
  7. Drain completely and wipe down surfaces with a soft cloth

Pro Tip: After the final drain, run the jets for 2-3 minutes with no water to help expel any remaining residue from the lines. Some users report needing to “dunk your arm in to get the plug unplugged to drain,” but this minor inconvenience ensures complete system flushing.

Top 4 Alternative Jetted Tub Cleaners Worth Considering

SpaKleen jetted tub cleaner vs ACTIVE jetted tub cleaner vs CLYND jetted tub cleaner vs Bio Ouster jetted tub cleaner comparison

While the Jacuzzi brand cleaner delivers manufacturer-backed results, several quality alternatives offer effective jacuzzi bath cleaning at lower price points.

SpaKleen Jetted Tub Cleaner

With 1,875 reviews averaging 4.5 stars, SpaKleen provides 10 cleanings for $19.50 ($1.95 per session). This USA-made formula works with all jetted tub brands and features a fast-action formula that dissolves quickly. Many users appreciate its septic-safe composition and report results nearly matching the Jacuzzi brand at a lower cost.

ACTIVE Jetted Tub Cleaner Bathtub Tabs

These convenient pre-measured tablets (4.5 stars from 361 reviews) cost $17.96 for 12 tablets—approximately $1.50 per cleaning. The professional-grade formula removes scale and residue effectively while being septic safe. Amazon’s Choice designation and tablet format make this a popular option for those who prefer no measuring.

CLYND Jetted Tub Cleaner

Earning the highest rating among alternatives (4.7 stars from 53 reviews), CLYND offers 24 tablets for $18.99 ($0.79 per tablet). This heavy-duty formula contains no harsh chemicals while remaining septic safe. Its Compact by Design certification indicates sustainable packaging, appealing to eco-conscious users.

Bio Ouster Jetted Tub Cleaner Kit

Priced at $21.99 with 4.4 stars from 898 reviews, this kit includes a microfiber towel with the cleaning solution. The professional-grade formula effectively removes bacterial buildup and works with all jetted systems. Made in the USA, it provides a mid-range option for those seeking thorough cleaning without the premium Jacuzzi price.

Prevent Buildup Between Deep Cleaning Sessions

Monthly deep cleaning prevents major problems, but daily habits extend time between thorough sessions and keep your jets performing optimally.

Post-Use Maintenance Routine

After every bath, follow these simple steps to reduce buildup:
– Wipe down visible surfaces with a soft cloth to remove soap film and oils
– Run clean water through the jets for 2-3 minutes to flush loose residue
– Leave the drain open until the tub is completely dry
– Never use regular household cleaners—they leave residue that promotes bacterial growth

Hard Water Solutions

If you live in a hard water area, consider these additional measures:
– Install a water softener for your entire home
– Use distilled water for your cleaning sessions
– Increase cleaning frequency to every 2-3 weeks
– Add a vinegar rinse cycle monthly to dissolve mineral deposits

Troubleshooting Common Jetted Tub Problems

Even with regular jacuzzi bath cleaning, issues may arise. Here’s how to diagnose and fix them:

Weak Jet Pressure

Cause: Mineral deposits or biofilm restricting water flow
Fix: Run a deep cleaning cycle, then inspect individual jets for visible blockage. Use a soft toothbrush to gently clean nozzle openings if needed.

Unpleasant Odors

Cause: Bacterial growth in stagnant water
Fix: Perform immediate deep cleaning, then ensure complete draining after each use. Leave drain open between uses to allow air circulation.

Gurgling Noises

Cause: Air trapped in lines or partial blockages
Fix: Run jets with clean water for 15 minutes to clear air pockets. If persistent, perform deep cleaning and check for clogs.

Final Maintenance Checklist for Long-Lasting Performance

Protect your investment with these essential jacuzzi bath cleaning practices:

  • Schedule monthly cleanings using either the Jacuzzi Systems Cleaner or a quality alternative
  • Never skip the rinse cycle—incomplete rinsing leaves residue that attracts more buildup
  • Run jets at full power during cleaning to ensure solution reaches all internal passages
  • Keep a cleaning log to track sessions and identify usage patterns
  • Drain completely after every use to prevent stagnant water conditions
  • Wipe down surfaces regularly to prevent soap scum accumulation

The modest investment of $0.80-$2.83 per cleaning session preserves your jetted tub’s performance and prevents costly repairs down the line. By following this maintenance routine, you’ll enjoy powerful, clean jets that deliver the luxurious hydrotherapy experience you deserve—without worrying about hidden contamination in your relaxation sanctuary. Your jacuzzi bath cleaning routine shouldn’t feel like a chore; with the right products and schedule, it becomes a simple habit that protects your investment and ensures years of worry-free soaking.

How to Use Jacuzzi Whirlpool Bath: Easy Steps


There’s nothing quite like sinking into your Jacuzzi whirlpool bath after a long day—the warm water enveloping your body as powerful jets target tired muscles. Yet many new owners hesitate to use their investment properly, worried they’ll damage the sophisticated system or miss out on key features. Knowing exactly how to use jacuzzi whirlpool bath equipment transforms uncertainty into confidence, ensuring you maximize therapeutic benefits while protecting your investment. This guide delivers precise, model-specific instructions for operating any Jacuzzi system, from basic Swirlpool models to advanced J-Shiatsu configurations.

Jacuzzi offers multiple bath system categories, each with unique operation methods. The Swirlpool line provides classic hydrotherapy with reliable jet performance, while the J-Quiet series incorporates noise-reducing pump technology. The J-Shiatsu systems simulate traditional massage techniques with adjustable intensity settings, and Lounge models feature ergonomic reclined seating for full-body immersion. Regardless of your model, these comprehensive instructions will help you master how to use jacuzzi whirlpool bath features correctly for optimal relaxation and longevity.

Prepare Your Bath for Proper Operation

Before filling your Jacuzzi, take 2 minutes to prepare for a safe, effective session. Remove all bath mats, loofahs, or other items stored in the tub, then inspect the surface for debris that could clog the system. Check that your drain stopper lifts and lowers smoothly—this prevents water from becoming trapped after your session. If your model has removable intake screens or filters (common in Aura and Aquasoul series), verify they’re clean and properly seated; clogged screens reduce jet performance by up to 70%.

Critical safety check: Examine your control interface to ensure all buttons respond properly. Pneumatic systems require firm presses, while electronic panels need light touches. If your bath has been idle for days, especially in cooler weather, don’t panic if jets make unusual sounds during initial activation—this typically resolves within 60 seconds as the pump primes. Gathering towels and bath products before filling lets you focus entirely on relaxation once the water reaches your ideal temperature.

Fill to the Correct Water Level and Temperature

Filling your Jacuzzi properly establishes the foundation for an effective hydrotherapy session. Most models perform best when filled to a level that fully covers the highest jet openings while leaving 2-3 inches of clearance at the top rim. Overfilling stresses seals and creates messy overflow, while underfilling causes the pump to draw air instead of water—potentially damaging the system over time. Consult your specific model manual, as water level requirements vary between collections like the Sharp series (compact models) versus the larger Aquasoul Double.

Water temperature requires careful attention for safe, comfortable use. Jacuzzi recommends 98-104°F (37-40°C) for most users, but your ideal temperature depends on personal preference and session duration. Water above 104°F carries risks of dizziness and cardiovascular stress, particularly during longer sessions. Test temperature with your elbow or wrist before entering—these areas sense heat more accurately than hands. If your model includes built-in heating (like many Skylounge® series), you can maintain temperature throughout extended use; otherwise, start slightly cooler than your target since water cools during use.

Activate the Jet System Without Damaging Components

Starting your Jacuzzi’s jet system correctly protects the pump motor and ensures years of reliable operation. Always begin by activating the pump on its lowest setting, allowing water to flow through the system before increasing intensity. Most models offer multiple speed settings controlled through pneumatic buttons, electronic panels, or rotary dials depending on your configuration. Starting low gives the pump time to prime fully and lets you assess jet action before committing to full intensity.

Once the pump runs smoothly, gradually increase jet intensity to your preferred level. Rotate individual jet faces or use adjustable nozzles to direct massaging streams where you need them most. If you own a J-Shiatsu system, explore the pre-programmed massage cycles that simulate professional techniques. Many users find starting with moderate intensity and gradually increasing provides the most satisfying experience as muscles relax and become more receptive to deeper pressure over time. Never jump straight to maximum intensity—this strains both your muscles and the pump system.

Target Specific Muscle Groups with Jet Adjustments

Jacuzzi whirlpool bath jet placement diagram

Mastering jet adjustment transforms your Jacuzzi from a simple warm bath into targeted therapy. Back jets positioned along tub walls deliver the most intense massage, ideal for relieving shoulder, lower back, and hip tension after physical activity. Foot and calf jets provide gentler stimulation that promotes circulation without overwhelming sensitive muscles, perfect for evening relaxation. Experiment with intensity settings to find your comfort zone—more intense doesn’t always mean better, as extended high-intensity exposure can cause muscle soreness rather than relief.

Many Jacuzzi models allow independent control of different jet banks, letting you activate only the jets you need while conserving energy and reducing noise. The J-Quiet series excels here with vibration-minimizing technology. If your model includes air injection systems alongside water jets (common in Design Series models), these create a gentler, effervescent sensation that provides light stimulation without deep pressure. For optimal results, spend 5 minutes on each major muscle group during your session.

Limit Session Duration for Maximum Therapeutic Benefit

Proper session timing ensures therapeutic benefits without health complications from extended hot water exposure. Standard hydrotherapy sessions of 15-30 minutes provide meaningful muscle relief while keeping core body temperature safe. Higher water temperatures require shorter sessions, as your body absorbs heat more rapidly. Similarly, higher jet intensities increase blood circulation and metabolic activity, generating additional body heat during your session.

Listen to your body’s signals throughout your bath. Dizziness, lightheadedness, or nausea indicate you’ve stayed too long or the temperature exceeds your tolerance. Pregnant individuals, those with cardiovascular conditions, and diabetics should consult healthcare providers about appropriate session limits before using their whirlpool bath. Never consume alcohol before or during hydrotherapy sessions—this significantly increases heat-related risks. For optimal results, most users find 20-minute sessions at moderate temperatures provide substantial relief without requiring constant monitoring of warning signs.

Implement Essential Safety Protocols During Use

Jacuzzi GFCI safety check

Jacuzzi whirlpool baths incorporate multiple safety features, but understanding these and additional precautions ensures your experience remains safe. GFCI (Ground Fault Circuit Interrupter) protection prevents shock hazards by cutting power if electrical leakage occurs—test this monthly to verify functionality. Never bypass GFCI protection, and contact a qualified electrician immediately if your system trips during normal operation.

Water temperature requires ongoing attention throughout each session. Test again before adding hot water, and consider lowering jet intensity when adding hot water to avoid dangerous splashing. Enter and exit your Jacuzzi carefully—wet surfaces create serious slip hazards. Many models include textured surfaces in critical areas, but adding an external bath mat provides additional protection. Children should never use whirlpool baths without direct adult supervision, and elderly users may benefit from handrails when entering and exiting.

Drain and Clean Immediately After Each Session

Proper post-use maintenance protects your investment and ensures hygiene for every session. Begin by running the jets with clear water for 2-3 minutes after each use, which flushes residual bath products, oils, and debris from internal plumbing. Some models include automatic purge cycles that activate when draining—these draw air through the system to clear remaining water from pipes and prevent stagnation. If your model lacks this feature, manually run pumps briefly after draining to remove standing water.

After purging, drain completely and wipe all surfaces dry with a soft cloth to prevent water spots. Use non-abrasive cleaners designed for acrylic or your bath’s specific surface material—avoid harsh chemicals that damage seals and finishes. Pay special attention to jet faces and control interfaces where residue accumulates most readily. For models with removable jet faces (like many Aura series), periodic manual cleaning provides more thorough maintenance than surface cleaning alone.

Follow Model-Specific Maintenance Schedules

Beyond daily cleaning, regular maintenance keeps your Jacuzzi operating at peak performance. Weekly maintenance includes surface cleaning with appropriate products, inspection of visible jets, and running filtration systems if equipped. Monthly deep cleaning targets internal plumbing using manufacturer-recommended solutions that dissolve buildup without damaging components. Never use standard household cleaners in jet cleaning—they deteriorate rubber seals and leave harmful residues.

Quarterly maintenance addresses components that wear over time. Inspect all seals and gaskets for cracking or drying, replacing damaged components before they fail. Check that all control functions respond properly and that pump operation sounds smooth. Annual professional inspection provides comprehensive evaluation of internal plumbing, electrical safety, and overall system condition. Many Jacuzzi owners schedule annual service in early autumn to prepare for heavy winter use when relaxation needs peak.

Troubleshoot Common Operational Issues

Understanding common problems saves time and frustration when issues arise. Reduced jet performance typically indicates clogged intake screens, insufficient water level, or air in the pump system. Check that water covers all jet openings and that intake screens are clean. If jets sputter, the pump likely contains air—activate on low speed for several minutes to purge air before increasing intensity.

Unusual pump sounds require investigation. Grinding noises often indicate debris in the impeller chamber—remove the intake screen and check for obstructions. Whining sounds may signal bearing wear, suggesting professional service is needed. Temperature issues often relate to settings or heater malfunctions—verify settings are correct and that the heater indicator shows active heating. Control interface problems typically stem from electrical issues or moisture—check power supply and ensure controls are clean and dry. Persistent problems require professional diagnosis.

« Older posts Newer posts »